TR7600 SIII_Camera_Calibration_en_v_2_0_2.pdf - 第32页
Test Research, Inc. 26 TR7600 SI II Series User Guide – Camera Ca libration 4) Find a single white hol e on the screen. Note: Please use the same white hol e used in Camera Shift Calibration. 5) Enlarge the square box to…
Test Research, Inc.
TR7600 SIII Series User Guide – Camera Calibration 25
2.6 Bi-Direction Shift Calibration
Note: This calibration is only applied to bi-direction scan camera. Generally, this
calibration is not required. Please check with TRI FAEs before performing this
calibration. Without professional assistance, calibration that failed may cause issues
which are difficult to resolve.
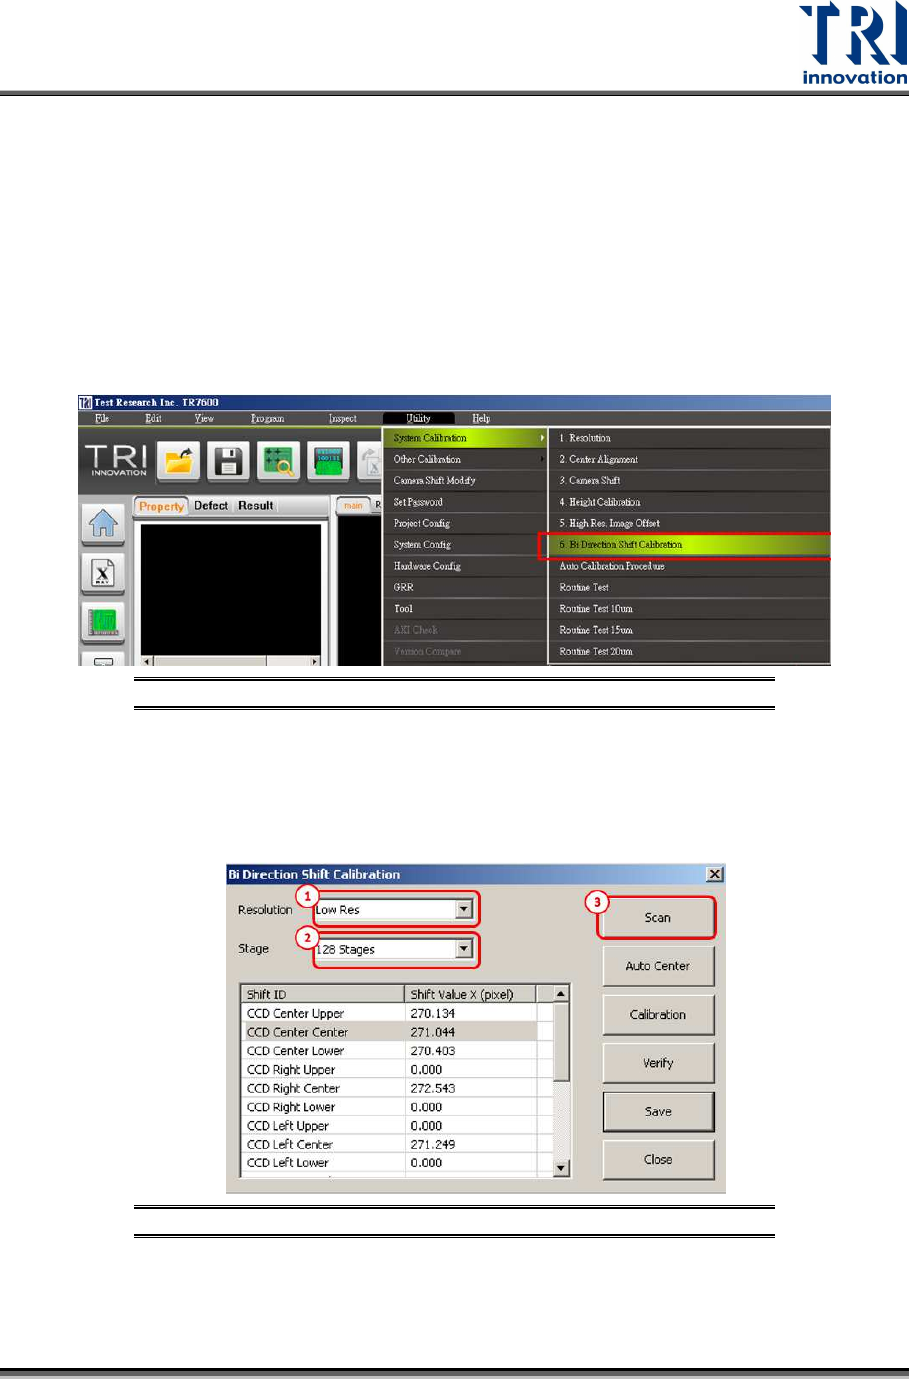
Go to [Utility] [System Calibration] [Bi-Direction Shift Calibration]
Calibrate low, median and high resolution (10, 7, 5 µm) one by one by following the
procedure below which takes low resolution as an example.
Figure 33: Utility/System Calibration/Bi-Direction Shift Calibration
1) Please choose Low Resolution.
2) Choose 128 stages.
3) Press [Scan].
Figure 34: Bi-Direction Shift Calibration Steps
Test Research, Inc.
26 TR7600 SIII Series User Guide – Camera Calibration
4)
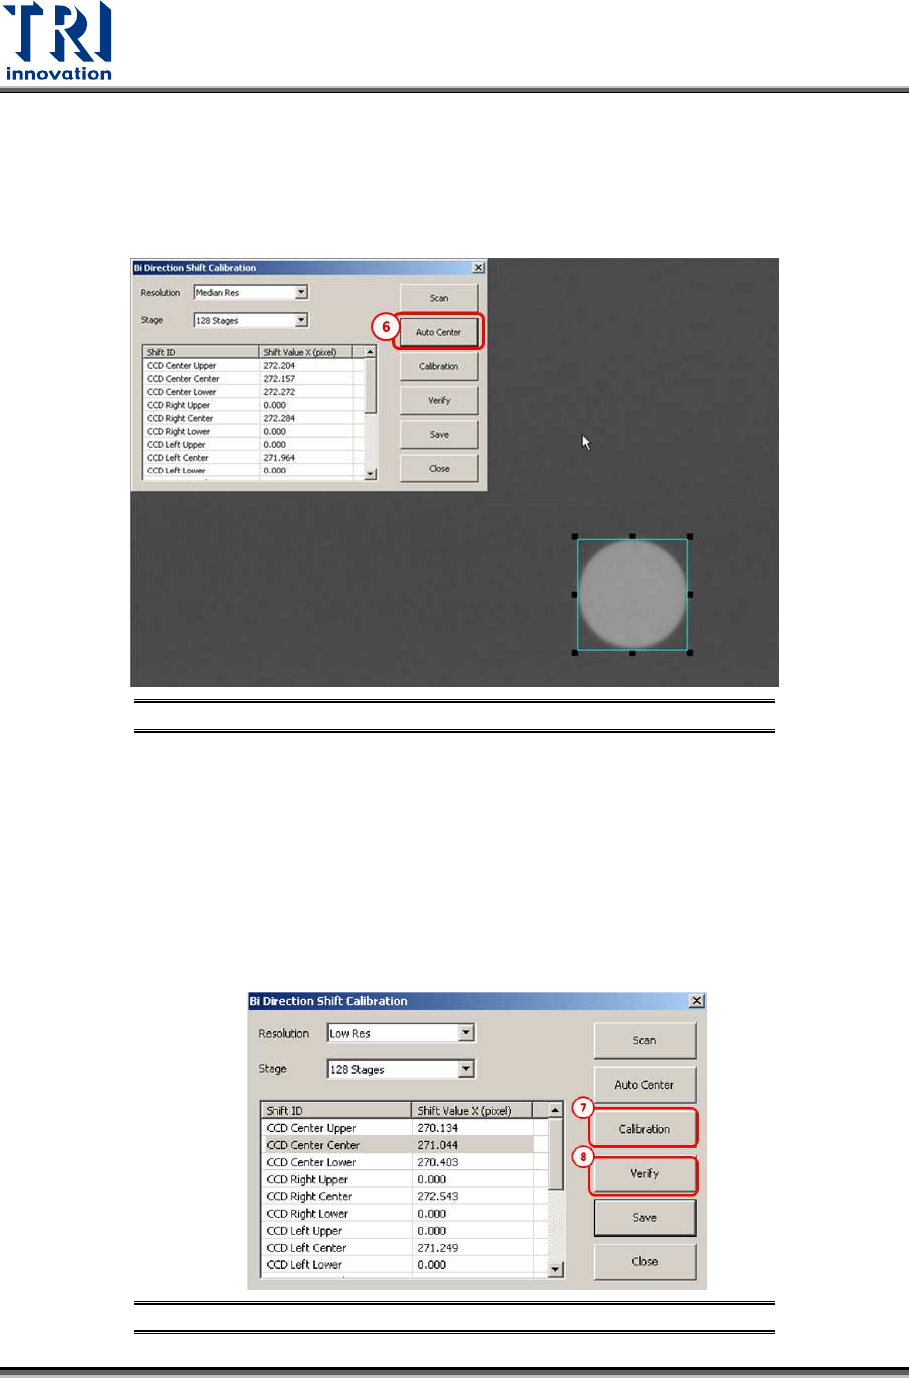
Find a single white hole on the screen.
Note: Please use the same white hole used in Camera Shift Calibration.
5) Enlarge the square box to enclose the white hole.
6) Click [Auto Center] and the square box will enclose the white hole.
Figure 35: Bi-Direction Shift Calibration/Auto Center
7) Press [Calibration] and then the machine will scan the calibration board from opposite
direction. Please press the number keys 1,2,3,4,5,6,7,8, and 9 to confirm all circle
images are located in the square box.
8) Press [Verify] to perform bi-directinonal scan. For example, stripe 1 image is scanned
from right side to the left side of the machine; stripe 2 image is scanned from the left
side to the right side of the machine; stripe 3 image is scanned from the right side to the
left side of the machine, and stripe 4 image is scanned from the left side to the right
side of the machine.
Figure 36: Bi-Direction Shift Calibration steps
Test Research, Inc.
TR7600 SIII Series User Guide – Camera Calibration 27
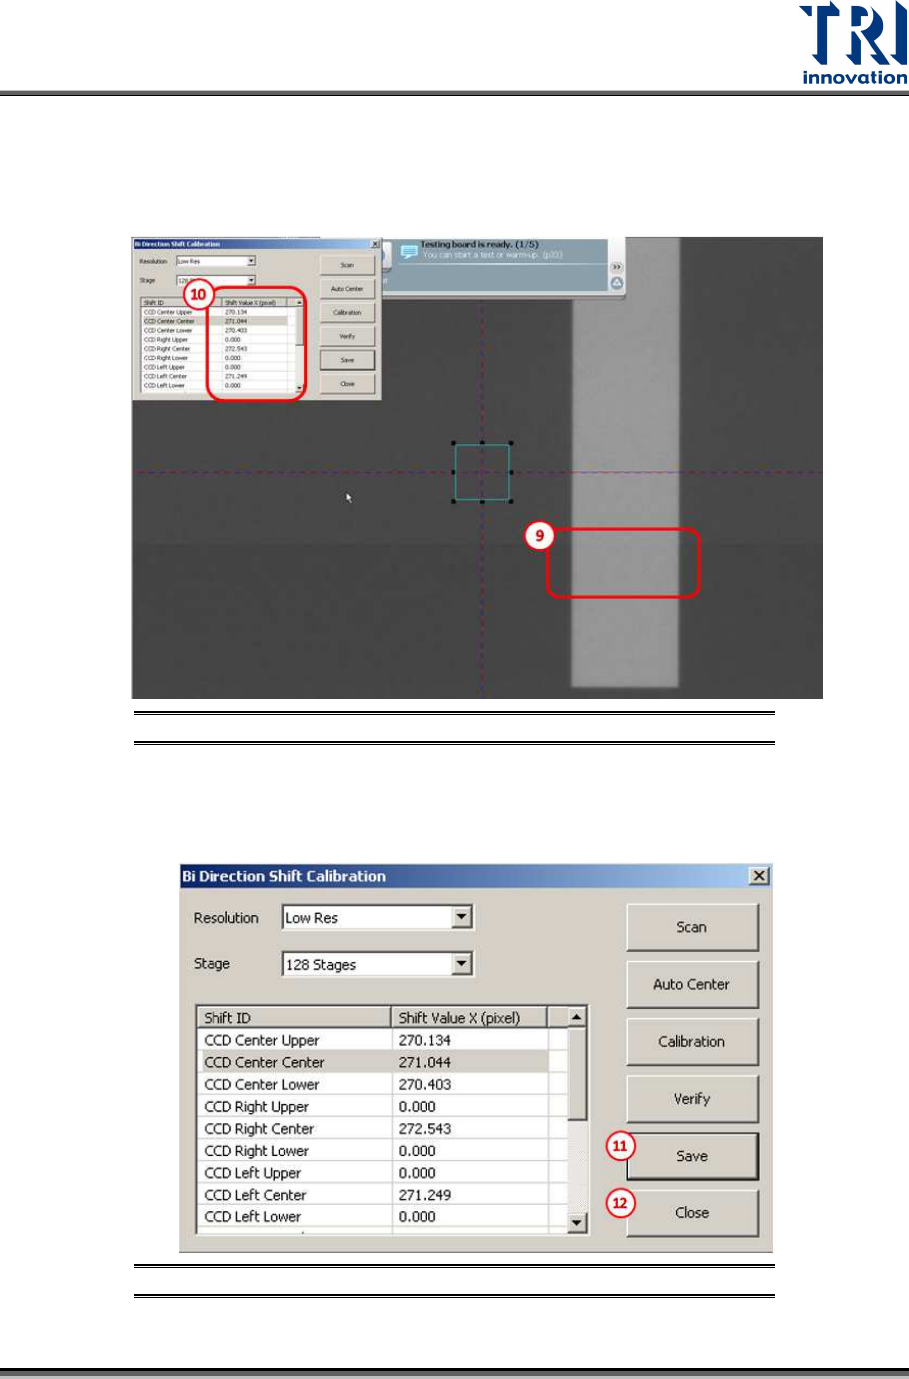
9) Please confirm the bi-direction images are well connected without offset by checking
whether the rectangle scanned image is normal or not.
10) If offset does exist, repeat the bi-direction calibration or change the [Shift Value X] until
the calibration succeeds.
Figure 37: Bi-Direction Shift Calibration steps
11) Press [Save] to save the change to the registry file.
12) Press [Close] to finish the calibration process.
Figure 38: Bi-Direction Shift Calibration steps