TR7600 SIII_Camera_Calibration_en_v_2_0_2.pdf - 第33页
Test Research, Inc. TR7600 SIII Ser ies User G uide – Cam era Calibr ation 27 9) Please confirm the bi-direction im ages ar e well connected without off set by c hecking whether the rectangle scanned i mage is normal or …
Test Research, Inc.
26 TR7600 SIII Series User Guide – Camera Calibration
4)
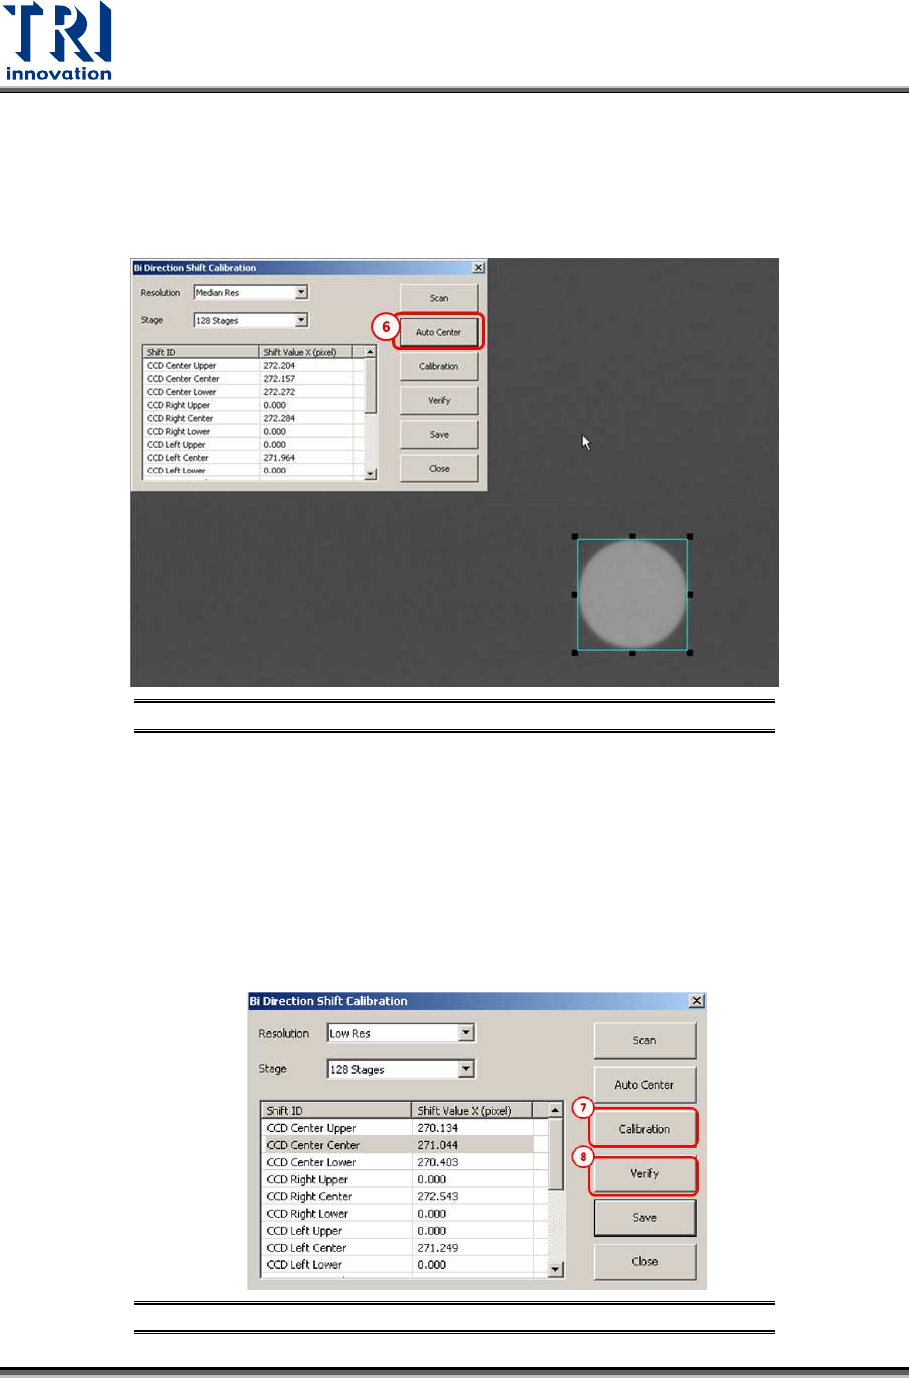
Find a single white hole on the screen.
Note: Please use the same white hole used in Camera Shift Calibration.
5) Enlarge the square box to enclose the white hole.
6) Click [Auto Center] and the square box will enclose the white hole.
Figure 35: Bi-Direction Shift Calibration/Auto Center
7) Press [Calibration] and then the machine will scan the calibration board from opposite
direction. Please press the number keys 1,2,3,4,5,6,7,8, and 9 to confirm all circle
images are located in the square box.
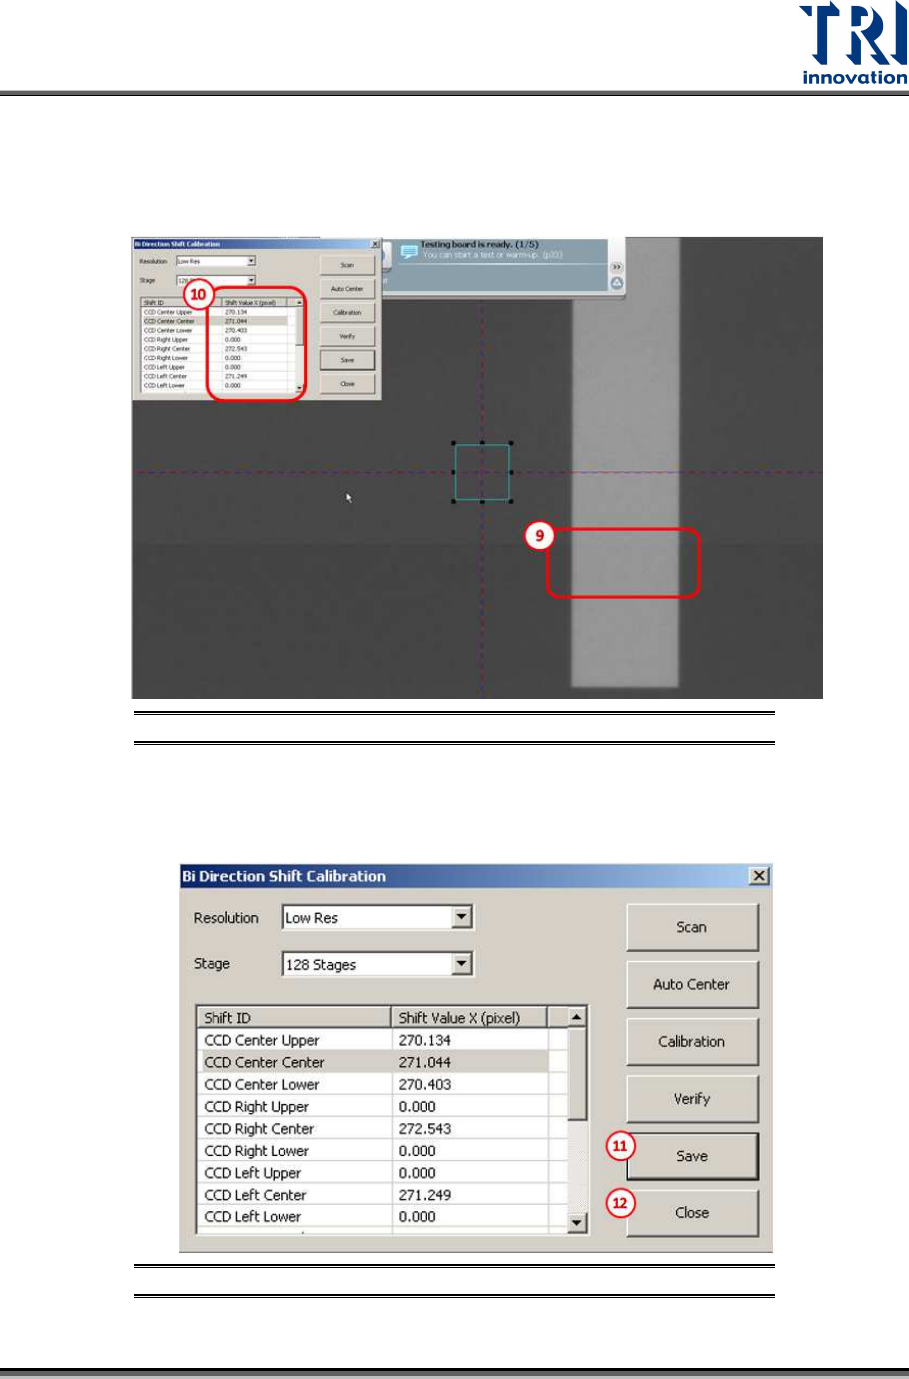
8) Press [Verify] to perform bi-directinonal scan. For example, stripe 1 image is scanned
from right side to the left side of the machine; stripe 2 image is scanned from the left
side to the right side of the machine; stripe 3 image is scanned from the right side to the
left side of the machine, and stripe 4 image is scanned from the left side to the right
side of the machine.
Figure 36: Bi-Direction Shift Calibration steps
Test Research, Inc.
TR7600 SIII Series User Guide – Camera Calibration 27
9) Please confirm the bi-direction images are well connected without offset by checking
whether the rectangle scanned image is normal or not.
10) If offset does exist, repeat the bi-direction calibration or change the [Shift Value X] until
the calibration succeeds.
Figure 37: Bi-Direction Shift Calibration steps
11) Press [Save] to save the change to the registry file.
12) Press [Close] to finish the calibration process.
Figure 38: Bi-Direction Shift Calibration steps
Test Research, Inc.
28 TR7600 SIII Series User Guide – Camera Calibration
3 2D
C
AMERA AND
L
ASER
C
ALIBRATION
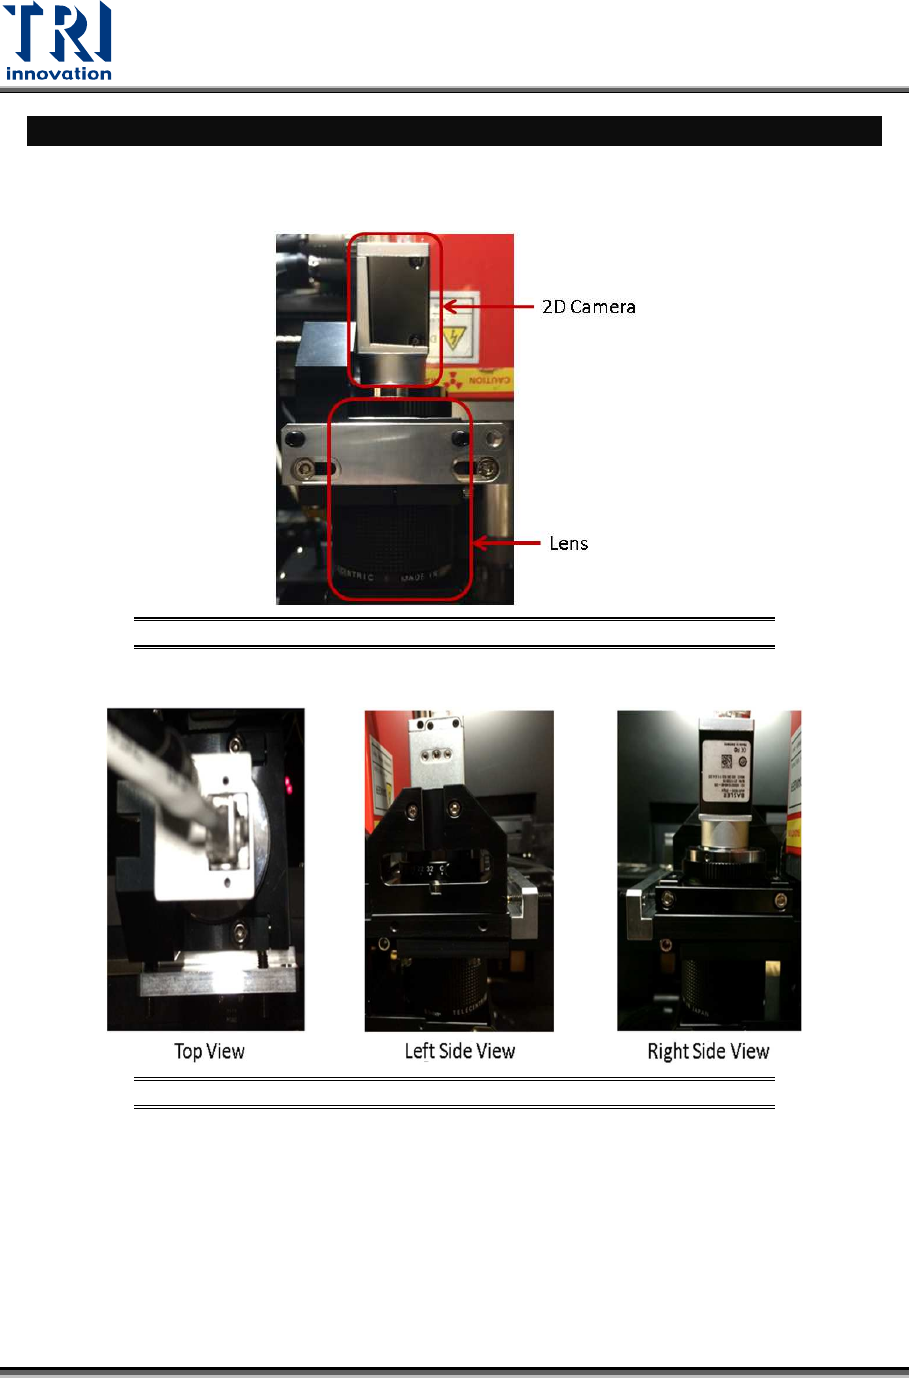
Hardware Introduction
During the calibration process, adjust 2D camera and lens positions..
Figure 39: Front View
Figure 40: Top View/ Right Side View/Left Side View