TR7600 SIII_Camera_Calibration_en_v_2_0_2.pdf - 第40页
Test Research, Inc. 34 TR7600 SI II Series User Guide – Camera Ca libration Follow the steps below. a) Loosen the screws as indicated. Figure 51 : Loo sen These Screw s b) I f the curr ent resolution is higher than the t…
Test Research, Inc.
TR7600 SIII Series User Guide – Camera Calibration 33
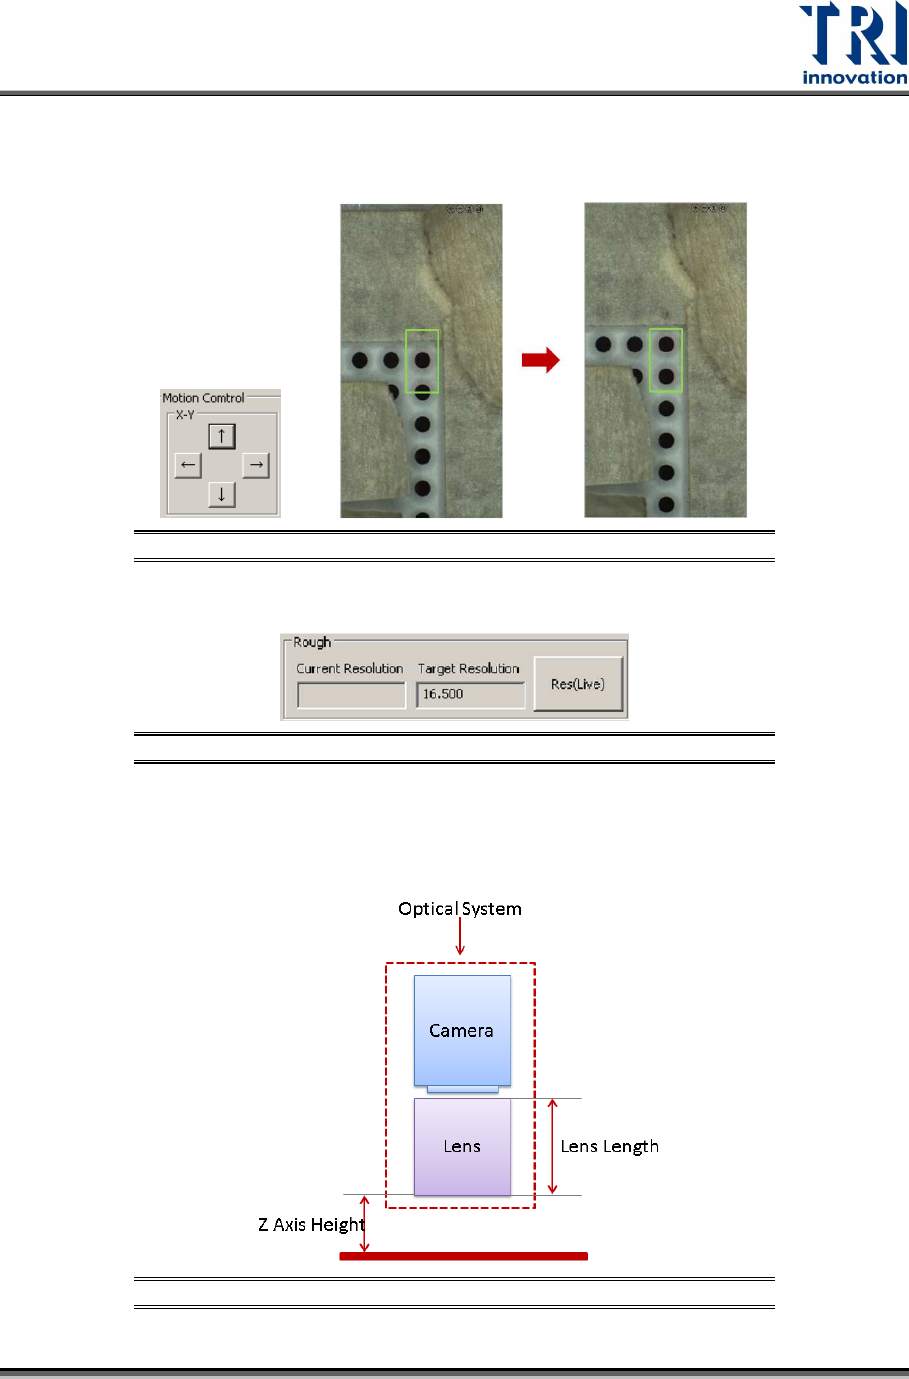
5) Use [↑], [↓], [←], or [→] buttons to move two circles situated at the uppermost right
corner to the center of the rectangle box. Another option is drag or click directly on the
left side 2D image to move these two circles to the center of rectangle box.
Figure 48: Move Two Circles to the Center of the Rectangle Box
6) Click [Res(Live)] and the main program will calculate the current resolution automatically.
Figure 49: Click [Res(Live)]
7) Before the calibration, the current resolution and target resolution may be totally different.
Adjust the lens height and Z axis height to make the difference between current
resolution and target resolution smaller than 0.1.
Figure 50: Optical System
Test Research, Inc.
34 TR7600 SIII Series User Guide – Camera Calibration
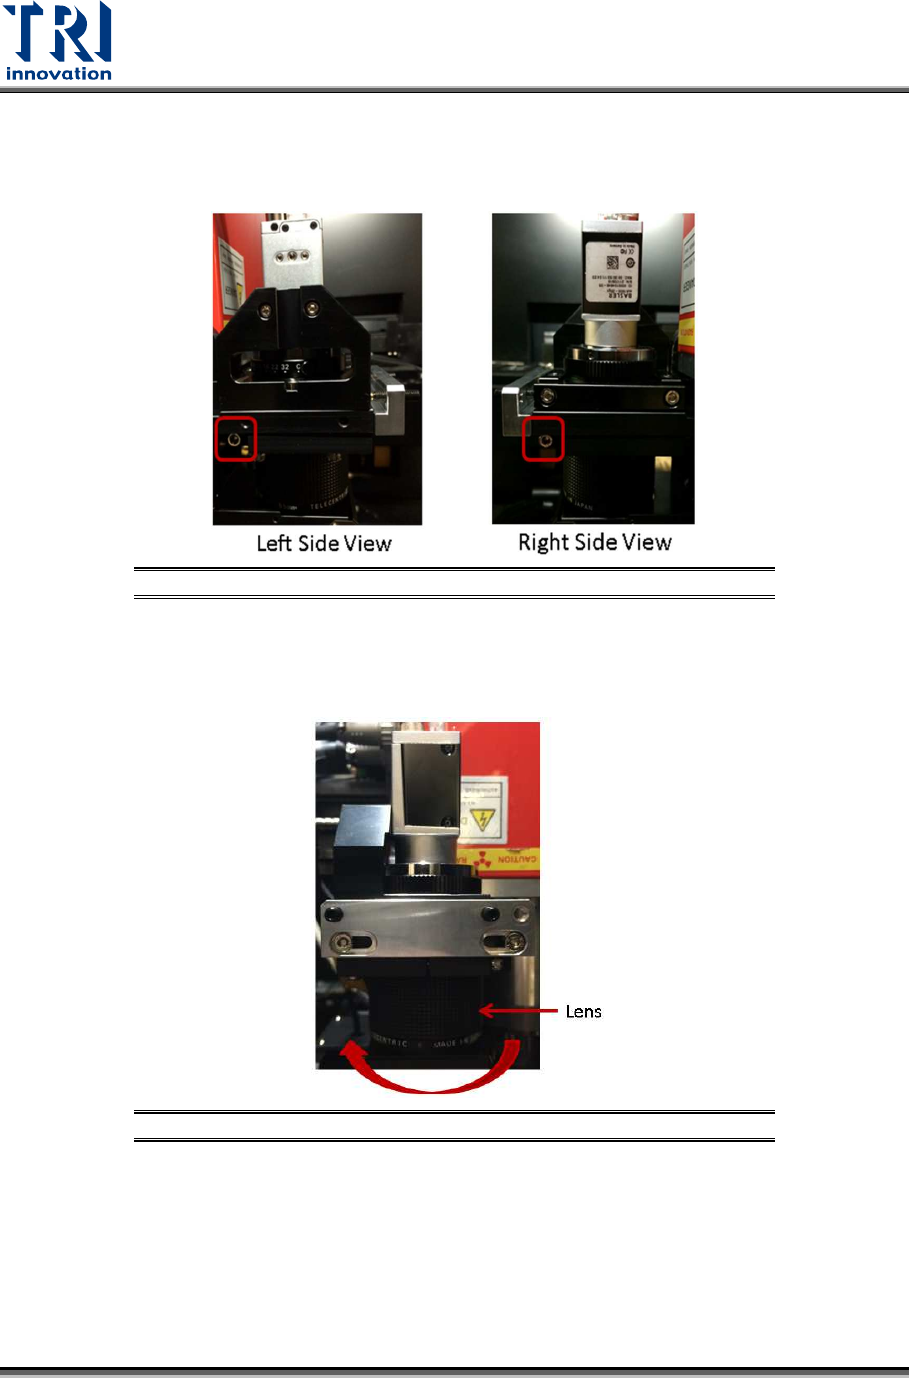
Follow the steps below.
a) Loosen the screws as indicated.
Figure 51: Loosen These Screws
b) If the current resolution is higher than the target resolution, turn the lens clockwise to
elevate the lens (i.e. to shorten the lens). The image will become blur, use the [Up] or
[Down] button to adjust the Z axis to make the image clearer.
Figure 52: Turn the Lens Clockwise
Test Research, Inc.
TR7600 SIII Series User Guide – Camera Calibration 35
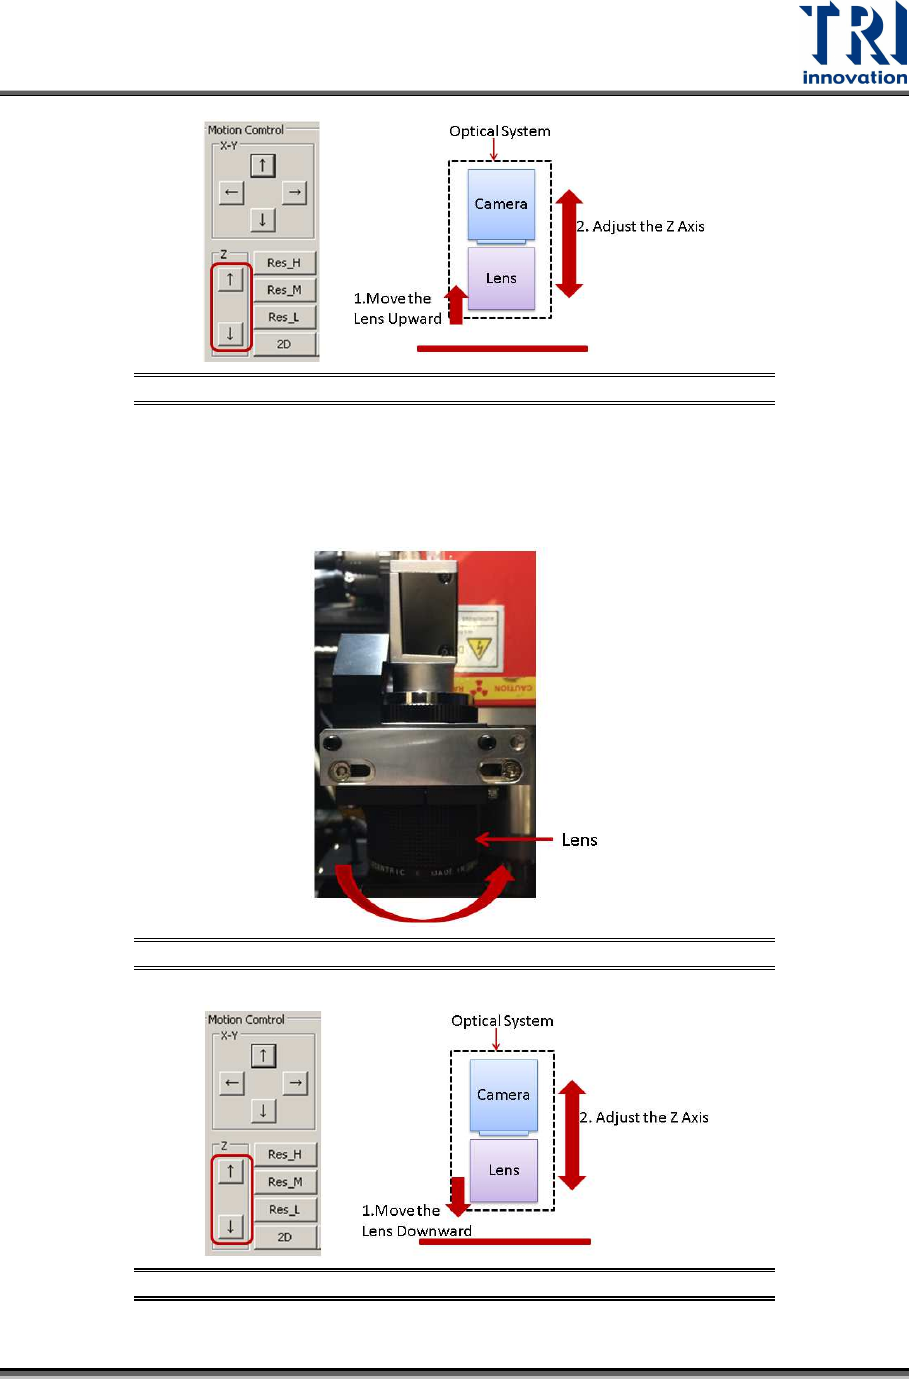
Figure 53: Adjust the Z Axis Height
c) If the current resolution is lower than the target resolution, turn the lens
counterclockwise to lower the lens (i.e. to lengthen the lens).
The image will become blur, use the [Up] or [Down] button to adjust the Z axis to
make the image clearer.
Figure 54: Turn the Lens Counterclockwise.
Figure 55: Adjust the Z Axis Height