TR7600 SIII_Camera_Calibration_en_v_2_0_2.pdf - 第58页
Test Research, Inc. 52 TR7600 SI II Series User Guide – Camera Ca libration 3.8 Set Up A m plifier In this calibration, put the c alibration b oard in the machine manually and clamp it. In this way, when the front door…
Test Research, Inc.
TR7600 SIII Series User Guide – Camera Calibration 51
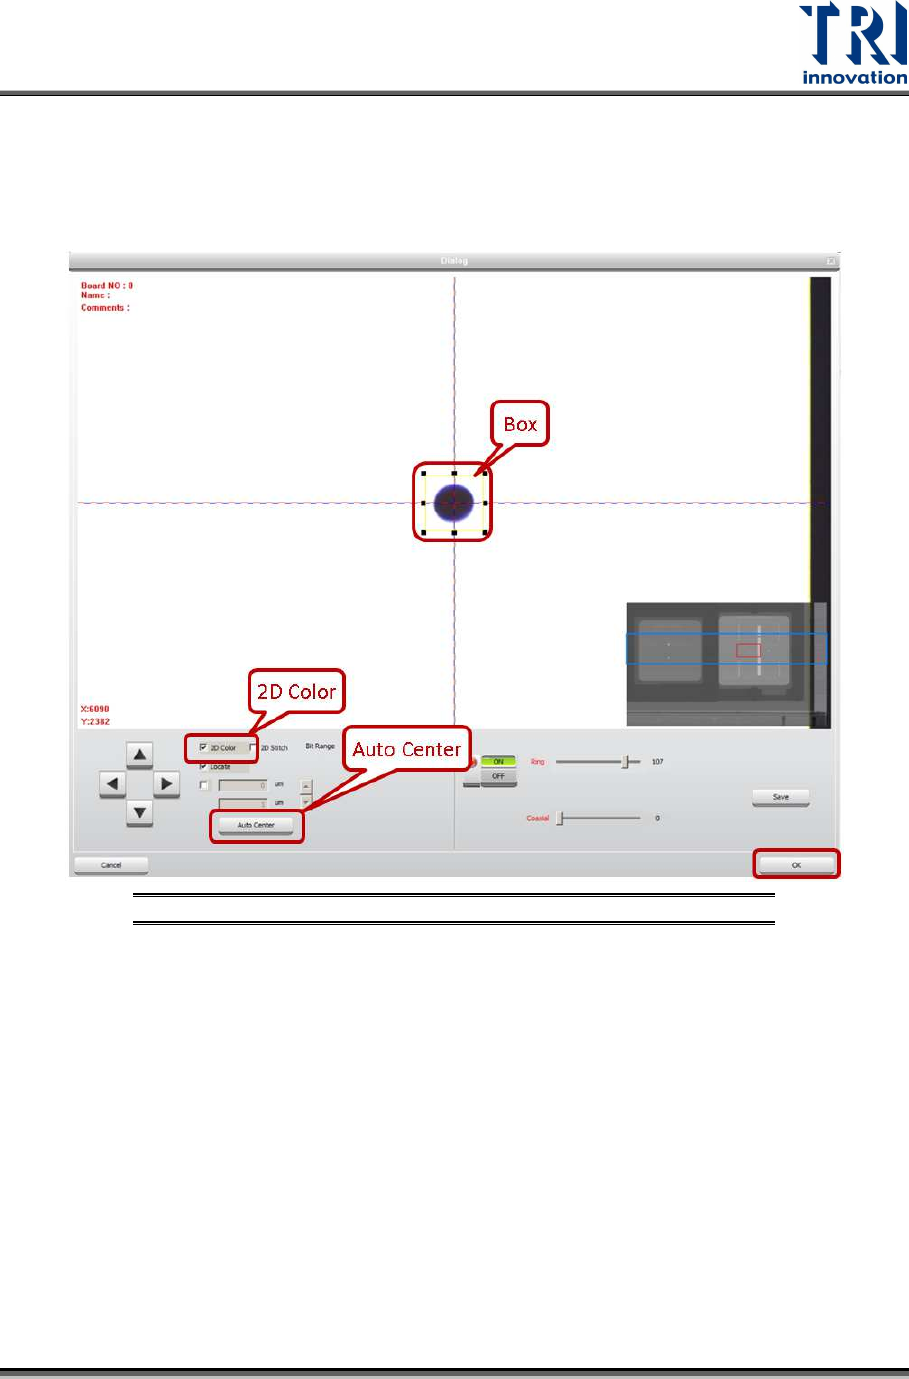
28) Click on [P2(2D Color)].
29) Click on [2D Color] and the screen will become brighter.
30) Put a single circle at the center of the cross line. Enlarge the box to confine the
circle. The box should be larger than the circle.
31) Click on [Auto Center] once or several times.
Figure 85: Find a Single Circle and Drag the Frame
32) Click on [OK] to exit.
33) Click on [Set] to save the data.
34) In order to confirm the calibration is successful, click on [Scan(XRay)] to re-scan
the board.
35) Choose the same single circle and move it to the center of the box. Click on
[2D(Color)]. If the circle remains at the center of the box, the calibration is
successful.
36) Repeat the steps above to do the calibration for another 5 conditions.
Test Research, Inc.
52 TR7600 SIII Series User Guide – Camera Calibration
3.8 Set Up Amplifier
In this calibration, put the calibration board in the machine manually and clamp it. In this
way, when the front door is opened and amplifier is set up, the calibration board can be
held and the zero height of its top surface can be fixed.
The amplifier is installed on the top of X-ray tube.
Basically, the amplifier should have been calibrated before sent to the customer site. In
this case, set up of the amplifier is not required.
However, if the machine does not have 2D camera and laser and users would like to
install them, follow the steps below.
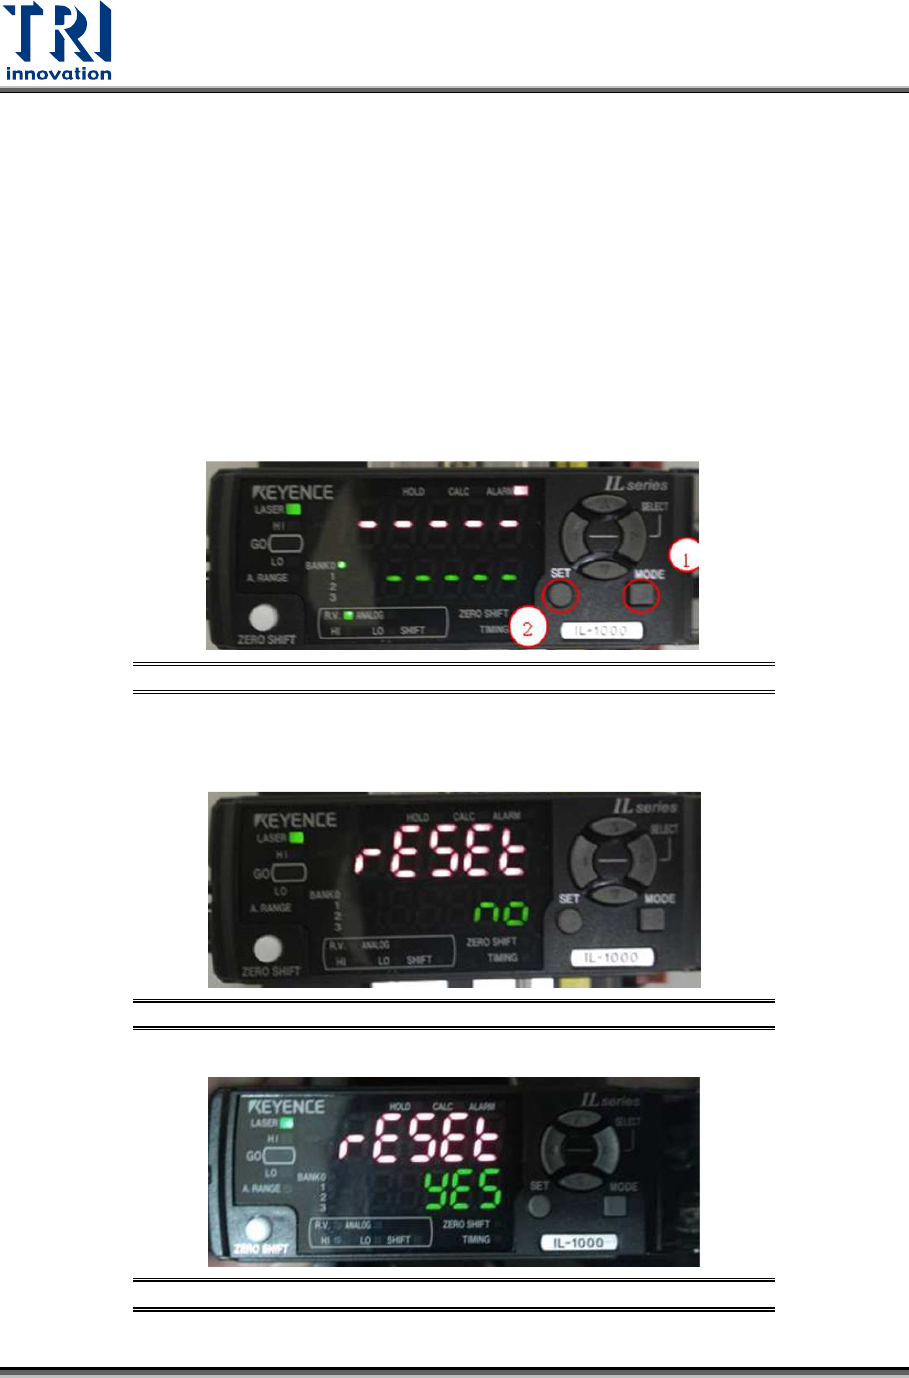
Please reset the amplifier first.
1) Please press [Mode] button and click on [Set] button 5 times at the same time.
Figure 86: Mode/Set
2)
Click on [
↑] or [↓] button to set [Reset] as [Yes] and then click on [Mode] button.
Figure 87: Reset/Yes/Mode
Figure 88: Reset/Yes/Mode
Test Research, Inc.
TR7600 SIII Series User Guide – Camera Calibration 53
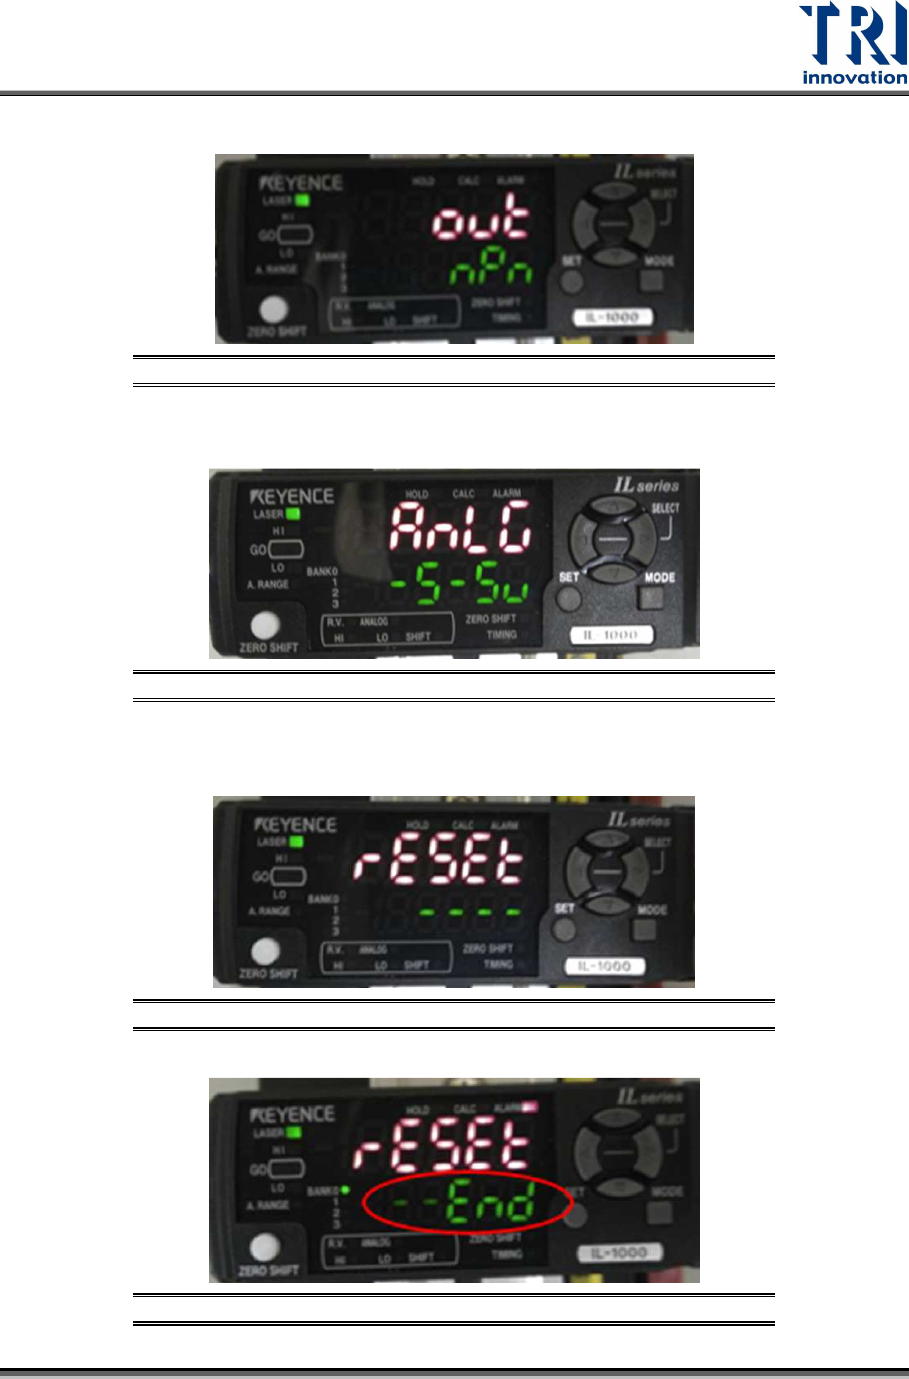
3) Click on [↑] or [↓] button to set [out] = [npn] and then click on [Mode] button.
Figure 89: npn/Mode
4) Click on [
↑] or [↓] button to set [Anlg] as [
-5~5v] and then click on [Mode] button.
Figure 90: Anlg/Mode
5) The device will reset automatically. After the reset is finished, the window will
show [End].
Figure 91: Reset
Figure 92: End