TR7600 SIII_Camera_Calibration_en_v_2_0_2.pdf - 第62页
Test Research, Inc. 56 TR7600 SI II Series User Guide – Camera Ca libration Set Up the Tolerance Value 1) Click on [ ←] or [→] button to switch the m ode to [HI]. Figure 10 0: HI 2) Click on [↑] or [↓] button to set th…
Test Research, Inc.
TR7600 SIII Series User Guide – Camera Calibration 55
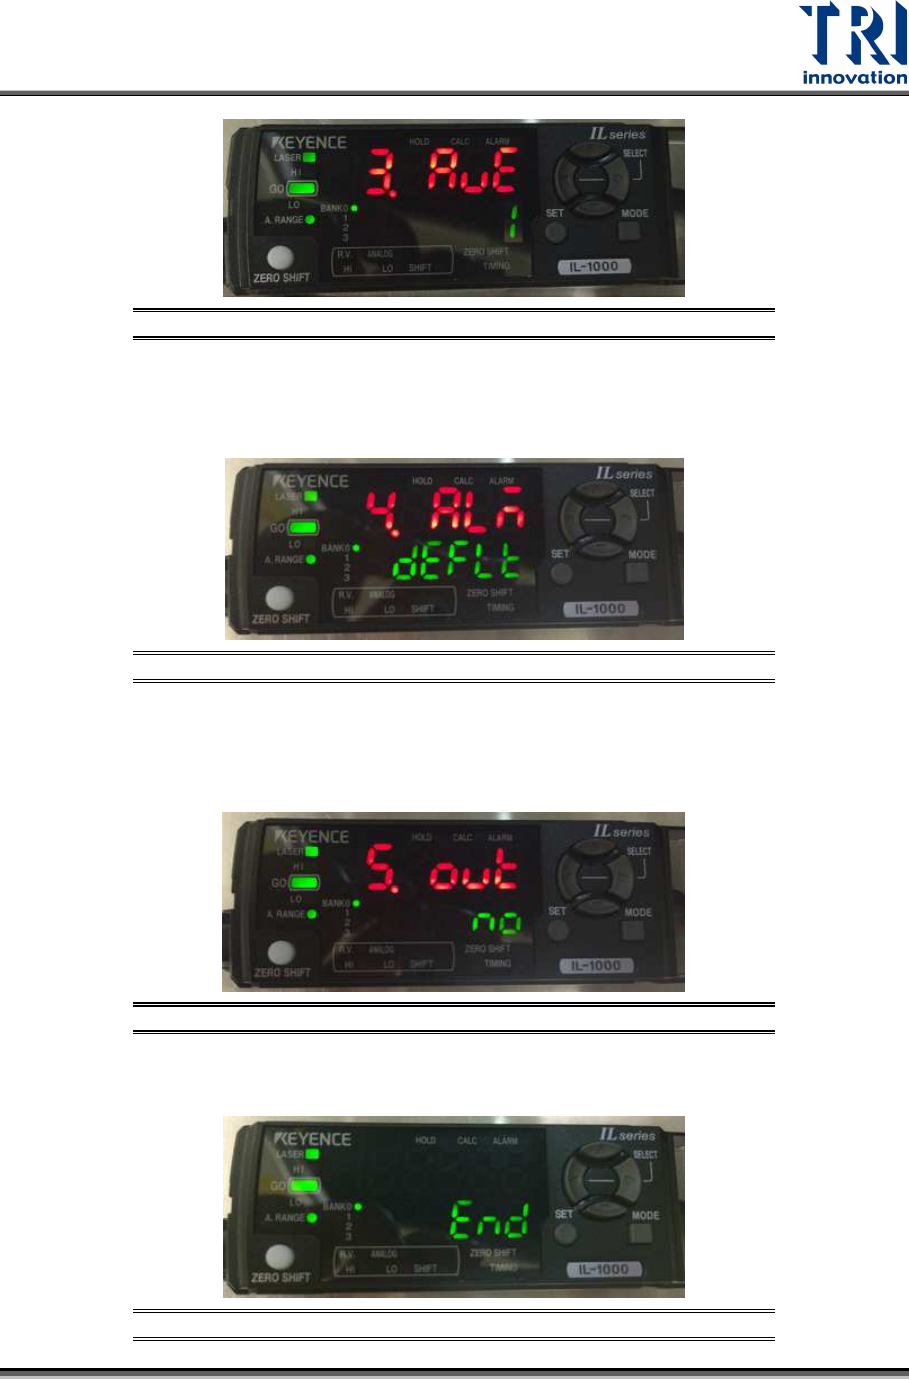
Figure 96: 3.AVE/Mode
5) Click on [
↑] or [↓] button to set [4.ALA] as [defle] and then click on [Mode] button.
Note: After you have seen [defle], you also can click on [
→], instead of [Mode], to
finish this step.
Figure 97: 4.ALA/Mode
6) Click on [↑] or [↓] button to set [5.out] as [no] and then click on [Mode] button.
Note: After you have seen [no], you also can click on [→], instead of [Mode], to
finish this step.
Figure 98: 5.out/Mode
7) After the process is finished, the window will display the [End] message.
Figure 99: End
Test Research, Inc.
56 TR7600 SIII Series User Guide – Camera Calibration
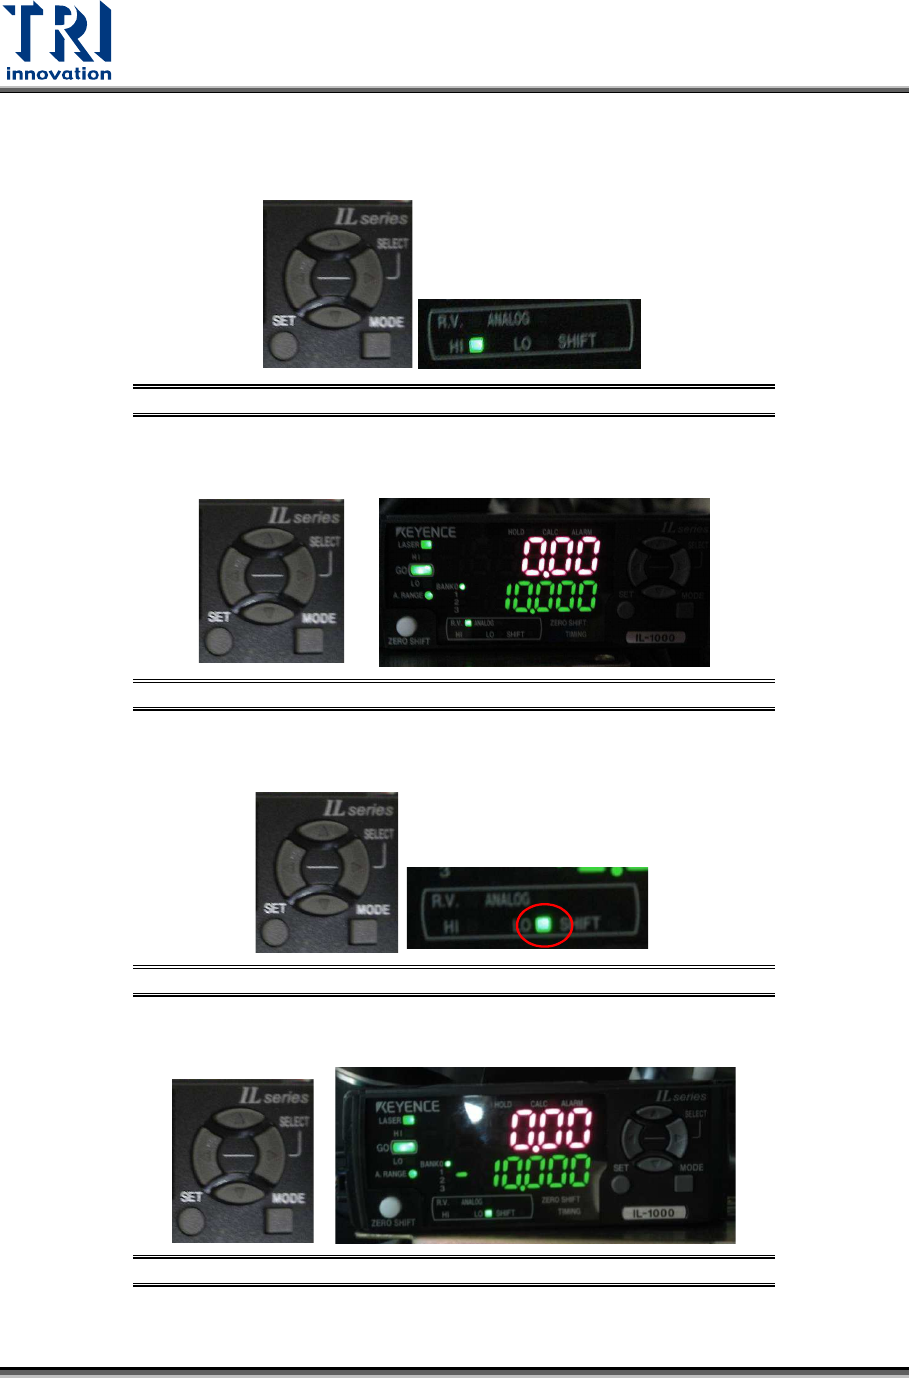
Set Up the Tolerance Value
1) Click on [
←] or [→] button to switch the mode to [HI].
Figure 100: HI
2) Click on [↑] or [↓] button to set the value as 10.
Figure 101: 10
3) Click on [
←] or [→] button to set the mode as [LO].
Figure 102: LO
4) Click on [↑] or [↓] button to set the value as [-10].
Figure 103: -10
Test Research, Inc.
TR7600 SIII Series User Guide – Camera Calibration 57
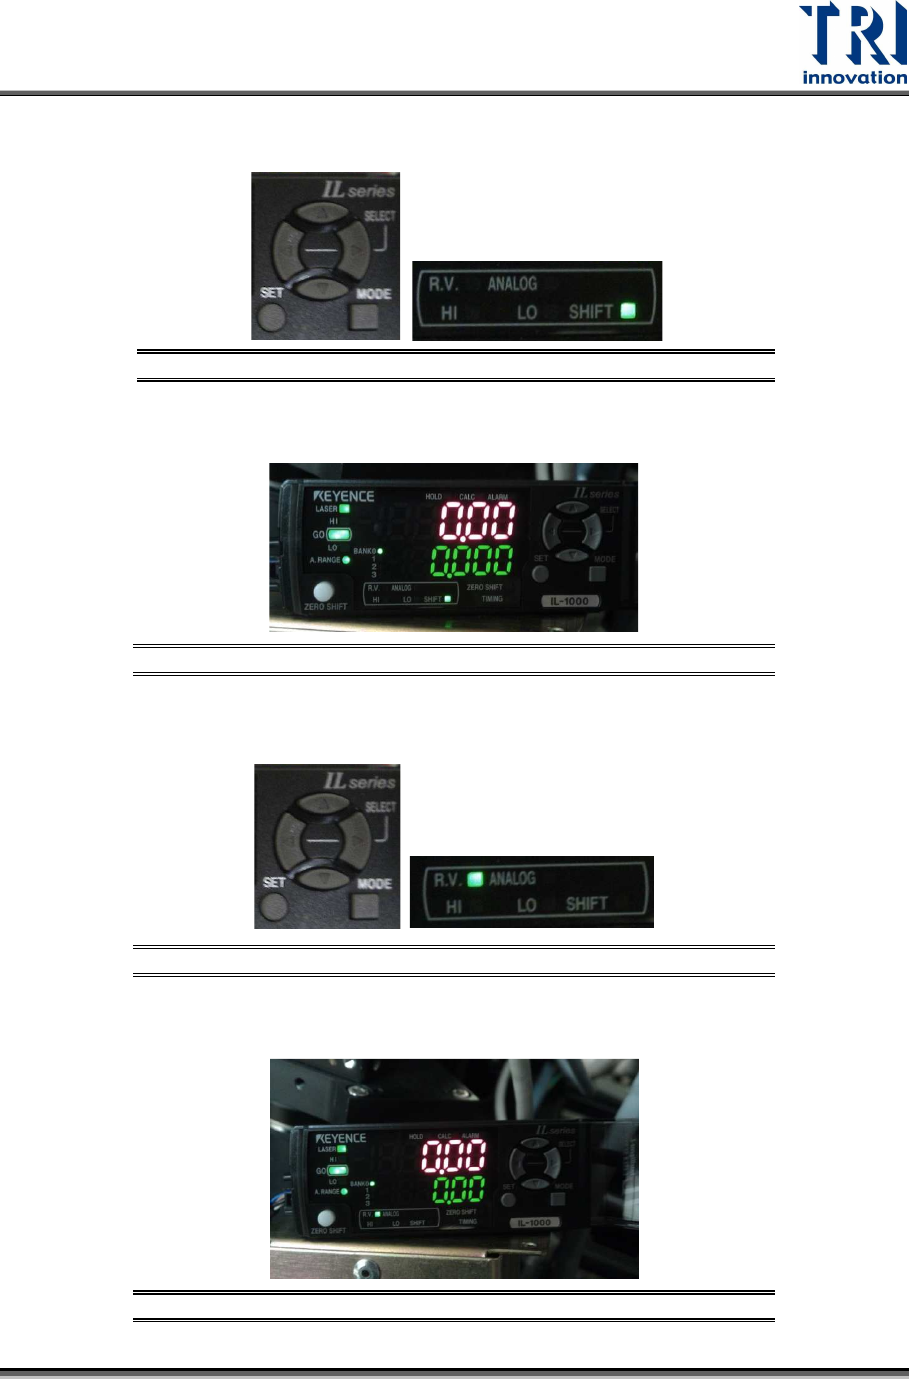
5)
Click on [
←] or [→] button to set the mode as [Shift].
Figure 104: Shift
6) The window should display the value [0.000].
Figure 105: 0.000
7) Click on [
←] or [→] button to set the mode as [R.V.].
Figure 106: RV
8) The setup is finished.
Figure 107: The Setup Is Finished