TR7600 SIII_Camera_Calibration_en_v_2_0_2.pdf - 第16页
Test Research, Inc. 10 TR7600 SI II Series User Guide – Camera Ca libration c) Right-click the mouse on the screen, and choose [Display Original]. Figure 9: Original d) I n the toolbar , clic k [Utility System Config…
Test Research, Inc.
TR7600 SIII Series User Guide – Camera Calibration 9
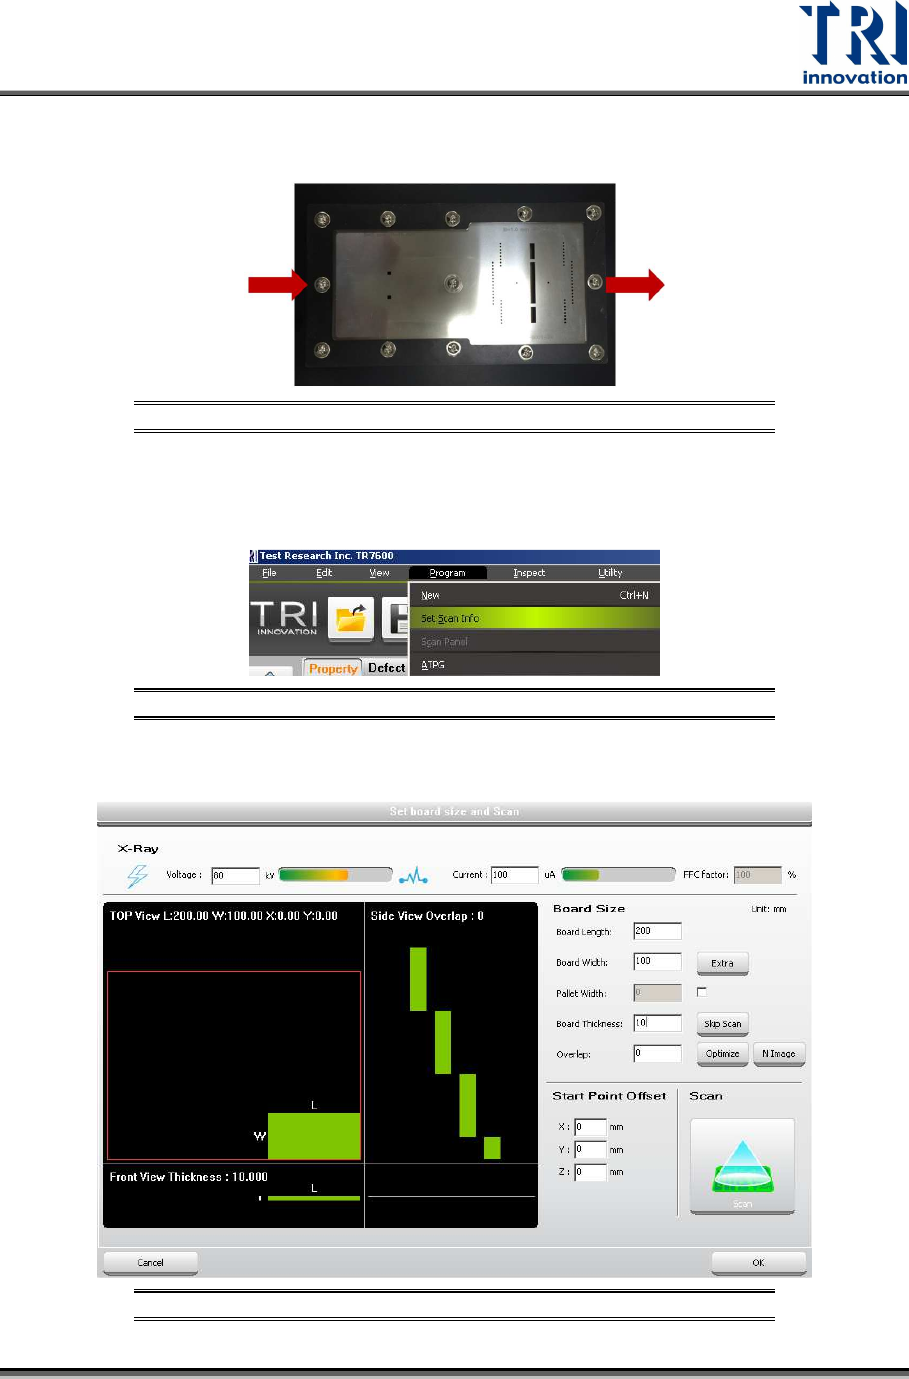
3) Under the left-in right-out board condition, please put the calibration board into the
machine shown as below.
Figure 6: Put the Calibration Board into the Machine
4) Set up the scan parameters:
a) Click [Program] [Set Scan Info].
Figure 7: Set Up Scan Info
b) Input the scan parameters and click [Scan] to scan the board. Click [Ok].
Figure 8: Set Up Scan Parameters

Test Research, Inc.
10 TR7600 SIII Series User Guide – Camera Calibration
c) Right-click the mouse on the screen, and choose [DisplayOriginal].
Figure 9: Original
d) In the toolbar, click [UtilitySystem ConfigurationData Bit Range], and choose
[Auto Range].
Figure 10: Utility
Figure 11: Auto Range

Test Research, Inc.
TR7600 SIII Series User Guide – Camera Calibration 11
Note 1: If the calibration result is not correct or there is any abnormality happens
during the inspection, please check the position of the calibration board.
Note 2: Use the [Program]
[Scan Panel] function for [Center Alignment Calibration],
[Camera Shift Calibration], and [Height Calibration].
Note 3: Use the [Scan] buttons in the pop-out dialog boxes in [Resolution] and [High
Res. Image Offset].
Note 4: To get a better image, click on the main screen
Choose [Display]
[IP, I].