TR7600 SIII_Camera_Calibration_en_v_2_0_2.pdf - 第60页
Test Research, Inc. 54 TR7600 SI II Series User Guide – Camera Ca libration Foll ow the steps below to set up the basic function. 1) P ress [M ode] button for 2 seconds. Figure 93: Mode 2) Click on [↑] or [↓] button to…
Test Research, Inc.
TR7600 SIII Series User Guide – Camera Calibration 53
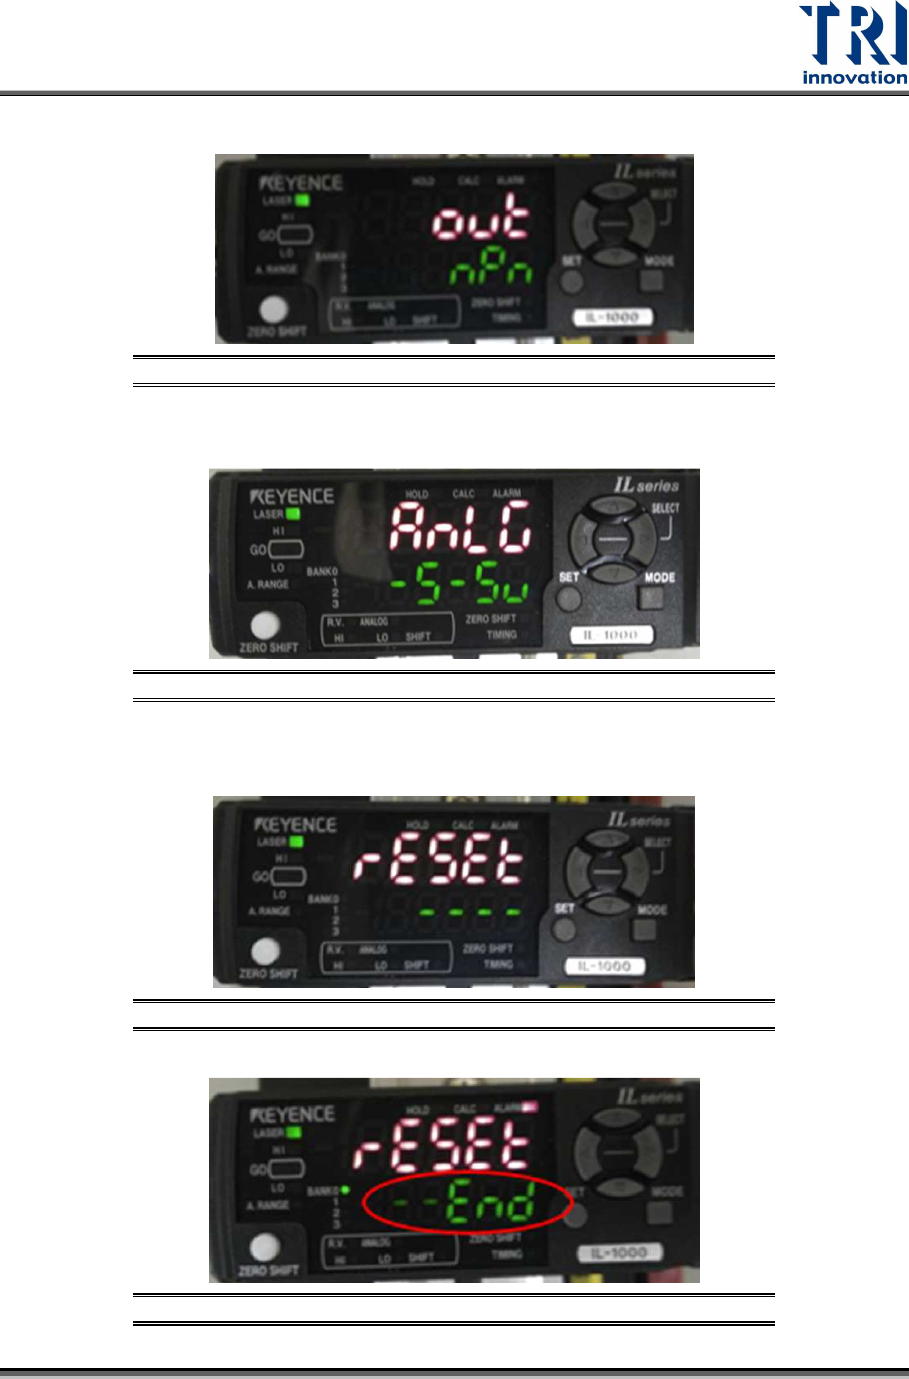
3) Click on [↑] or [↓] button to set [out] = [npn] and then click on [Mode] button.
Figure 89: npn/Mode
4) Click on [
↑] or [↓] button to set [Anlg] as [
-5~5v] and then click on [Mode] button.
Figure 90: Anlg/Mode
5) The device will reset automatically. After the reset is finished, the window will
show [End].
Figure 91: Reset
Figure 92: End
Test Research, Inc.
54 TR7600 SIII Series User Guide – Camera Calibration
Follow the steps below to set up the basic function.
1) Press [Mode] button for 2 seconds.
Figure 93: Mode
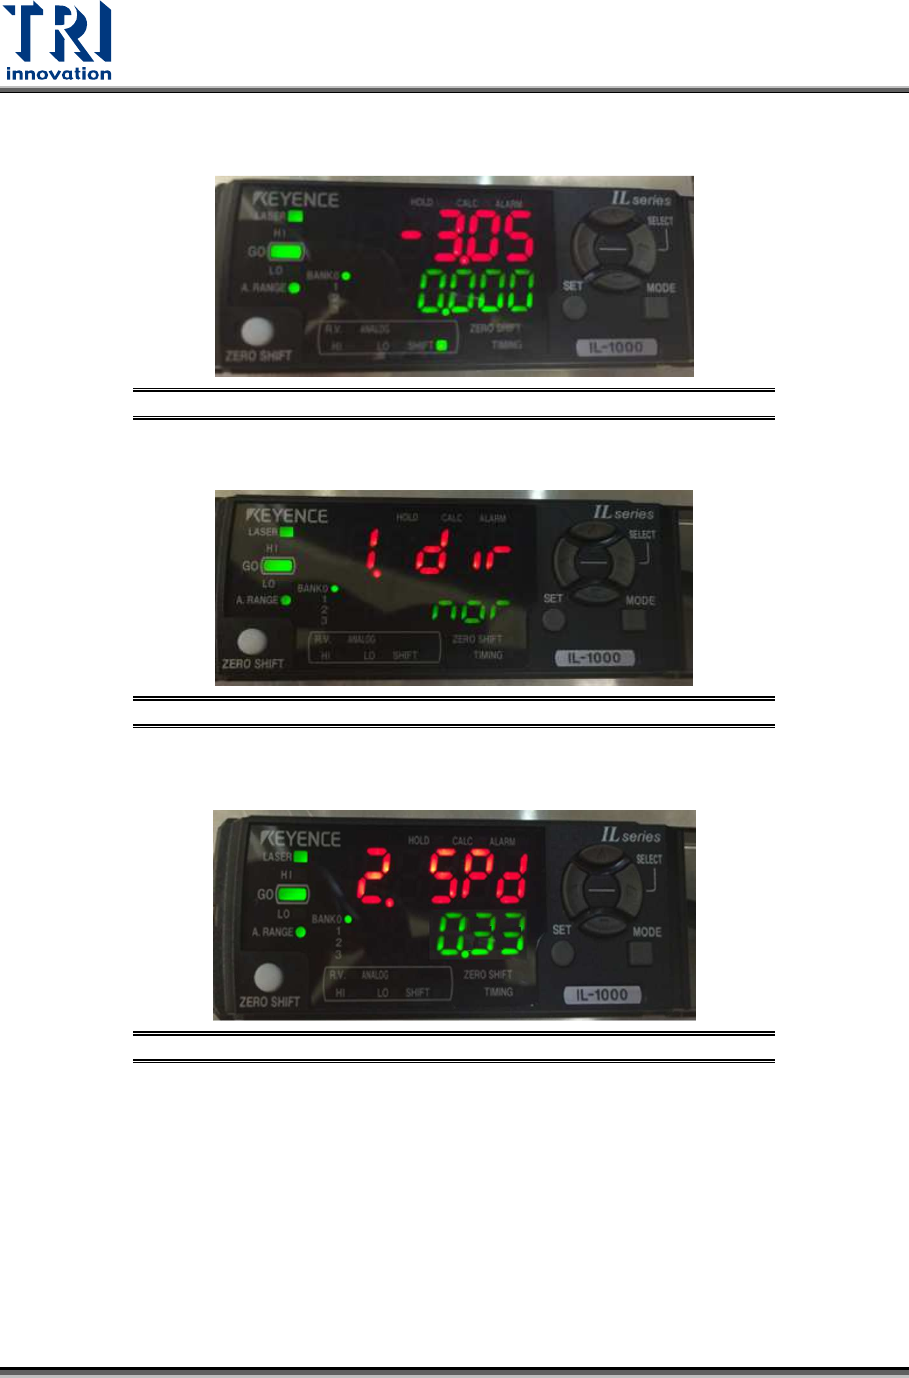
2) Click on [↑] or [↓] button to set [1.dir] as [nor] and then click on [Mode] button.
Figure 94: 1.dir/Mode
3) Click on [
↑] or [↓] to set [2.SPD
] as [0.33] and then click on [Mode] button.
Figure 95: 2.SPD/Mode
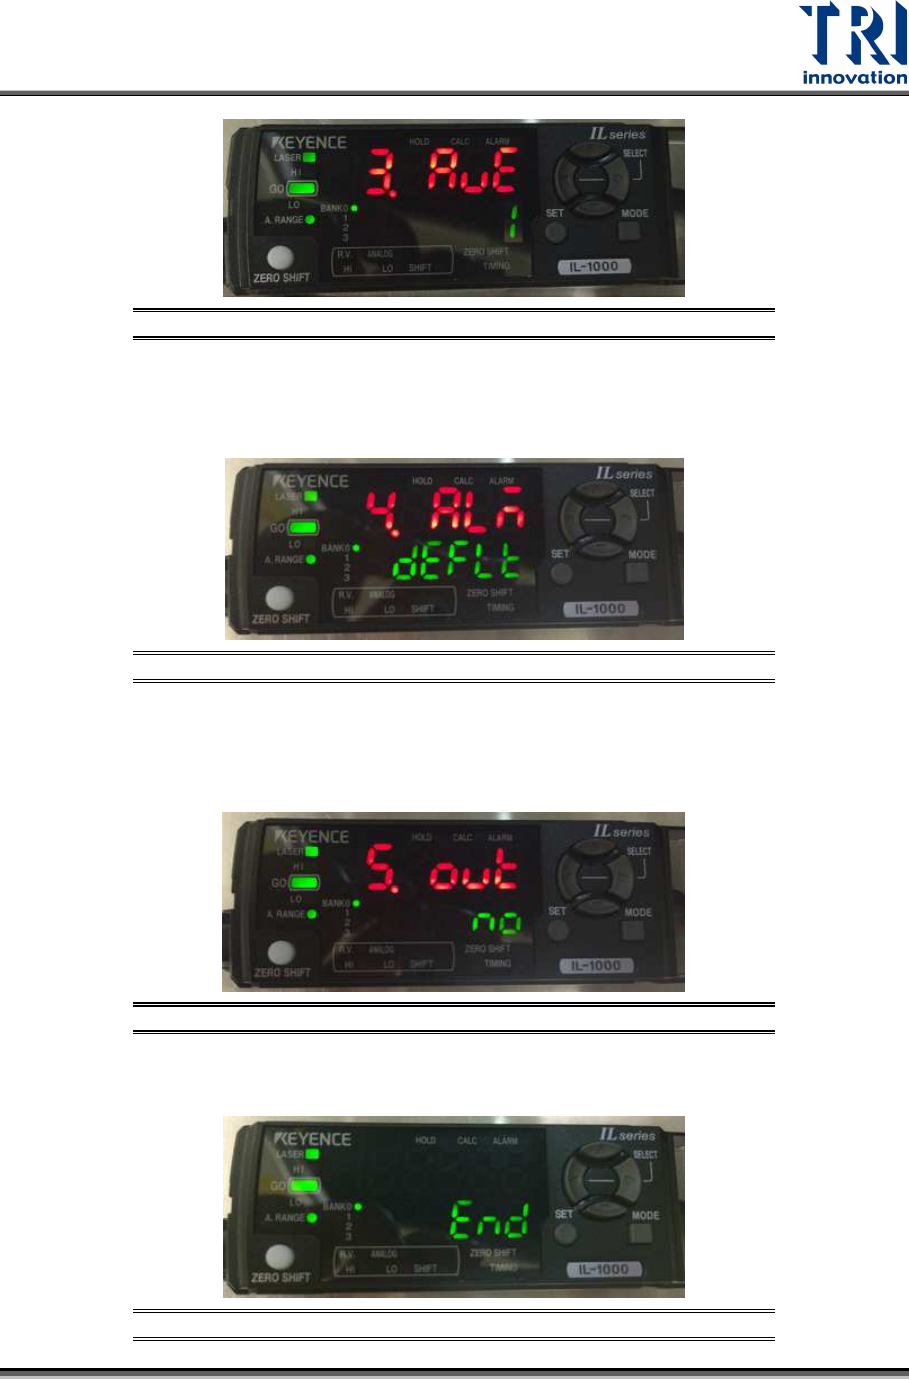
4) Click on [
↑] or [↓] button to set [3.AVE] as [1] and then click on [Mode] button.
Note: After you have seen [1], you also can click on [
→], instead of [Mode], to
finish this step.
Test Research, Inc.
TR7600 SIII Series User Guide – Camera Calibration 55
Figure 96: 3.AVE/Mode
5) Click on [
↑] or [↓] button to set [4.ALA] as [defle] and then click on [Mode] button.
Note: After you have seen [defle], you also can click on [
→], instead of [Mode], to
finish this step.
Figure 97: 4.ALA/Mode
6) Click on [↑] or [↓] button to set [5.out] as [no] and then click on [Mode] button.
Note: After you have seen [no], you also can click on [→], instead of [Mode], to
finish this step.
Figure 98: 5.out/Mode
7) After the process is finished, the window will display the [End] message.
Figure 99: End