TR7600 SIII_Camera_Calibration_en_v_2_0_2.pdf - 第47页
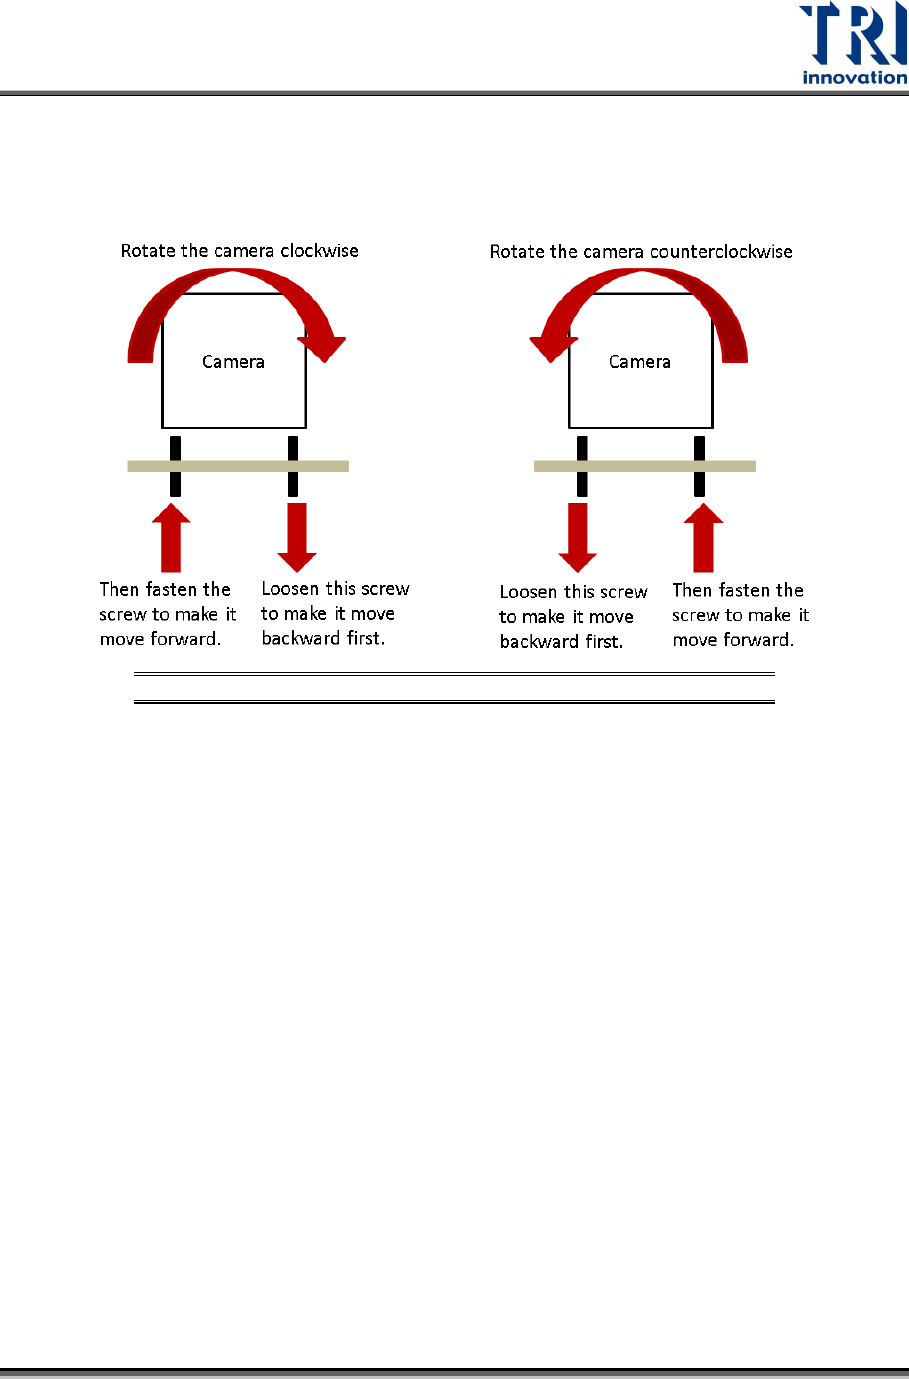
Test Research, Inc. TR7600 SIII Ser ies User G uide – Cam era Calibr ation 41 6) W h en fixture i s us ed, one screw need to be l oosen firs t and th en fasten the other screw to rotate t he c amera. Figure 67: Rotate th…
Test Research, Inc.
40 TR7600 SIII Series User Guide – Camera Calibration
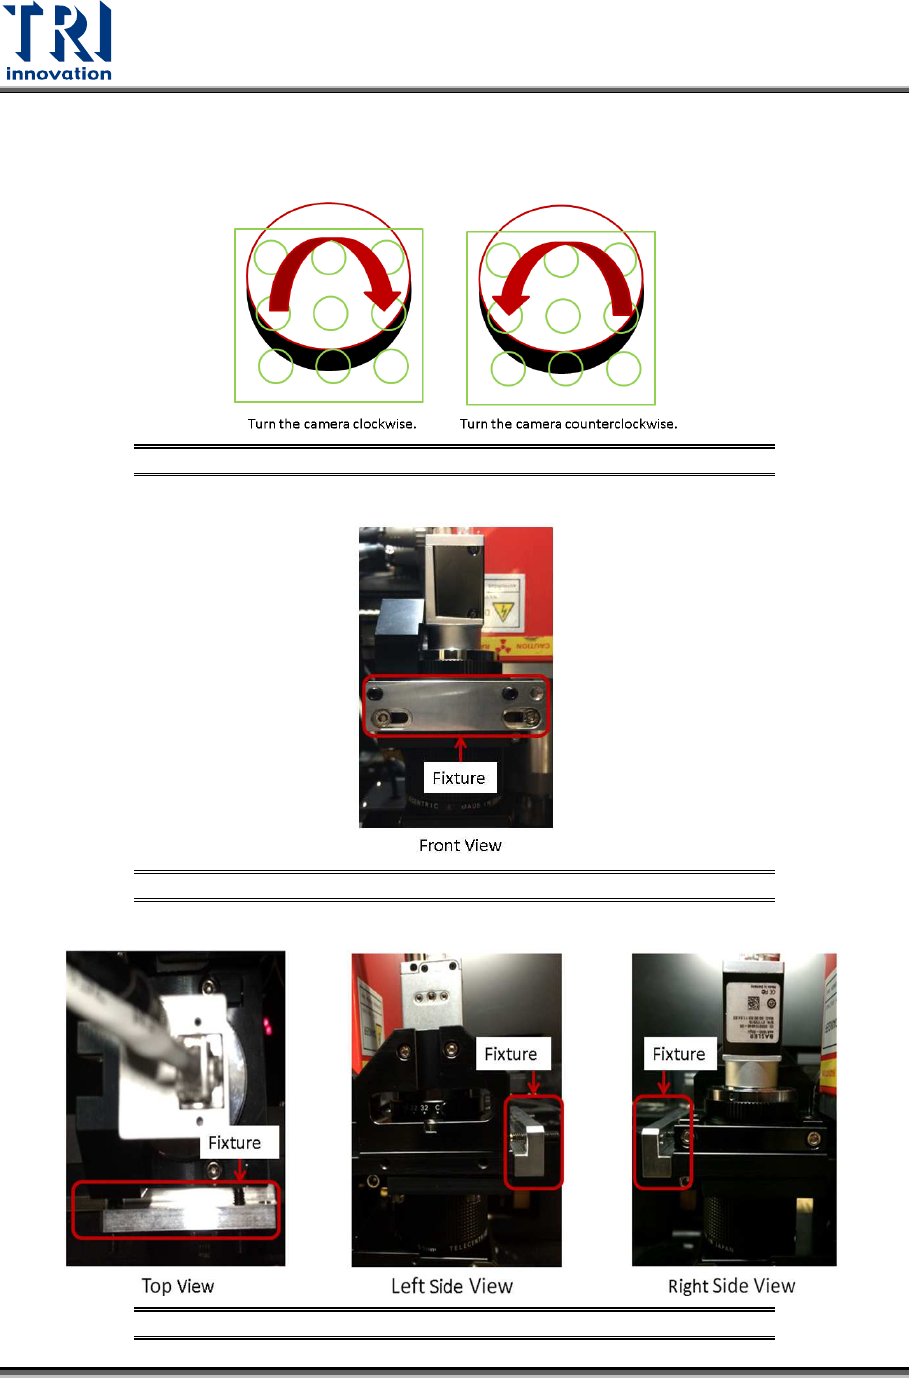
5) Use the fixture to rotate the camera to the direction indicated in figure below.
Figure 64: Rotate the Camera by the Direction Indicated
Figure 65: Fixture/Front View
Figure 66: Fixture/Top View/Right Side View/Left Side View
Test Research, Inc.
TR7600 SIII Series User Guide – Camera Calibration 41
6) When fixture is used, one screw need to be loosen first and then fasten the other
screw to rotate the camera.
Figure 67: Rotate the Camera
7) After the camera is rotated, click on [Camera Rotate] to check if the [OK]
message appeared. If yes, fasten the screws. If no, keep rotating the camera until
the [Ok] message appeared.
8) After the screws are fastened, click on [Camera Rotate] to check for [OK]
message again.
9) Once the [OK] message appeared, click on [2D Resolution] and move to the next
step.
Test Research, Inc.
42 TR7600 SIII Series User Guide – Camera Calibration
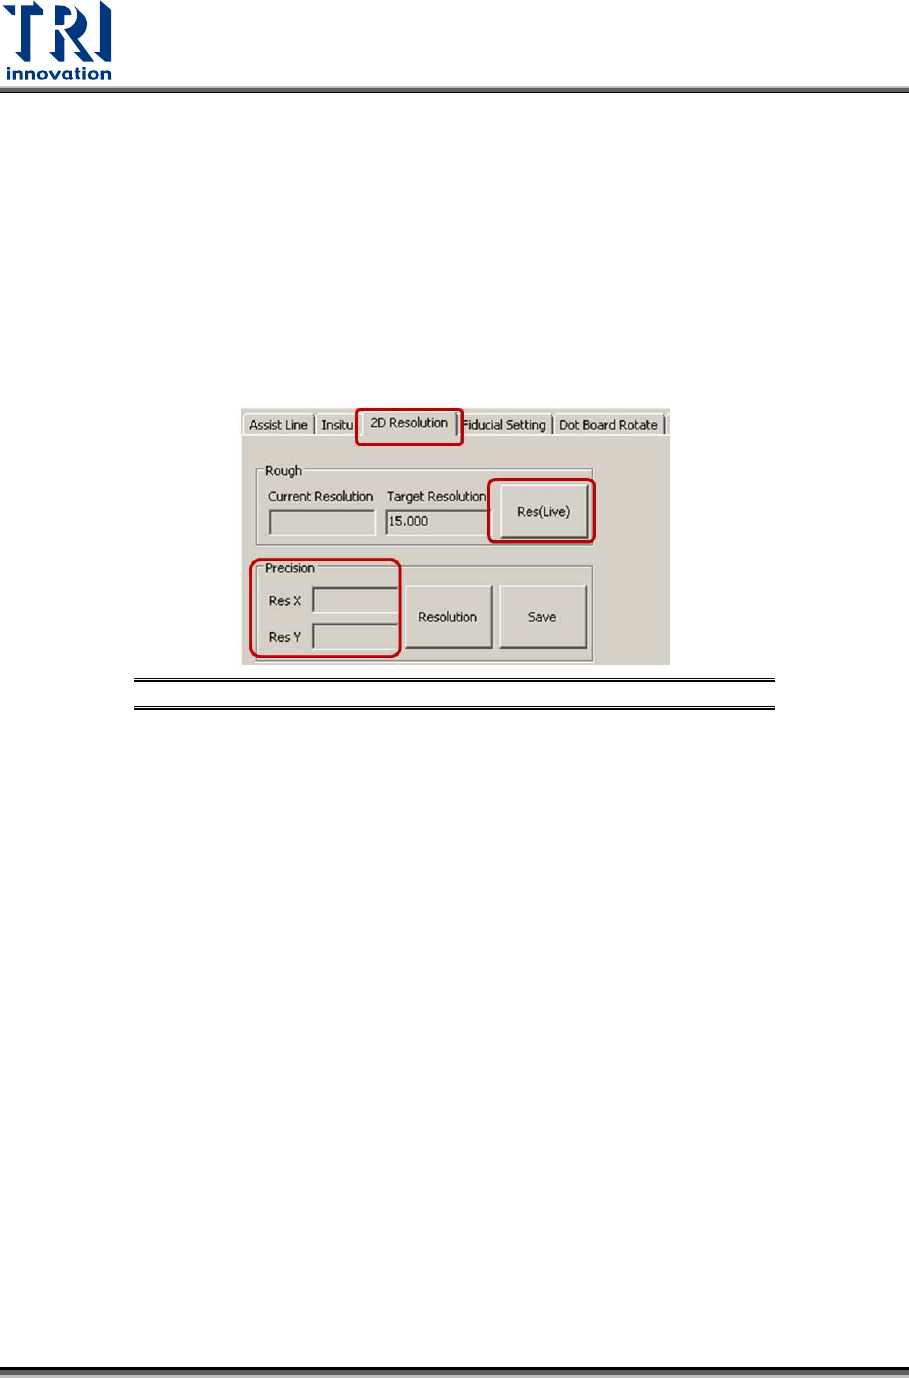
3.5 2D Resolution:
Calibrate 2D camera resolution precisely.
1) Click on [2D Resolution].
2) Click on [Res(Live)].
3) Calibrate the current resolution using the same procedure described in the Step 1.
2D Resolution.
4) If both the values in the [Res. X] and [Res. Y] fields are within the range from 16.4
to 17, the calibration is successful.
5) Click on [Save].
Figure 68: 2D Resolution
3.6 Camera Rotate
1) Please repeat the same procedure described in the Section 3.4 Camera Rotate
to check whether camera aligns to X and Y axes again.
2) If the result is not good, repeat the steps in Section 3.5 2D Resolution and
Section 3.4 Camera Rotate again until see the [OK] message appeared.