DEK INFINITY USER MANUAL.pdf.pdf - 第342页
INFINITY &21680$ %/(5(3/ (1,6+0(1 76 352)/2: 9.58 User Manual Software Versi on 7 If the Unload Boar d Start in Set Preference s is set to Separation, the follow- ing window and menu bar is displayed: Selecting Cont…
INFINITY
&21680$%/(5(3/(1,6+0(176
352)/2:
Software Version 7 User Manual 9.57
17.Select Exit (F8).
18.Select Proceed (F1). The ProFlow unit is placed in contact with the screen.
19.Go to Step 23.
20.If the ProFlow unit is in front of the image continue with Step 21. If the
ProFlow unit is at the rear of the image go to Step 23.
21.Select Run (F1).
If the Camera Idle Position in Set Preferences is set to Behind Rail, the
following window and menu bar is displayed:
Selecting Continue Run clears the warning window and the print cycle
continues.
Selecting End Run clears the warning window, the print cycle is aborted and
control is returned to the ready page.
Use Next Previous Exit
Proceed
Select
Another
Run Head
Paste
Load
Clean
Screen
Adjust Setup Monitor Maint.
Camera Behind Rail Warning
The CAMERA HOME POSITION is set to 'Behind
Rail'
Ensure that no tooling pins or other
obstructions are on the table behind the
rear rail, as these could cause damage to
the camera.
This option will only have an effect for
boards that are less than 250mm wide.
This option can be disabled from the set
preference page.
Continue
Run
End
Run
INFINITY
&21680$%/(5(3/(1,6+0(176
352)/2:
9.58 User Manual Software Version 7
If the Unload Board Start in Set Preferences is set to Separation, the follow-
ing window and menu bar is displayed:
Selecting Continue Run clears the warning window and the print cycle
continues.
Selecting End Run clears the warning window, the print cycle is aborted and
control is returned to the ready page.
NOTE
If Camera Idle Position is set to Behind Rail and Unload Board Start is set
to Separation, the warning windows appear one after the other in the order
shown above.
The machine carries out a print cycle, the ProFlow unit moves to the rear of
the image.
22.When the ProFlow unit is at the rear of the image, select End Run (F1).
23.Open the front printhead cover.
24.Ensure that the ProFlow pressure mechanism is in the raised position (to
expose transfer head diaphragm).
Unload Board Speedup Warning
The UNLOAD BOARD SPEEDUP option is set to
'Separation'
With this option enabled it should be noted
that there is only a minimal clearance
between the underside of the board and any
tooling being used, while the board is being
unloaded.
This option must not be used for boards that
are populated on the underside, as this
could damage the boards.
Continue
Run
End
Run
End
Run
Stop
Cycle
Paste
Load
Clean
Screen
Adjust
Knead
Paste
INFINITY
&21680$%/(5(3/(1,6+0(176
352)/2:
Software Version 7 User Manual 9.59
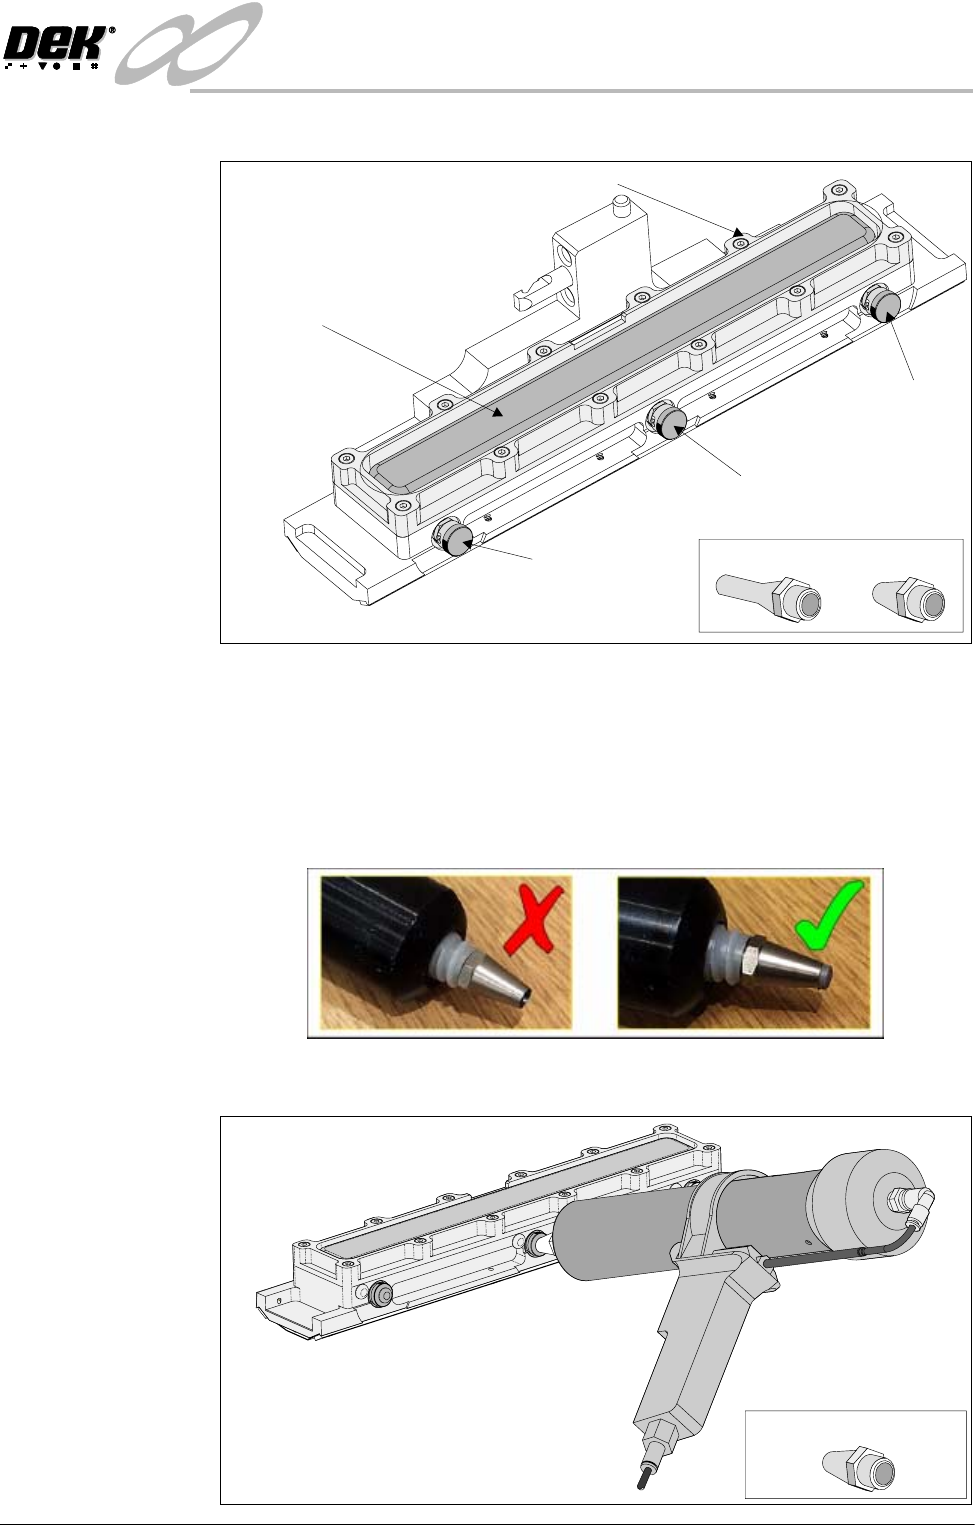
25.Remove the centre filling port bayonet cap.
26. Using either a general purpose mastic gun or the optional ProFlow pneumatic
gun. Load a standard cartridge and fit the short recharging nozzle to the
cartridge, (figure below refers).
NOTE
Ensure that any air within the cartridge and nozzle is expelled prior to using
the gun, ie charge the gun so that paste is starting to exude from the nozzle
(figure below refers).
27.Push the nozzle of the gun into the centre filling port of the ProFlow transfer
head (see figure below).
Filling Port
Bayonet Cap
Diaphragm
Diaphragm Retainer
Recharging Nozzles
Filling Port
Bayonet Cap
Filling Port
Bayonet Cap
Transfer Head (Showing Diaphragm)
Short Recharging Nozzle