DEK INFINITY USER MANUAL.pdf.pdf - 第73页
INFINITY 0$&+,1 (352*5 $00,1* 67$*( 9,6 ,216<67(0 6(783 Soft ware Ver sion 7 User Manual 1.71 If the Camera Idle Position in Set Prefe rences is set to Be hind Rail, the following window and menu bar is di…
INFINITY
0$&+,1(352*5$00,1*
67$*(9,6,216<67(06(783
1.70 User Manual Software Version 7
Positional
Information
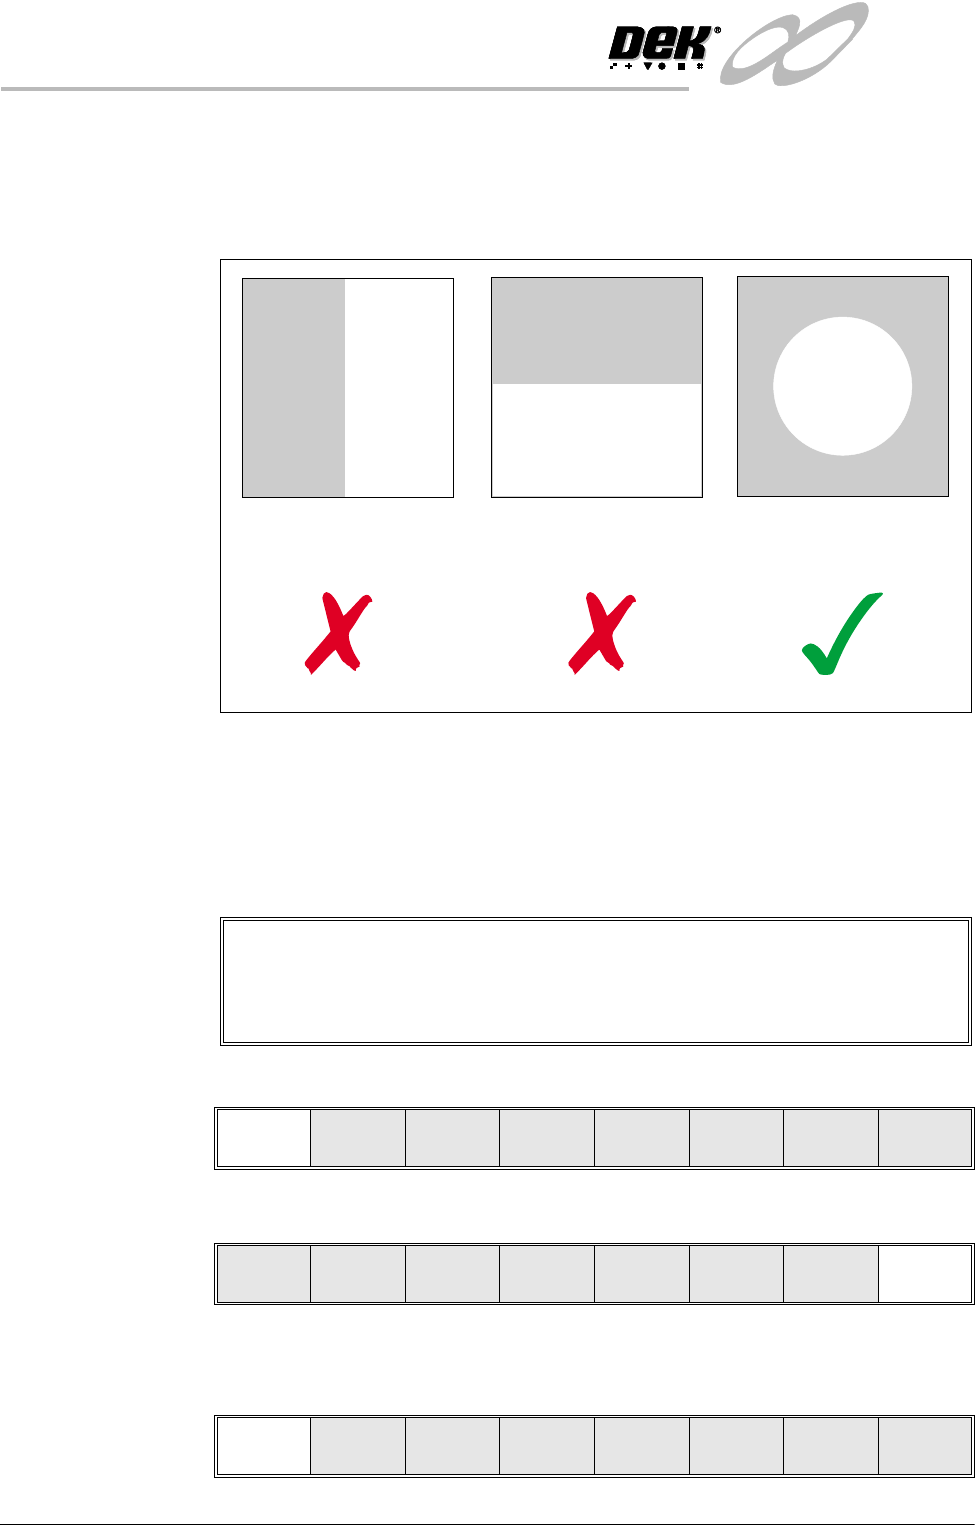
When selecting a Video Model, if the image shapes have edges all in the X
direction or all in the Y direction, not enough positional information exists for
the camera system. An image with good X and Y information is necessary for
accurate positioning:
Preparing the
Vision System
The vision system learns the fiducial during a board setup. The fiducial
coordinates are entered into the product file during the editing of a default file.
This enables the camera to find the fiducials initially. The setup needs to be run
in step mode from the status page.
The following procedure is typical for all fiducial shapes, although in this
instance a circle fiducial shape is referred to throughout.
1. Select Mode (F1) until Step is indicated in the mode option on the screen.
2. Select Exit (F8).
3. Place the board onto the conveyor.
4. Select Run (F1).
No Positional information
in the X direction
No positional information
in the Y direction
Equal positional information
in the X and Y directions.
Video Model
The procedure for creating a Video Model is very similar to that for creating a
Fiducial, throughout the following fiducial procedure, boxes like this contain
alternative procedure steps, to allow the setup of a Video Model.
Mode
Load
Data
Edit
Data
Setup
Squeegee
Change
Screen
Change
Tooling
Change
Language
Exit
Mode
Load
Data
Edit
Data
Setup
Squeegee
Change
Screen
Change
Tooling
Change
Language
Exit
Run Head
Paste
Load
Clean
Screen
Adjust Setup Monitor Maint.
INFINITY
0$&+,1(352*5$00,1*
67$*(9,6,216<67(06(783
Software Version 7 User Manual 1.71
If the Camera Idle Position in Set Preferences is set to Behind Rail, the
following window and menu bar is displayed:
Selecting Continue Run clears the warning window and the print cycle
continues.
Selecting End Run clears the warning window, the print cycle is aborted and
control is returned to the ready page.
If the Unload Board Start in Set Preferences is set to Separation, the follow-
ing window and menu bar is displayed:
Selecting Continue Run clears the warning window and the print cycle
continues.
Selecting End Run clears the warning window, the print cycle is aborted and
control is returned to the ready page.
NOTE
If Camera Idle Position is set to Behind Rail and Unload Board Start is set
to Separation, the warning windows appear one after the other in the order
shown above.
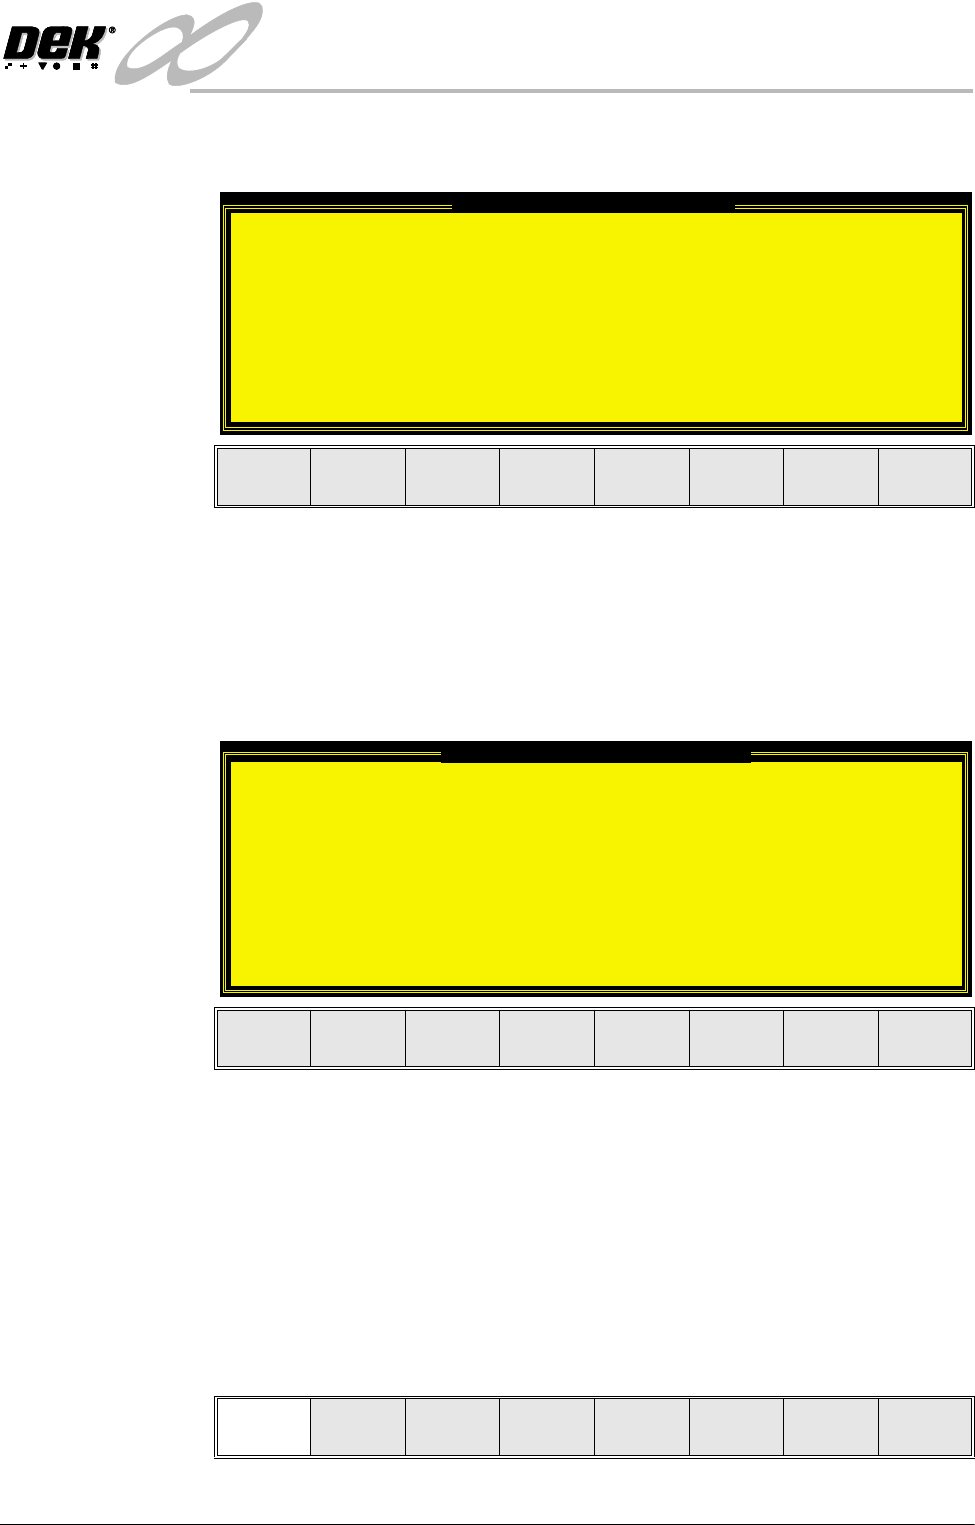
5. Select Auto Board (F1).
Camera Behind Rail Warning
The CAMERA HOME POSITION is set to 'Behind
Rail'
Ensure that no tooling pins or other
obstructions are on the table behind the
rear rail, as these could cause damage to
the camera.
This option will only have an effect for
boards that are less than 250mm wide.
This option can be disabled from the set
preference page.
Continue
Run
End
Run
Unload Board Speedup Warning
The UNLOAD BOARD SPEEDUP option is set to
'Separation'
With this option enabled it should be noted
that there is only a minimal clearance
between the underside of the board and any
tooling being used, while the board is being
unloaded.
This option must not be used for boards that
are populated on the underside, as this
could damage the boards.
Continue
Run
End
Run
Auto
Board
Manual
Board
Knead
Paste
Exit
INFINITY
0$&+,1(352*5$00,1*
67$*(9,6,216<67(06(783
1.72 User Manual Software Version 7
6. Select Step (F1).
7. Select Step (F1).
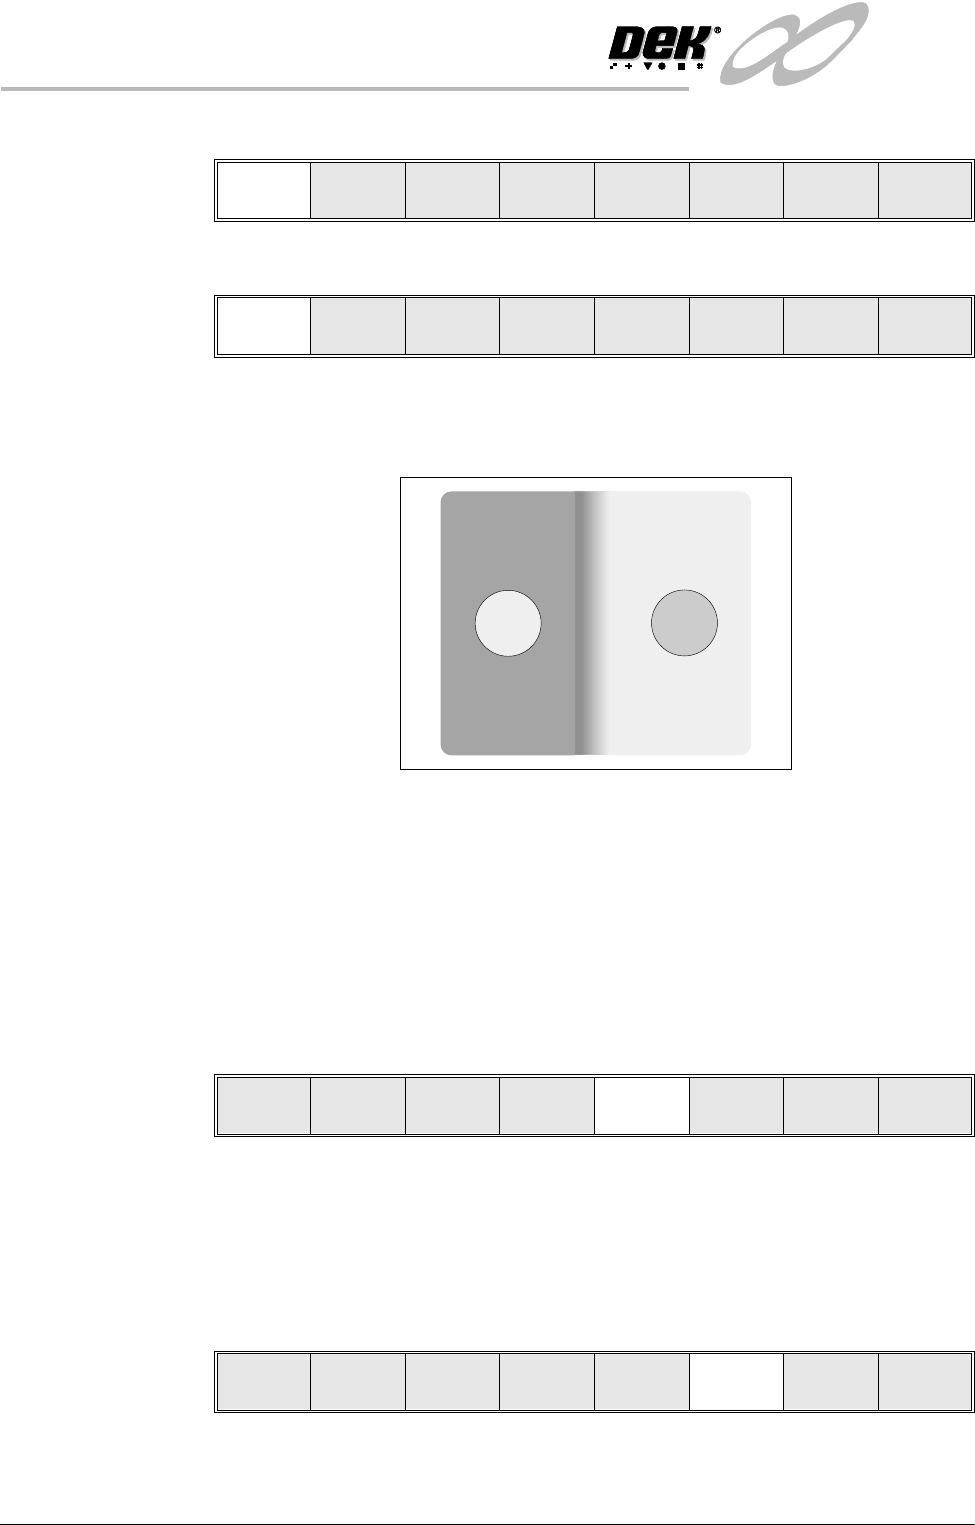
The board fiducial/select mark should now be visible on the vision data
window.
If selective print/pass through is enabled, the image on the left hand side of
the monitor is the board select mark. The right hand side of the monitor
shows the corresponding position on the screen, which is a mirror image of
the board without the select mark. While the select mark is being setup and
the menu bar is as Step 8, the message ‘The form of this fiducial will select
Print / Pass through’. is displayed.
If the fiducial is in the field of view go to Step 10. If the fiducial is not in the
field of view, continue with Step 8.
8. Select Search Step (F5).
For each press of Search Step the camera conducts an increasing spiral search
to enable the operator to locate the fiducial. If this search is not successful
the camera can be returned to its origin. Re-check the fiducial co-ordinates
set in the product file.
9. Select Search Reset (F6). When the fiducial is located continue with Step
10.
10.If auto fiducial setup is enabled go to Step 27, otherwise continue with Step
11.
Step Head
Inspect
Setup
Single Exit
Step Head
Inspect
Setup
Single Exit
Step Head
Fiducial
Setup
Adjust
Search
Step
Search
Reset
Single Exit
Step Head
Fiducial
Setup
Adjust
Search
Step
Search
Reset
Single Exit