00197461-01_AI_Portaltausch_X-Serie_S_INTERN_de_en.pdf - 第59页
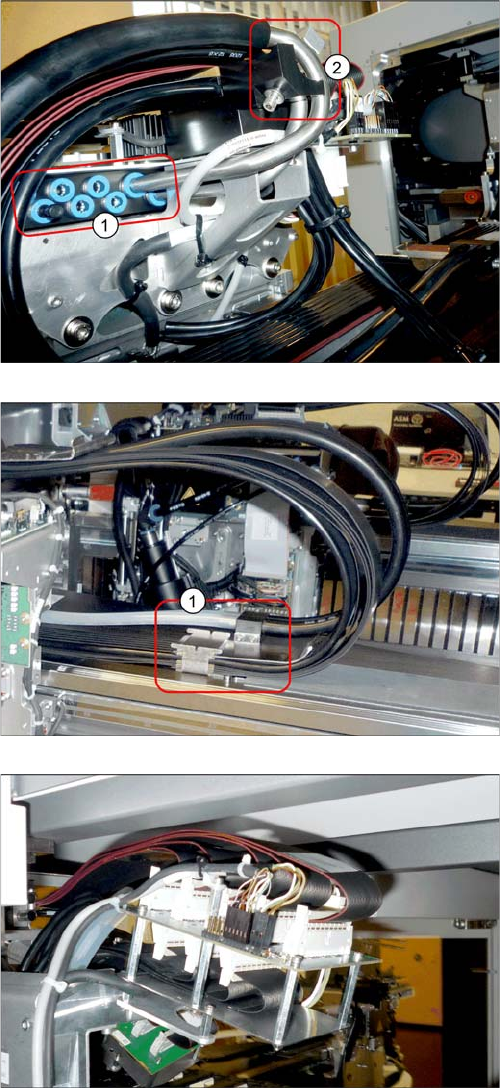
Installation Removing the Gantry Gantry Exchange Portaltausch 59 ► Use the hose u nlocking too l to disconnect all hoses from the head vacuum distributor (1) . You may want to mark their positions, to make clear assignme…
Installation
Removing the Gantry
58 Gantry Exchange Portaltausch
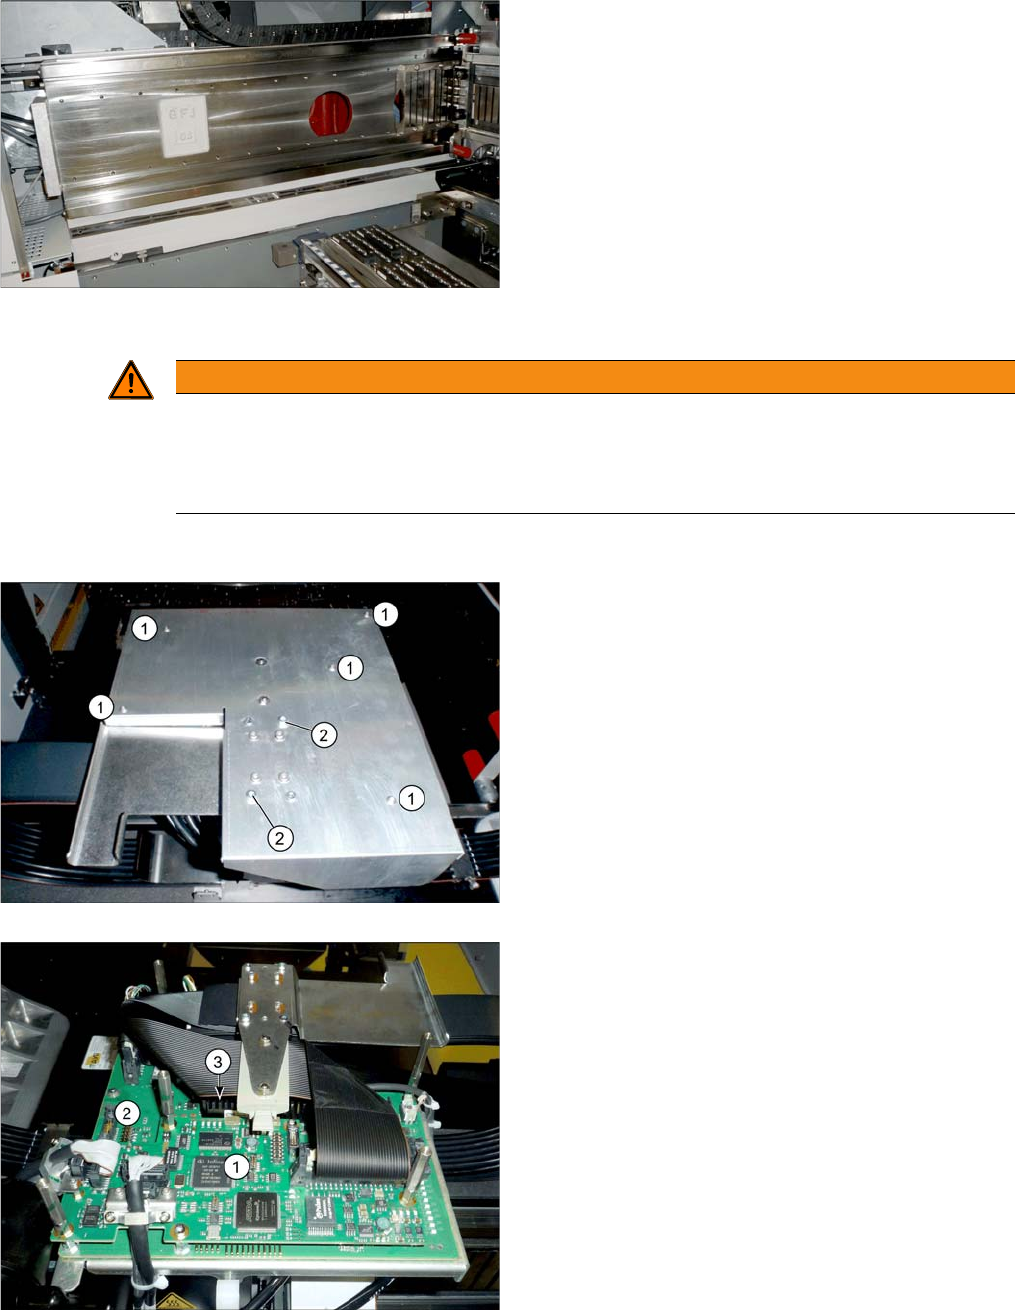
► Loosen in sequence the screws fastening each magnet, and then remove the magnet.
Disconnecting the trailing cable and hoses
In order to easily remove the gantry, you first need to re-
move several magnets. The quantity to be removed de-
pends on the machine and location:
X3 S, X4 S – location 1, 3:
Minimum of five magnets
X3 S, X4 S – location 2/4 and X4i S:
Minimum of three magnets
WARNING
Powerful magnetic fields!
Risk of injuries and/or damage to property from powerful magnetic fields.
► When working on the magnets, observe the safety instructions 00195600-xx about working
with powerful magnetic fields!
1. Five fastening screws (not sealed)
2. Two fastening screws (with sealing varnish)
► If there is a board cover present, dismantle this. You
need to loosen the fastening screws for this at(1)
and (2).
Boards on the gantry
1. Vision board spread spectrum
2. Head interface
► Unplug all trailing cable cables from the head inter-
face. You may want to mark their positions, to make
clear assignment easier later on (see also "4.1 De-
scription of Boards" [ ➙ 69]).
Installation
Removing the Gantry
Gantry Exchange Portaltausch 59
► Use the hose unlocking tool to disconnect all hoses
from the head vacuum distributor (1). You may want
to mark their positions, to make clear assignment
easier later on.
► For vacuum pump operation: Use the hose unlocking
tool to disconnect the vacuum hoses and the retain-
ing bracket (2).
► Disconnect the cable and hose holders (1) from the
gantry.
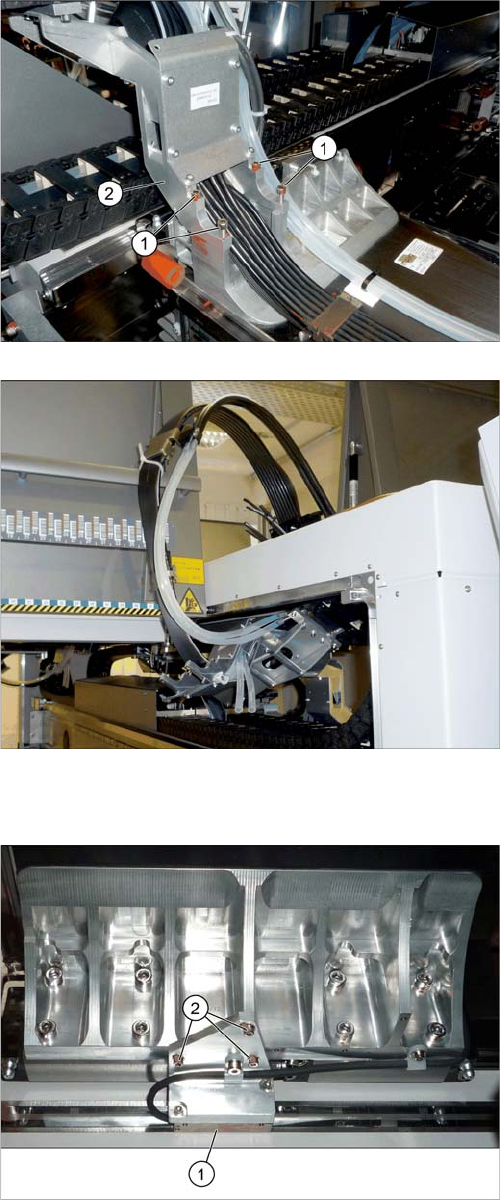
Gantry interface
► Unplug the connectors for the motor, temperature
sensor and incremental encoder Y axis from the gan-
try interface (see also"4.1 Description of Boards"
[➙69]).
► Unthread the corresponding cable as far as the gan-
try. Open any cable ties on the trailing cable holder.
Mark their positions, to make replacement easier lat-
er on. Pay close attention to the cable ties on the mo-
tor cable.
Installation
Removing the Gantry
60 Gantry Exchange Portaltausch
Moving the incremental encoder
► Loosen the screws fastening the trailing cable holder.
Make sure that you do not lose the rubber mat under
the cables.
► Hook the trailing cable (e.g. with cable ties) up, so
that it is not in the way during the remaining removal
tasks.
► Loosen the three screws (2) fastening the Y incre-
mental encoder (1). Move the incremental encoder
as far as possible outwards (away from the scale)
and fix this into place with a screw.
This prevents the incremental encoder or the tape meas-
ure from being damaged during removal.