PCP-Manual-REV-C.pdf - 第35页
PCP Series Manual Revision B / October 2021 Page 35 of 56 How to Use the PCP wit h Portal If your PCP is on a workcel l with PVA Portal, you will use the screen s that follow to operate it. Refer to the Portal manual for…

PCP Series Manual
Revision B / October 2021
Page 34 of 56
Replace the Star Shaped Coupling
1. Examine the star shaped coupling in the bearing block. If it is damaged, replace it.
2. Use a pick to remove the star shaped coupling.
3. Put the new star shaped coupling in the bearing block.
4. Use the pick to position it correctly.
5. Push on the coupling to make sure it is correctly installed.
Figure 42: Replace Coupling
Replace the Stator
1. Perform the procedure to disassemble and clean the pump. Discard the used stator.
2. Install the new stator.
3. Assemble the pump and install it in the workcell.
PCP Series Manual
Revision B / October 2021
Page 35 of 56
How to Use the PCP with Portal
If your PCP is on a workcell with PVA Portal, you will use the screens that follow to operate
it. Refer to the Portal manual for additional information on how to use the program.
NOTE: The screens may be different based on customer specific configuration.
The screens that relate to the PCP are in Manual mode under “PCP050”. When you are in
this screen, a row of tabs will be shown under the row of manual mode tabs. Use the left
and right arrows to scroll through the tabs.
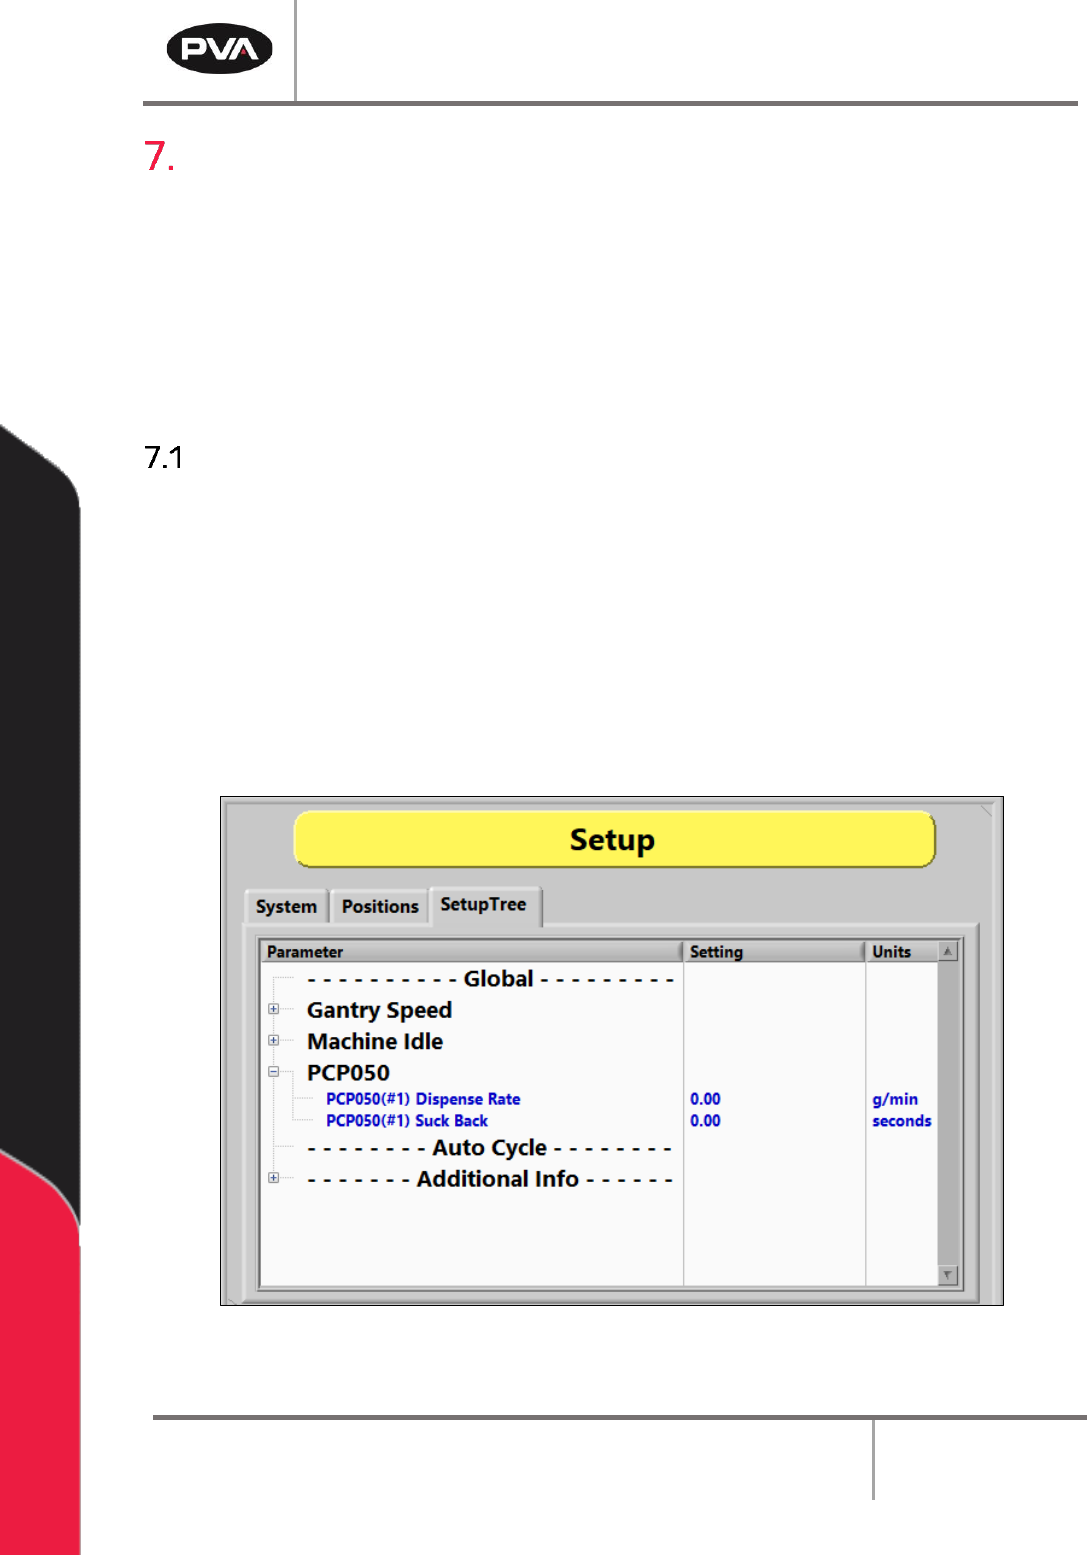
Setup Mode
The settings that are used in Auto Cycle can be changed in Setup Mode as shown below.
1. Select Setup mode.
2. Select the Setup Tree tab.
3. Select the + symbol next to a Parameter to expand the setup tree as shown in the
examples below.
4. Double click on any parameter to open an edit window.
Figure 43: Setup Screen
PCP Series Manual
Revision B / October 2021
Page 36 of 56
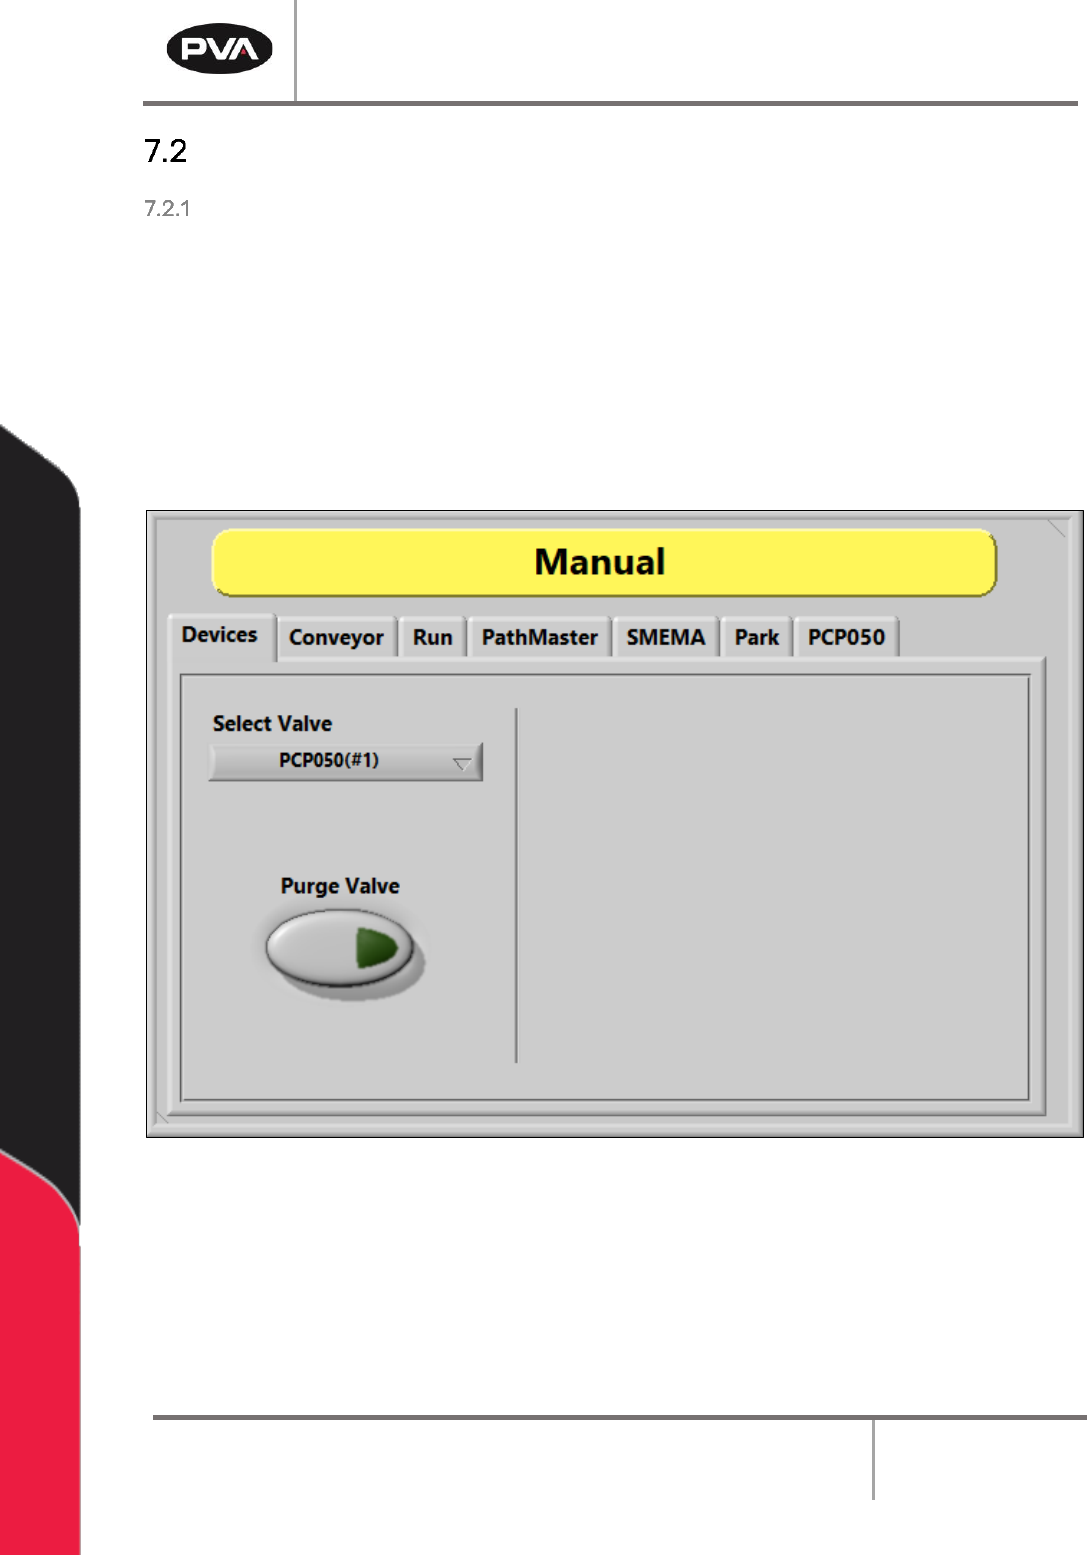
Manual Mode
Devices
1. Select Manual from the cycle stop screen.
2. Select the Devices tab.
3. Select the valve from the Select Valve drop down menu.
4. Select Purge Valve to purge material from the selected valve.
5. Select the Z-Slide Up or Down buttons to move the Z-slide.
Figure 44: Devices Screen