OM-1754-001w_GS-F600.pdf - 第151页
OM-1754 4-27 CAUTION When the at ring is cut, take care not to get injured by the commercially available cutter . 1303-001 3.2 Inspection, Cleaning, and Lubrication Spots
OM-1754
4-26
WARNING
Pay close attention to the cutter blade during the
maintenance work.
•
Lack of attention will result in a hand injury, etc.
Wear gloves and take the greatest care in performing
the work.
•
Be sure to attach the cutter blade cover to the cut unit
during the maintenance work for safety purposes.
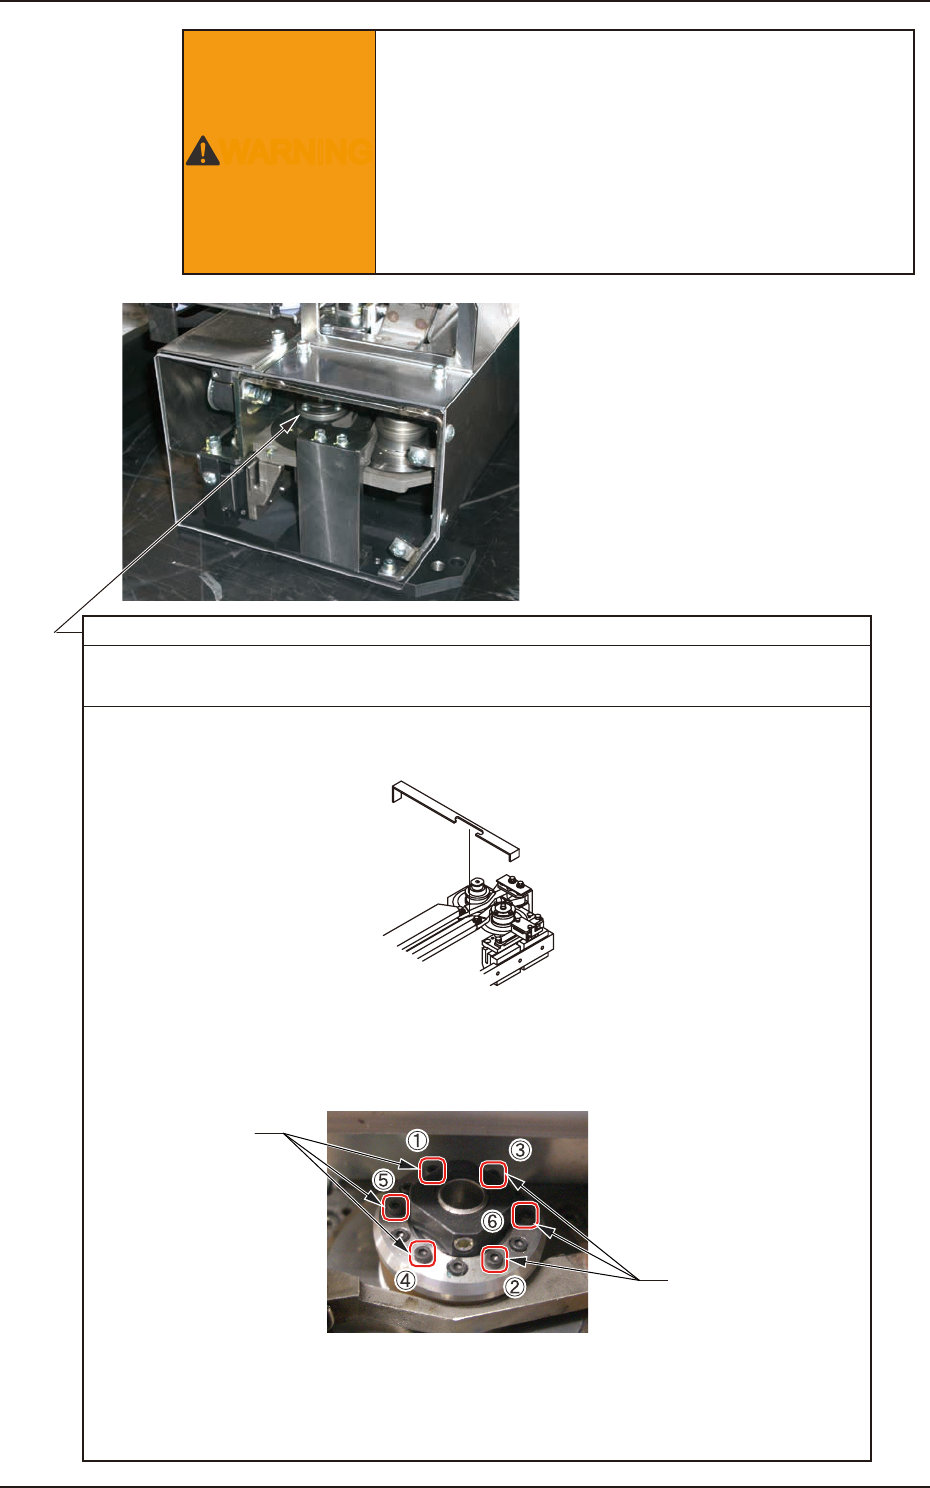
Attachment Position of
Cut Unit Fixing Jig
Flat Ring
Every Year Replacement
Required Time: 10 minutes
(1) Remove 11 screws and detach the cover.
(2) Use the cutter unit fixing jig with the tape clamp closed to fix the urethane clamp section.
(3) Loosen and remove the seal-cover bolt (6 locations) in the order of No. 1 to No. 6,
using a wrench.
(4) Change the flat ring.
(5) Put the shield cover and attach the bolts (6 locations) on it.
(Attach it using the torque driver attached to the line accessory.)
(Tightening Torque : 18.6 to 22.6 Ncm (1.9 to 2.3 kgfcm))
Bolts
Bolts
FD19
1303-001
3.2 Inspection, Cleaning, and Lubrication Spots

OM-1754
4-27
CAUTION
When the at ring is cut, take care not to get injured by
the commercially available cutter.
1303-001
3.2 Inspection, Cleaning, and Lubrication Spots
OM-1754
4-28
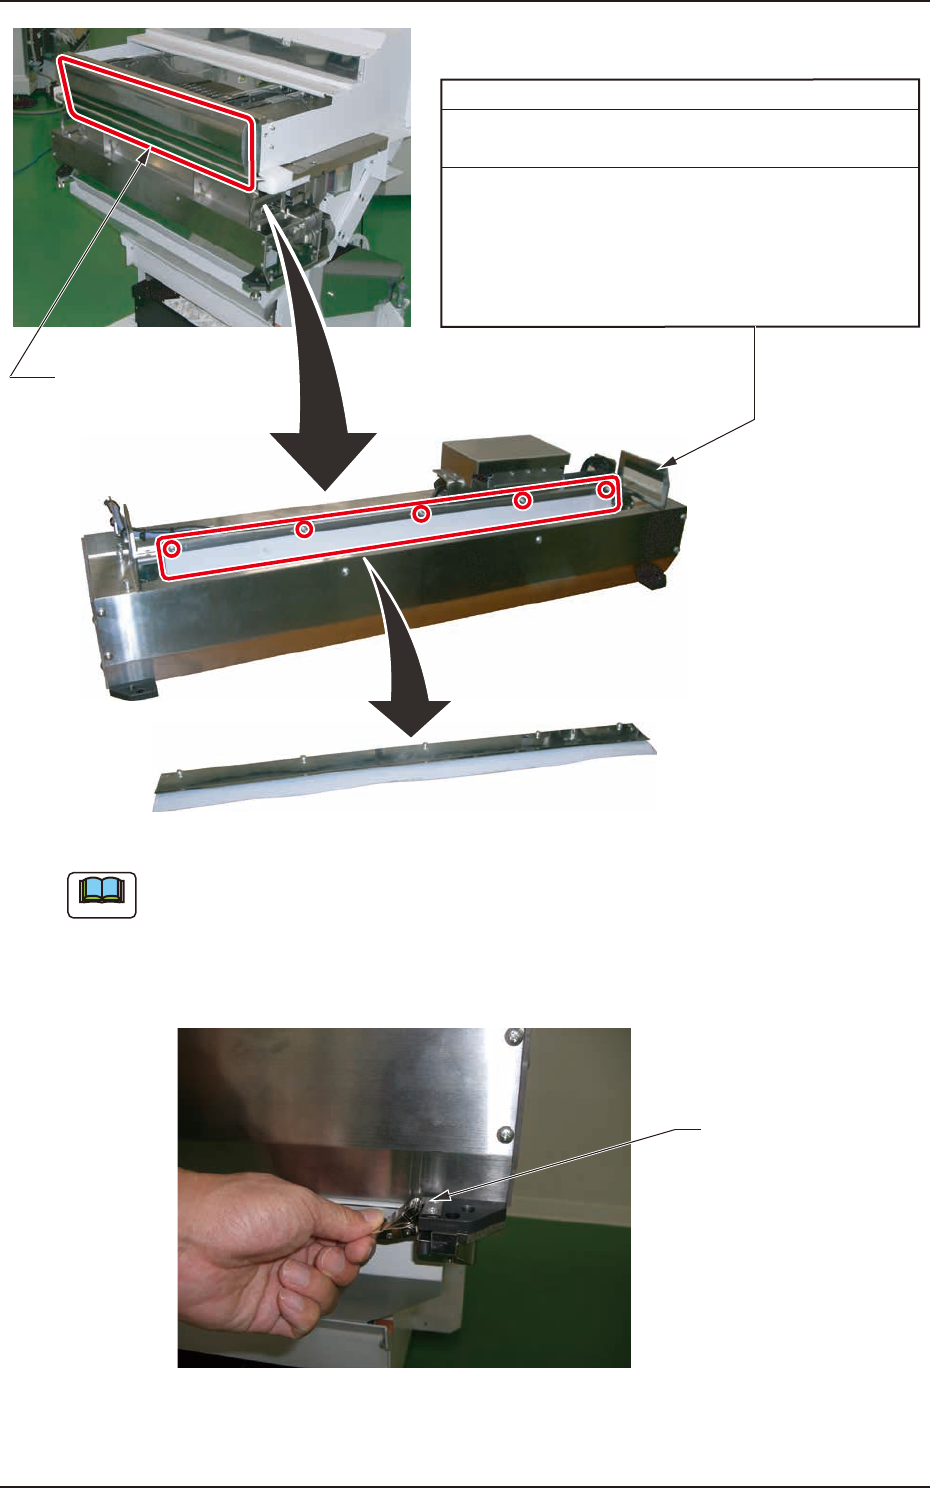
(2) Remove the tape guide.
(1) Remove the front safety bar and take out the cutter
from the cart.
(3) Remove five screws.
(4) Replace the fluorine sheet.
Fluorine Sheet
Every Y ear Replacement
Required Time: 15 minutes
Front Safety Bar
Catch Locks
Removed fluorine-processed sheet.
(a) When the cutter is setup on the cart, fix the two
connectors securely.
(b) When the cutter is setup on the cart, push the cutter
into the end and fix it securely using the catch locks
(2 locations).
(c) Do not forget to attach the safety cover.
Note
FD20
1303-001
3.2 Inspection, Cleaning, and Lubrication Spots