4OM-1050-002.pdf - 第64页
1.4.4 Detachment and Attachment of V acuum Nozzle The vacuum nozzles must be detached or attached with the operation power being turned "ON" It is dangerous. Be sure to detach or attach a vacuum nozzle alone (w…
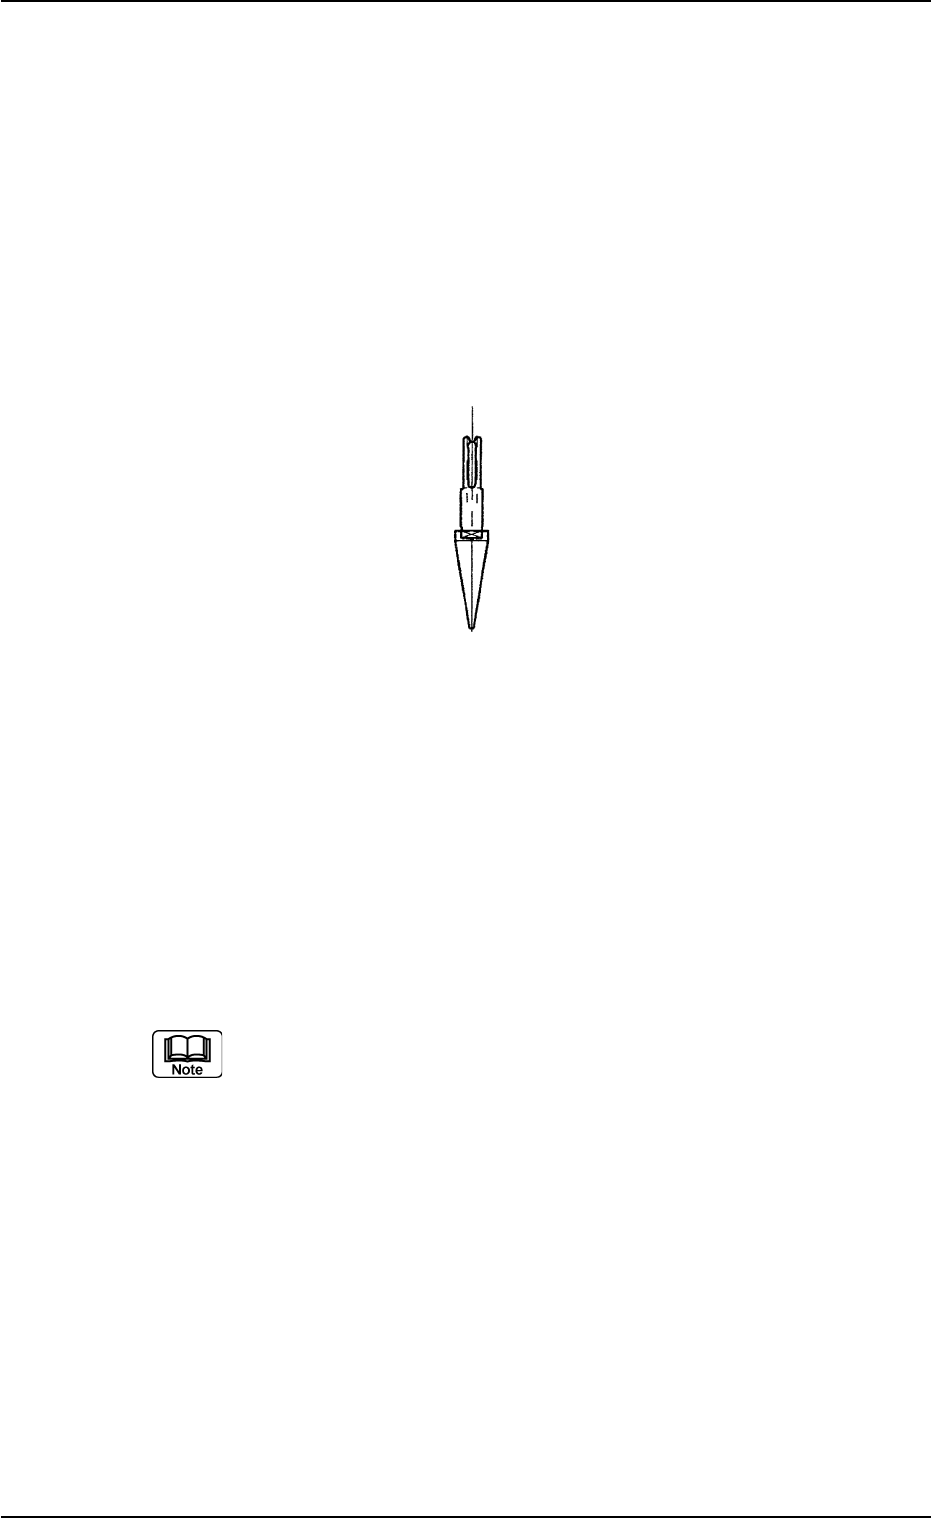
1.4.3 Cleaning of Vacuum Nozzle
Periodically perform cleaning of vacuum nozzles to maintain reliable
and stable component picks and placement.
• It is advisable that the nozzle be cleaned at least once a week.
• Change cleaning frequency according to varying frequency of use
and stain degree along with certain environmental conditions.
• When the vacuum suction force weakens or a nozzle failure in com-
ponent pick or placement occurs, it is required to check the stain
degree and clean the nozzle.
Fig. 4A63
Cleaning Method
(1) Detach the vacuum nozzle.
(2) Blow air to remove dust and dirt. At this time, use clean, dry, and
non-lubricated air.
When the nozzle is heavily stained, clean it with an ultrasonic
cleaning machine or a rag soaked in alcohol.
(3) Attach the vacuum nozzle.
(a) Refer to "1.4.4 Detachment and Attachment of Vacuum
Nozzle" for detailed information of detachment and
attachment procedures.
(b) Detach the nozzle before demagnetizing it.
Keep the head section free of any magnetic field.
As an example,
• Do not bring a magnet close to the head section.
• Do not bring the demagnetizer to the head section.
0301-006 1-49 AFO01ETRP
1.4 Maintenance Method
1.4.4 Detachment and Attachment of Vacuum Nozzle
The vacuum nozzles must be detached or attached
with the operation power being turned "ON"
It is dangerous. Be sure to detach or attach a vacuum
nozzle alone (without any other attended personnel).
Before detaching or attaching a vacuum nozzle, be
sure to spread a rag under the working area.
Otherwise, a fallen vacuum nozzle will easily be lost if
any.
(1) Detachment of Vacuum Nozzle
(1-1) Set the [OPERATION] switch to the "SETUP" side.
Confirm that the "LOCK" lamp on the front operation panel is
"ON"
0301-005 1-50
AFO01ETRP
1.4 Maintenance Method
CAUTION
CAUTION
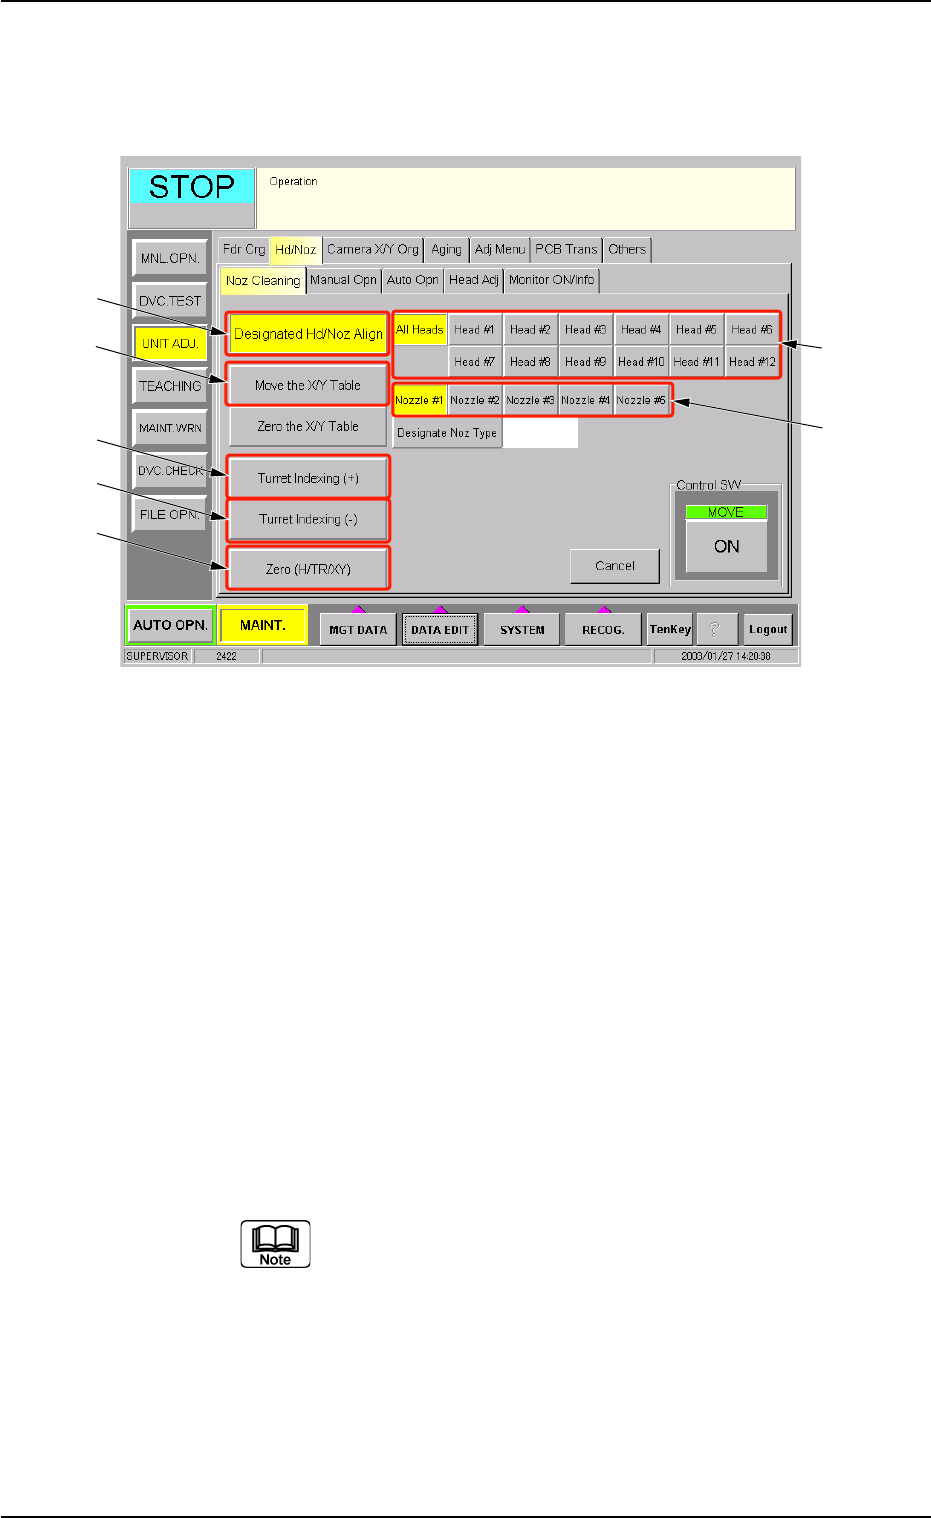
(1-2) Open the "Noz Cleaning" tab sheet. (Operation Sequence:
"UNIT ADJ." Window (Submenu) Æ "Nozzle Adj." Tab Æ
"Noz Cleaning" Tab Sheet)
Fig. 4A64 "Noz Cleaning" Tab Sheet
(1-3) Select the [Move the X/Y Table] button (*4) and press the
[ON] button (entitled "MOVE"). In 2 seconds, press the
[ENABLE] button on the operation panel.
The X/Y Table moves from the cleaning position to the es-
cape position.
(1-4) Select the [All Heads] button (*1) and specify the nozzle (*2)
to be detached.
Select the [Designated Hd/Noz Align] button (*3) and press
the [ON] button (entitled "MOVE"). In 2 seconds, press the
[ENABLE] button on the operation panel.
The nozzle is shifted to the position (the front side of the
machine) where it can easily be cleaned.
To detach a nozzle on the desired head, press the
corresponding [Head #] button.
1.4 Maintenance Method
0301-006 1-51 AFO01ETRP
*3
*4
*5
*6
*7
*1
*2