LmrXP142机械手册.pdf - 第73页
b. Apply the specified grease to the top of the vacuum cut pins using the fine brush. c. Lower the pins and apply the specified grease to the bottom of the vacuum cut pins. Notes: The following areas must be grease to en…
b. Push the pusher to lower any one piston.
Note: After one piston is lowered, the other pistons can be pushed down by hand.
c. Using the fine brush, apply the specified grease to the bottom of each piston
pin (around the piston pin and the grease channel).
d. Spread the grease by moving the piston pins up and down. Ensure that any
of the piston pins identified as having poor movement in step 4, are now
moving smoothly.
Note: Not all pistons can be reached with a single piston lowered because the
pusher gets in the way. For example, with piston 1 lowered, pistons 7, 8 and
9 cannot be reached for lubrication. In this case, lower piston 11 to lubricate
pistons 1, 7, 8 and 9.
Caution: Ensure that the pusher axis is rotated in unison with the revolver to prevent
excessive pressure between each pin and the pusher.
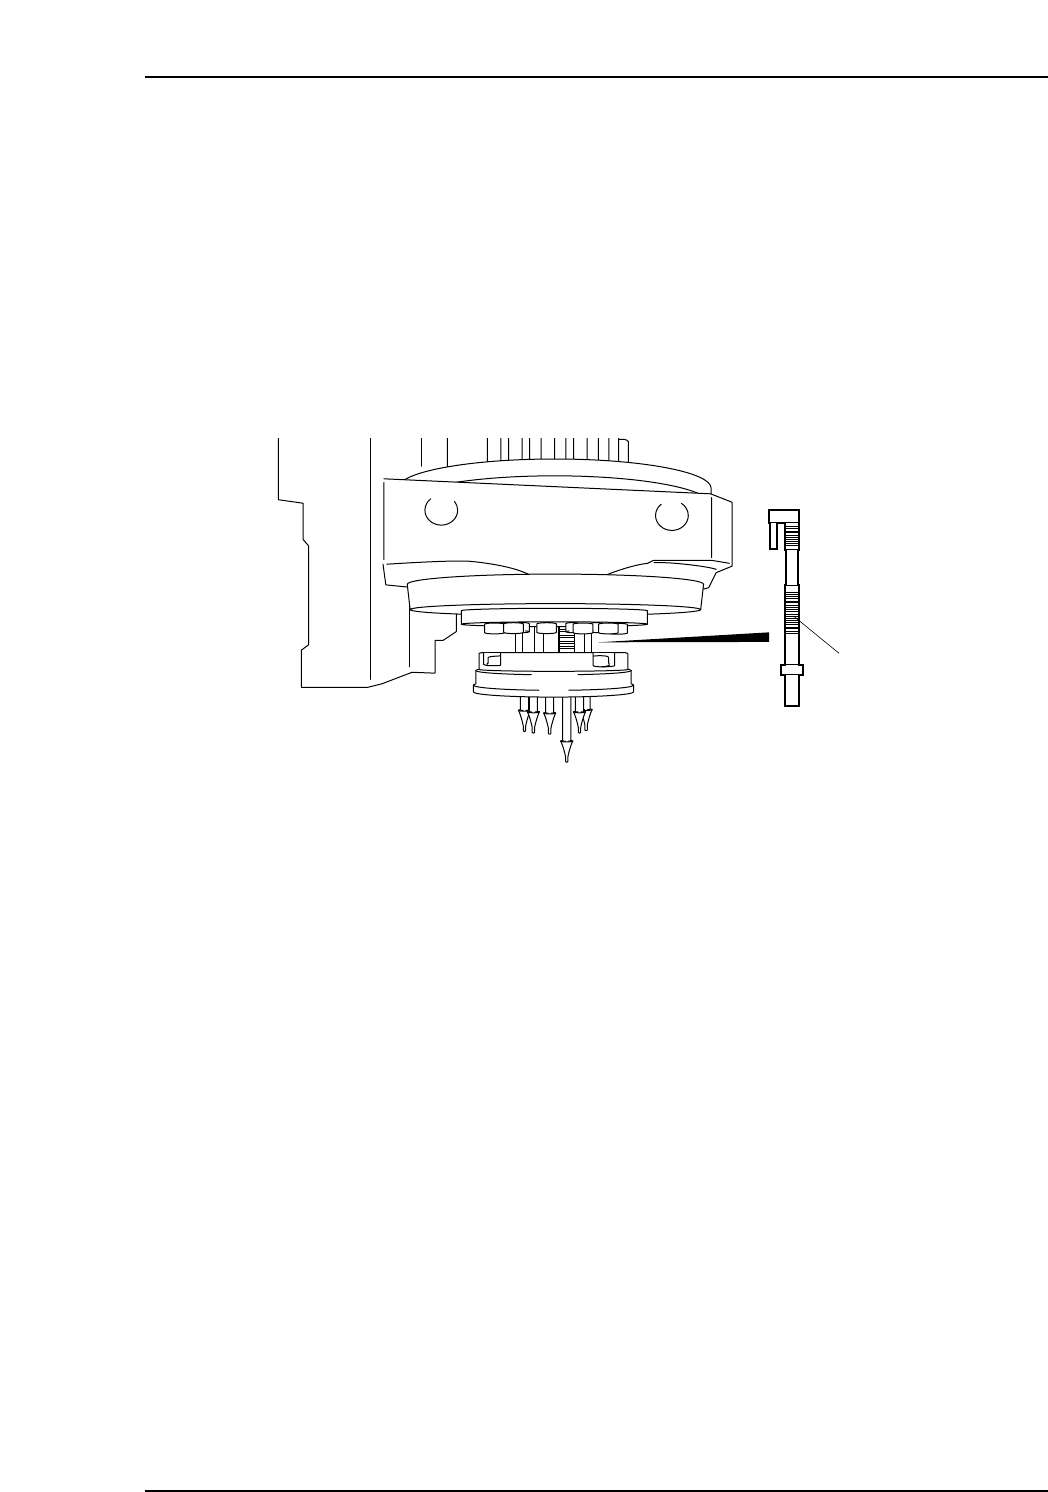
7. Lubricate the vacuum cut pins (around the outside of the revolver).
a. Raise the pusher, and then raise the resetter to raise all the vacuum cut pins
and vacuum pins.
Note: If it is difficult to raise the resetter by hand, use the direct I/O “Y01F
ResetCylinder” to raise it.
XP1ML210E
Bottom of the piston pin
Part 3 Chapter 2 Lubrication
Edition 3.0 3-2-13 XP-142E Mechanical Reference
b. Apply the specified grease to the top of the vacuum cut pins using the fine
brush.
c. Lower the pins and apply the specified grease to the bottom of the vacuum
cut pins.
Notes: The following areas must be grease to ensure that the vacuum cut pins are fully
lubricated.
1. Apply grease to all visible areas (upper front of the pin) with the pin raised.
2. Apply grease to all visible areas (lower front of the pin) with the pin lowered.
3. Raise the pin again.
4. Half rotate the pin by finger, and then apply grease to the upper back of the pin.
5. Lower the pin again, and then apply grease to all visible areas of the bottom of the
pin.
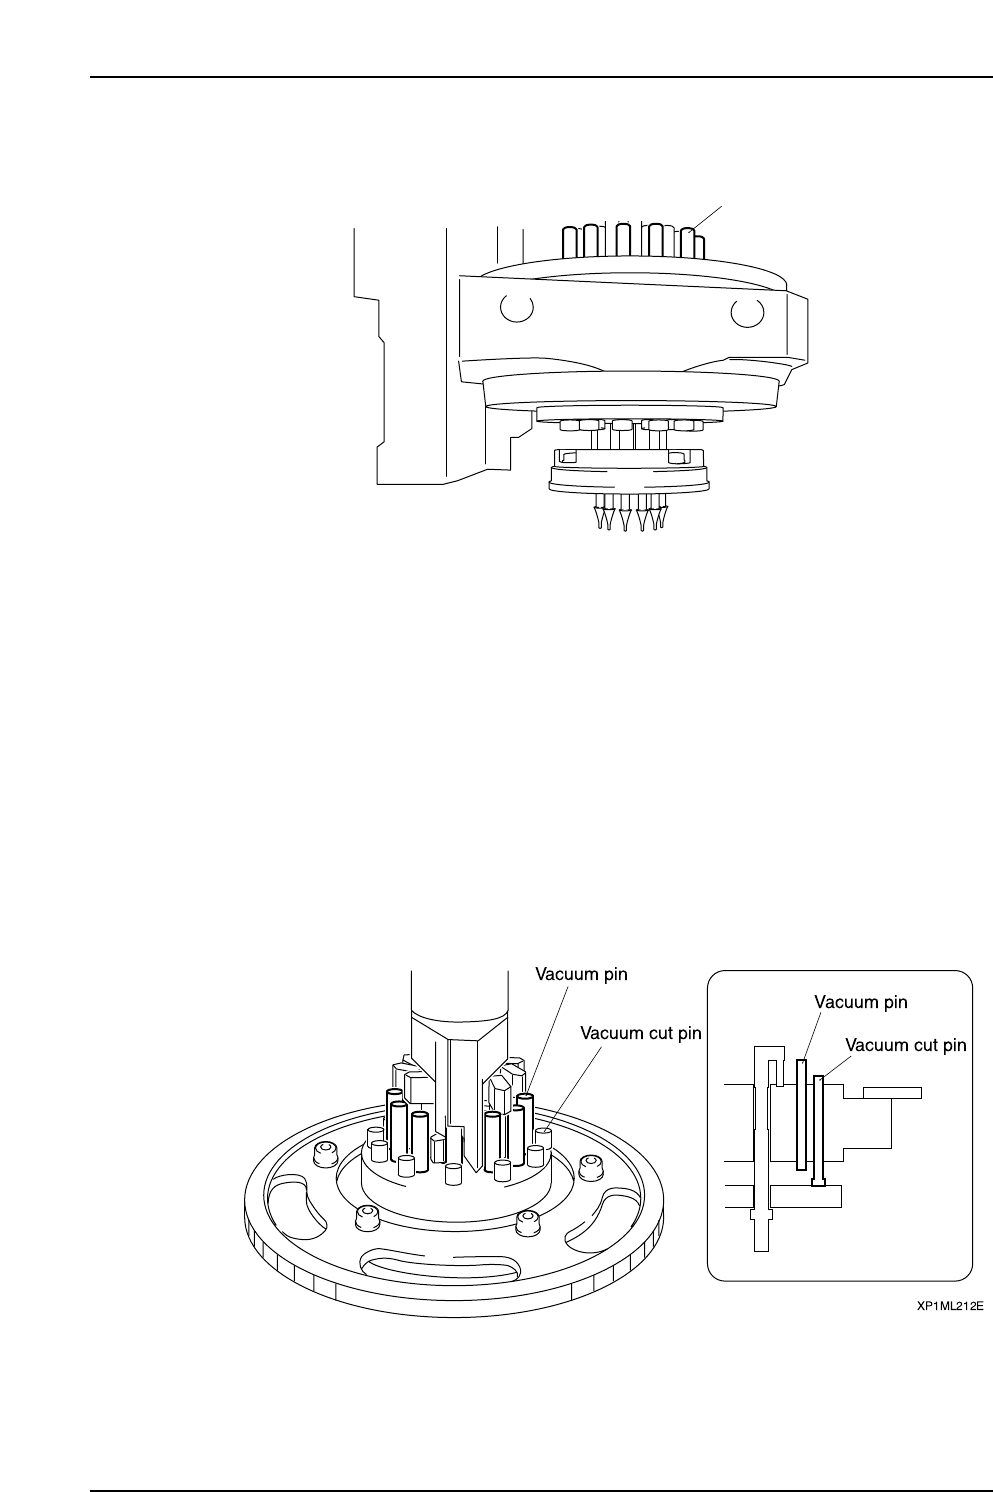
8. Lubricate the vacuum pins (around the inside of the revolver).
a. Lower all the vacuum cut pins (around the outside of the revolver) by finger.
b. Apply the specified grease to the top of the vacuum pins using the fine brush.
Note: Applying grease to the back of the vacuum pins is difficult. Using the fine
brush, ensure that the grease is applied to the revolver.
XP1ML211E
Vacuum cut pin
Part 3 Chapter 2 Lubrication
Edition 3.0 3-2-14 XP-142E Mechanical Reference
c. Lower all the vacuum pins (around the inside of the revolver), and raise all
the vacuum cut pins (around the outside of the revolver).
d. Apply the specified grease to the bottom of the vacuum pins using the fine
brush.
Note: Applying grease to the back of the vacuum pins is difficult. Using the fine
brush, ensure that the grease is applied to the revolver.
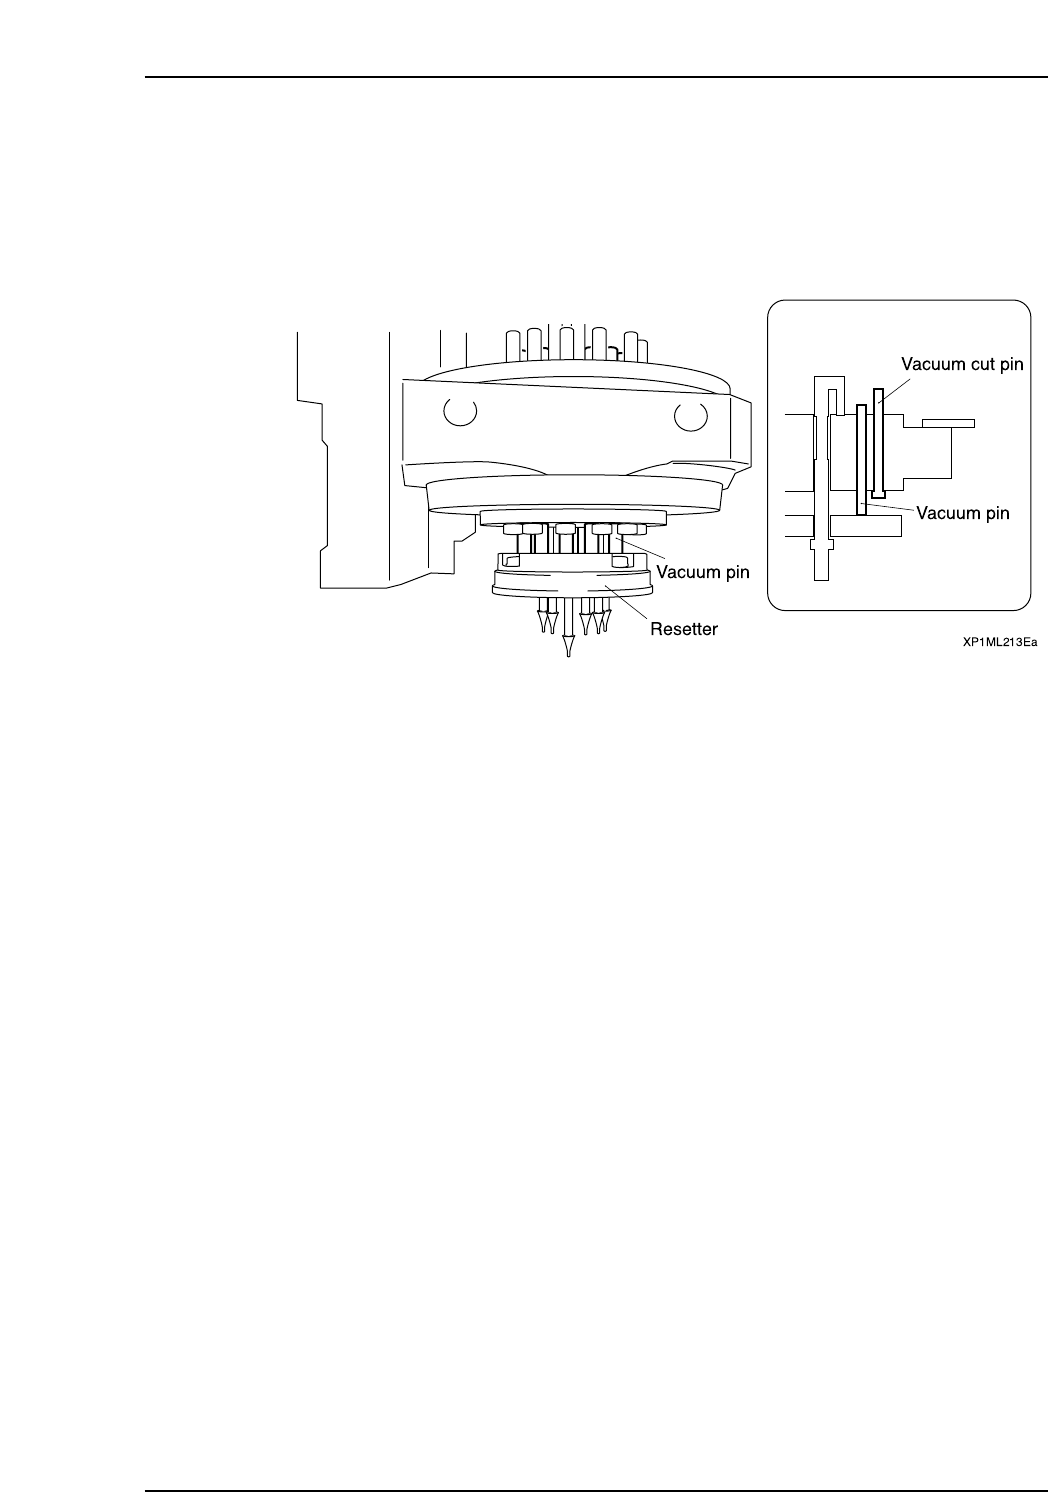
9. Wipe away any excess grease.
a. Raise the resetter by hand to raise all the vacuum cut pins and vacuum pins.
Note: If it is difficult to raise the resetter by hand, use the direct I/O “Y01F
ResetCylinder” to raise it.
b. Wipe away any excess grease from the bottom of the revolver using the flat
brush and cloth. In particular, wipe away any excess grease from the bottom
of the pins and the top of the resetter (ensure that the bottom of the pins are
not sticky).
10. Spread the grease around the parts of the unit by running the machine in idle
mode for a few minutes.
Part 3 Chapter 2 Lubrication
Edition 3.0 3-2-15 XP-142E Mechanical Reference