LmrXP142机械手册.pdf - 第75页
Notes: Part 3 Chapter 2 Lubrication Edition 3.0 3-2-16 XP-142E Mechanical Reference
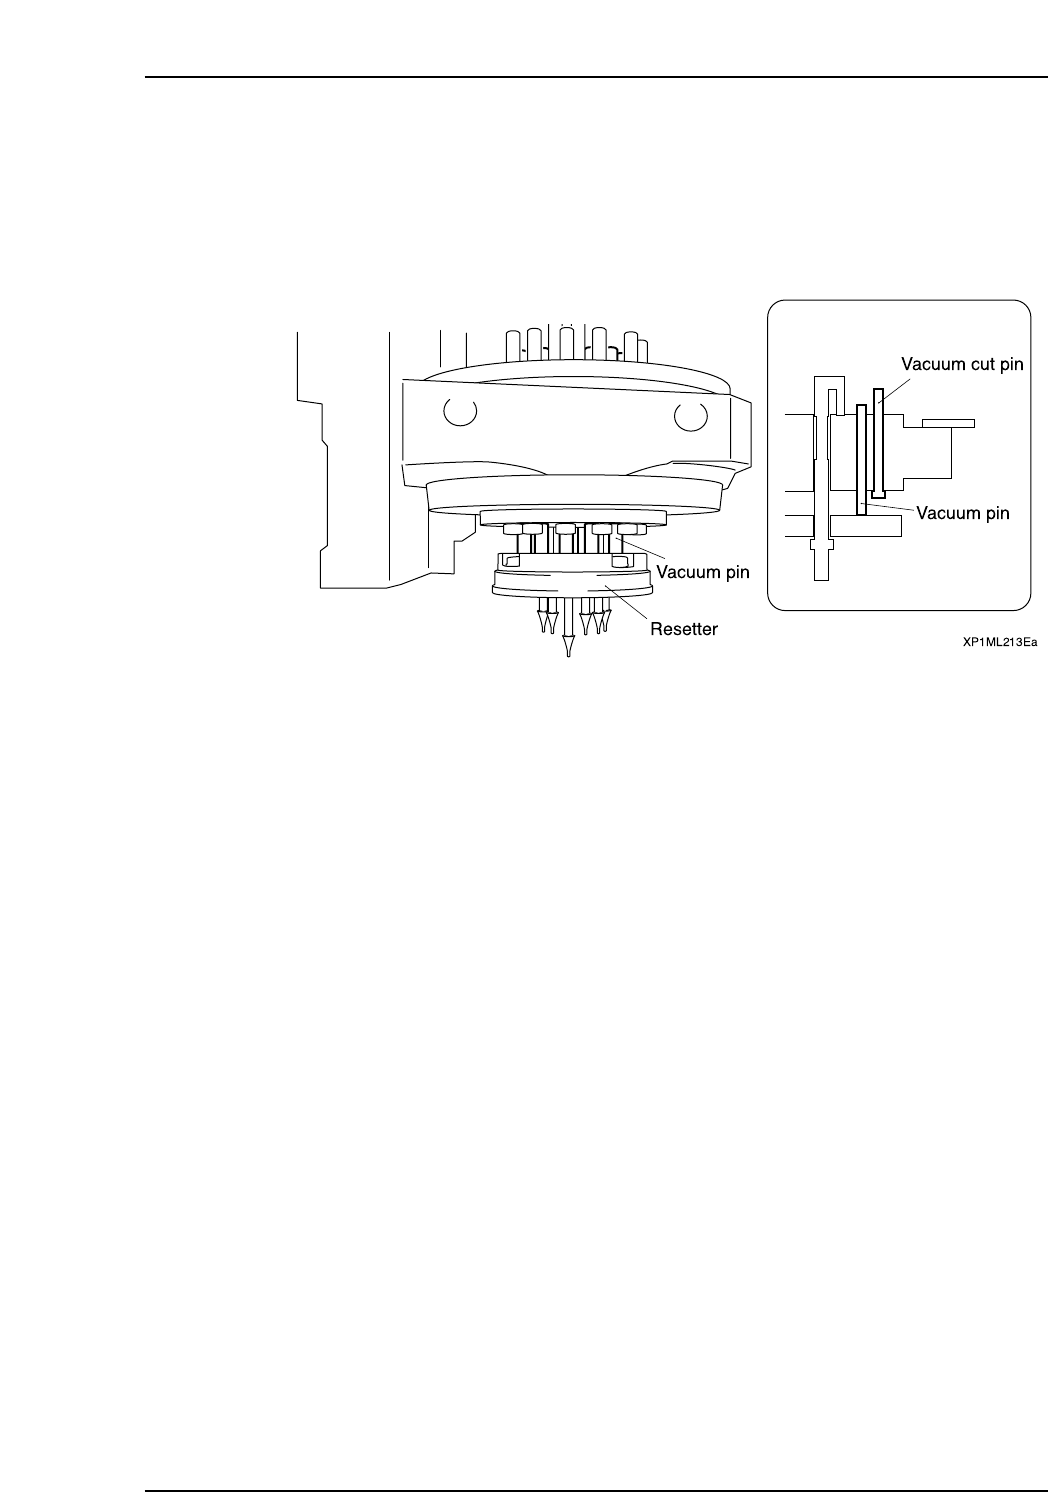
c. Lower all the vacuum pins (around the inside of the revolver), and raise all
the vacuum cut pins (around the outside of the revolver).
d. Apply the specified grease to the bottom of the vacuum pins using the fine
brush.
Note: Applying grease to the back of the vacuum pins is difficult. Using the fine
brush, ensure that the grease is applied to the revolver.
9. Wipe away any excess grease.
a. Raise the resetter by hand to raise all the vacuum cut pins and vacuum pins.
Note: If it is difficult to raise the resetter by hand, use the direct I/O “Y01F
ResetCylinder” to raise it.
b. Wipe away any excess grease from the bottom of the revolver using the flat
brush and cloth. In particular, wipe away any excess grease from the bottom
of the pins and the top of the resetter (ensure that the bottom of the pins are
not sticky).
10. Spread the grease around the parts of the unit by running the machine in idle
mode for a few minutes.
Part 3 Chapter 2 Lubrication
Edition 3.0 3-2-15 XP-142E Mechanical Reference

Notes:
Part 3 Chapter 2 Lubrication
Edition 3.0 3-2-16 XP-142E Mechanical Reference
3. Replacing Consumable Parts
3.1 Replacing the Strobe Light
Point
Replace the strobe light if it fades or burns out. Take care when handling the strobe light
because it is easily damaged.
Procedure
DANGER
Turn off the power to the machine at the main switch and
then wait 5 minutes before replacing the strobe light.
CAUTION
• When mounting the strobe light, avoid touching the
strobe light glass with your hands. Oil from hands can
shorten the life of the strobe light.
• Make sure that the harness connections are above the
strobe light connections when tightening the nuts.
• Ensure that the polarity of strobe light is correct when
connecting the terminals.
Part 3 Chapter 3 Replacing Consumable Parts
Edition 3.1 3-3-1 XP-142E Mechanical Reference