CP43维护手册.pdf.pdf - 第136页
Chapter 14 Replacing Consumable Parts The vacuum pressure is low. Cause Measure Condition The gauge is broken. Replace the gauge. Bad air is leaking from the filter case, piping, or air tank. The belt is loose. The bolts…

14 – 9
Version 7.0
Chapter 14 Replacing Consumable Parts
The degree of control of the gap between the rotor and cylinder and
side plate is very severe on the CP IV-2, making it a higher quality
vacuum pump than on the previous machines. Since special
techniques and jigs are necessary when making adjustments, please
do not assemble or disassemble the pump. When changing the
vacuum pump, there are some general rules that should be
followed. If any of the problems in the table listed below occur,
and it is necessary to disassemble the pump, please contact Fuji.
Table 14-3 Causes and Measures
The
vacuum
pressure
is low.
Cause
Measure
Condition
Oil is in the filter and
the blade can not
project.
There is debris in the
filter and air cannot
be drawn in.
Remove the filter case, noise reduction
muffler and one-way valve. Wash the
inhalation and ventilation openings in a
chlorine based liquid such as chlorothene
or diaphron. Turn the fan (if the fan is not
turned, leave it in this state for a while). After
checking to see that the fan is working, turn
on the power sourch so that the oil and
cleaning liquid is spewed out.
When using the cleaning fluid, to ensure
that none of the volatile gases are inhaled,
make sure that there is sufficient
ventilation in the room. Also make sure
that none of the cleaning fluid makes
contact with alcohol, benzene, gasoline,
and cleaning oil are all very flammable
liquids, do not use them as the
cleaning solution.
Remove the filter element and the
compressed air will eliminated.
Using a neutral detergent such as
diaphron or chlorothene, wash the dirty parts.
After it is dry, place it back in again. Do not
use thinner, alcohol, benzene,
gasoline, or any other cleaning oils
on the parts that make contack with
the picking mechanisms.
CP IV-3 Maintenance

Chapter 14 Replacing Consumable Parts
The
vacuum
pressure
is low.
Cause
Measure
Condition
The gauge is broken. Replace the gauge.
Bad air is leaking
from the filter case,
piping, or air tank.
The belt is loose.
The bolts on the
pulley are loose.
The rotation speed
falls due to a breakage
in the motor.
An unusual sound
occurs. An indication
that the alignment
may be off.
An unusual sound
occurs. An indication
that the motor may
have overheated and
may be damaged.
An unusual sound
occurs. An indication
that some bolts may
be loose.
Check that all the parts are firmly tightened.
Pull the belt and readjust it.
Check that all the bolts on the pulley are
tight.
Repair or replace the motor. (Check the
electrical source and voltage.)
Adjust the alignment of the pulley.
Repair or replace the motor.
(Check the electrical source and
voltage.)
Retighten the bolts.
14 – 10
Version 7.0
CP IV-3 Maintenance
14 – 11
Version 7.0
Chapter 14 Replacing Consumable Parts
The following procedures should be followed when removing and
attaching the pump. The procedures listed below enable the
adjustment for the belt tension to be done with ease.
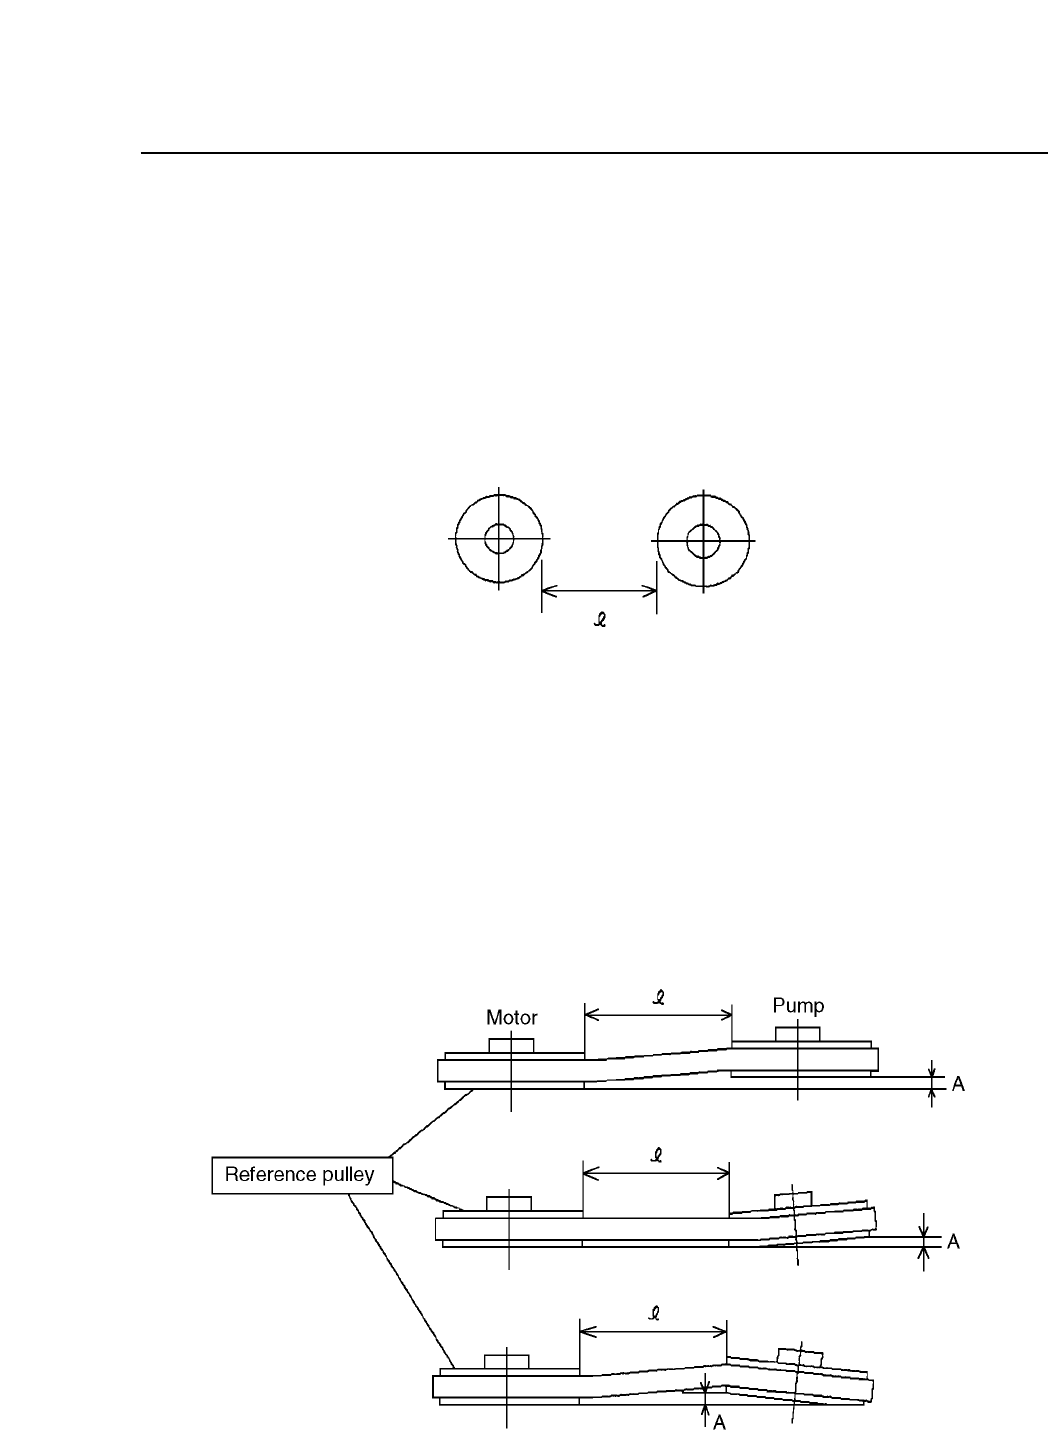
When removing the pump, follow the procedures below.
(1) Remove the belt from the pulley.
(2) Using a caliper measure the distance between the pulley and
the motor axis. Record this distance.
Fig. 14-9 Distance between the Axes
(3) Remove the pump.
When attaching the pump back follow the procedures below.
(1) Without moving from its position, place the pump on the base.
(2) Temporarily stop the pump, and adjust the alignment
according to the measurements that were recorded previously
for the distance between the axes. The permissible amount of
leeway for the alignment should be no greater than 0.3. mm.
Fig. 14-10 Adjusting the Alignment of the Axes
CP IV-3 Maintenance