CP43维护手册.pdf.pdf - 第90页
Chapter 6 Placing Heads 6.1.2 Attachment (1) After putting the spring in, put in the holder . (2) The correct set position looking from the fr ont is such that there is one nozzle on the left (this sets the M nozzle). (3…
6 – 1
Version 7.0
Chapter 6 Placing Heads
6. Placing Heads
The placing head picks parts from the feeders and place them onto the board
currently in production. The placing head assembly consists of the holder,
nozzle, shaft and other related parts.
6.1 How to Remove the Holder
Before removing the holder, the user must do the following four things:
• Move the holder to be removed to station 8.
• Move the XY table away from station 8 by hand. The holder is very
difficult to remove if the XY table is underneath.
• For safety's sake, turn off the power.
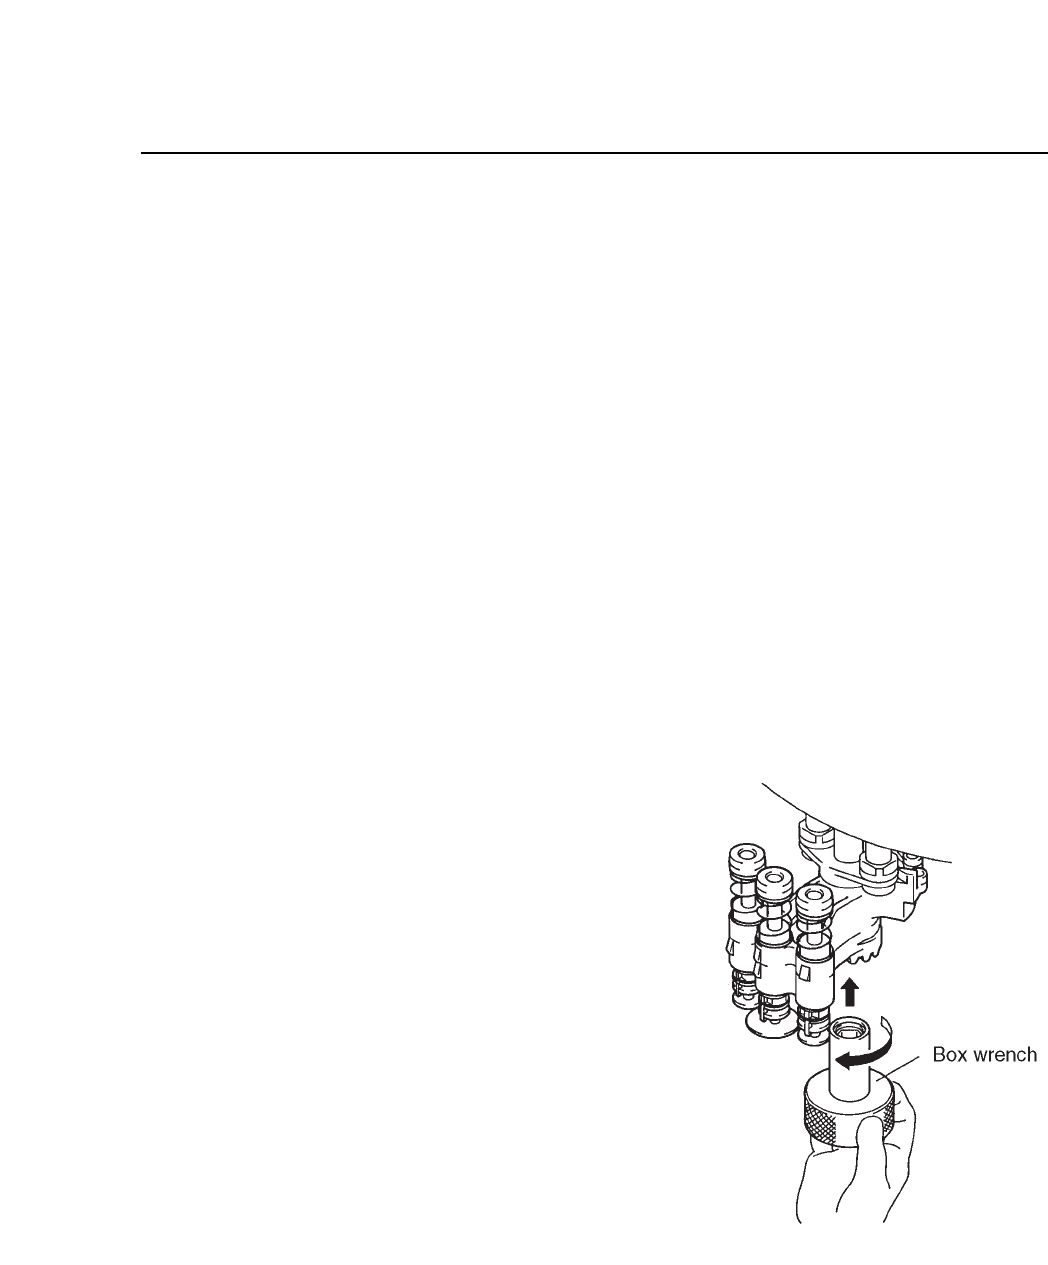
• To remove the holder, use a box wrench (MPJ-0072).
6.1.1 Removal
(1) Use the box wrench to
loosen the M6 hexagonal
nut under the holder.
(2) After removing the nut,
slide the holder down to
remove it. The spring
washer and washer will
also be removed so take
care not to drop them.
Fig. 6-1 Holder Removal
CP IV-3 Maintenance
Chapter 6 Placing Heads
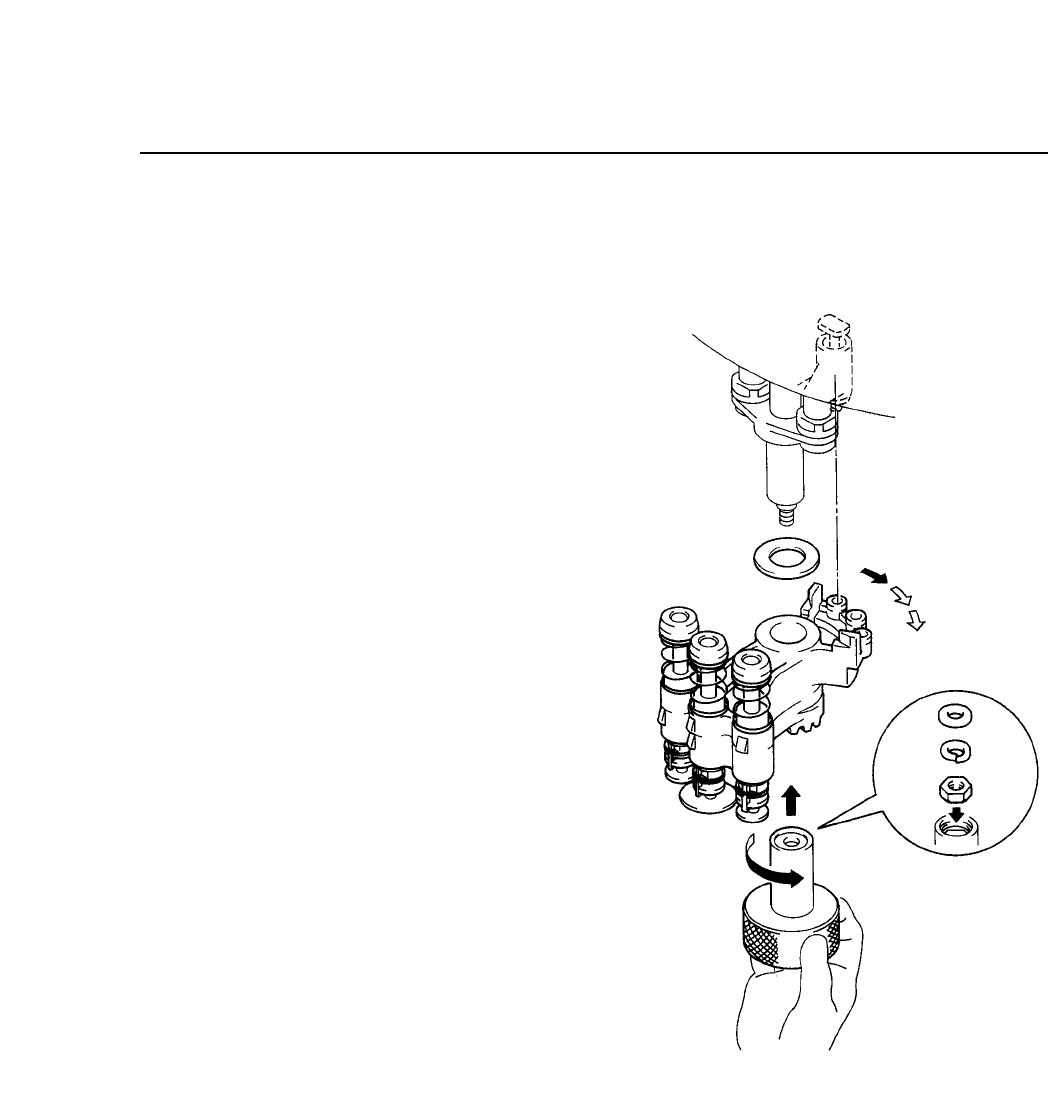
6.1.2 Attachment
(1) After putting the
spring in, put in the
holder.
(2) The correct set position
looking from the front
is such that there is one
nozzle on the left (this
sets the M nozzle).
(3) After inserting the M6
hexagonal nut, spring
washer and flat washer
into the box wrench,
tighten these onto the
assembly.
Fig. 6-2 Holder Attachment
6 – 2
Version 7.0
CP IV-3 Maintenance
6 – 3
Version 7.0
Chapter 6 Placing Heads
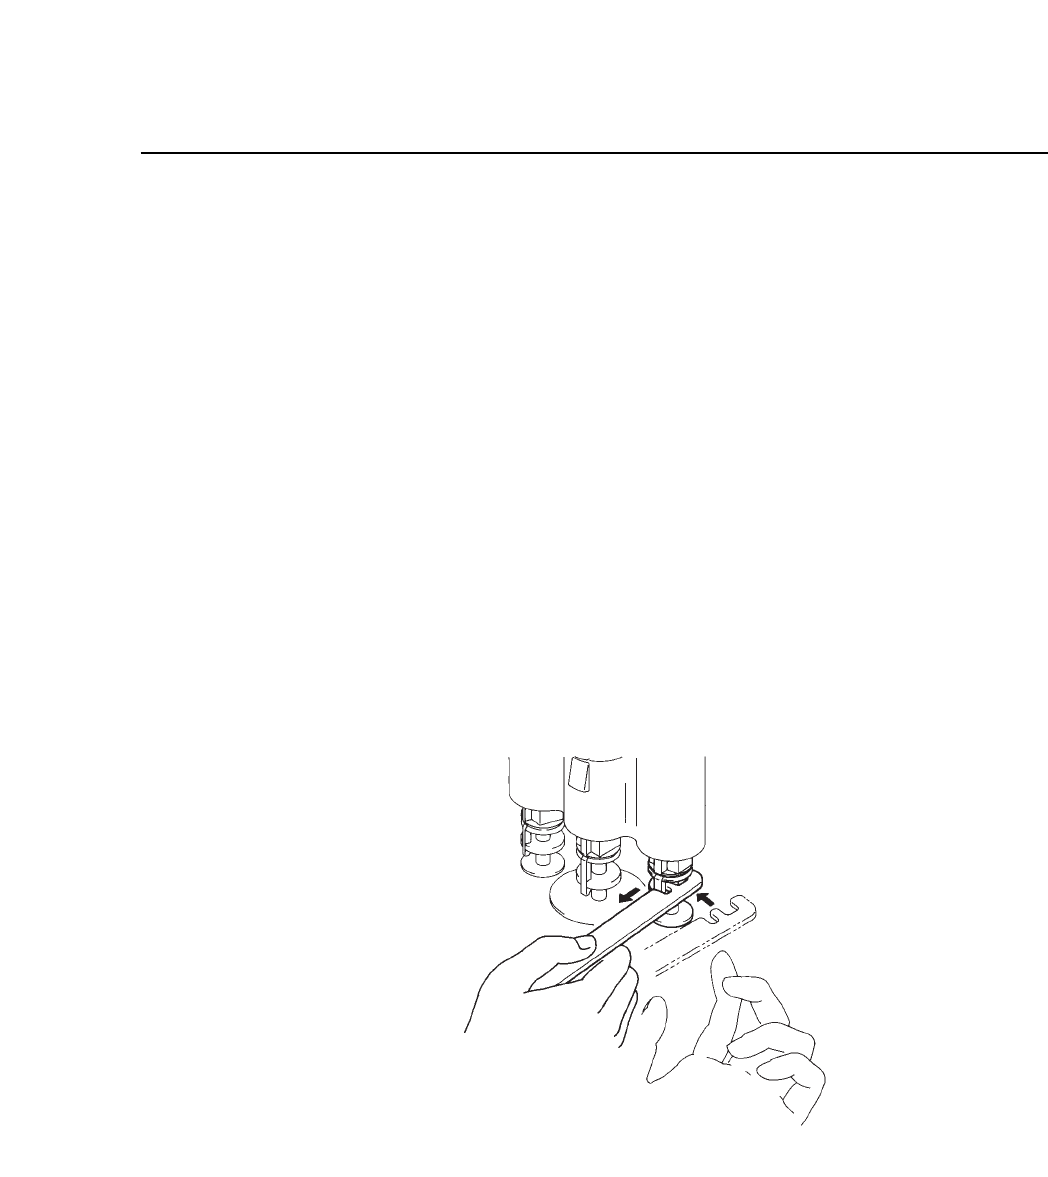
6.2 How to Remove the Nozzle
When removing the nozzle, use nozzle removal jig MPJ-1100.
6.2.1 Removal
To remove the nozzle from the holder, follow the steps below.
These steps require the nozzle removal jig MPJ-1100.
(1) Rotate the nozzle by hand to a point where the nozzle catch is
facing the front.
(2) Set the nozzle removal jig, MPJ-1000, on the nozzle stem, as
shown in figure 6-3, and pull toward yourself. This disengages
the nozzle catch, allowing the nozzle to be slid out of the
holder.
Note: One hand should be placed under the nozzle to prevent damage in
case it shoots out.
Fig. 6-3 Nozzle Removal
6.2.2 Attachment
A nozzle is attached simply by inserting the upper step into the
holder and sliding it upward.
CP IV-3 Maintenance