雅马哈YSM切刀更换和保养方法..pdf - 第29页
Service Engineer Service Information SI0907002E - 003 = YS machine’s tape cu tter cleaning and lubrication 29 / 63 Step 2 Remo ve the safety CE covers on the back side of the machine. 1) Remove the CE cover on the latera…
Service Engineer
Service Information
SI0907002E-003=YS machine’s tape cutter cleaning and lubrication
28/63
3.4.4 Remove the Fixed feeder bank with 14 feeder positions (Only for YS24X)
For ease of service work, you can slide the sATSII away from the machine to make space for
the operator to work in.
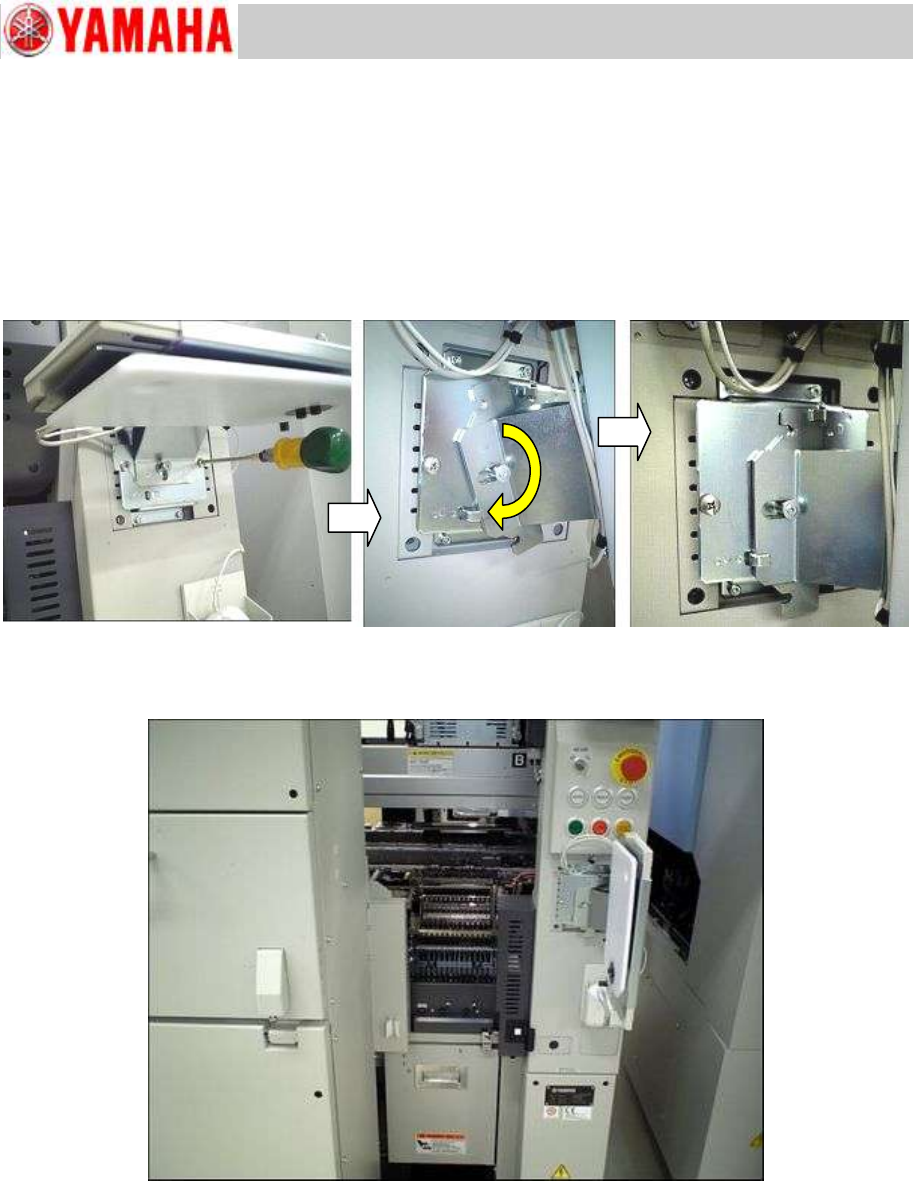
Step 1 Move the keyboard and the mouse aside.
Loosen the fixing screws (2 pcs) of the keyboard bracket and rotate the keyboard bracket 90
degrees clockwise until it stops at the hook on the bracket base.
Figure 36
* By rotating the bracket 90 degrees, you can get inside the space between the cover and the sATSII.
Figure 37
Service Engineer
Service Information
SI0907002E-003=YS machine’s tape cutter cleaning and lubrication
29/63
Step 2 Remove the safety CE covers on the back side of the machine.
1) Remove the CE cover on the lateral side of the sATSII.
2) Remove the CE cover on the right side of the feeder bank.
Figure 38
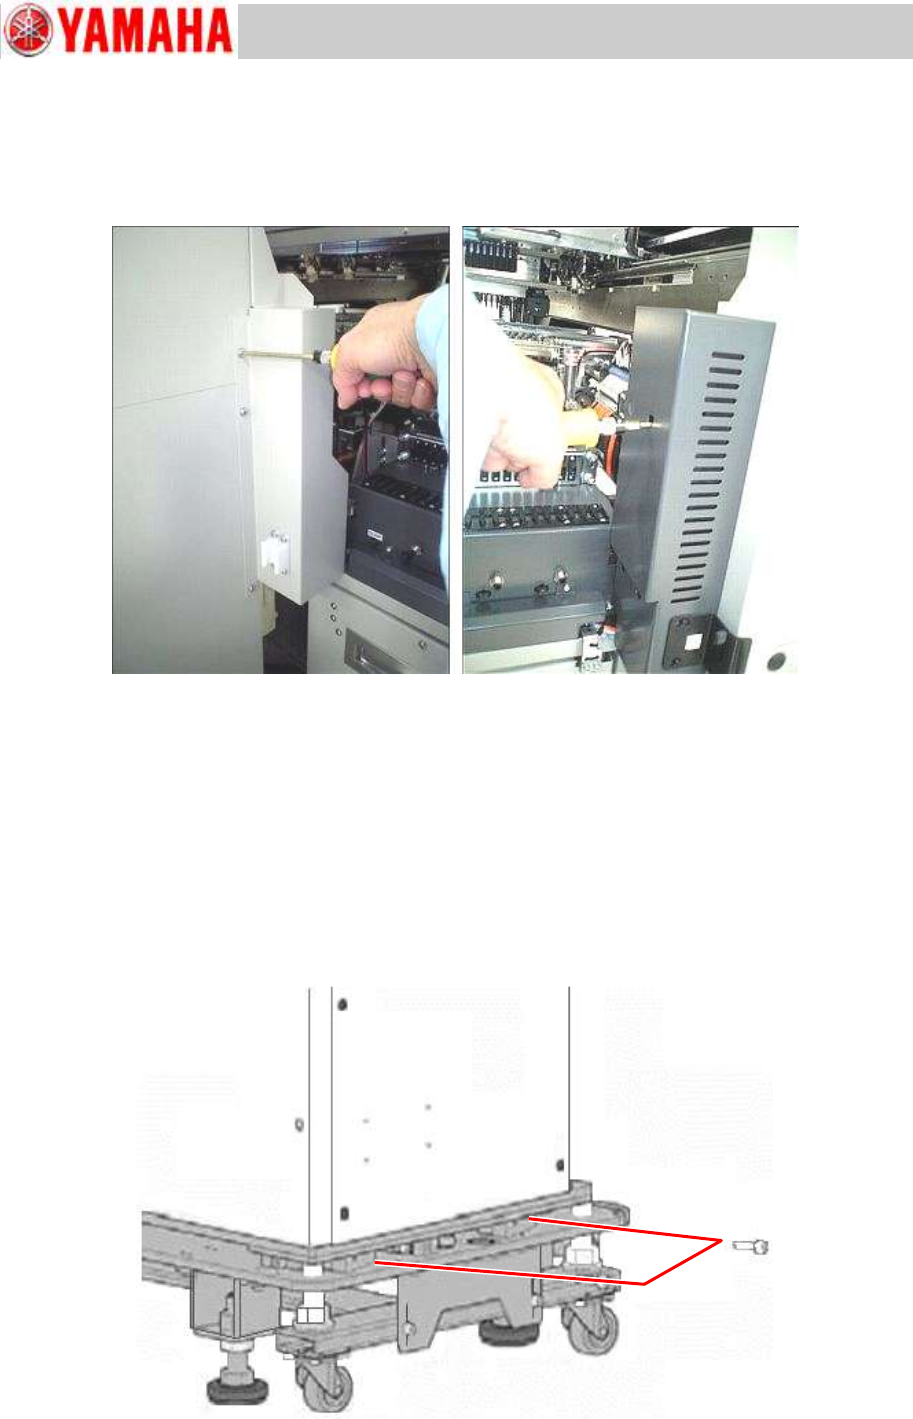
Step 3 Unclamp the sATSII and slide it to its maintenance position.
1) Remove the fixing screws of the sATSII (two locations) with a hex wrench as shown in the
figure below.
Note:
Some sATSIIs are fastened with four (4) screws when shipped from the factory (with two more
screws on the opposite side). In this case, remove them as well
Be careful not to lose the removes screws as they will be used again when clamping the
sATSII later on.
Figure 39
Service Engineer
Service Information
SI0907002E-003=YS machine’s tape cutter cleaning and lubrication
30/63
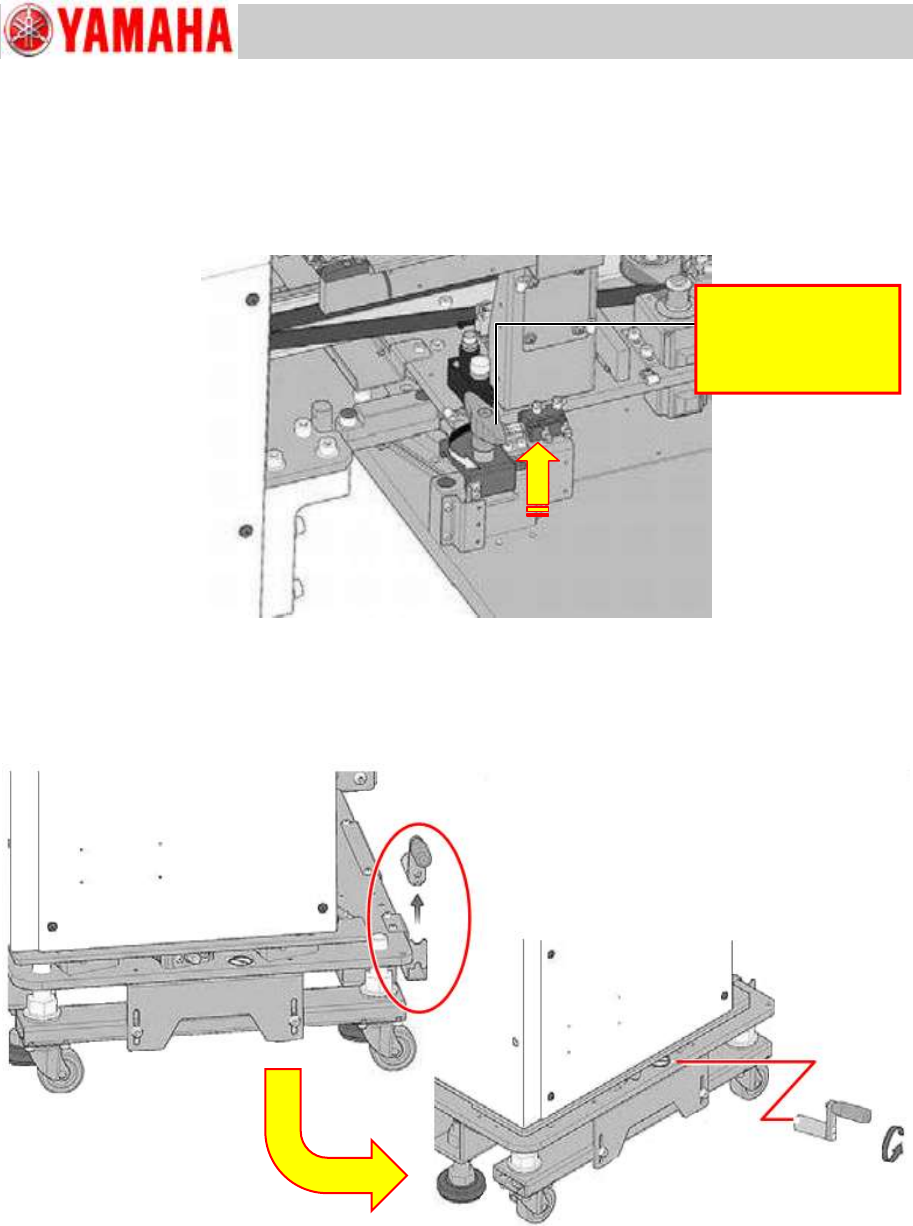
2) Unclamp the sATSII by rotating the clamp handle counterclockwise by six (6) turns.
Note:
Do not turn the clamp handle more than the specified number of times. Otherwise the handle
will come off.
Figure 40
3) Attach the sATSII sliding handle to sATSII.
4) Rotate the handle counterclockwise to move the sATSII to its maintenance position.
Figure 41
Rotate the clamp
handle
counterclockwise by
six turns.