Micron Technical Reference V9 Volume 4.pdf - 第197页
TRANSPORTATION - MAJOR RELOCATION MACHINE HEIGHT AND LEVELLING Chapter Issue 2, Jul 16 Technical Reference Manual 43.57 1. Adjust the front right hand foot (1) to achieve th e desired height. 2. Adjust the front left han…
TRANSPORTATION - MAJOR RELOCATION
MACHINE HEIGHT AND LEVELLING
43.56 Technical Reference Manual Chapter Issue 2, Jul 16
Style 1, 2, 3 and 5 Before operation, the machine must be installed at the correct height and
levelled.
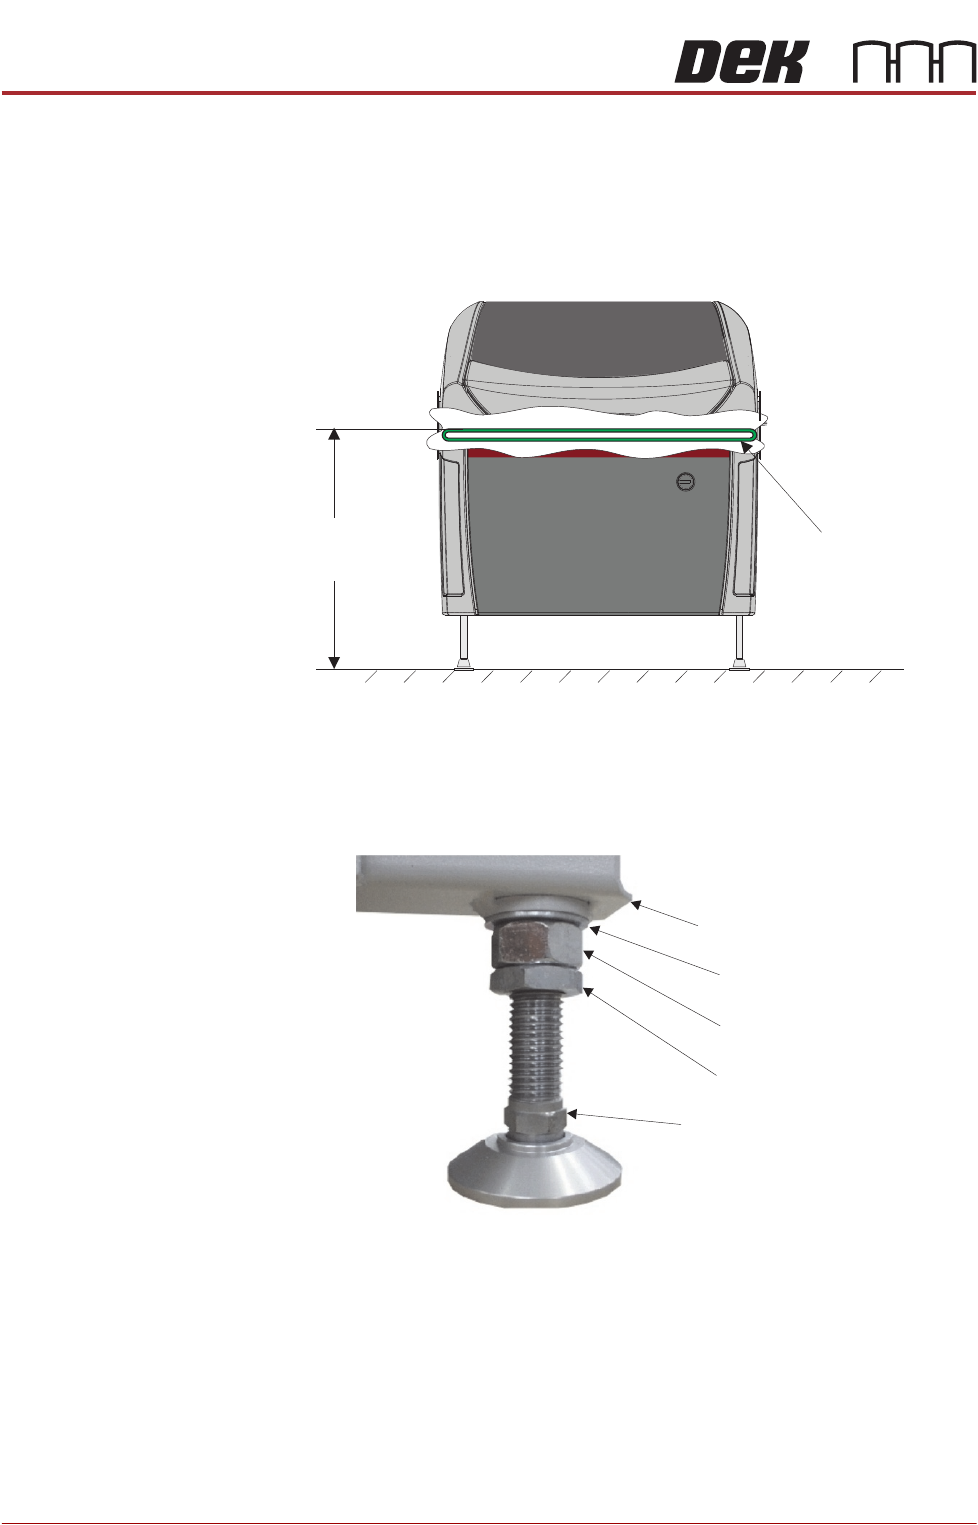
The height of the machine is governed by the external machines that it is to be
connected to and ranges from 840mm to 980mm. The height is measured from
the floor to the top of the transport belts.
The transport height may be adjusted as low as 830mm by removing the M24
full nut on each of the legs. In the event of the transport height being adjusted
above 839mm at a later date, the M24 full nut must be refitted.
NOTE
To achieve reliable DEK SPC testing and Cp/Cpk results, the machine legs must
be secured correctly to the frame to increase the rigidity of the machine.
Height to Top
of Transport Belts
840mm to 980mm
View on Front of Machine
Transport Belts
M24 Washer
Machine Frame
M24 Full Nut
M24 Half Nut
Leg Adjusting Nut
TRANSPORTATION - MAJOR RELOCATION
MACHINE HEIGHT AND LEVELLING
Chapter Issue 2, Jul 16 Technical Reference Manual 43.57
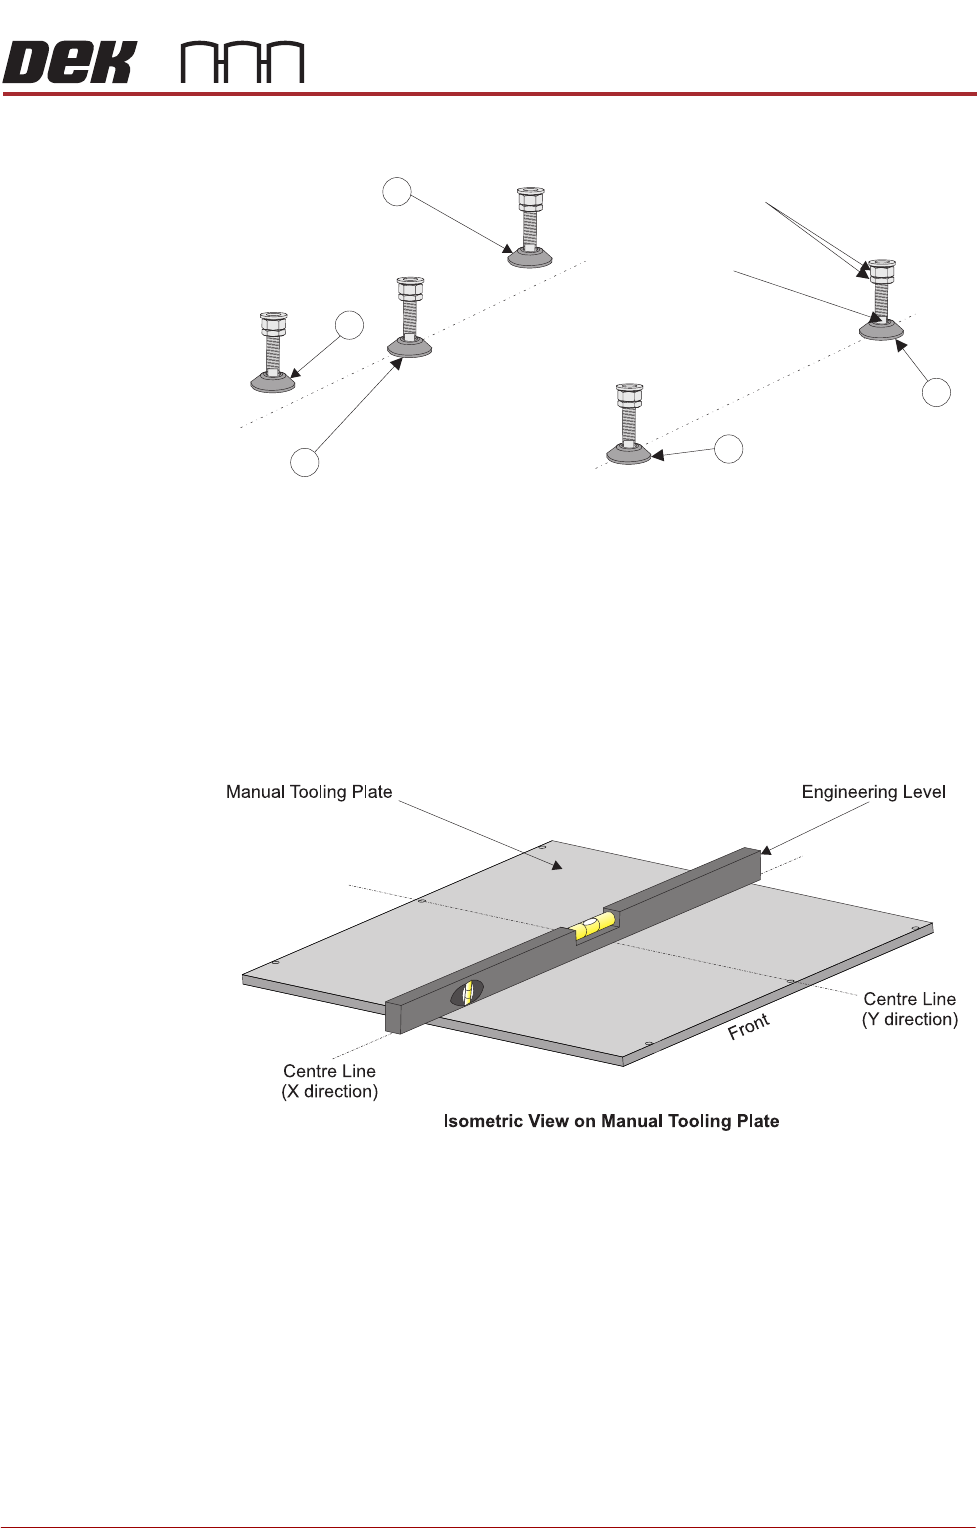
1. Adjust the front right hand foot (1) to achieve the desired height.
2. Adjust the front left hand foot (2) to approximately the same height.
3. Lower the rear centre mounting foot (3) so that it is in contact with the floor.
4. Raise the rear left (4) and rear right (5) mounting feet so they are not in
contact with the floor/leg spacers and the machine is supported on the front
two and rear centre mounting feet.
5. Place an engineering level on top of the manual tooling plate along the front
row of screws running from left to right.
6. Adjust the front left (2) mounting foot to level the machine in the X direction.
7. Move the engineering level along the centre row of screws running from front
to back.
8. Adjust the rear centre (3) mounting foot to level the machine in the Y
direction.
9. Repeat Steps 5 to 8 until the machine is level in both directions.
10. Carefully lower the rear left mounting foot (4) so that it is in contact with the
floor/leg spacer. Check the machine level has not been disturbed.
11. Carefully lower the rear right mounting foot (5) so that it is in contact with the
floor/leg spacer. Check the machine level has not been disturbed.
12. Raise the rear centre mounting foot (3) so it is not in contact with the floor.
Isometric View on Machine Mounting Feet
Locking Nuts
Front
4
3
2
1
Leg Adjuster
5
TRANSPORTATION - MAJOR RELOCATION
MACHINE HEIGHT AND LEVELLING
43.58 Technical Reference Manual Chapter Issue 2, Jul 16
13. Lock off all five mounting feet using the locknuts.
14. Recheck the machine is level.
15. Recheck the machine height has not been disturbed.
16. Remove the engineering level from the machine.
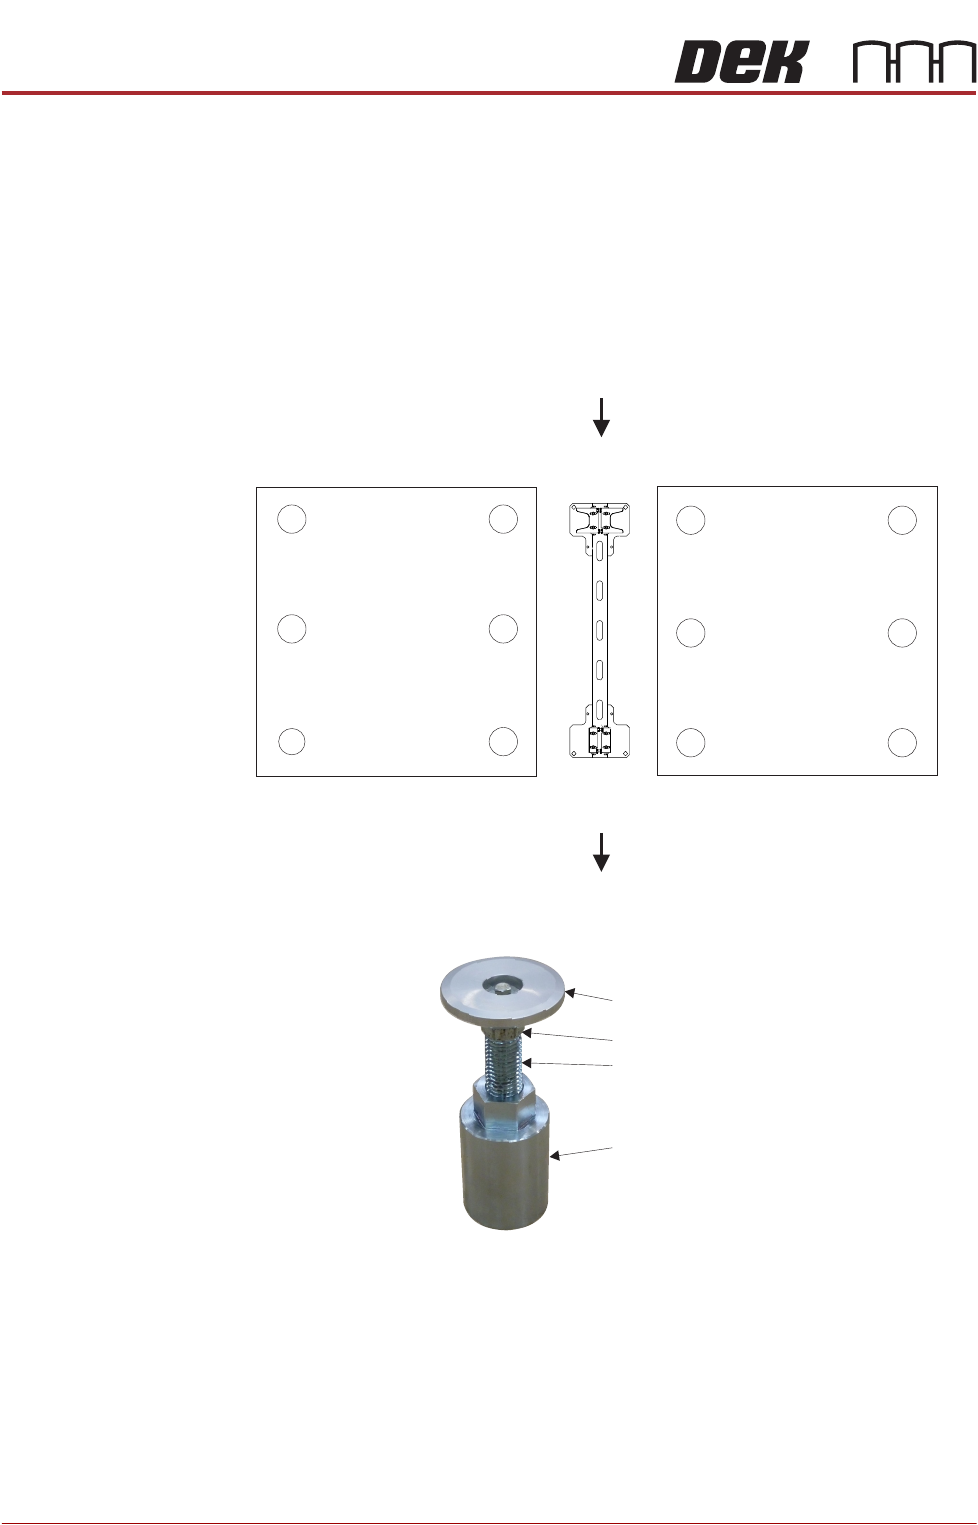
Style 4 Before operation, Machines A and B must be installed at the correct height,
levelled and aligned using the supplied Location Plate Assembly.
For this procedure, refer to the following diagram indicating feet numbers.
NOTE
The centre Mounting foot (6) is only used for initial levelling.
1
6
2
3
5
4
Rear of machine
Front of machine
1
6
2
3
5
4
Rear of machine
Front of machine
Upline
Downline
Machine A
Machine B
Swivel Plate
Foot
Leg Bolt
Full Nut