00196062-03_SM_LDU-X_EN.pdf - 第25页
4 Service Work 4.2 Replacing Spare Parts Service Manual SIPLACE LDU-X Linear Dipping Unit 11/2017 25 Removal The slide bearing has a recess (1) . This must point left, towards the EDIF unit (2) . ► Remove the sliding f…
4 Service Work
4.2 Replacing Spare Parts
24 Service Manual SIPLACE LDU-X Linear Dipping Unit 11/2017
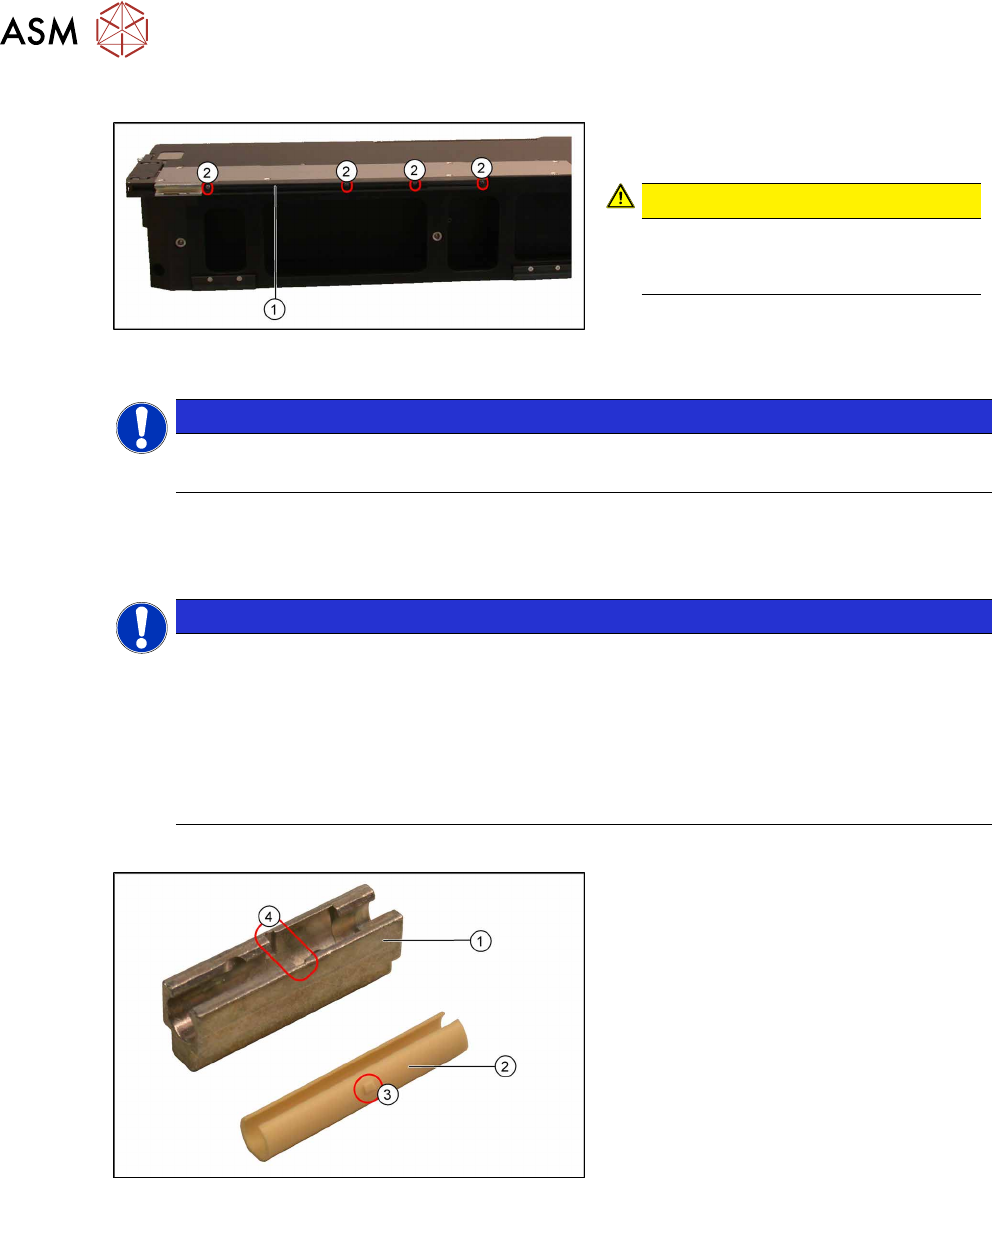
Removal
► Loosen the 4 screws (2) fastening the
slide bearing (1).
CAUTION!
Note that the left one of the four
screws (the one towards the EDIF
side) is longer than the others.
.
Installation
NOTICE
Important installation instructions
Make sure that the pins on the slide bearing engage correctly on the LDU-X.
► Installation is performed by following the above instructions in the reverse order.
4.2.7 Replacing the front slide bearing
NOTICE
Retrofit kit LDU-X robustness
The front slide bearing is part of the retrofit kit "LDU-X robustness V2.
[03134341-01]". If the plastic rear slide bearing [03003994-xx] is still fitted to the LDU-X,
you will need to replace all parts in the retrofit kit:
Contains: rear slide bearing, front slide bearing, stop pin and both support blocks
(seeTI2016-07D05). The retrofit kit is factory-fitted from the version "Linear Dipping Unit X
[03063461-04]". All older versions of the LDU-X can be updated with this retrofit kit.
Overview
Slide bearing, LDU version with 2 drilled holes
[03128490-xx]
1. Slide bearing, LDU version
2. Sliding foil
3. Studs on the sliding foil
4. Recesses for the studs on the sliding
foil
Equipment required
●
Standard tools
●
Tweezers or sliding foil remover [03075421-xx]
●
Spare parts:
– Slide bearing, LDU version with 2 drilled holes [03128490-xx]
– Sliding foil, X-feeder JUM-S-06LY [03019604-xx]
– Screws ISO 7046-2-M3 x 10-A2-70-H" [03023240-xx] (2x)
4 Service Work
4.2 Replacing Spare Parts
Service Manual SIPLACE LDU-X Linear Dipping Unit 11/2017 25
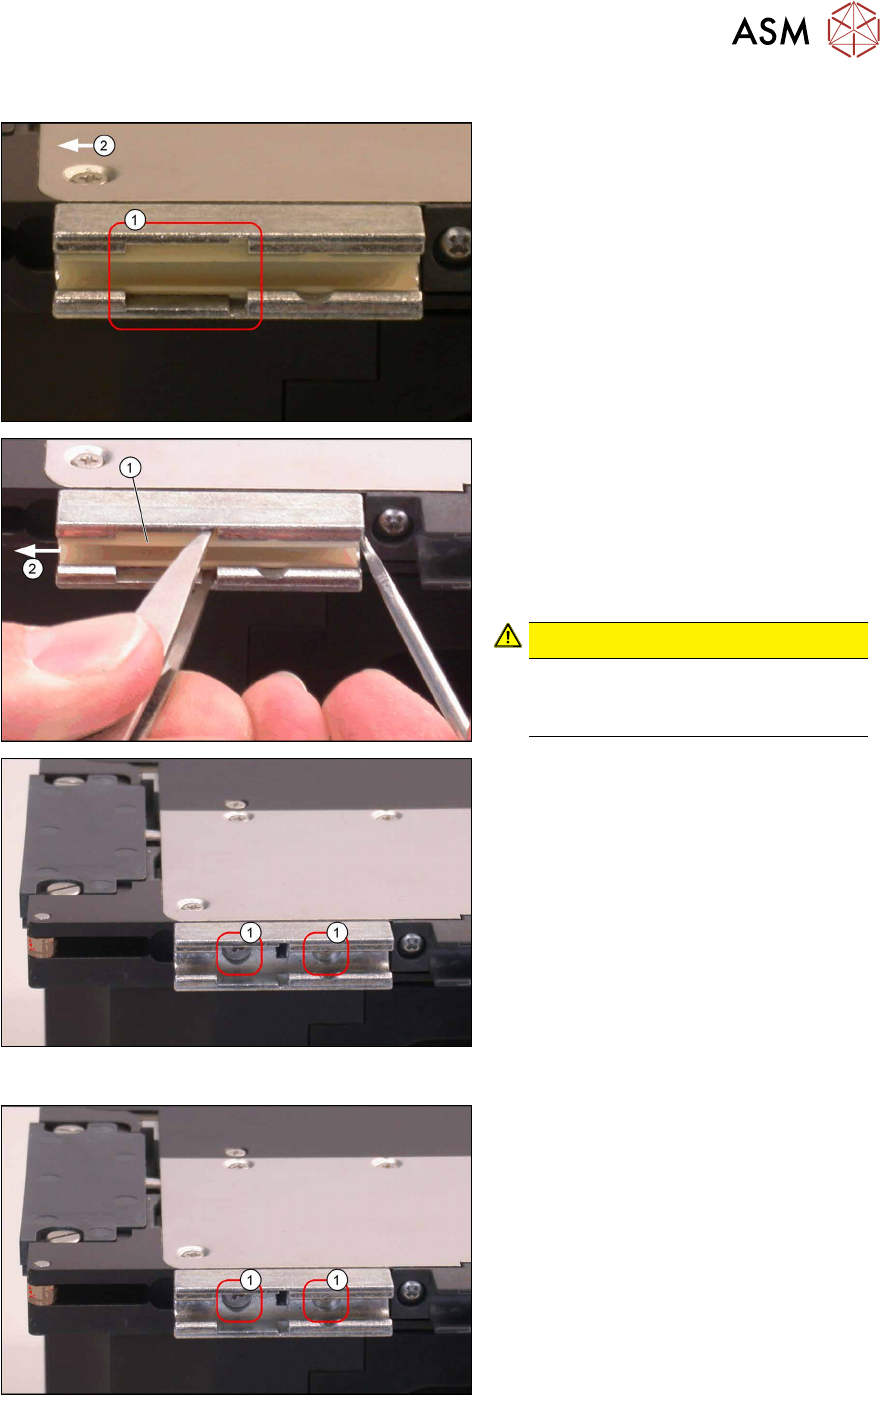
Removal
The slide bearing has a recess(1). This
must point left, towards the EDIF unit(2) .
► Remove the sliding foil(1). Use
tweezers or a sliding foil remover to
carefully press this together a little, so
that the locking studs are released.
► Use a suitable tool (e.g. screwdriver)
to push the sleeve forwards(2) and
out of the slide bearing.
CAUTION!
The sliding foil can break very easily!
Do not press the sliding foil together
with too much pressure!
.
► Loosen the two fastening screws(1)
and remove the old sliding foil.
Installation
► Fasten the new slide bearing with the
two fastening screws(1).
Pay attention to the correct orientation
of the slide bearing.
4 Service Work
4.2 Replacing Spare Parts
26 Service Manual SIPLACE LDU-X Linear Dipping Unit 11/2017
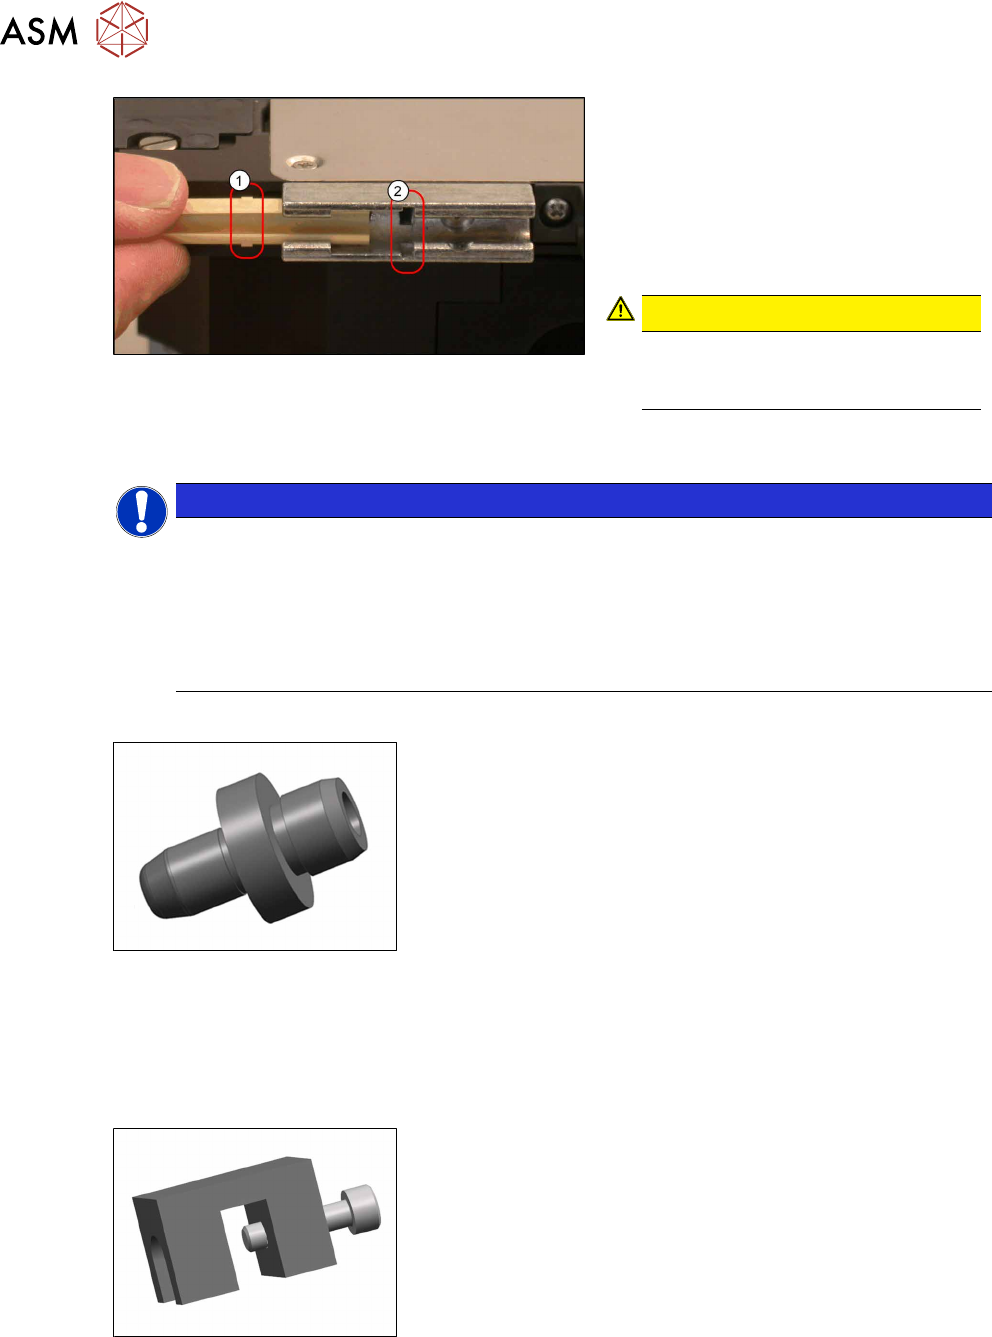
► Insert the new sliding foil. Carefully
press this together a little and push
the sliding foil into the slide bearing,
from the front, until the studs (1) on
the sliding foil engage in the relevant
recesses(2) on the slide bearing.
Pay attention to the orientation of the
sliding foil, as shown in the diagram.
CAUTION!
The sliding foil can break very easily!
Do not press the sliding foil together
with too much pressure!
.
4.2.8 Replacing the stop pin
NOTICE
Retrofit kit LDU-X robustness
The stop pin is part of the retrofit kit "LDU-X robustness V2 kit [03134341-01]". If the LDU-X
still has the plastic version of the slide bearing [03003994-xx] fitted, you will need to replace
all the parts included in this retrofit kit: rear slide bearing, front slide bearing, stop pin and
both support blocks (see TI2016-07D05). The retrofit kit is factory-fitted from the version
"Linear Dipping Unit X [03063461-04]". All older versions of the LDU-X can be updated with
this retrofit kit.
Overview
Stop pin /X-Series modified [03132870-02]
Equipment required
●
Allen key size 4
●
Spare part: stop pin /X-Series modified [03132870-02]
●
Ejector tool for LDU pin [03148837-01]