00196062-03_SM_LDU-X_EN.pdf - 第66页
4 Service Work 4.2 Replacing Spare Parts 66 Service Manual SIPLACE LDU-X Linear Dipping Unit 11/2017 4.2.29.12 Removing the EDIF Unit ► Loosen the screw (1) fastening the cable clamp on the two cables to the EDIF and re…
4 Service Work
4.2 Replacing Spare Parts
Service Manual SIPLACE LDU-X Linear Dipping Unit 11/2017 65
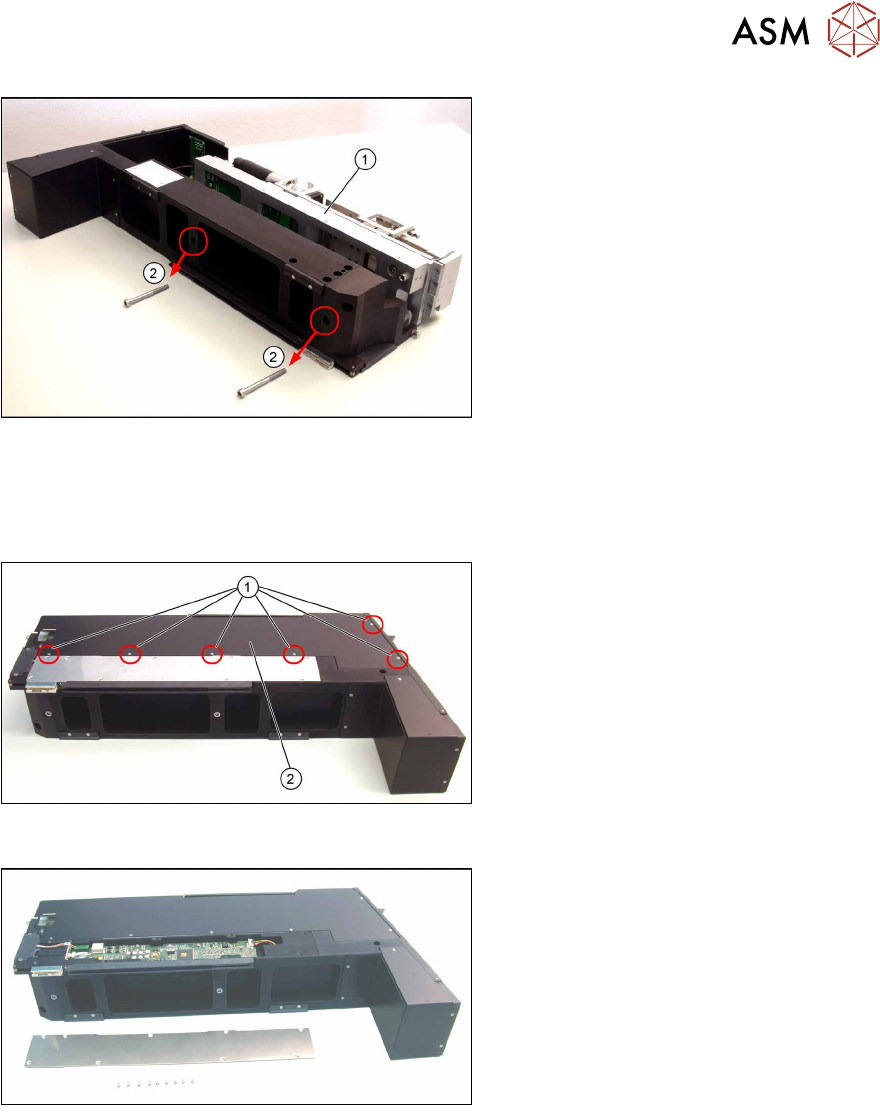
► Refit the LDU base unit(1) on the
LDU housing and fix this into place
with the two fastening screws (2).
See also
2 4.2.29.8 "LDU-X Controller" [}62]
4.2.29.10 Fitting the Side Covers
► Refit the left side cover(2) and fix into
place with the 6 screws(1).
► Do the same for the right side cover.
4.2.29.11 Removing the Controller Cover
► Loosen and remove the 9 screws
fastening the side cover plate and
place the cover plate to one side.
4 Service Work
4.2 Replacing Spare Parts
66 Service Manual SIPLACE LDU-X Linear Dipping Unit 11/2017
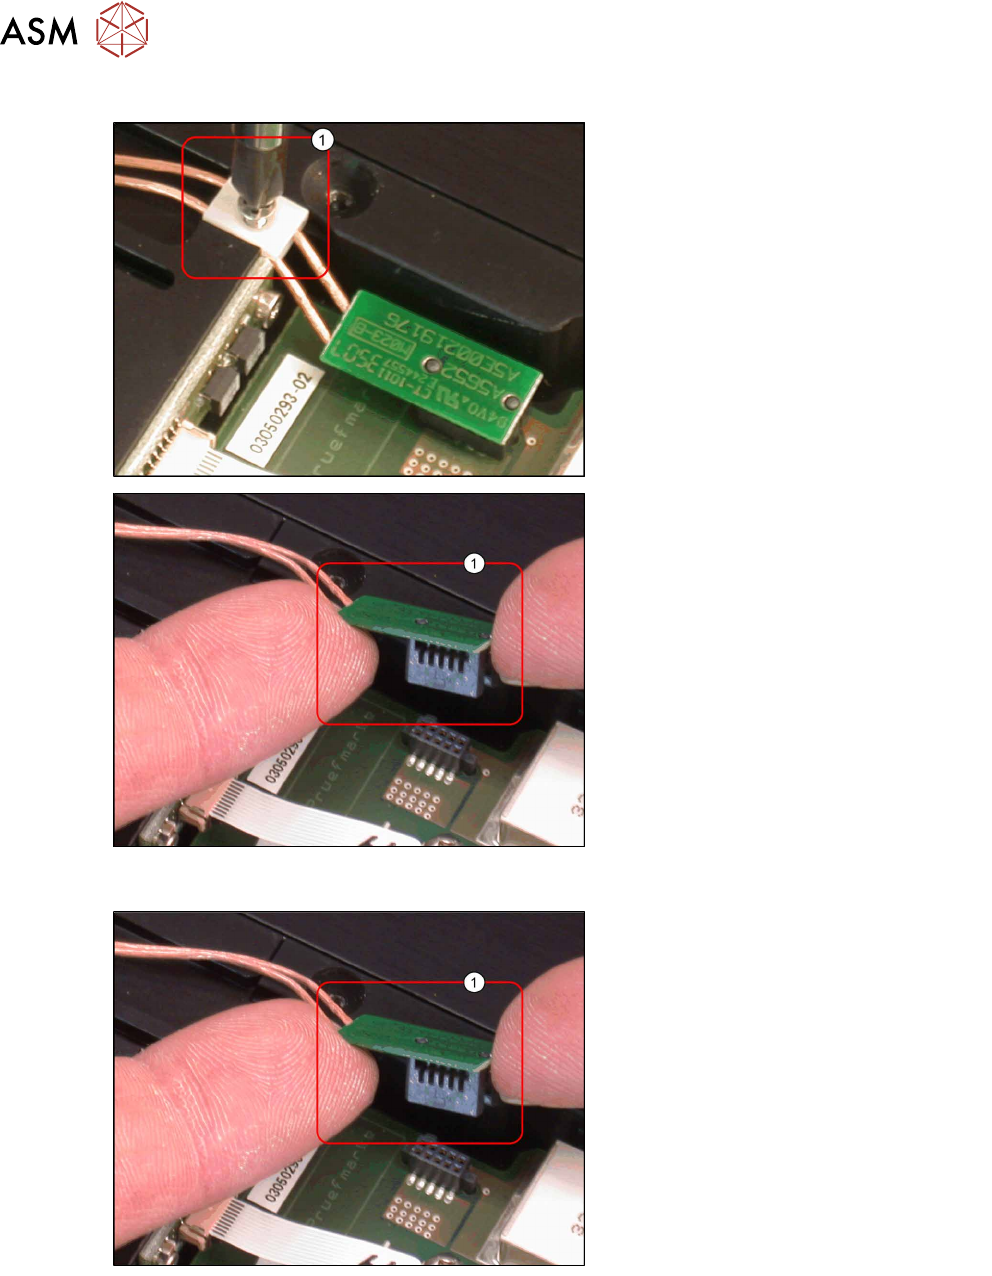
4.2.29.12 Removing the EDIF Unit
► Loosen the screw(1) fastening the
cable clamp on the two cables to the
EDIF and remove the cable clamp.
► Remove the connector(1) for the EDIF
unit from the control board.
4.2.29.13 Fitting the EDIF Unit
► Plug the connector(1) for the EDIF
unit into the control board.
4 Service Work
4.2 Replacing Spare Parts
Service Manual SIPLACE LDU-X Linear Dipping Unit 11/2017 67
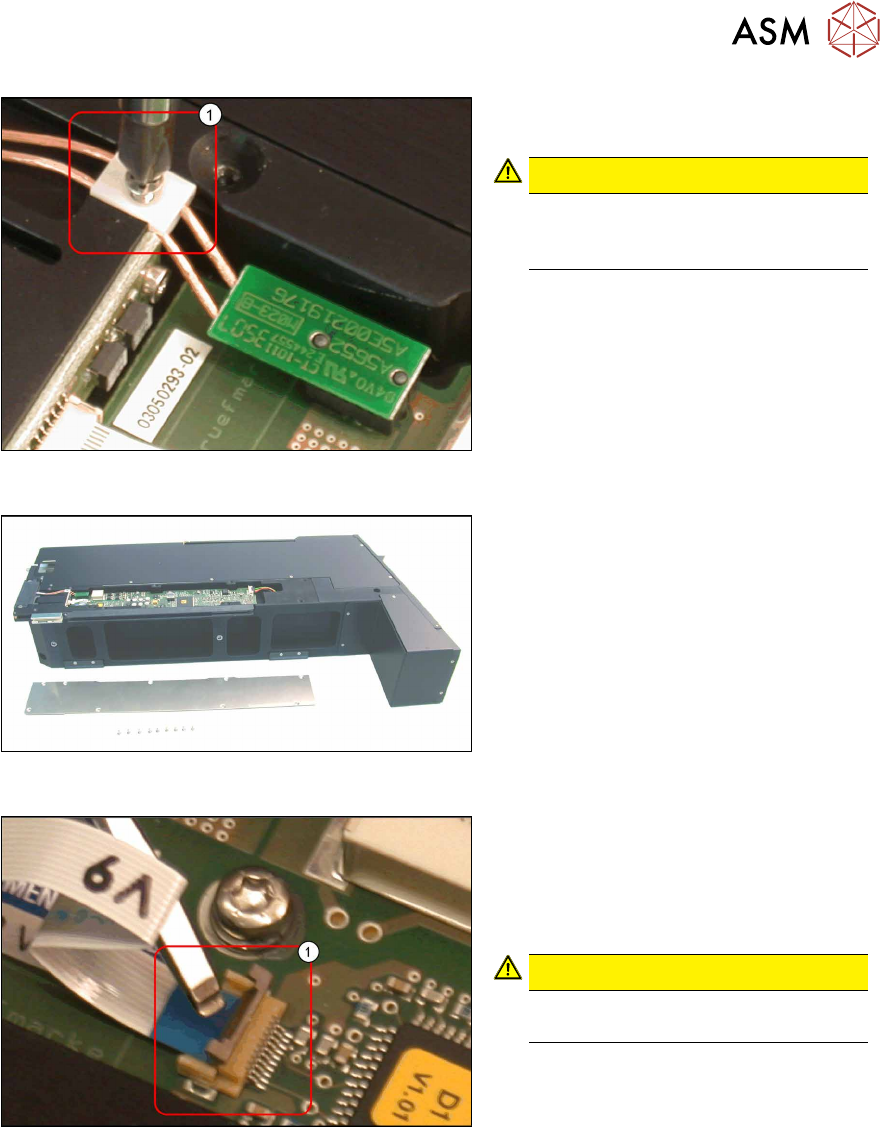
► Fix the two cables for the EDIF unit
with the cable clamp(1).
CAUTION!
Make sure that the cable has enough
play between the clamp and the
EDIF unit.
.
4.2.29.14 Fitting the Controller Cover
► Fasten the cover plate with 9 screws.
4.2.29.15 Removing the Cable to the IrDA Board
► Loosen the flat ribbon cable to the
IrDA board, by carefully lifting up the
clamp(1) e.g. with a flat-bladed
screwdriver.
► Take the flat ribbon cable out.
CAUTION!
Take care not to damage the cable or
clamp!
.