00196062-03_SM_LDU-X_EN.pdf - 第61页
4 Service Work 4.2 Replacing Spare Parts Service Manual SIPLACE LDU-X Linear Dipping Unit 11/2017 61 4.2.29.6 Fitting the Motor Mount ► Place the motor mount (3) onto the upper section base plate (2) and loosely tighte…
4 Service Work
4.2 Replacing Spare Parts
60 Service Manual SIPLACE LDU-X Linear Dipping Unit 11/2017
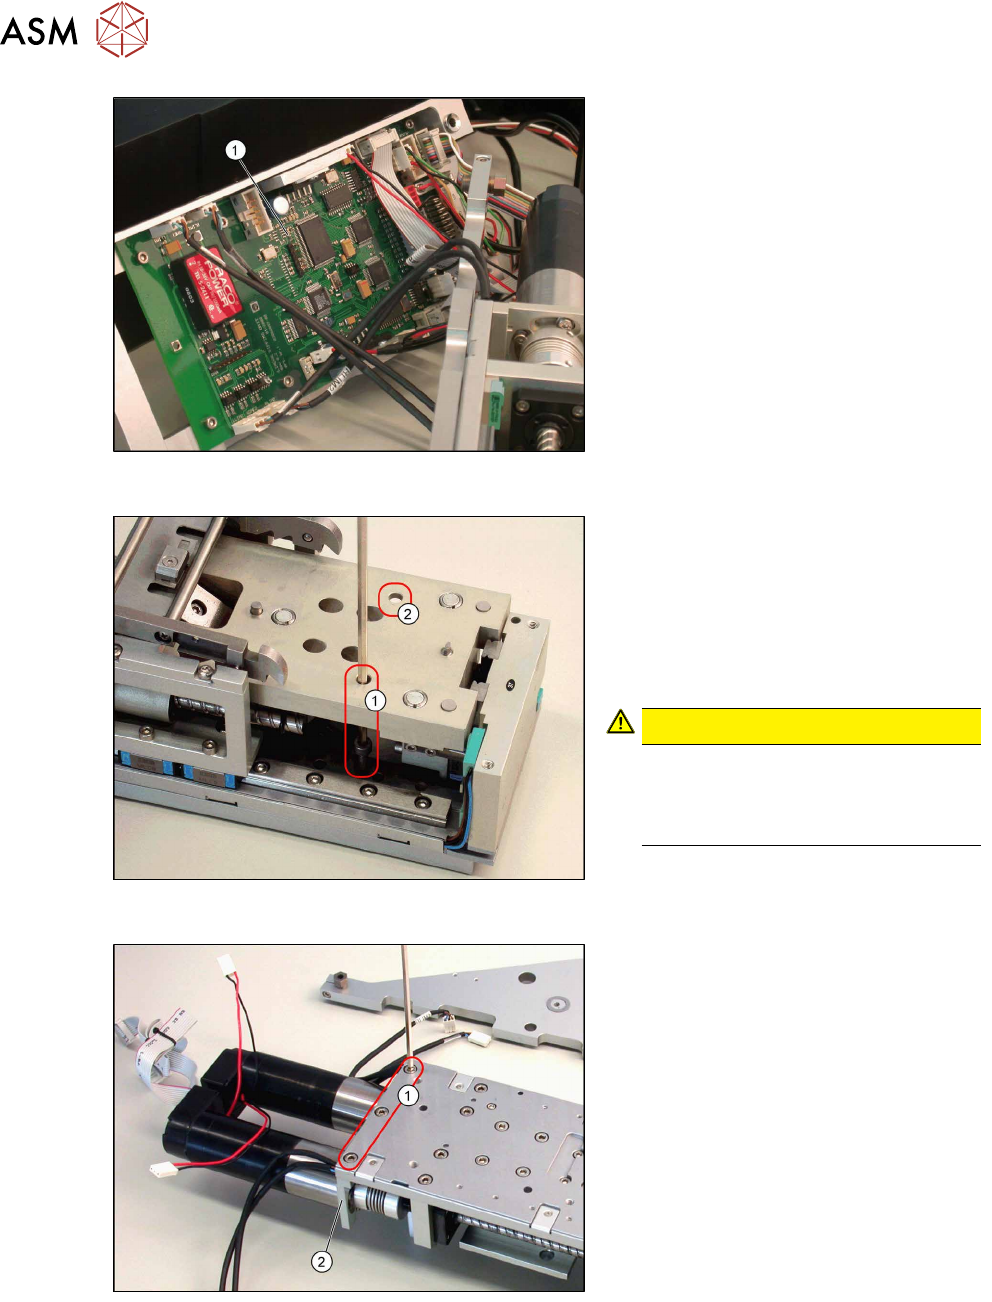
► Make a note of the positions of all
connectors and cables on the LDU-X
control board(1), to make it easier to
reconnect them correctly later on (see
also 4.2.29.8 "LDU-X Control-
ler" [}62]).
► Unplug all connections from the LDU-
X control board and disconnect all
cables.
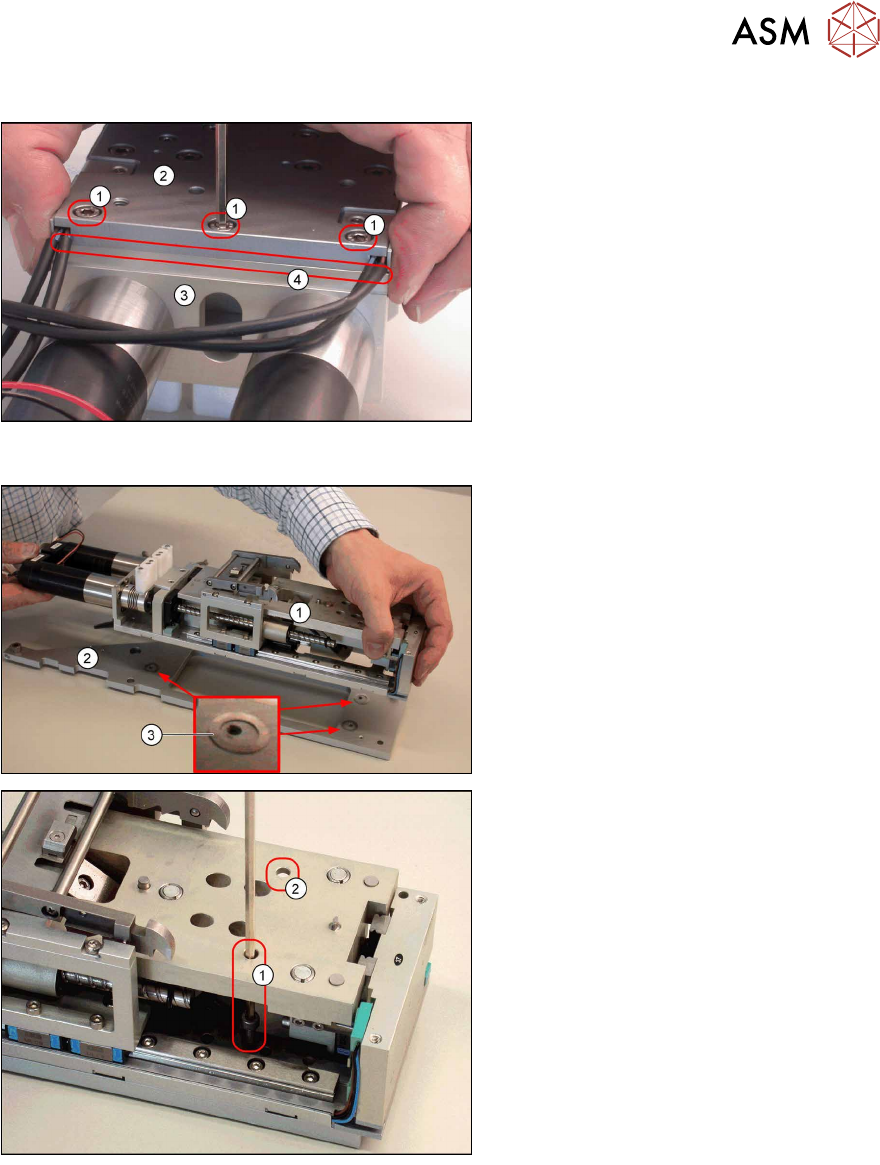
4.2.29.4 Removing the Base Plate
► Loosen the two front screws at(1)
and(2) fastening the base plate of the
base unit upper section.
► Loosen the third screw on the back
part of the motor couplings.
► Carefully lift the upper section of the
base unit off the base plate.
CAUTION!
Each screw has a 0.3mm washer
with it.
Make sure that you do not lose
these!
.
4.2.29.5 Removing the Motor Mount
► Loosen the 3 screws fastening the
motor mount.
4 Service Work
4.2 Replacing Spare Parts
Service Manual SIPLACE LDU-X Linear Dipping Unit 11/2017 61
4.2.29.6 Fitting the Motor Mount
► Place the motor mount(3) onto the
upper section base plate(2) and
loosely tighten the 3 fastening
screws(1).
► Align the motor mount so that it is
straight and the edges(4) of the up-
per section base plate and the motor
mount are flush with one another.
► Tighten the 3 fastening screws(1).
Make sure that the edges remain
flush with one another.
4.2.29.7 Fitting the Base Plate
► Refit the upper section of the base
unit(1) on the base plate(2). Make
sure that the 3washers (0.3mm)(3)
are in the correct places.
► Loosely tighten the front two of the 3
fastening screws(1) and(2) for the
base plate of the base unit upper sec-
tion and the third fastening screw on
the back part of the motor couplings.
Make sure you do not move the 0.3
mm washers out of position.
► Align the upper section of the base
unit and the base plate so that they
are flush.
► Tighten the 3 fastening screws. Make
sure that the upper section of the
base unit and the base plate remain
flush with one another.
4 Service Work
4.2 Replacing Spare Parts
62 Service Manual SIPLACE LDU-X Linear Dipping Unit 11/2017
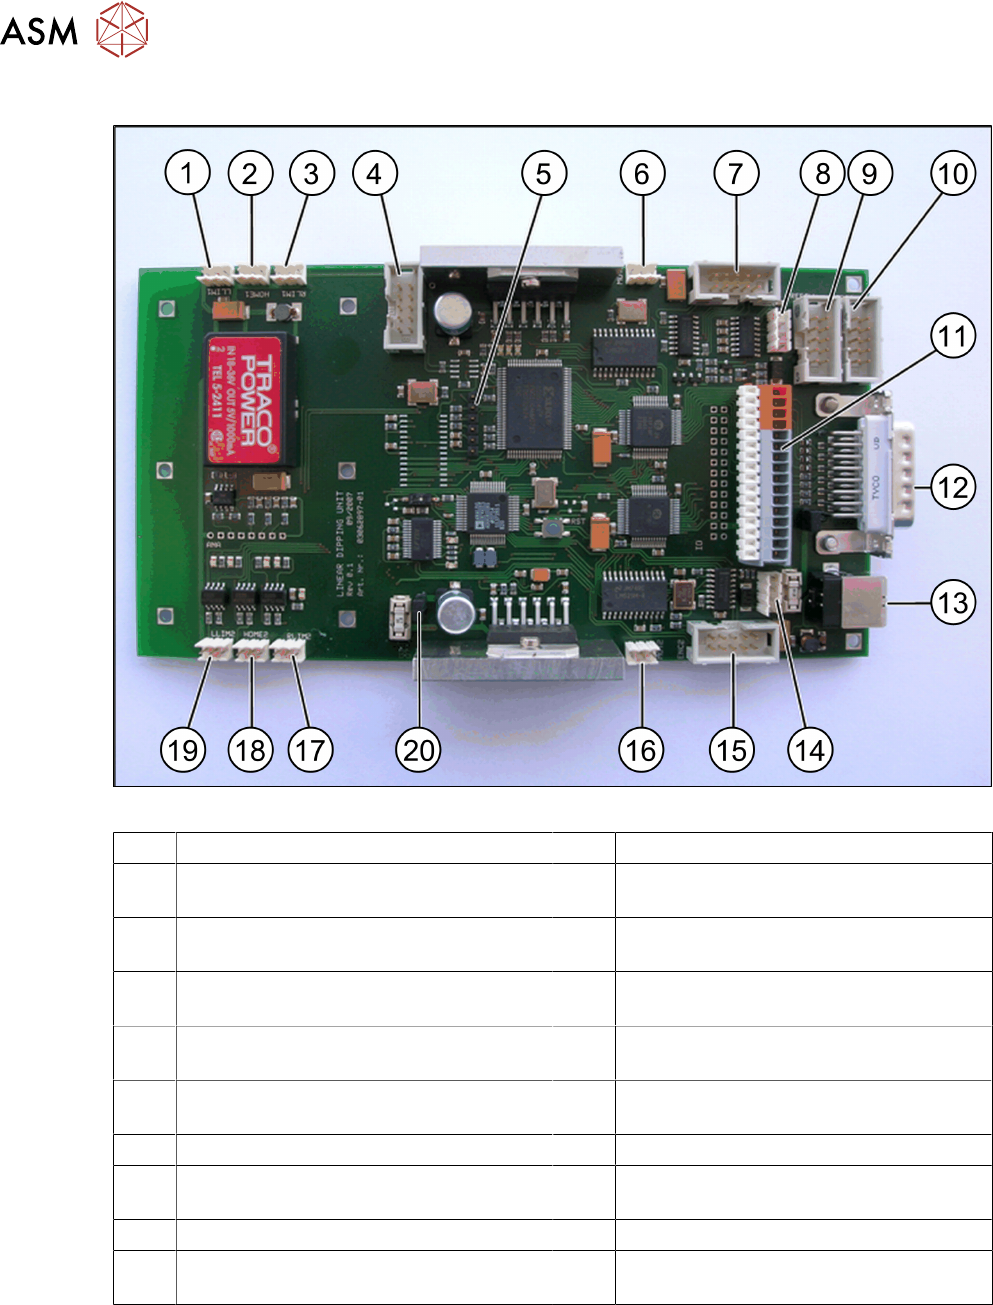
4.2.29.8 LDU-X Controller
Fig.4: LDU-X control board
1 3 pin connector strip for sensor (LLIM1) 2 From FS03 tray sensor
3 3 pin connector strip for sensor (RLIM1) 4 10 pin connector strip for refill unit
(MOT1)
5 6 pin connector pin strip for programming
interface
6 3 pin connector strip for motor, X axis
(MOT1)
7 10 pin connector strip for rotary encoder
from motor, X axis
8 4 pin connector strip for control board, X
adapter
9 10 pin connector strip for refill unit (op-
tional)
10 10 pin connector strip for service cable
(RS232)
11 16 pin terminal strip
(for details see table below)
12 Sub-D connector
13 USB socket 14 4 pin connector strip for display
15 10 pin connector strip for rotary encoder
from motor, X axis (MOT2)
16 3 pin connector strip for motor, X axis
(MOT2)
17 3 pin connector strip for sensor (RLIM2) 18 From FS03 dip plate sensor
19 3 pin connector strip for sensor (LLIM2) 20 2 pin connector strip for emergency stop
button