00196062-03_SM_LDU-X_EN.pdf - 第49页
4 Service Work 4.2 Replacing Spare Parts Service Manual SIPLACE LDU-X Linear Dipping Unit 11/2017 49 ► Remove the two screws marked in the diagram (2) . ► Remove the handle (3) . Installation ► Fit the new handle (1) …
4 Service Work
4.2 Replacing Spare Parts
48 Service Manual SIPLACE LDU-X Linear Dipping Unit 11/2017
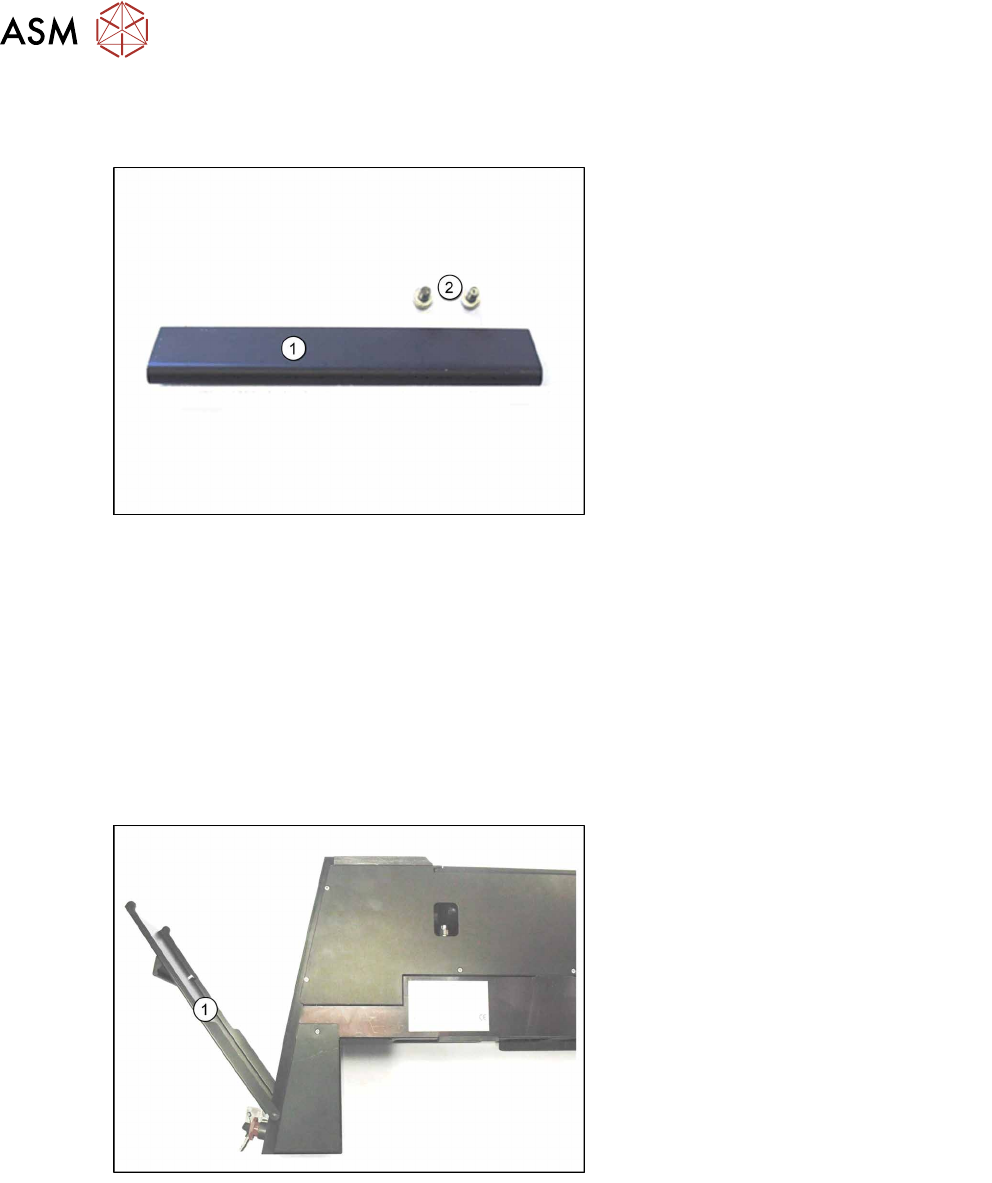
4.2.23 Replacing the handle
Overview
Spare parts kit "Handle" [03062471-xx]
Legend
1. Handle [03062471-xx] with holes
drilled for grub screws
2. Screws ISO4762–M3x6-8.8, gal-
vanized [03007733-xx] (2x)
Equipment required
●
Standard tools
●
Loctite 222 (screw locking varnish)
●
Allen key size 2.5
●
Spare parts:
– Handle [03062471-xx]
– Screws ISO4762–M3x6-8.8, galvanized [03007733-xx] (2x)
Removal
► Place the LDU-X down on its left-hand
side, on a stable, clean and even sur-
face.
► Open the flap(1).
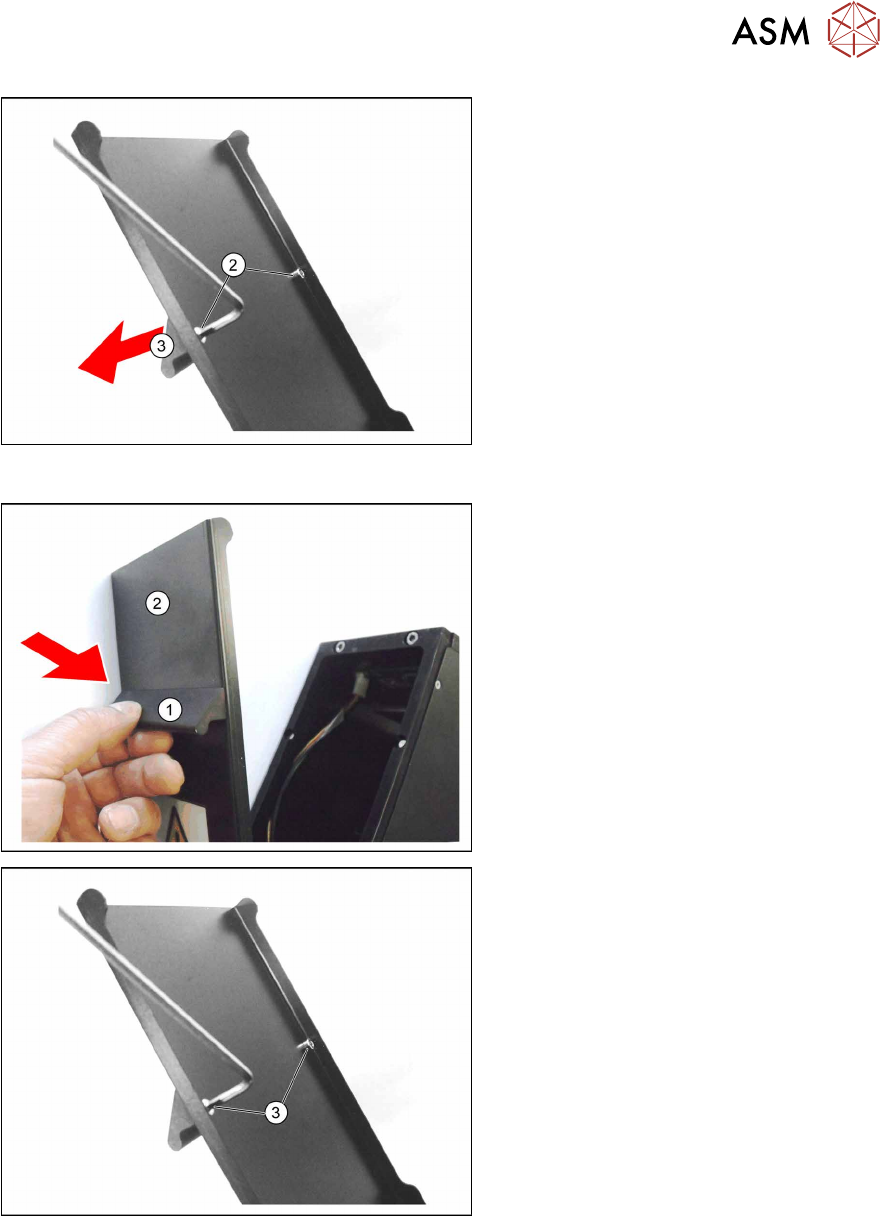
4 Service Work
4.2 Replacing Spare Parts
Service Manual SIPLACE LDU-X Linear Dipping Unit 11/2017 49
► Remove the two screws marked in the
diagram(2).
► Remove the handle(3).
Installation
► Fit the new handle(1) on the outside
of the flap, as shown in the dia-
gram(2).
► Position the new handle so that the
threaded holes in the handle are over
the two holes in the flap.
► Coat the two screws with "Loctite 222
locking varnish".
► Push the screws(3) on the inner side
of the flap into the holes provided.
► Fasten the handle to the flap, using
the two screws(3).
4 Service Work
4.2 Replacing Spare Parts
50 Service Manual SIPLACE LDU-X Linear Dipping Unit 11/2017
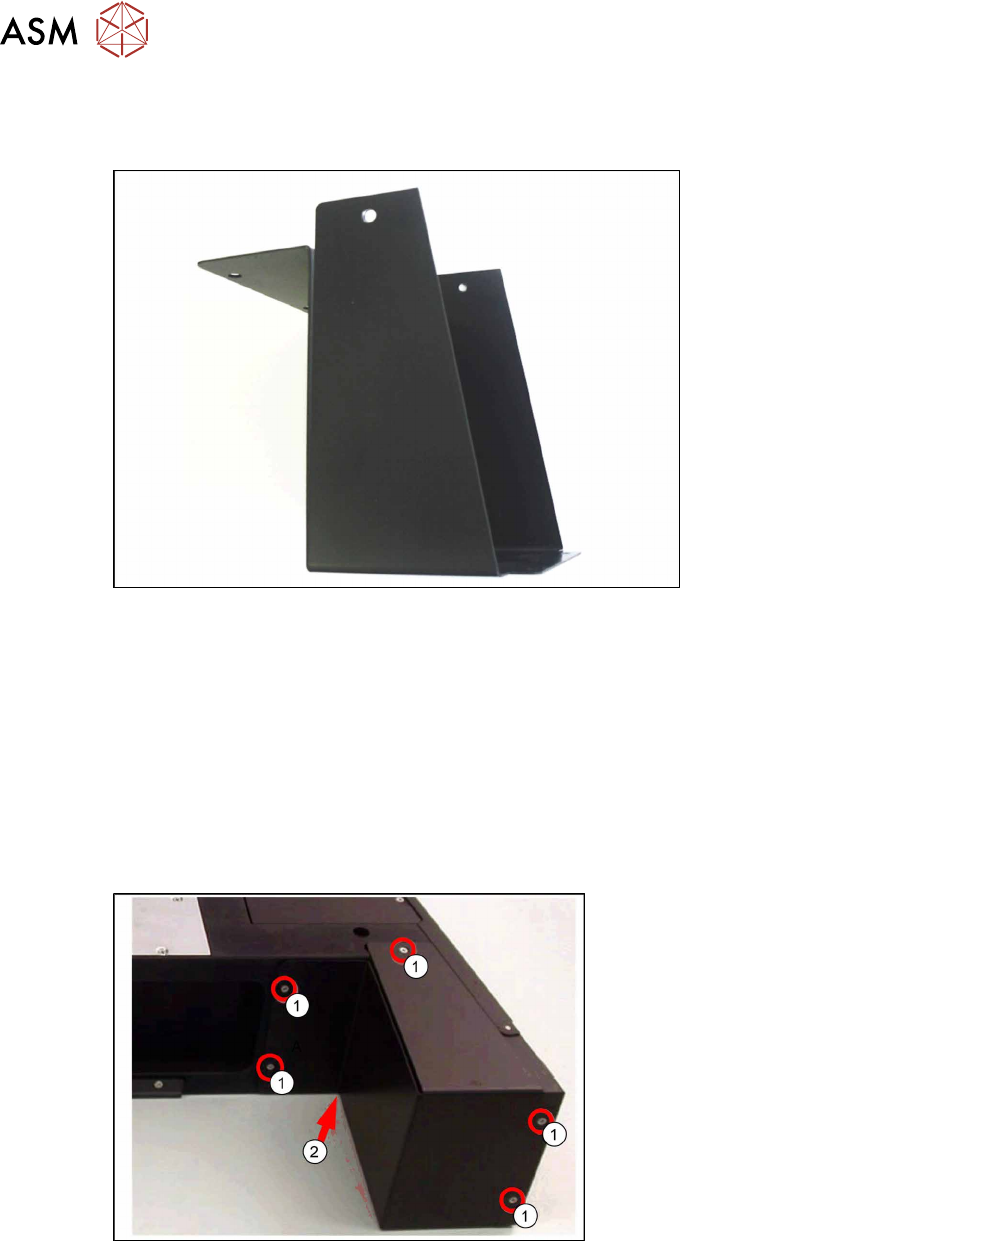
4.2.24 Replacing the cover panel
Overview
Cover panel with screws [03062033-xx]
Equipment required
●
Standard tools
●
Loctite 222 (screw locking varnish)
●
Phillips screwdriver
●
Spare parts:
– Cover panel [03062033-xx]
– Screws ISO 7046-2-M2.5 x 6-A2-70-H [03023228-xx]
Removal
► Place the LDU-X down on its right-
hand side, on a stable, clean and
even surface.
► Unscrew the 5 marked screws(1),
which fasten the cover panels.
The 6th screw(2) is loosened in the next
step, when you have turned the LDU-X
over.