COU2000 PRO计数器英文说明书 Operaton Manual-en(1).pdf - 第24页
VERSION: .1.01 E 24 / 52 company . If you need it, please co ntact u s or our di stributor to pu rchase it. The printi ng cable pu rchas ed by yoursel f wil l damage the machine or device and cannot be dri ven . ARGOS:OS…
VERSION: .1.01 E
23 / 52
5、Option functions(Label print & Barcode copy)
5.1 Label Print
5.1.1 Overview
The label printing option provided by the COUP2000 Pro series products is used to print the
results of SMD material inventory on standard specification labels, replacing manual
copying
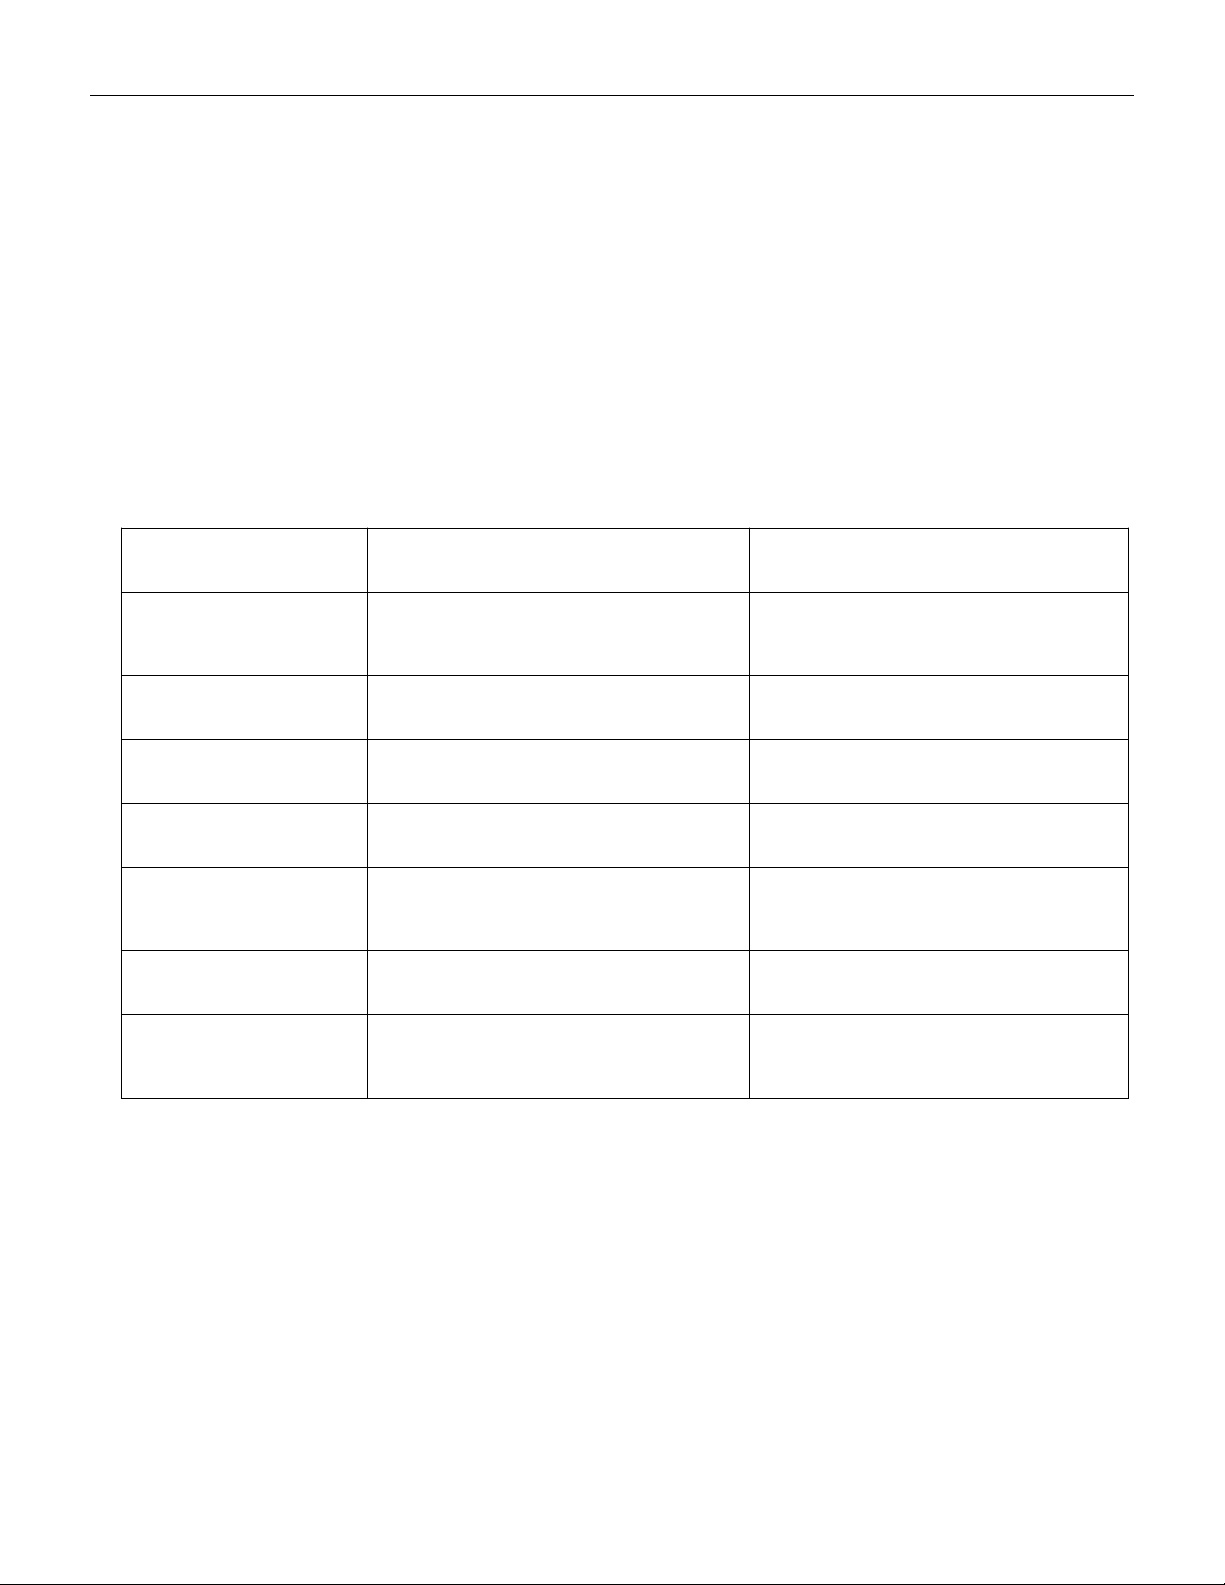
This printer is only used as an output terminal for the SMD counter COUP2000 Pro series.
The communication method, character format, ribbon, and label paper specifications have
been debugged and set, as shown in the table below:
Printer model
ARGOS:OS-214Plus(U)
Zebra: ZD888
Programming
Language
PPLA, PPLB, PPLZ
ZPL、EPL、PPLB
Print method
Thermal transfer
Thermal transfer
Barcode type
Code 128、Code 49
Code 128、Code 49
Resolution
203DPI
203DPI
Communication
interface
USB,type B
USB, type B
Ribbon
110mm ×100m
110mm ×100m
Label paper
65mm × 26mm 1000pcs/roll
gap:2mm
65mm × 26mm 1000pcs/roll
gap:2mm
Note:
Please do not attempt to modify the printer settings and confirm that the consumables
carbon ribbon and label paper are consistent with the requirements; Label paper and
carbon ribbon can be purchased from printing consumables suppliers. If there are special
requirements, please contact us or our distributors
*The communication cable of the printer is a USB interface, which is a special cable of our
VERSION: .1.01 E
24 / 52
company. If you need it, please contact us or our distributor to purchase it. The printing
cable purchased by yourself will damage the machine or device and cannot be driven
.
ARGOS:OS-214Plus(U) Zebra: ZD888
5.1.2 Label Printing
The COUP2000 Pro series that has selected the label printing function option can print
labels.
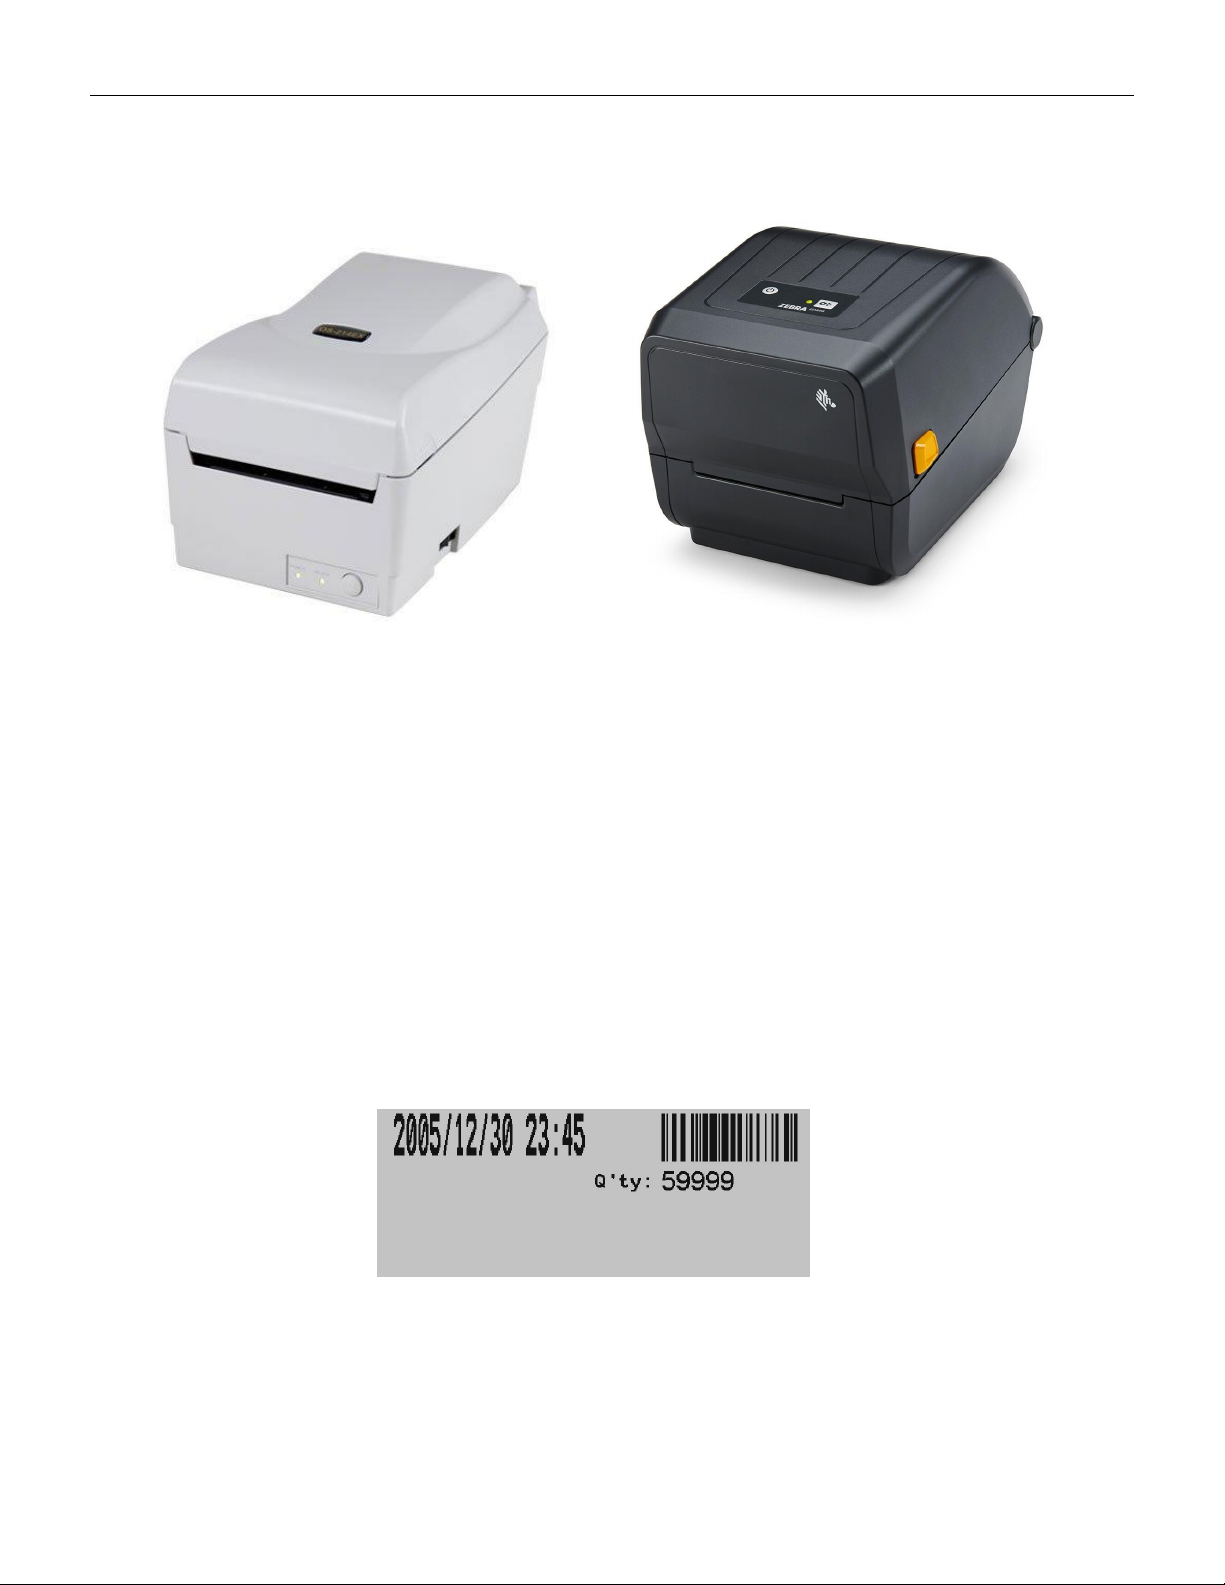
When the counting is complete and the number of parts is displayed on the screen, press
the PRINT key on the control panel, and the printer will print labels indicating the time and
number of parts. As shown in the following figure:
Label(not includes p/n of component)
VERSION: .1.01 E
25 / 52
5.1.3 Set up the printer
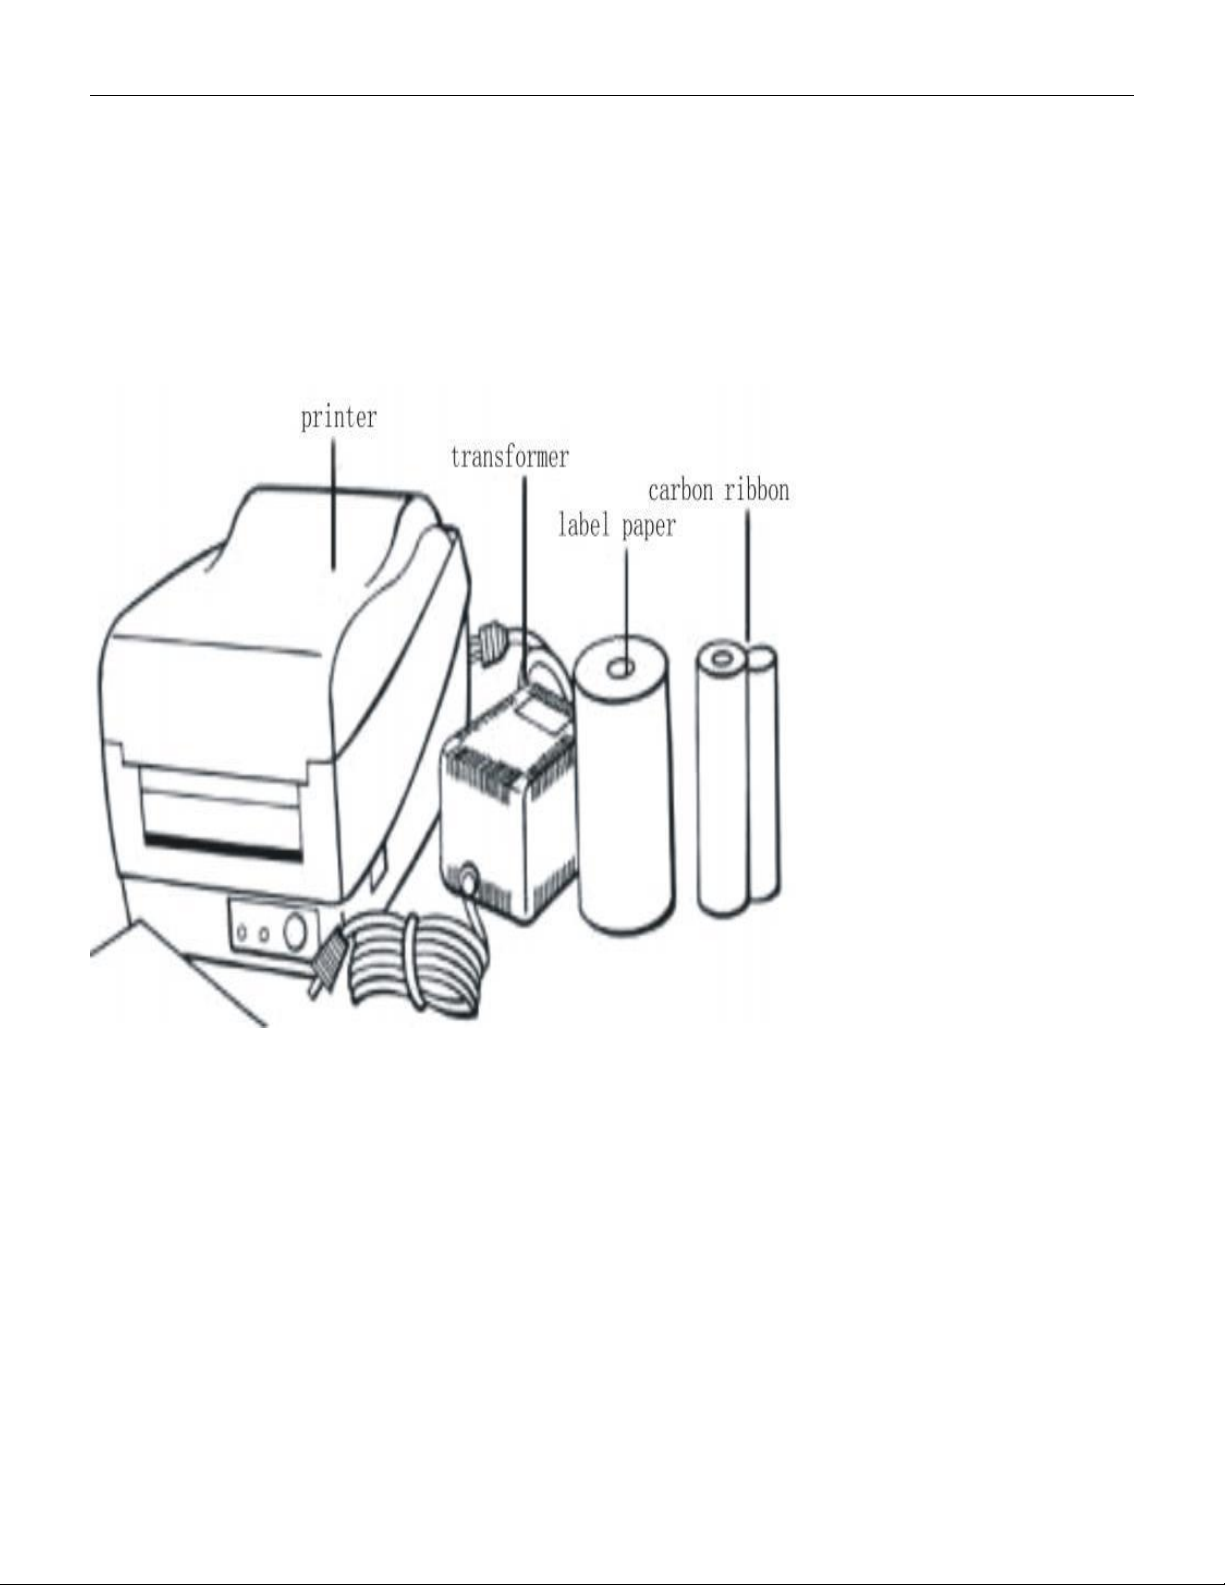
5.1.3.1 Unpacking& check
After opening the box, take out the filling material first, and then carefully take out the
printer。
Check if the following items are complete: (printer, transformer, ribbon, label paper, and
communication cable)
Please place the printer on a flat and sturdy surface and check for any damage caused by
transportation
5.1.3.2 Power and communication connection
5.1.3.2.1Connect the printer power cord
Keep the power on switch in the "off" position
Connect one end of the transformer to the power socket of the printer, and the other end to