COU2000 PRO计数器英文说明书 Operaton Manual-en(1).pdf - 第31页
VERSION: .1.01 E 31 / 52 5.1.4.4 Ri bbon installatio n 5.1.4.4.1 Open the upper co ver of printer and keep it i n op en po sition。 5.1.4.4.2 Release the print head lock column and o pen th e prin t head module to a verti…
VERSION: .1.01 E
30 / 52
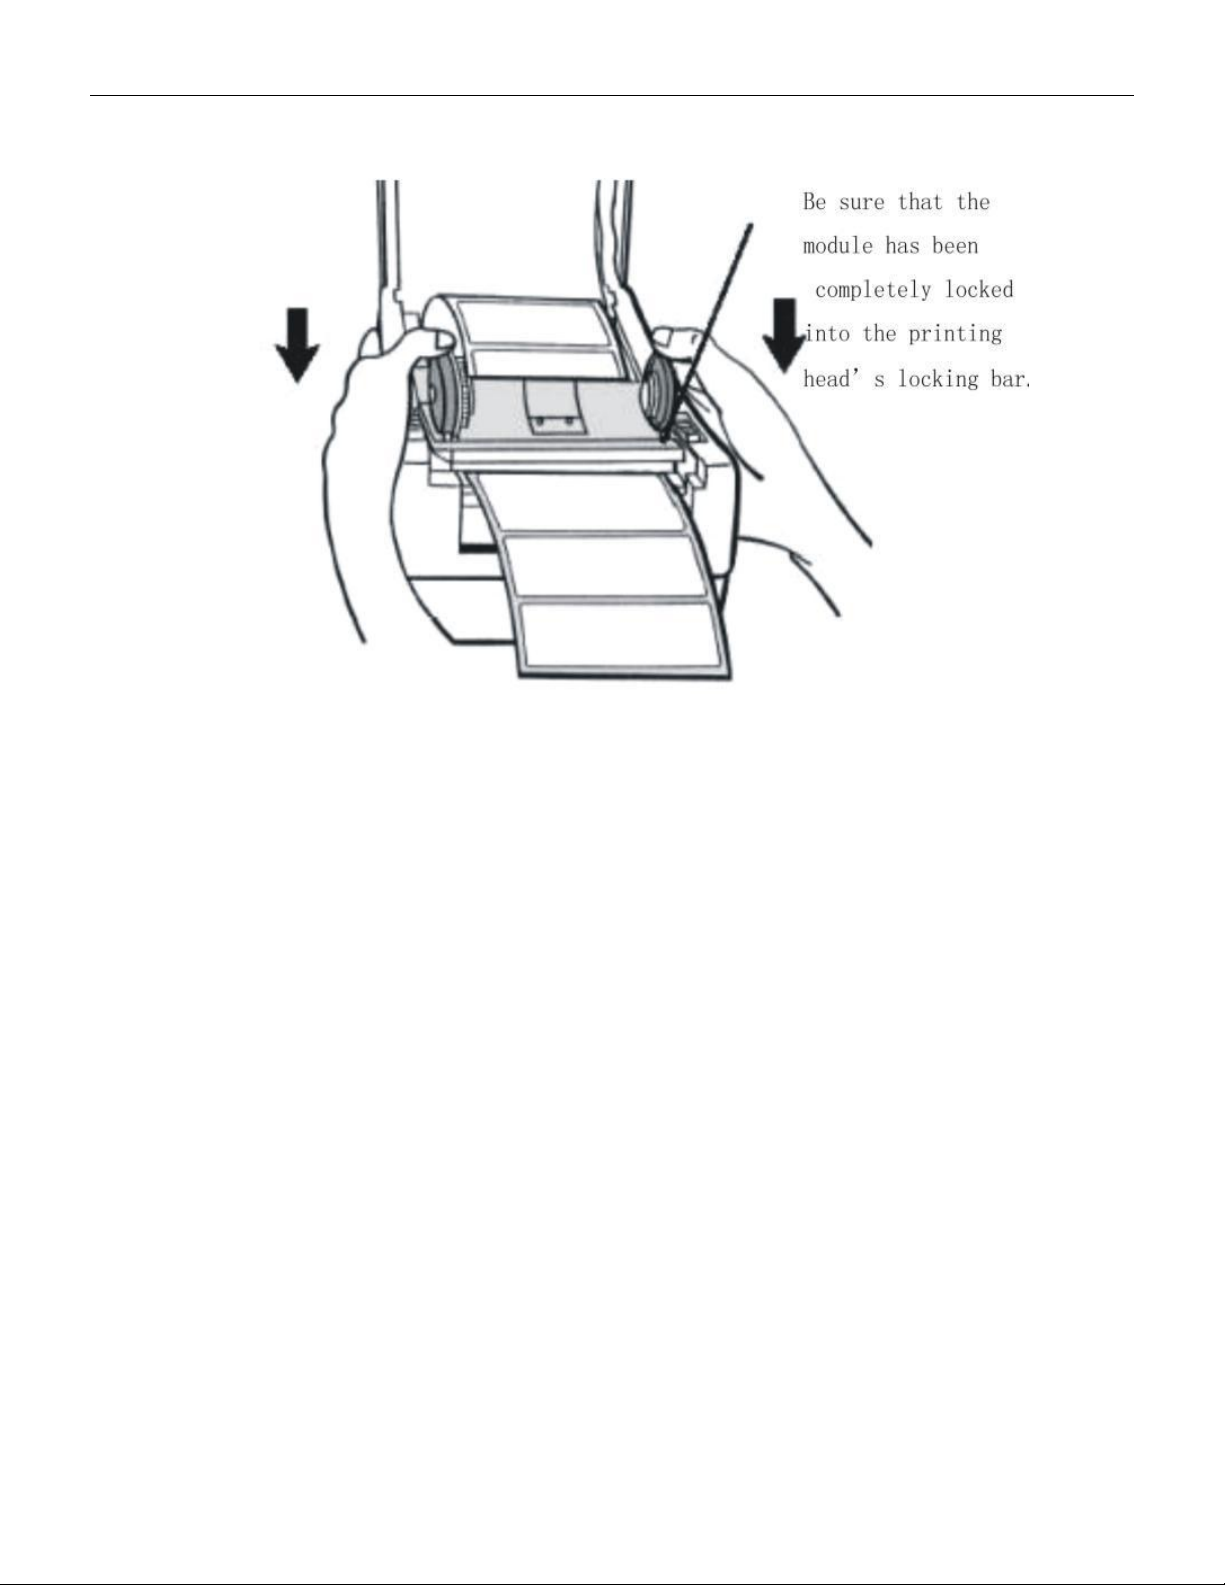
5.1.4.2.6 Cover the print head module and ensure that it is fully inserted into the column
print head lock column。
5.1.4.2.7 Cover the upper cover of the printer。
5.1.4.3 Printing Test
When the label paper is installed and printed for the first time, it is necessary to confirm the
paper output position. Please hold down the "FEED" button and turn on the power until the
printer motor starts and release it; The printer automatically sends out labels of a certain
length to complete the paper measurement operation.
VERSION: .1.01 E
31 / 52
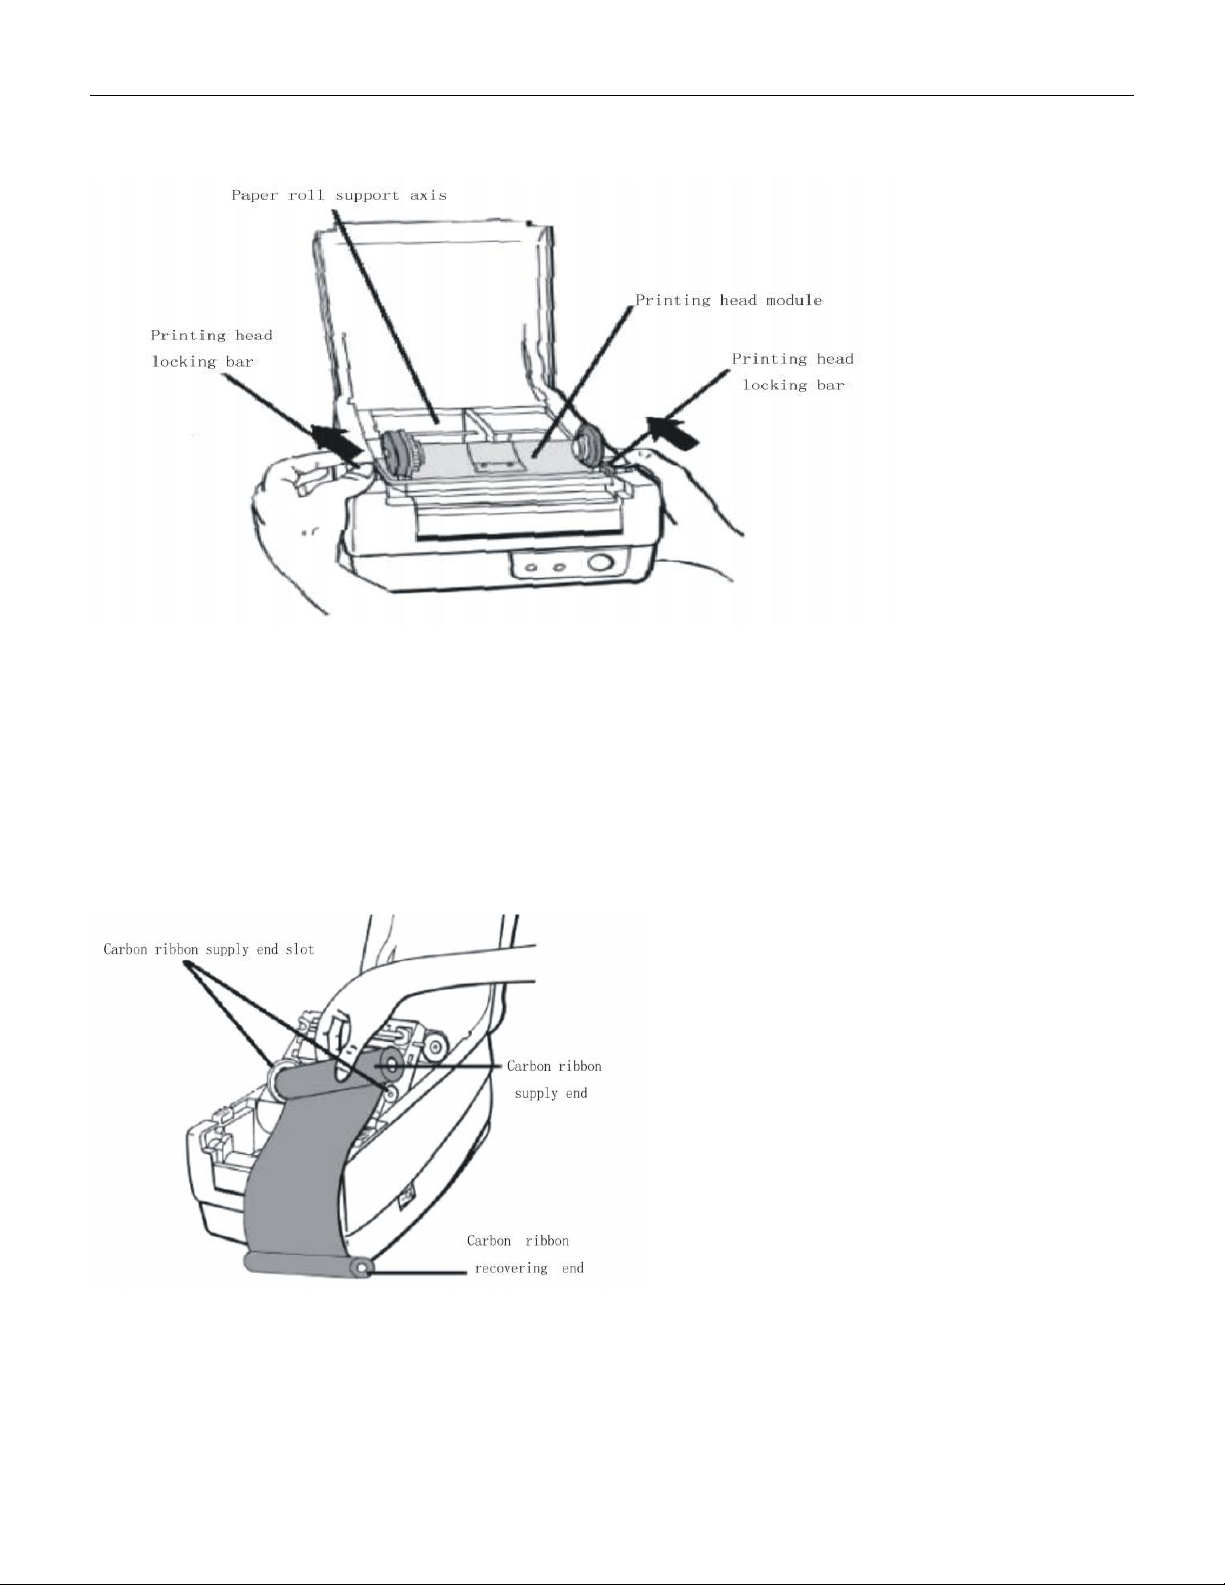
5.1.4.4 Ribbon installation
5.1.4.4.1 Open the upper cover of printer and keep it in open position。
5.1.4.4.2 Release the print head lock column and open the print head module to a vertical
position.。
5.1.4.4.3 Open the ribbon and insert the ribbon supply end into the ribbon supply end slot
(first insert the left end of the ribbon)
Insert the paper tube into the left slot, apply slight force to the left, and insert the paper
tube at the right end of the carbon ribbon into the right slot
5.1.4.4.4 Insert the carbon ribbon recycling paper tube into the carbon ribbon recycling slot
VERSION: .1.01 E
32 / 52
(as above), and then roll the gear for a full circle
5.1.4.5 Restore factory setting
5.1.4.5.1 Power on and wait for more than 5 seconds
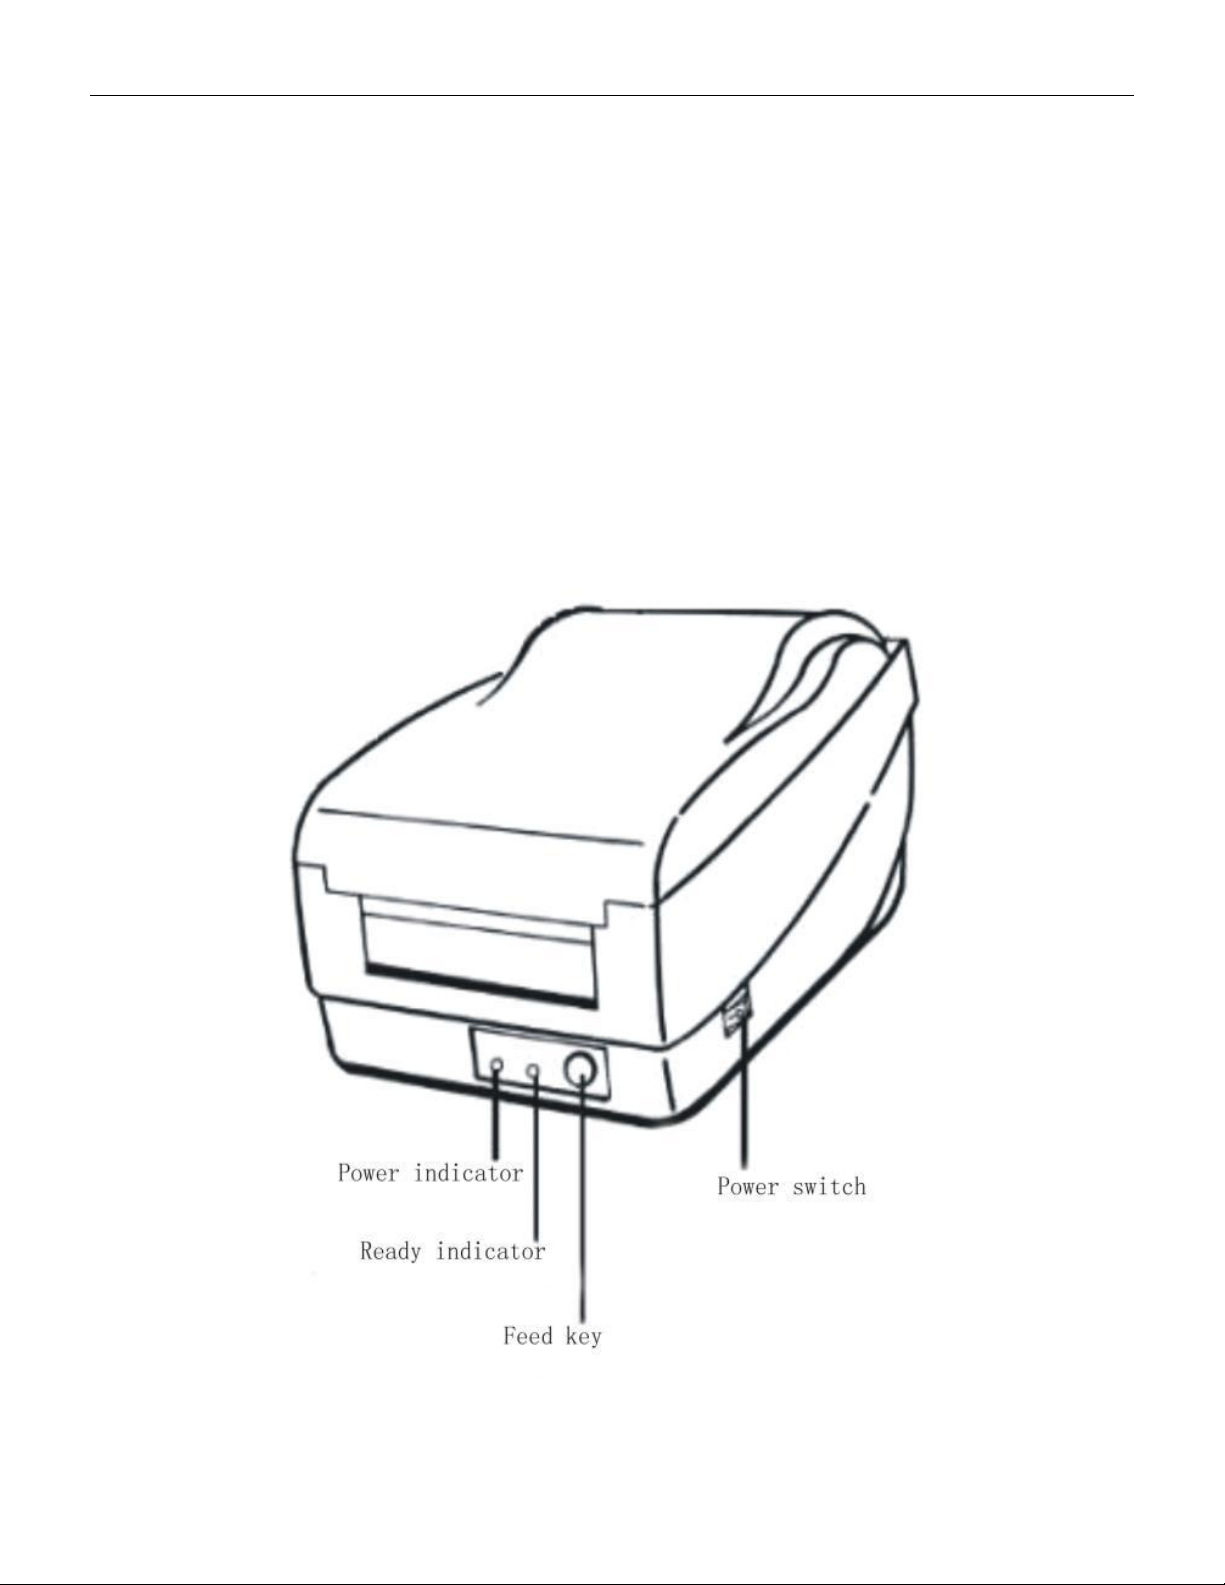
5.1.4.5.2 Press and hold the "FEED" button for about 10 seconds, and the "READY" and
power indicator lights will turn off in sequence。
5.1.4.5.3 Release the "FEED" button when the two indicator lights light up in sequence。
5.1.4.5.4 At this point, the printer will send out a 12 inch long blank label and restore the
factory settings。
The above are solutions for situations where the printer may be damaged or set incorrectly.
All settings will be stored in the printer and will not be lost when the power is turned off。
5.1.4.6 Printer panel operation guide