DEK INFINITY USER MANUAL.pdf.pdf - 第331页
INFINITY &21680$ %/(5( 3/(1,6+0(1 76 352)/2: Soft ware Ver sion 7 User Manual 9.47 6. If the set pre ference is set to pause, the tricoloured be acon shows red and the following window is displayed: 7. Select Refill…
INFINITY
&21680$%/(5(3/(1,6+0(176
352)/2:
9.46 User Manual Software Version 7
If the Camera Idle Position in Set Preferences is set to Behind Rail, the
following window and menu bar is displayed:
Selecting Continue Run clears the warning window and the print cycle
continues.
Selecting End Run clears the warning window, the print cycle is aborted and
control is returned to the ready page.
If the Unload Board Start in Set Preferences is set to Separation, the follow-
ing window and menu bar is displayed:
Selecting Continue Run clears the warning window and the print cycle
continues.
Selecting End Run clears the warning window, the print cycle is aborted and
control is returned to the ready page.
NOTE
If Camera Idle Position is set to Behind Rail and Unload Board Start is set
to Separation, the warning windows appear one after the other in the order
shown above.
The print run resumes.
Camera Behind Rail Warning
The CAMERA HOME POSITION is set to 'Behind
Rail'
Ensure that no tooling pins or other
obstructions are on the table behind the
rear rail, as these could cause damage to
the camera.
This option will only have an effect for
boards that are less than 250mm wide.
This option can be disabled from the set
preference page.
Continue
Run
End
Run
Unload Board Speedup Warning
The UNLOAD BOARD SPEEDUP option is set to
'Separation'
With this option enabled it should be noted
that there is only a minimal clearance
between the underside of the board and any
tooling being used, while the board is being
unloaded.
This option must not be used for boards that
are populated on the underside, as this
could damage the boards.
Continue
Run
End
Run
INFINITY
&21680$%/(5(3/(1,6+0(176
352)/2:
Software Version 7 User Manual 9.47
6. If the set preference is set to pause, the tricoloured beacon shows red and the
following window is displayed:
7. Select Refill Paste (F1). The message ‘Open the cover and change the
ProFlow cassette.’ is displayed.
8. Select Open Cover (F2).
9. Carry out Steps 19-33 of Prior to a Print Run procedure, earlier in this
section.
10.Select Continue (F1). The print run resumes.
11. If the set preference is set to suspend, the tricoloured beacon shows red and
the following window is displayed:
12.Select Refill Paste (F1). The message ‘Open the cover and change the
ProFlow cassette.’ is displayed.
13.Select Open Cover ((F2).
14.Carry out Steps 19-33 of Prior to a Print Run procedure, earlier in this
section.
15.Select Continue (F1). The print run resumes.
Pause on Warning
Print Medium Low. Please replenish.
Refill
Paste
Defer
Continue
Open
Cover
Continue
Open
Cover
Suspend on Warning
Print Medium Low. Please replenish.
Refill
Paste
End
Run
Continue
Open
Cover
Continue
Open
Cover
INFINITY
&21680$%/(5(3/(1,6+0(176
352)/2:
9.48 User Manual Software Version 7
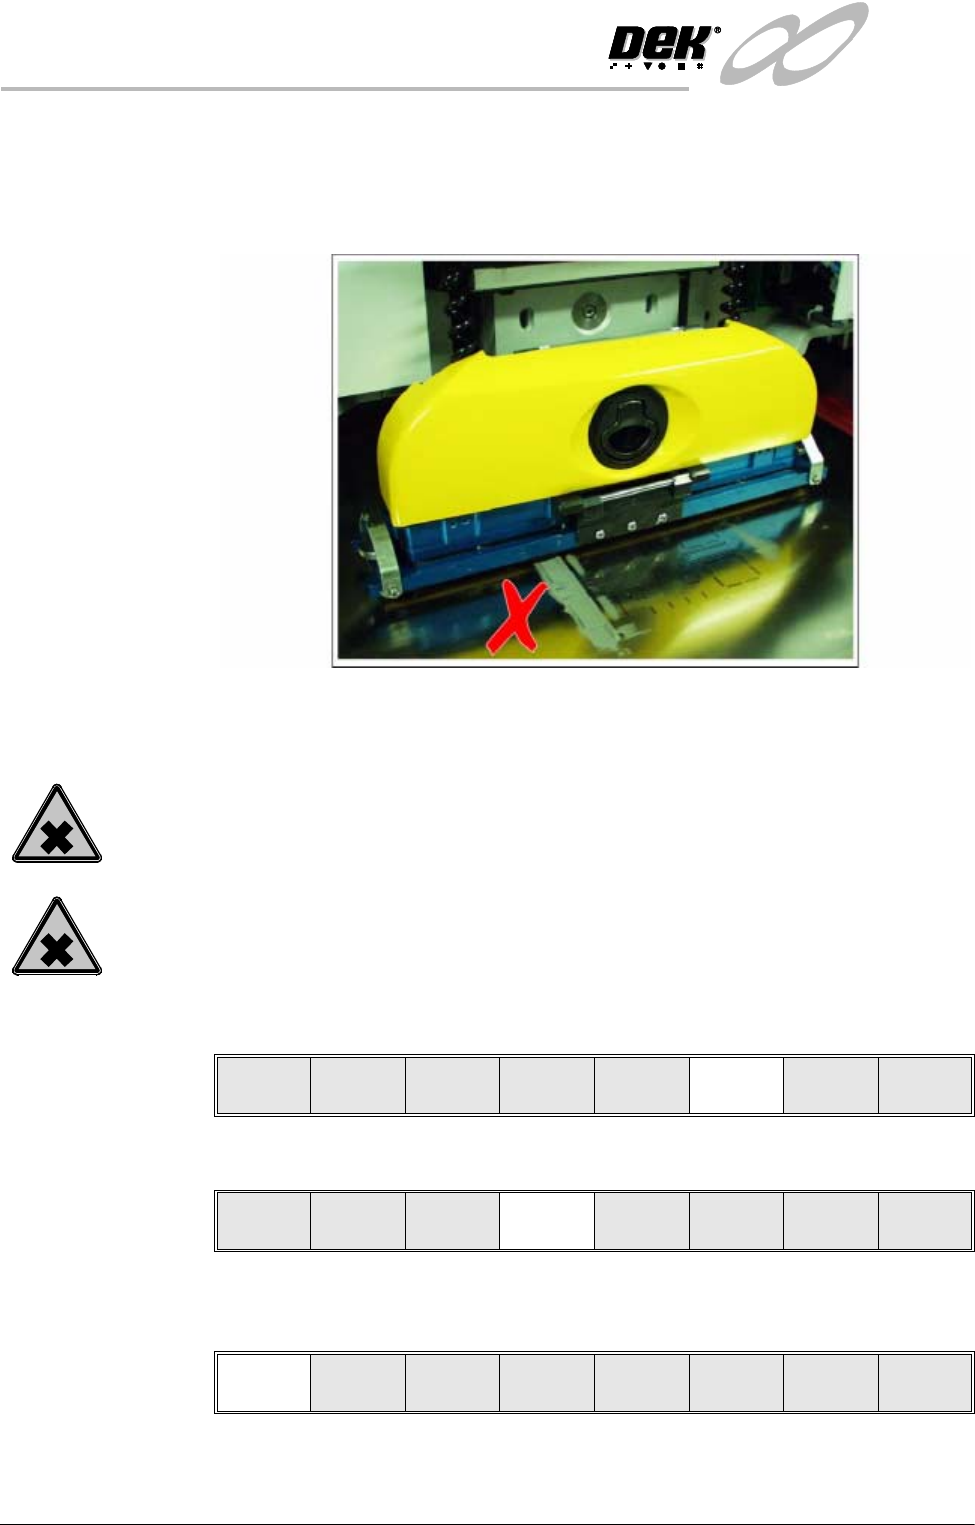
Retention System
Replacement
Due to wear over prolonged periods, it is necessary to replace the wiper foils and
skis. An obvious indication of blade deterioration is print medium left deposited
on the screen after a print cycle, an example of this indication is shown in the
figure below.
Figure 9-1 Example Of Proflow Wiper Wear
Replace the wipers and skis as follows:
WARNING
SOLDER PASTE AND SOLVENTS. WHEN USING OR HANDLING ANY SOLDER
PASTE OR SOLVENT FORMULATION THE MANUFACTURERS’ RECOMMEND
SAFETY PRECAUTIONS MUST BE STRICTLY ADHERED TO.
WARNING
PROTECTIVE CLOTHING. APPROVED PROTECTIVE CLOTHING SHOULD BE
WORN BY SOLDER PASTE AND SOLVENT HANDLERS AT ALL TIMES TO
ELIMINATE FUME INHALATION, EYE CONTACT, SKIN CONTACT AND
INGESTION.
1. Press Setup (F6).
2. Press Setup ProFlow (F4).
3. Press Change ProFlow (F1). The message ‘Replace ProFlow Cover then
Close Cover and Press Continue’ is displayed.
4. Open the front printhead cover.
5. Fit the cover to the underside of the ProFlow transfer head unit.
Run Head
Paste
Load
Clean
Screen
Adjust Setup Monitor Maint.
Mode
Load
Data
Edit
Data
Setup
ProFlow
Change
Screen
Change
Tooling
Change
Language
Exit
Change
ProFlow
Load
Cassette
Prime
ProFlow
Exit