2OM-1751-003w_G5S.pdf - 第279页
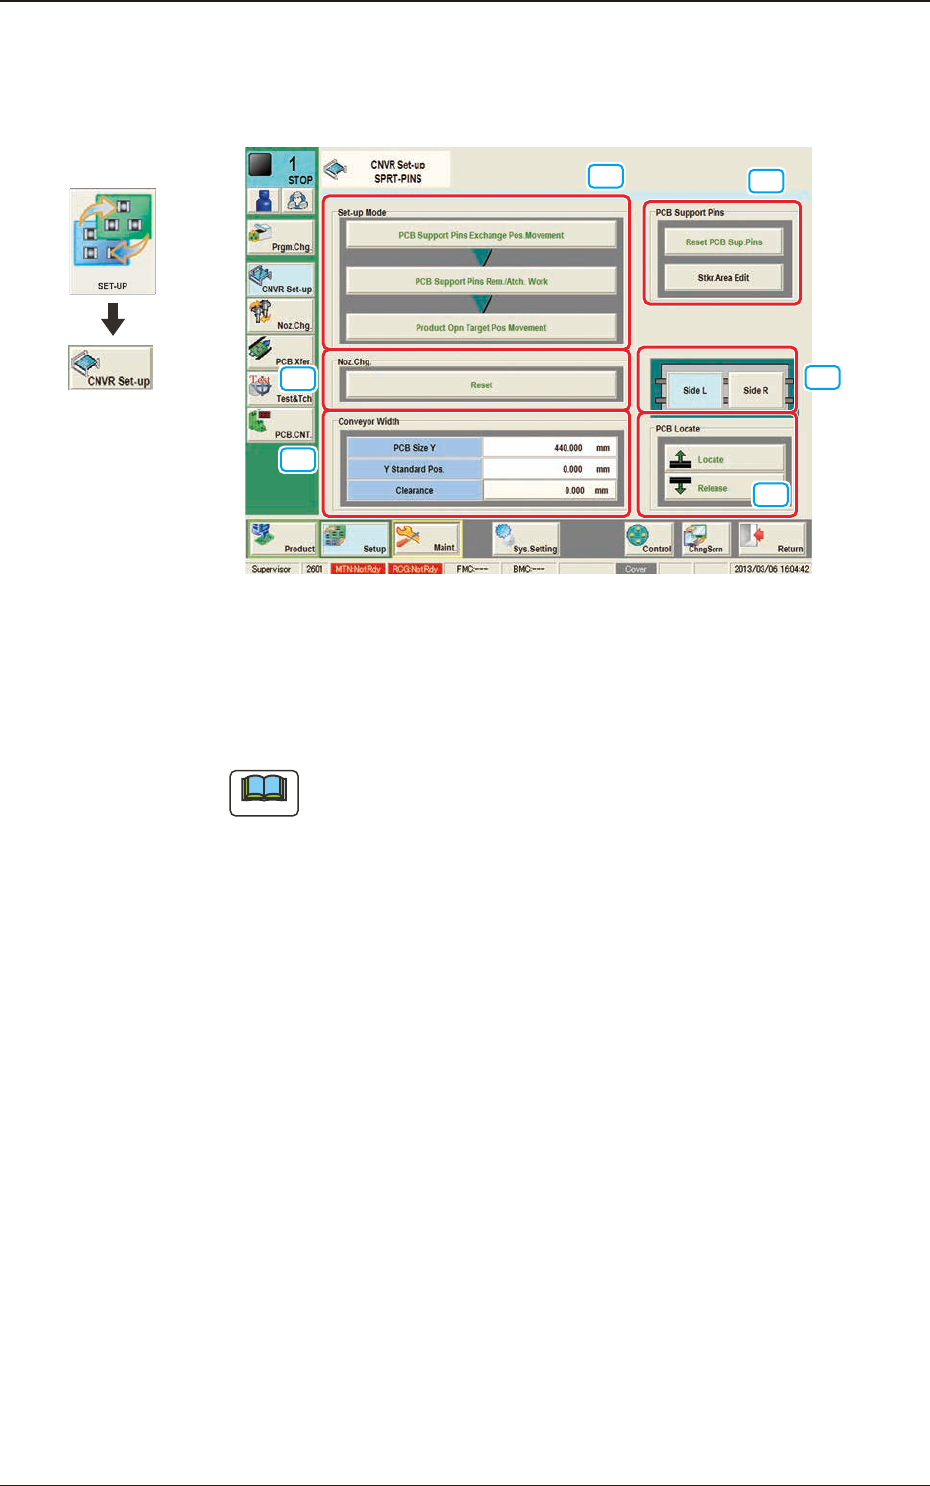
2OM-1751 6-7 1303-001 4. "CNVR Set-up" Window The "CNVR Set-up" window appears. [1] [2] [5] [4] [3] [6] F2F7 [1] "Set-up Mode" Group Box Each function in this group box can be used for the r…
2OM-1751
6-6
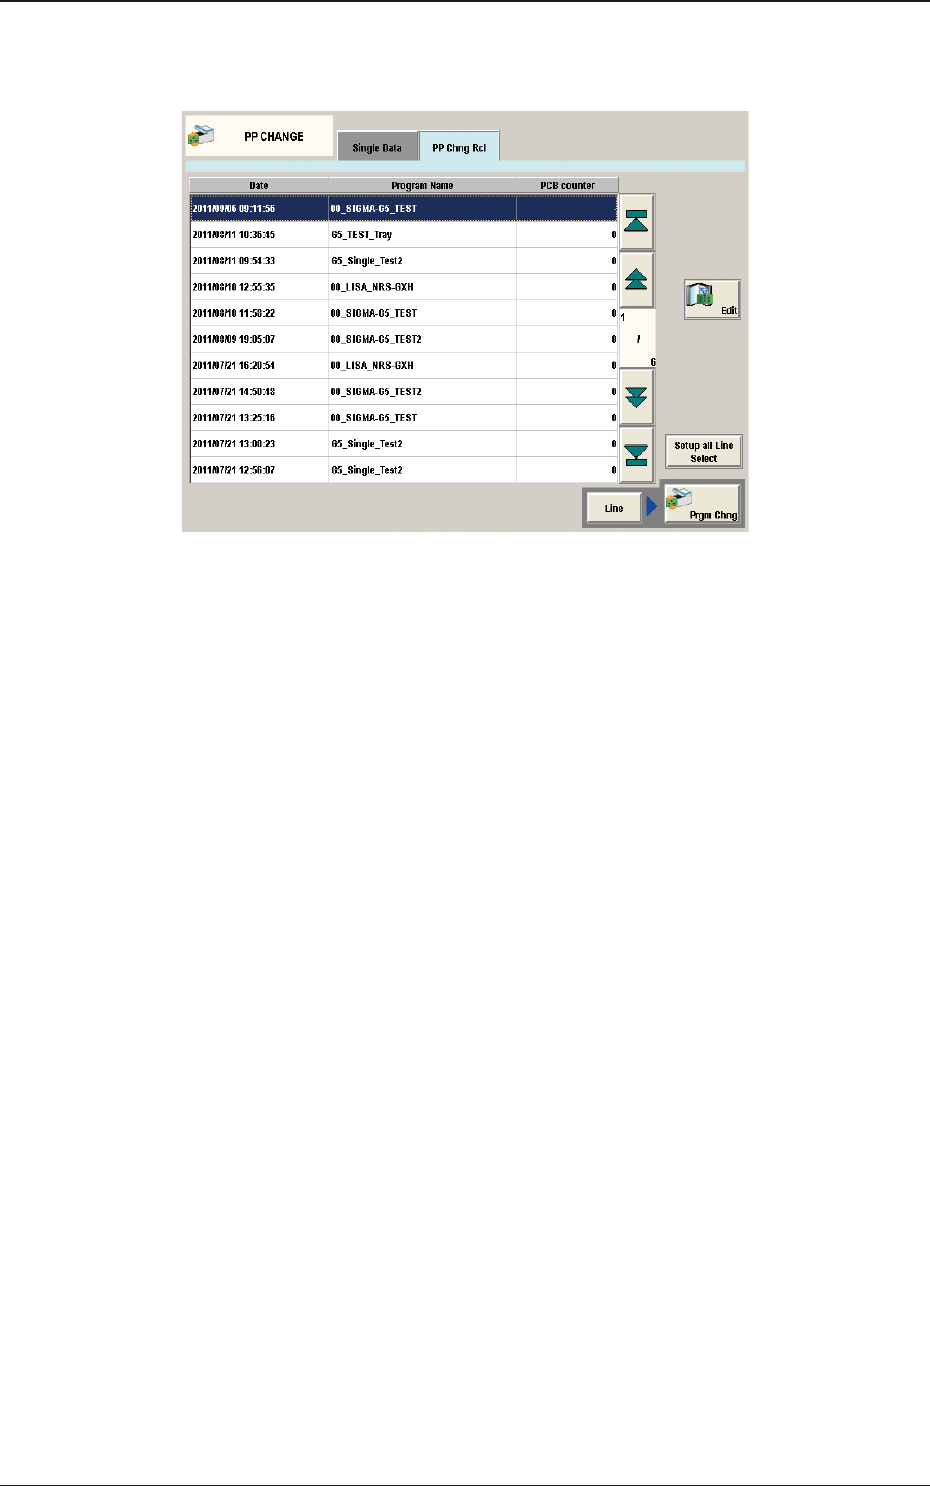
[7] "PP Chng Rcl" Tab Sheet
The pattern program change history is displayed in this section.
F2F6
1303-001
3. "PP CHANGE" Window
2OM-1751
6-71303-001
4. "CNVR Set-up" Window
The "CNVR Set-up" window appears.
[1]
[2]
[5]
[4]
[3]
[6]
F2F7
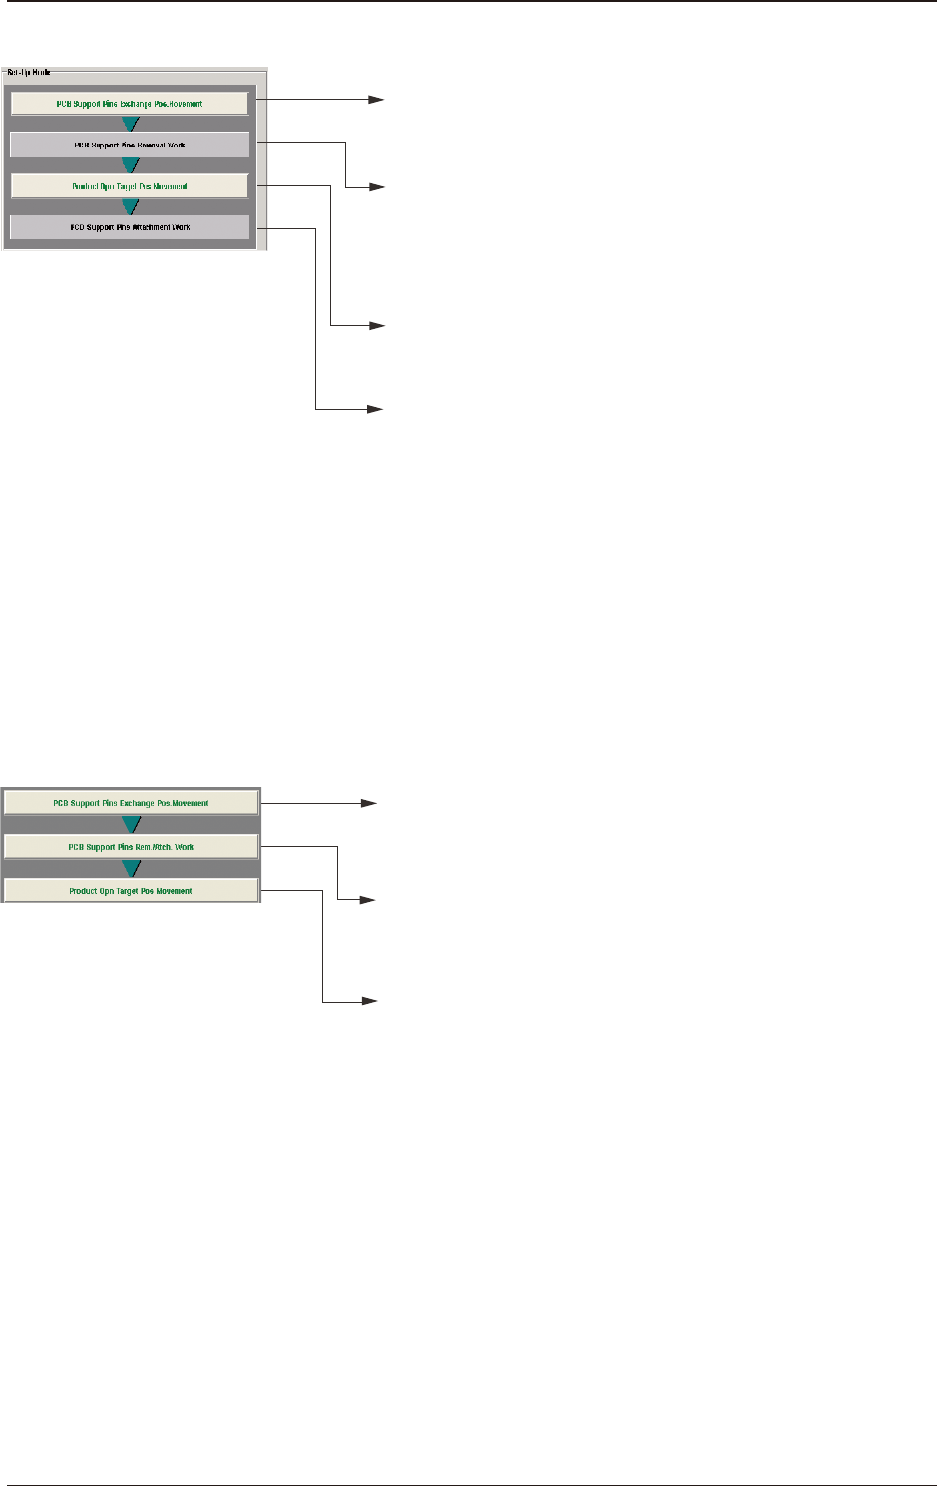
[1] "Set-up Mode" Group Box
Each function in this group box can be used for the replacement work of the
support pins.
Note
The window changes depending on manual or automatic operation.
Graphic
Development
4. "CNVR Set-up" Window
2OM-1751
6-81303-001
4. "CNVR Set-up" Window
•
For Support Pin Manual Change
• When the [START] button is pressed in10 seconds
after this button, the head retracts and the conveyor
width becomes the maximum one.
• When the [START] button is pressed in 10 seconds
after this button, the conveyor width is set up and
the movement to the Y arrange position is performed.
• When the [START] button is pressed in 10 seconds
after the [Locate] button in the "PCB Locate" group box,
the support base starts moving up.
• Turn off the lamp of the [COVER READY] button,
open the transparent cover, then set the support pins.
•
After the setting, close the transparent cover and turn on the
lamp of the [COVER READY] button.
• Press the [START] button in 10 seconds after the
[Release] button in the "PCB Locate" group box.
The backup base starts moving down.
PCB Support Pins Rem. Work
• Turn off the lamp of the [COVER READY] button,
open the transparent cover, then collect the support pins.
After the collection, close the transparent cover and turn on
the lamp of the [COVER READY] button.
PCB Support Pins Atch. Work
F2F8
•
For Support Pin Automatic Change
• When the [START] button is pressed in10 seconds
after this button, the head retracts and the conveyor
width becomes the maximum one.
• When the [START] button is pressed within 10 seconds
after this button, the support pin automatic setup is
performed according to the pattern program.
• When the [START] button is pressed within 10 seconds
after this button, the conveyor width is moved to
the production position.
F2F9
[2] "Noz Chg." Group Box
[Reset] Button
When this button is pressed and within 10 seconds, the [START] button on
the operation panel is pressed, the support pins are housed in the nozzle area.