CP45FVNEO Maintenance Reference (Eng, Ver3).pdf - 第45页
Daily Inspection 2-1 1 2.5. St age Camera Cleaning 2.5.1. Cover Glass Inspection Perform visual inspection to determine whethe r there is any dust or foreign matter on the cover glass of the stage camera, which can cause…
Samsung Component Placer CP45NEO Series Maintenance Reference
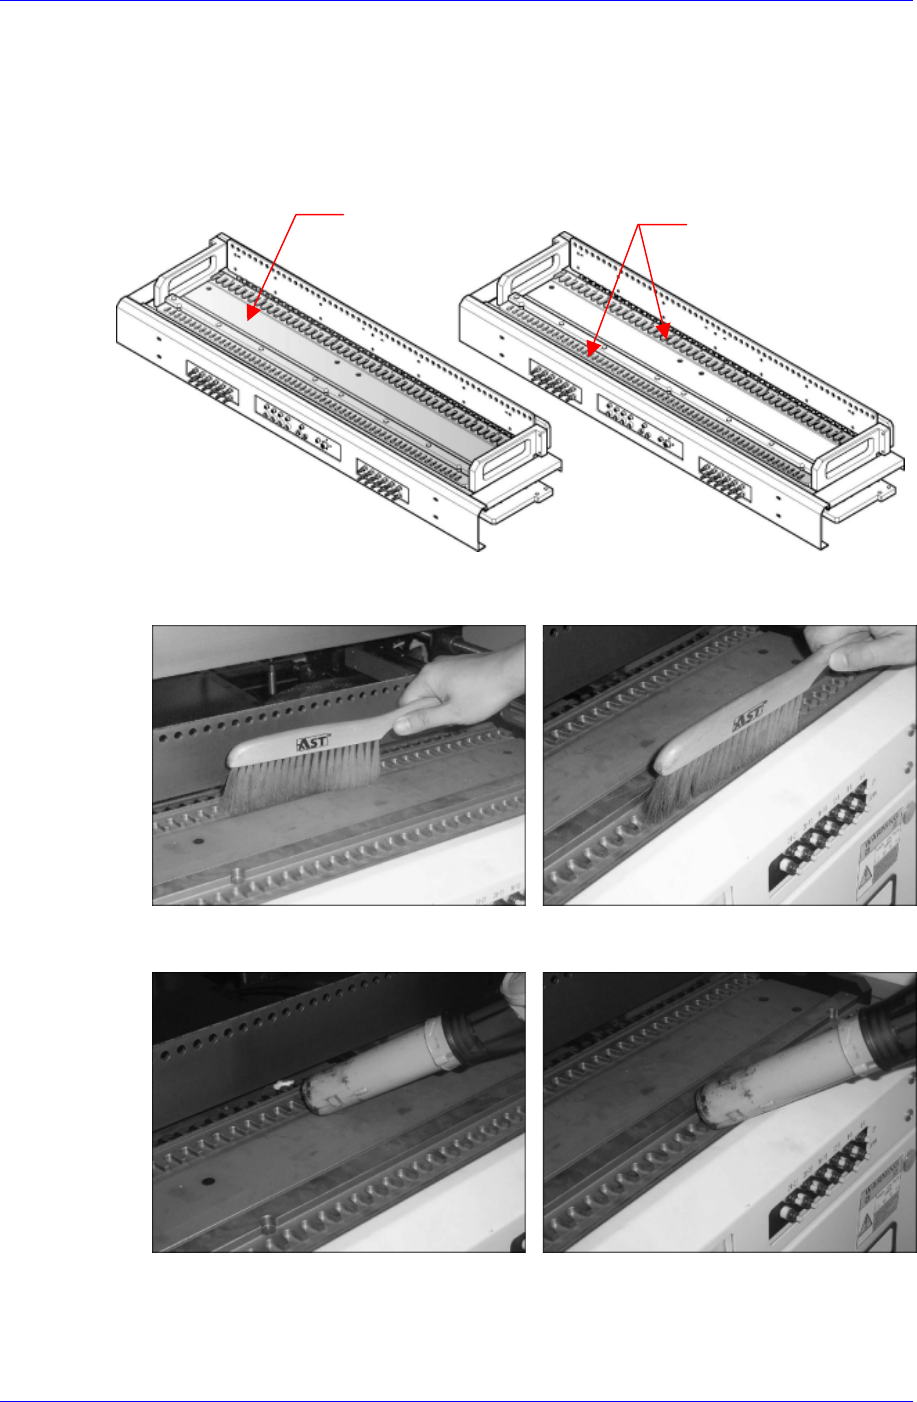
2.4. Feeder Station Cleaning
Inspection
Check visually if there is chip or foreign matter on the feeder station surface. These may
cause pickup error by distorting the pickup point when setting up the feeder.
Solution
Feeder Station uppe
r
Feeder Slot
Using the supplied brush , remove the chip or foreign matter on the feeder slot.
Using the
vacuum cleaner, remove the chip or foreign matter on the feeder station
upper surface and feeder slot.
2-10
Daily Inspection
2-11
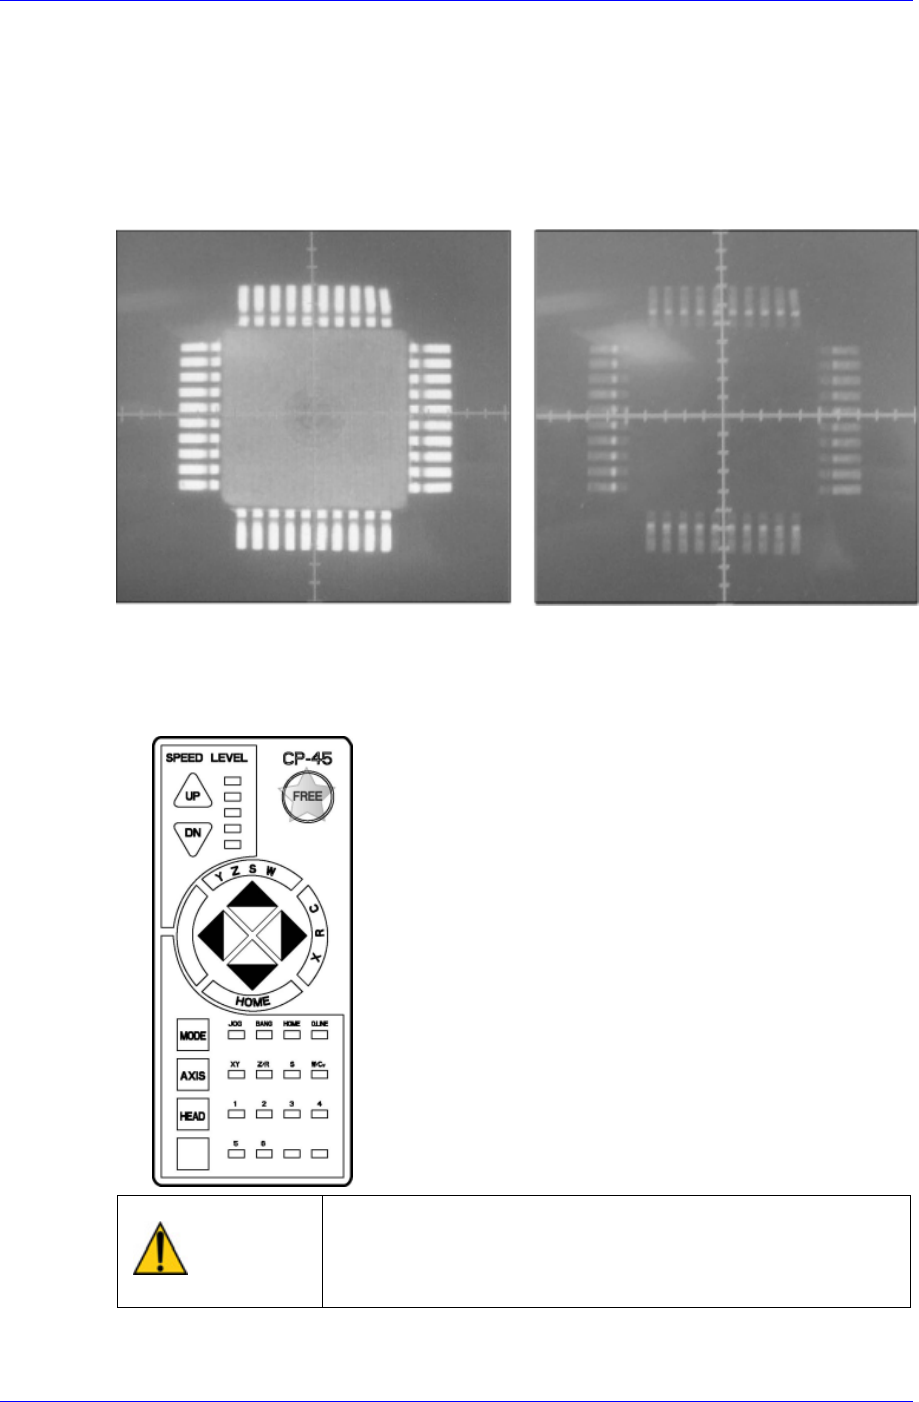
2.5. Stage Camera Cleaning
2.5.1. Cover Glass
Inspection
Perform visual inspection to determine whether there is any dust or foreign matter on the
cover glass of the stage camera, which can cause error when the camera recognizes a
component.
<Nomal Stage Camera Vision Image> <Abnormal Stage Camera Vision Image>
Solution
Put the machine in a motor-free state by pressing the motor-free button of the
teaching box.
Warning
After clicking the “Motor Free” button on the teaching box,
click the “Stop” and “Reset” buttons on the front operation
panel. Conduct inspection while the motor power supply is
turned off.
Separate the cover glass by removing the cover glass press after unscrewing the 2
Samsung Component Placer CP45NEO Series Maintenance Reference
screws on the side of the stage camera installed at the rear of the machine using a
2mm L-wrench.
Cover Glass Press
Screw
Cover Glass
Figure 2-1. Stage Camera
Clean the dust or foreign matter on the cover glass of the stage camera using a clean
cloth and alcohol.
Assembling is done in the reverse order.
Caution
The cover glass is fragile. Take care.
2.5.2. Camera Lens & LED
Inspection
Check to see if there are any dust or contamination on the camera lens and LED
Solution
Put the machine in a motor-free state by pressing the motor-free button of the
teaching box.
2-12