CP45FVNEO Maintenance Reference (Eng, Ver3).pdf - 第68页
Samsung Component Placer CP45NEO Series Maintenance Refer ence Rear Feeder Unlock Sensor (Ligh t emitting section) Rear Feeder Unlock Sensor (Ligh t receiving section) Caution If the feeder loose sensor is cancell ed arb…
Weekly Inspection
3-17
Warning
Do not insert any part of your body into the machine during
I/O testing. Otherwise, serious injury may result.
If any problems still occur, contact our designated C/S company (STS) and local
agent.
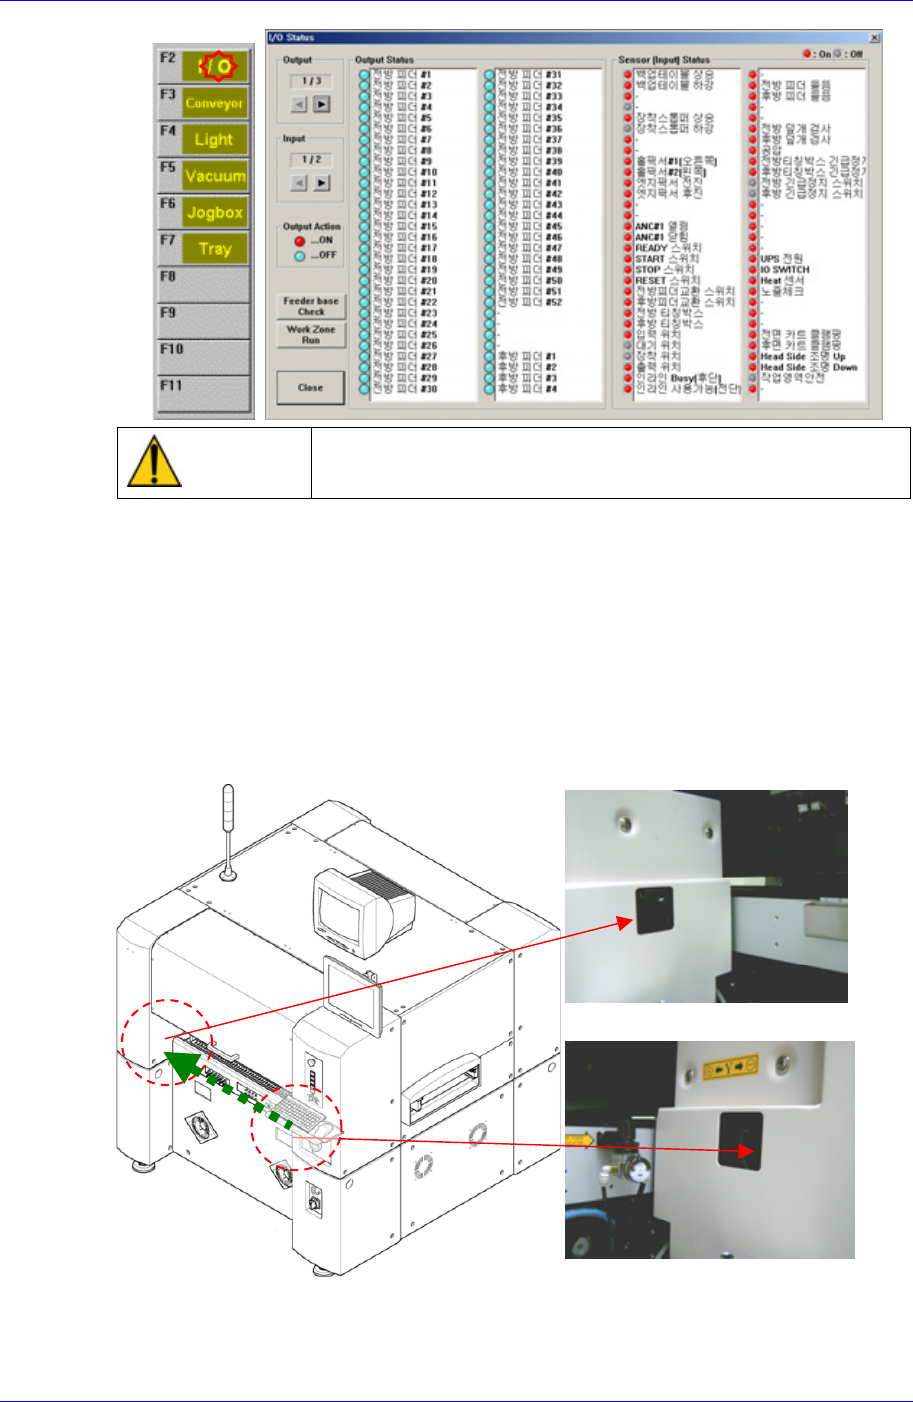
3.1.7. Feeder Unlock Sensor
점검
Feeder unlock sensors are installed at the front and rear of this machine. The system
comes into the emergency stop status if the feeder is not installed correctly at the feeder
base. In this case, verify that the feeder is installed properly.
Front Feeder Unlock Sensor (Ligh
t
receiving section)
Front Feeder Unlock Sensor (Ligh
t
emitting section)
Samsung Component Placer CP45NEO Series Maintenance Reference
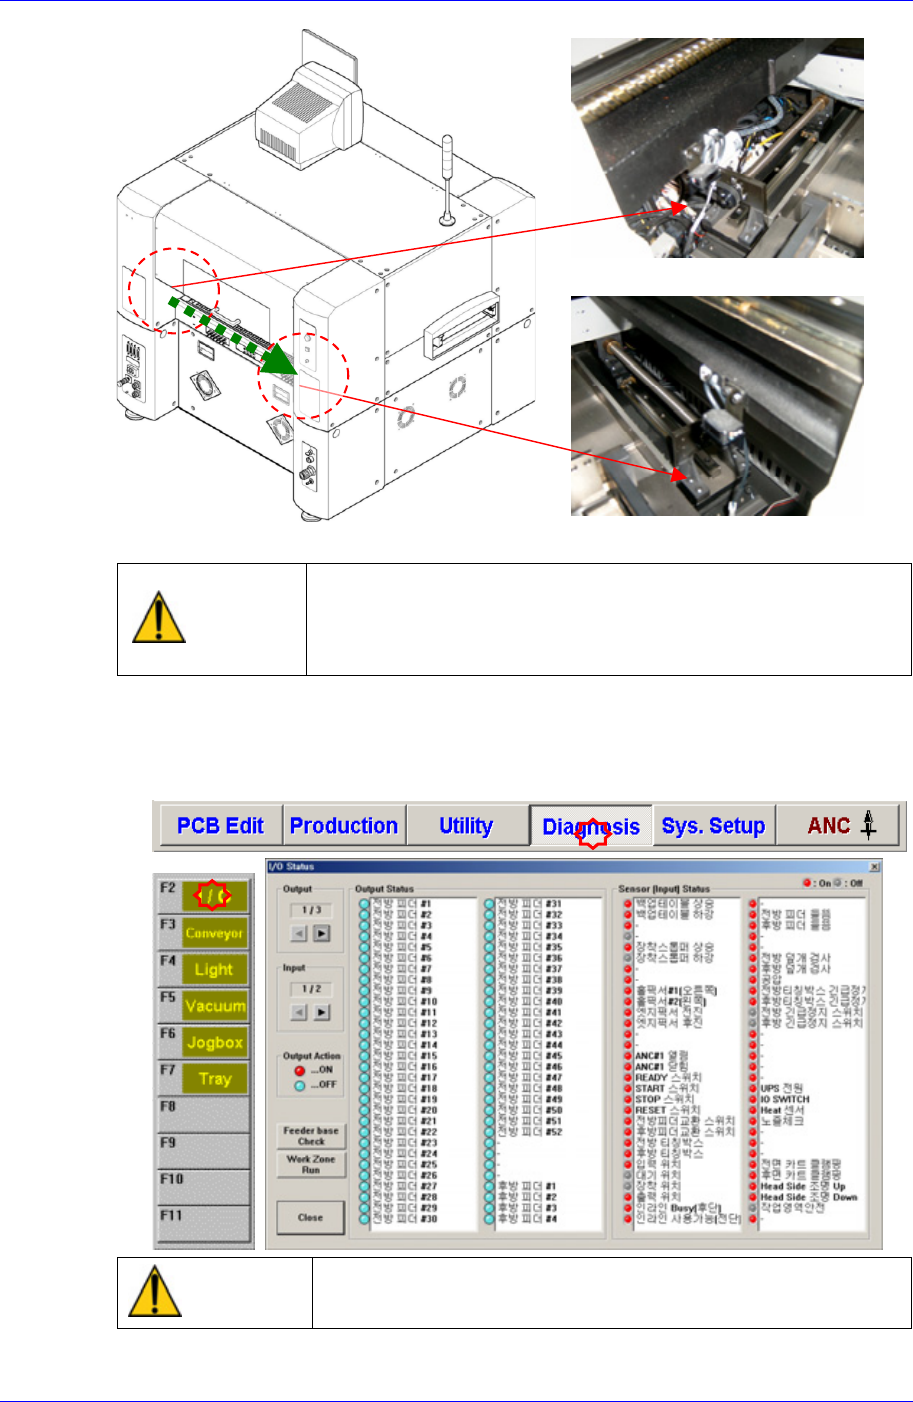
Rear Feeder Unlock Sensor (Ligh
t
emitting section)
Rear Feeder Unlock Sensor (Ligh
t
receiving section)
Caution
If the feeder loose sensor is cancelled arbitrarily, the head
and the feeder might collide as a loose feeder cannot be
sensed.
Do not cancel the feeder loose sensor arbitrarily.
Solution
After selecting the Diagnosis from the main menu tool bar in the MMI screen, select
the I/O command from the sub menu tool bar to check the sensor operation.
Warning
Do not insert any part of your body into the machine during
I/O testing. Otherwise, serious injury may result.
3-18
Weekly Inspection
3-19
If any problems still occur, contact our designated C/S company (STS) and local
agent.
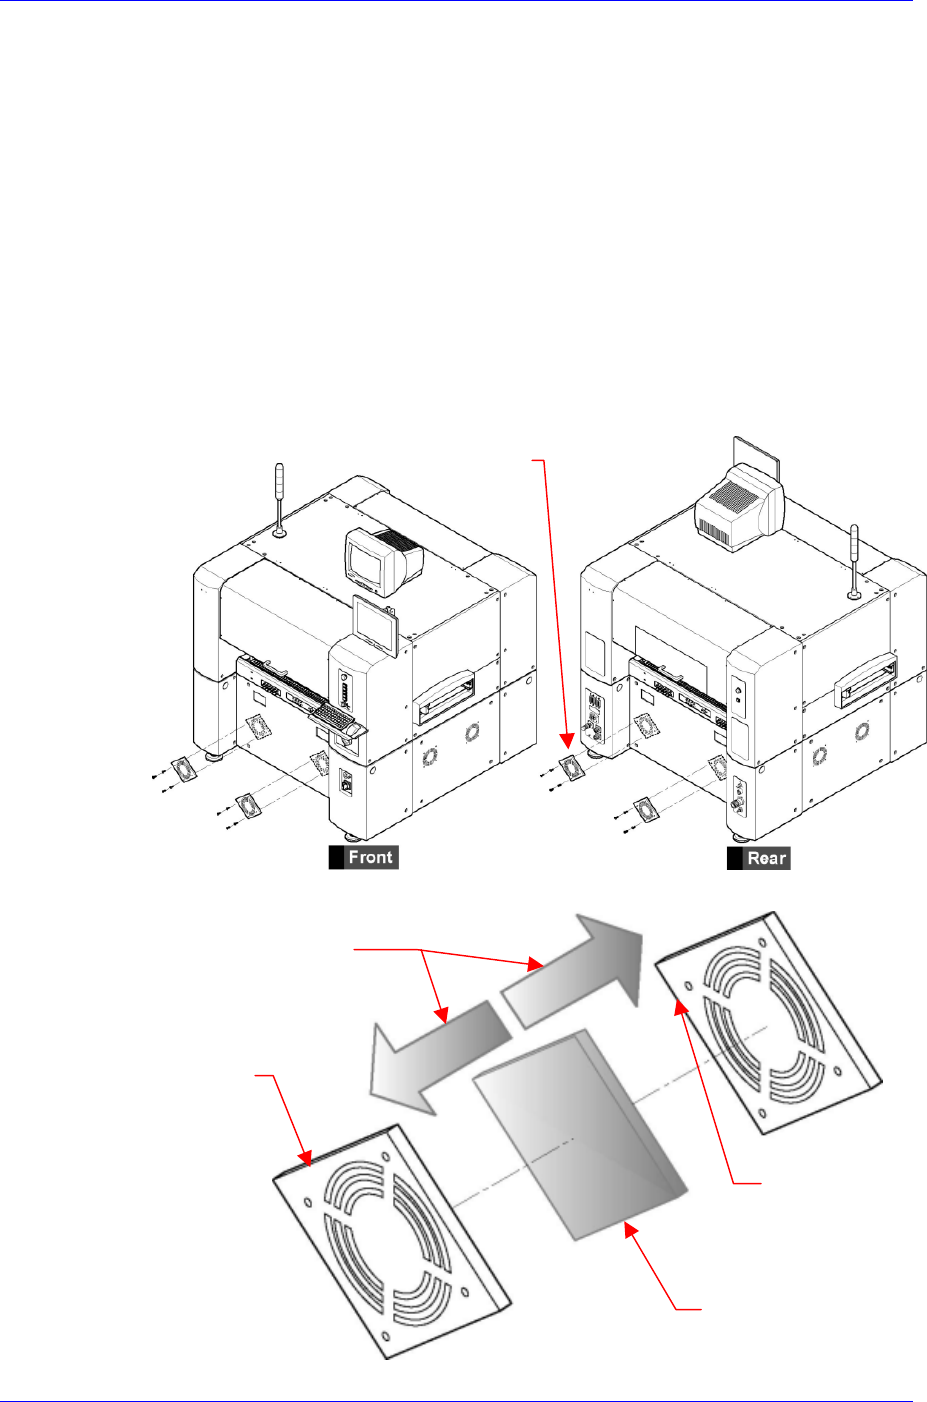
3.1.8. Cover Cooling Fan
Inspection
Check if the filter of the cooling fan installed on the left cover of the machine is
contaminated. Otherwise, It may cause the error of the electronic device.
Solution
Remove the filter covers from the front and rear of the machine using a “+” shaped
screwdriver, separate the filter, and clean with vacuum cleaner.
Remove the covers on the front and rear of the machine by unscrewing four bolts on
each cooling fan filter cover using a “+” shaped screwdriver.
Cooling Fan Filter Cove
r
Open the cooling fan filter cover, remove the filter, and clean it with vacuum cleaner.
The direction to open Cooling
Fan Filter Cover
Cooling Fan Filte
r
Cover Out Side
Cooling Fan Filter
Cover Inner Side
Cooling Fan Filte
r