CP45FVNEO Maintenance Reference (Eng, Ver3).pdf - 第98页
Samsung Component Placer CP45NEO Series Maintenance Guide Wa r n i n g After clicking the “Motor Free” butto n on the teaching box, click the “Stop” button on the front operation panel. Conduct inspection while the motor…
Lubricant Method
4-9
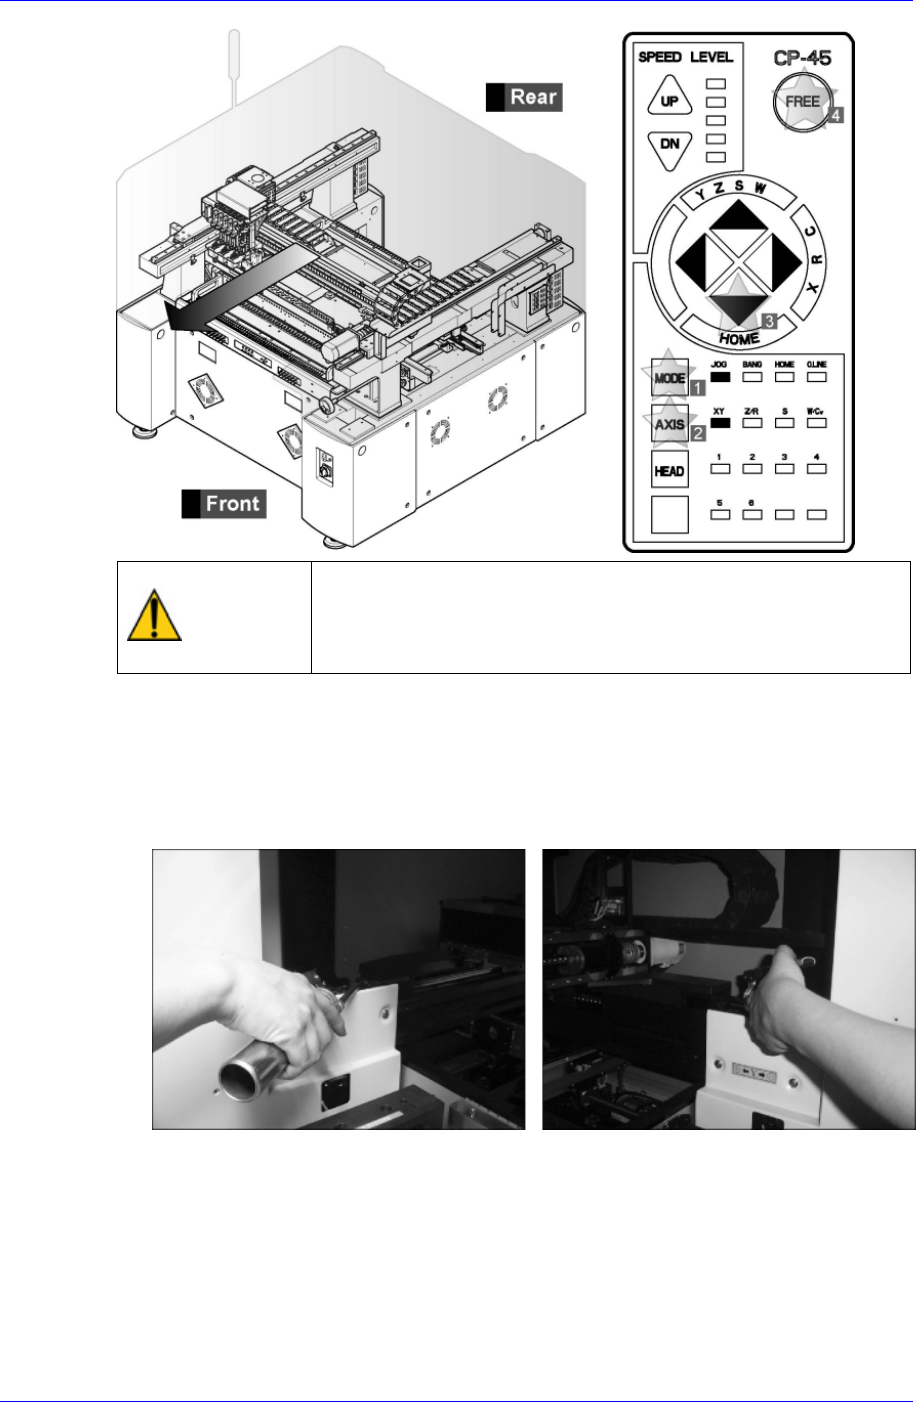
Warning
After clicking the “Motor Free” button on the teaching box,
click the “Stop” button on the front operation panel.
Conduct inspection while the motor power supply is turned
off.
Remove dust and foreign matter from the LM guide rail and ball screw using the
clean cloth in the clean kit supplied by us.
Inject adequate volume of grease through the grease nipple (A) of the Y1 and Y2 LM
guide block on the front of the machine using the grease injection device provided by
us.
Using the teaching box, move the X-axis to the rear, and the Y-axis LM guide block
and grease nipples (B) and (C) to the position adequate for injecting grease.
Samsung Component Placer CP45NEO Series Maintenance Guide
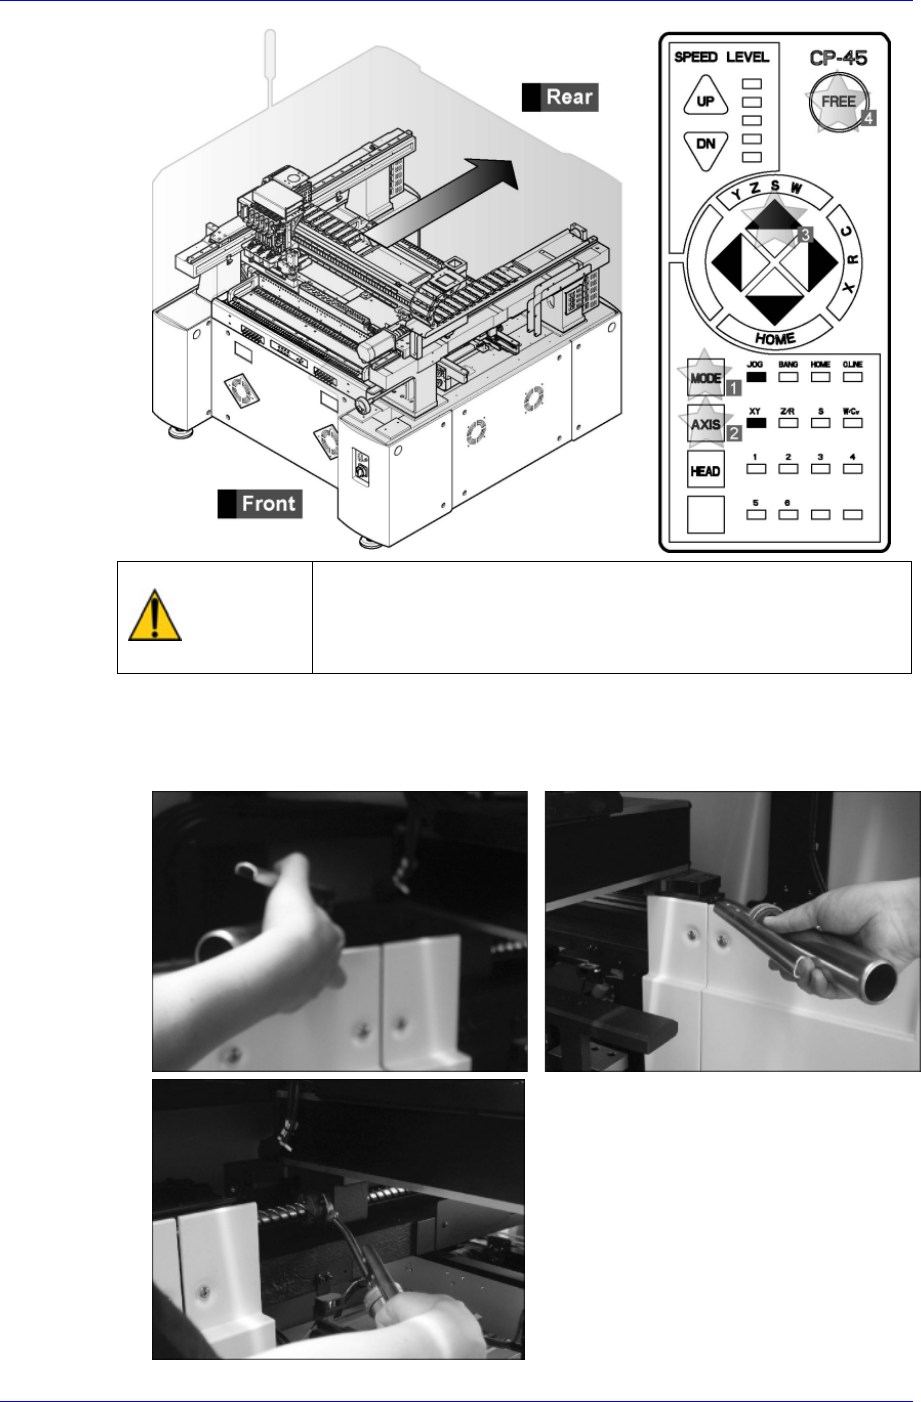
Warning
After clicking the “Motor Free” button on the teaching box,
click the “Stop” button on the front operation panel.
Conduct inspection while the motor power supply is turned
off.
Inject adequate volume of grease through the grease nipple (B) of the Y1 and Y2 LM
guide block on the front of the machine using the grease injection device provided by
us.
4-10
Lubricant Method
4-11
Caution
The designated grease must be applied using the
designated lubricator in the designated manner. Other
lubricating methods are unacceptable.
4.2.3. Conveyor
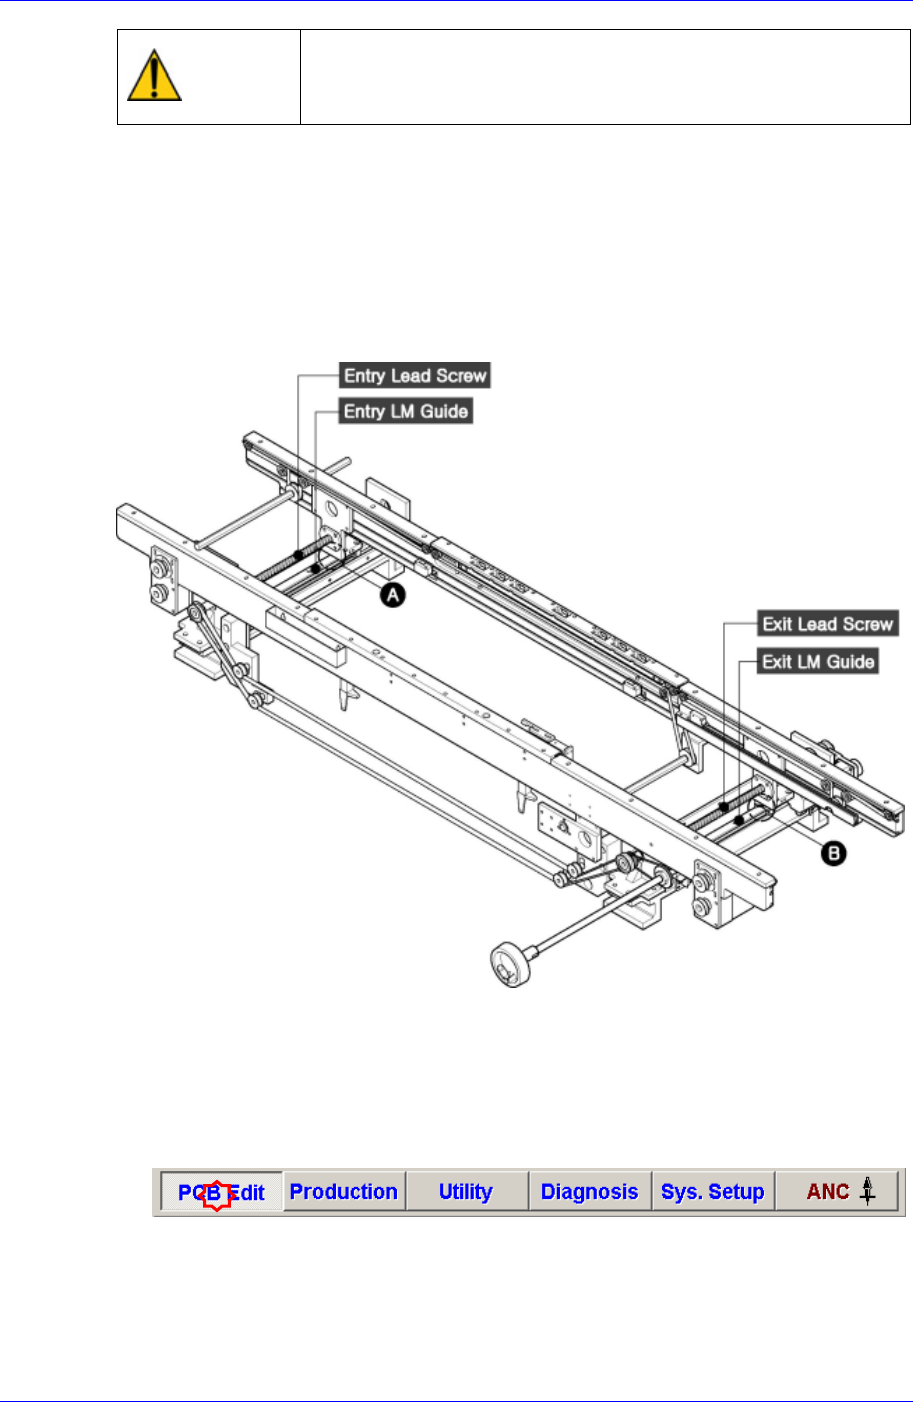
4.2.3.1. Lead Screw and LM Guide for Adjusting Conveyor Width
Inspection
Look for components, dust or discoloration of the lead screw.
Insufficient lubricant on the lead screw can cause difficulty in adjusting the width of
the conveyor. Check the lubricant condition.
Figure 4-4. Lead Screw for Adjusting Conveyor Width
Solution
Click the ‘PCB Edit’ on the menu tool-bar of the main menu on the MMI, click
‘Board’ on the menu tool-bar of the auxiliary menu, enter the maximum size of
400mm in the Y direction of the conveyor in the ‘Y Edit Box’ of ‘7. Board Size’ area,
and click ‘Conv. Width button’. [Large PCB Type maximum size (460mm)]