YRM20_Mainte_E.pdf - 第112页
5. 1-year maintenance 3-45 Chapter 3 Periodic maintenance items 5.2 Inspecting conveyor belt and cleaning guide Inspect the worn status of conv eyor belt. As the worn of belt transferring surface proceeds, a stable board…
5. 1-year maintenance
3-44
Chapter 3 Periodic maintenance items
7
Clean the spline shaft interior.
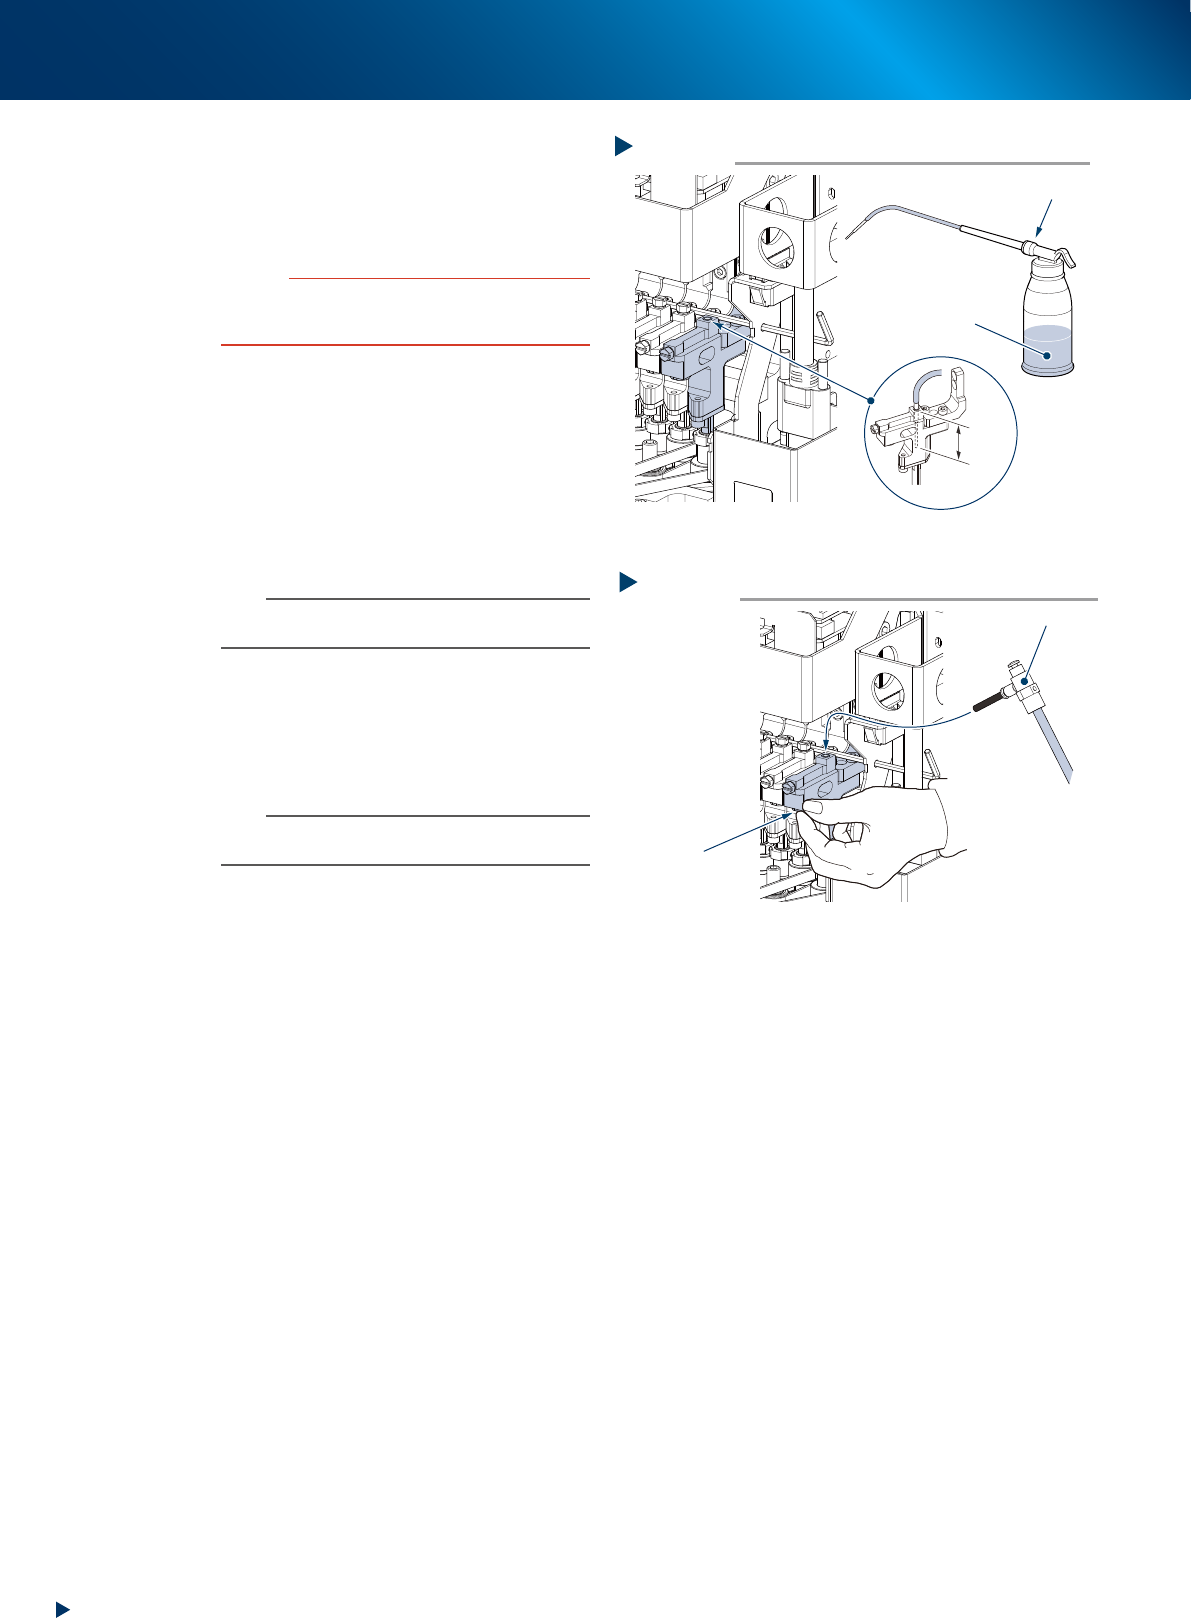
1. Insert the nozzle of the cleaning kit into the
cleaning hole of the spline shaft.
2. Pour ethanol into the spline shaft air path to
clean away dust and grime.
c
CAUTION
Be sure to insert the nozzle tip of the cleaning kit at least
25 mm into the spline shaft. If not inserted enough, ethanol
might flow out on the packings.
8
Blow air into the spline air path.
1. Prepare an air blow tool (option) and
connect it to the air connector located at the
center of the feeder exchange carriage.
2. Close the hole pulled out the air hose to
prevent the air leakage, then air-blow the
spline shaft interior.
3. Check that the soiled ethanol has not been
exhausted from the tip of spline shaft.
n
NOTE
Repeat Steps 6 and 7 until the ethanol flown out from
spline shaft becomes clear.
9
Return the head to its original position.
1. Mount the maintenance bolt, insert the air
hose and attach the nozzle.
2. Pull out the hexagon wrench (or the wire)
fixing the Z-axis.
n
NOTE
When the nozzles are detached by hand, return each
nozzle to the head which it was detached.
Step 7
Ethanol
Cleaning the spline shaft interior
Cleaning kit
25mm
or more
53356-KMX-10
Step 8
Blowing the air path
Close with finger
Air blow tool
53357-KMX-10
5. 1-year maintenance
3-45
Chapter 3 Periodic maintenance items
5.2 Inspecting conveyor belt and cleaning guide
Inspect the worn status of conveyor belt. As the worn of belt transferring surface proceeds, a stable board
transfer is disturbed by slip. The periodical inspection of the worn status is required.
Moreover, small particles of worn parts piled upon the light-receiving surface of conveyor sensor may lead a
mis-detection of board or so. And small particles of worn parts which piled up around the belt guide section
or the outer periphery of pulley may make the belt stuck.
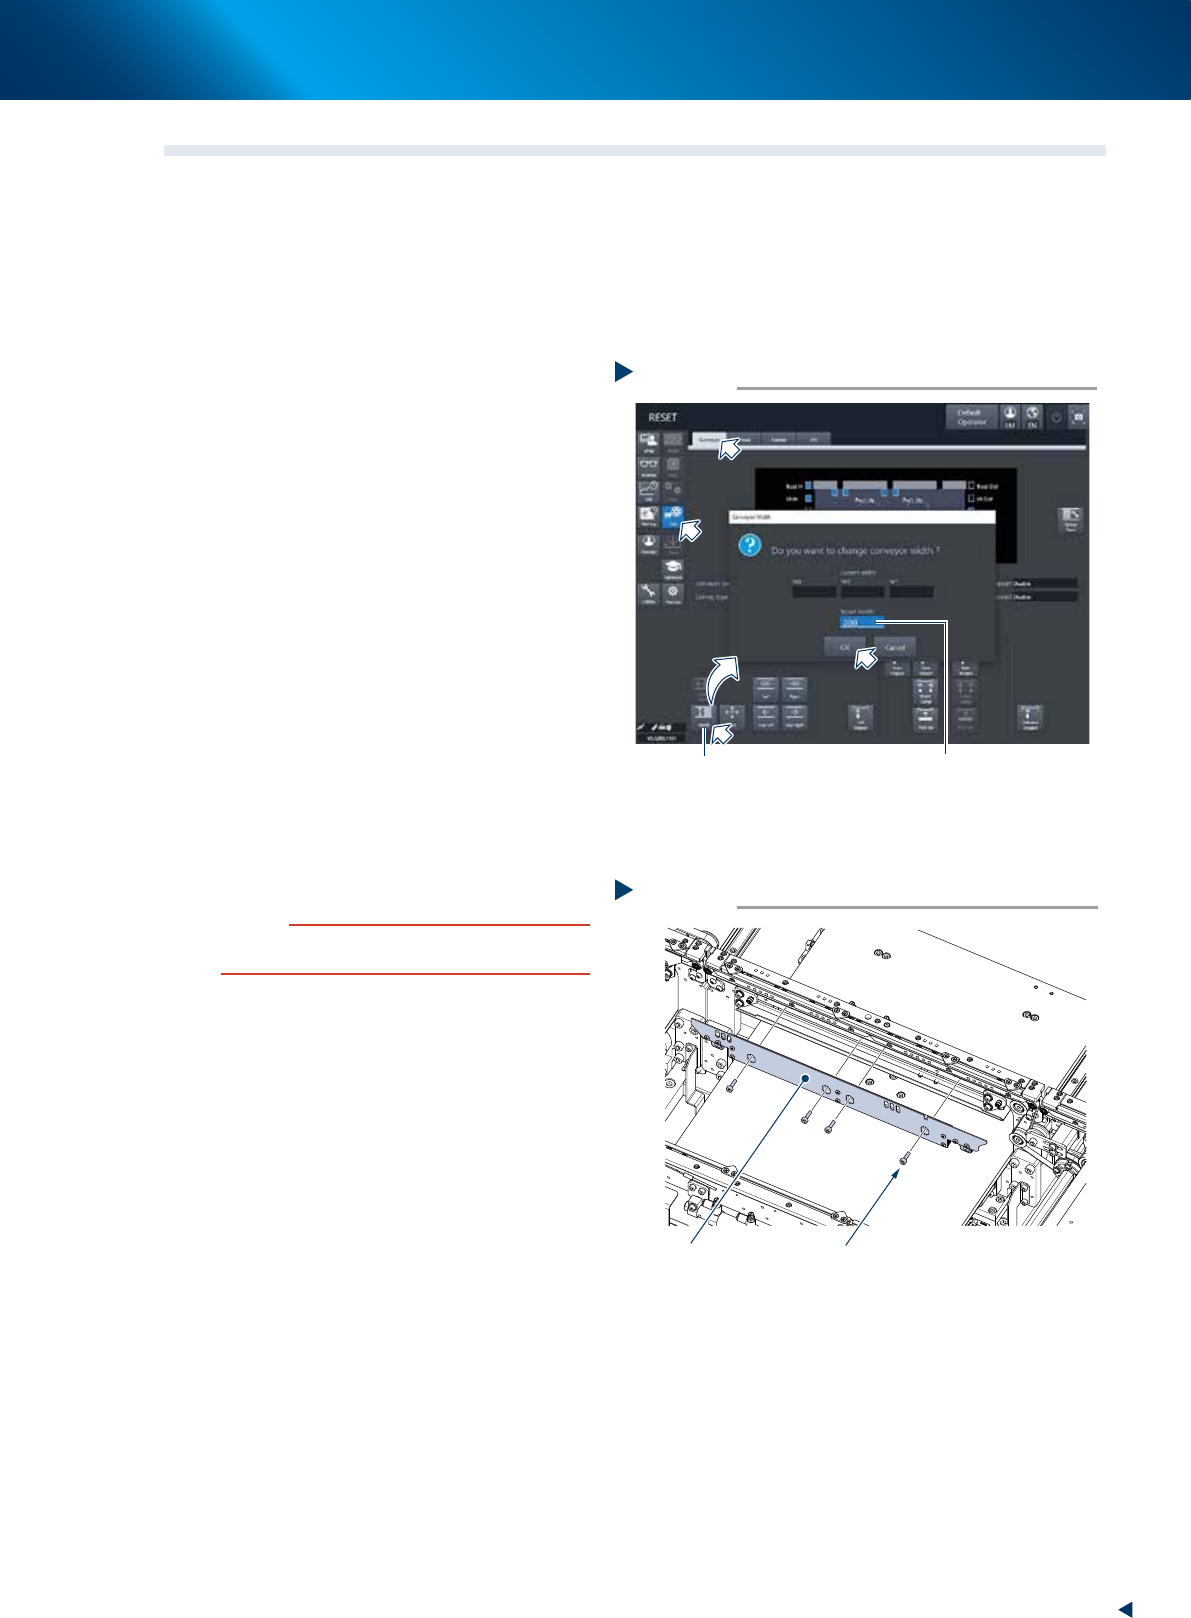
1
Set the conveyor to convenient width to
work.
1. Press the [Conveyor Width] button to display
the Conveyor width changing screen.
2. Enter the width value which allow a hexagon
wrench to insert (approx. 200mm) in the
"Changed conveyor width" field and press
the [OK] button. Then the conveyor width is
changed to the specified.
2
Prepare for work.
e
1. Remove all items sensitive to magnetic fields
such as wristwatches and magnetic ID cards.
2. Press the emergency stop button and detach
the feeder exchange carriage.
3. Open the machine safety cover and detach
the upper cover.
4. Place a square cloth on the push up plate.
3
Remove 4 mounting bolts of board
clamp plate (shown at right) using a
hexagon wrench (3), and detach the
board clamp plate.
c
CAUTION
Do not remove the bolts other than the 4 bolts illustrated
at right.
Removing the board clamp plate
Step 3
Board clamp plate Mounting bolt
53363-KMX-00
Changing the conveyor width
Step 1
[Width] button
Enter the value
which allows to insert a tool
(Approx. 200mm)
54304-KMX-00
5. 1-year maintenance
3-46
Chapter 3 Periodic maintenance items
4
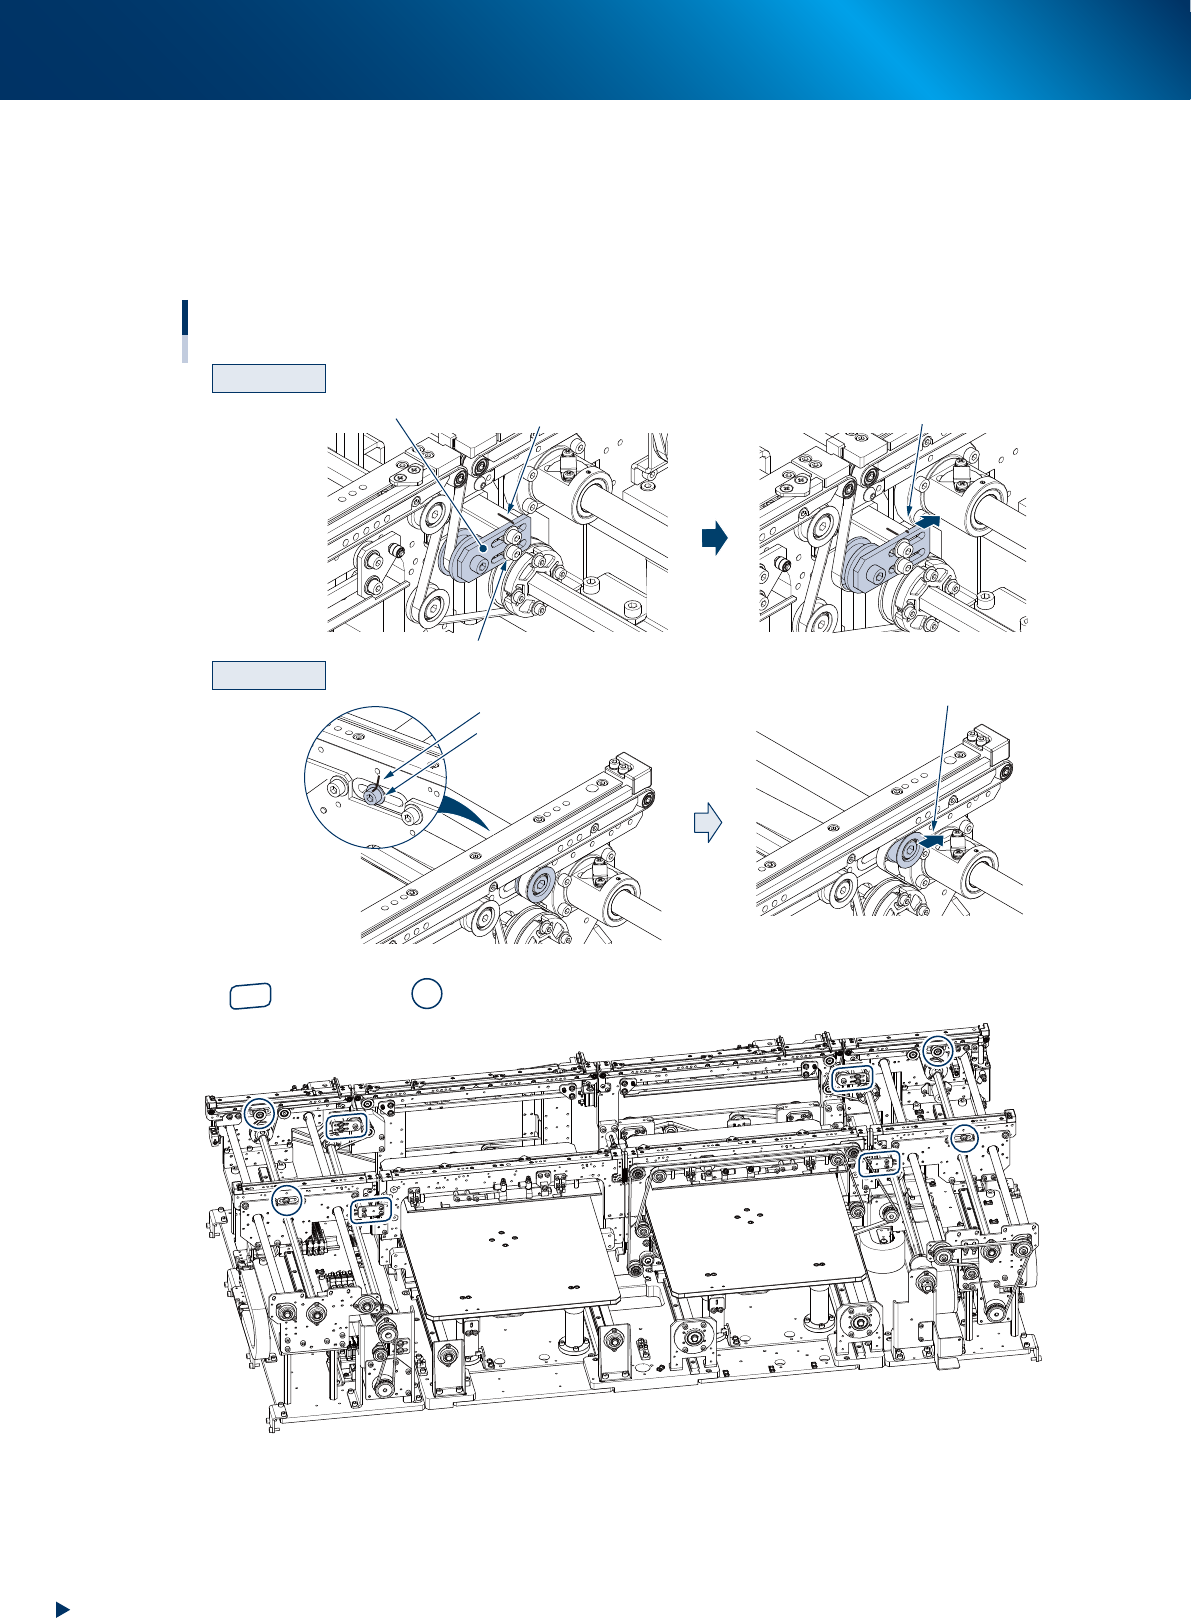
Loosen the belt.
1. Before loosening the conveyor belt, mark the current position of pulley bracket (CV2, CV3) and pulley
mounting bolt (CV1, CV4) using a permanent marker.
2. Loosen the pulley bracket (hereinafter referred to as "bracket") using a hexagon wrench (3) and slide it to far
end of long hole (loosening direction).
For CV1 and CV4, loosen the pulley mounting bolt using a hexagon wrench (5) and (4), and slide the pulley.
CV2 and CV3
CV1 and CV4
Machine rear
CV4
CV1
CV3
CV2
Loosening the conveyor belt
Slide the bracket
Loosen the mounting bolt
Loosen the mounting bolt
Mark with a permanent marker
Bracket
Slide the pulley
Mark with a permanent marker
Entrance
Exit
: Bracket position : Pulley position
53364-KMX-00
5
Detach the belt from the conveyor by removing it from the pulley and board
guide.