YRM20_Mainte_E.pdf - 第127页
6. 2-year maintenance 3-60 Chapter 3 Periodic maintenance items 6.2 RM head unit 6.2.1 Cleaning/lubricating scissors gear T his section describes cleaning and lubricating the rotating axis (N-axis) in the rotary unit and…
6. 2-year maintenance
3-59
Chapter 3 Periodic maintenance items
6. 2-year maintenance
This section describes 2-year maintenance items.
6.1 HM head unit
6.1.1 Replacement of ejector bit
The ejector bit deteriorates its function during a long time usage. Its replacement to the new ejector bit is
recommended in every 2 years to keep the machine performance, even it depends the operating condition.
Here describes the replacement method.
c
CAUTION
A bit is non-reusable. The new one should be prepared for replacement.
1
Prepare for work.
1. Remove all items sensitive to magnetic fields
such as wristwatches and magnetic ID card.
e
2. Press the emergency stop button and detach
the feeder exchange carriage.
3. Open the machine safety cover and place a
square cloth right below the target head
unit.
2
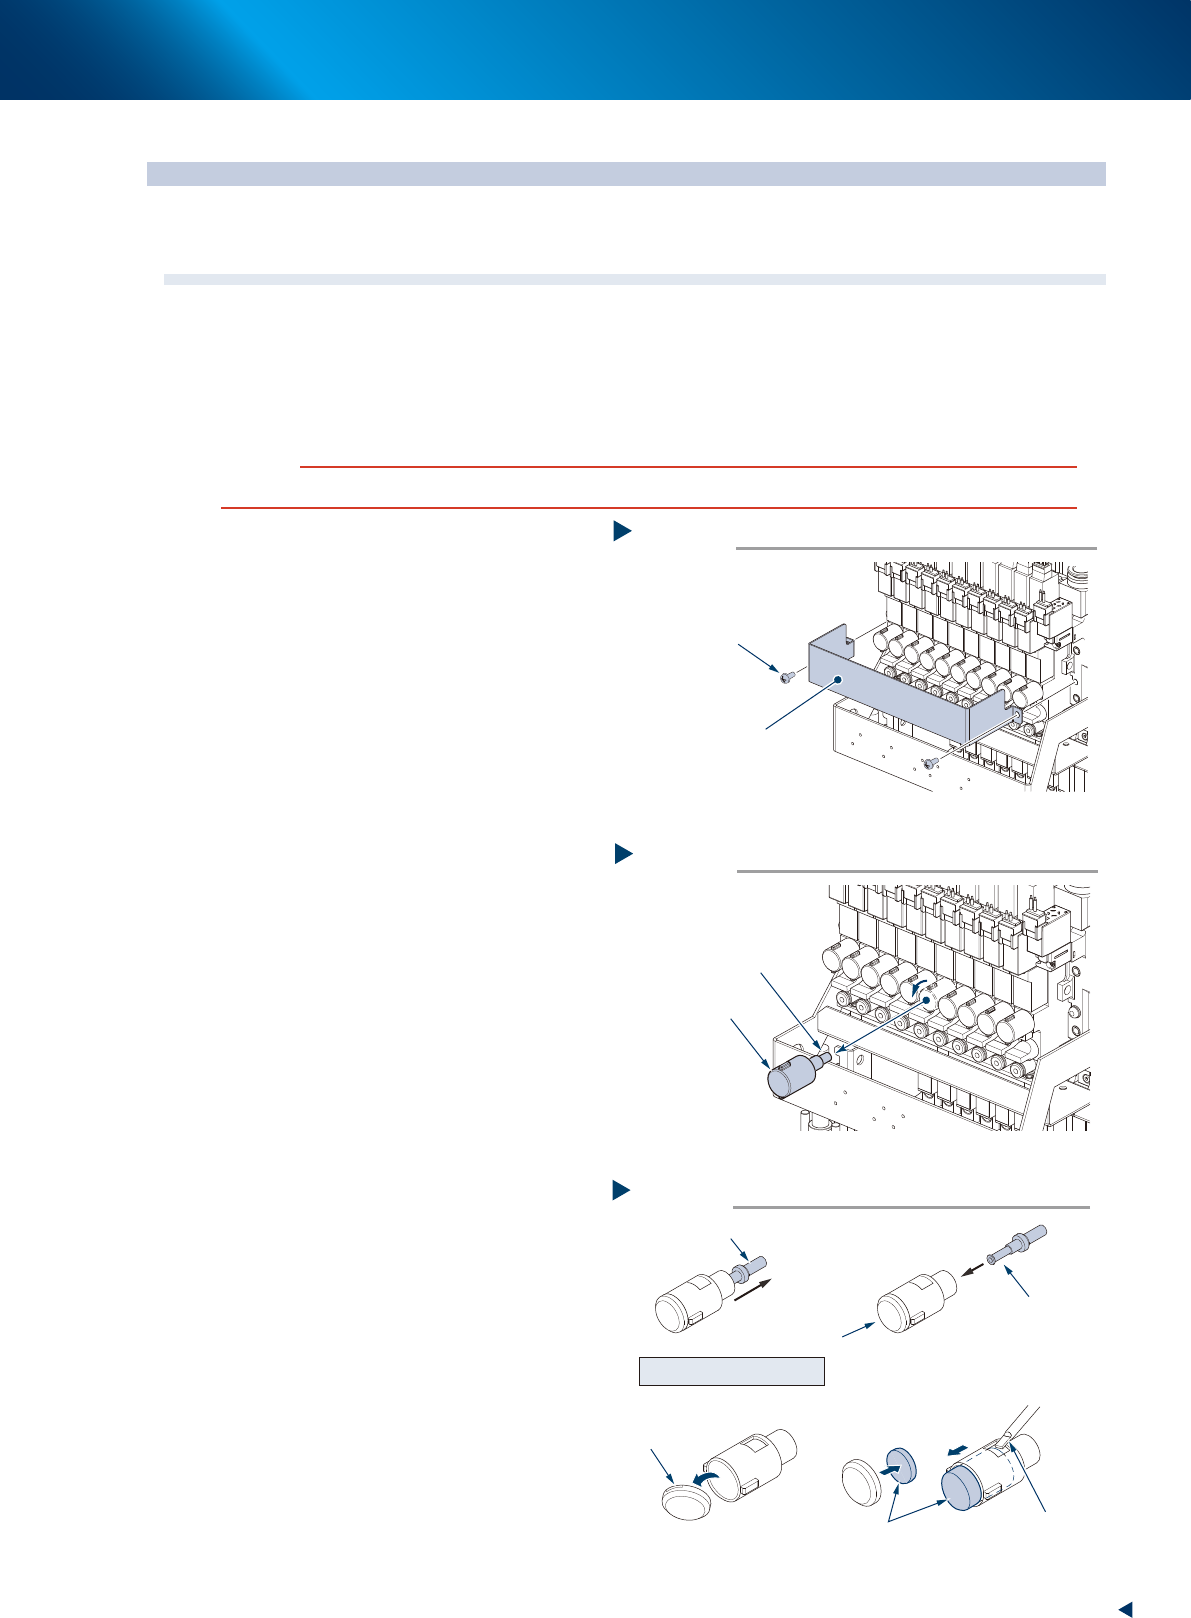
Remove the current plate using Phillips
screwdriver.
3
Remove the bit cap by rotating it to left
by hand.
4
Pull out the bit to be replaced from bit
cap and insert the new bit.
When the muffler is soiled, replace it
also.
5
Attach the bit to head.
1. Insert the bit cap to its original position and
rotate to right to fix.
2. Attach the current plate to its original
position using Phillips screwdriver.
3. Retrieve the square cloth.
Removing the current plate
Step 2
Current plate
Mounting screw (Phillips)
53394-KMX-00
Removing the bit
Step 3
Bit cap
Bit
53395-KMX-00
Replacing the bit
Step 4
Bit to be replaced
New bit
Precision flat-head
screwdriver
Notch
Remove the tip of bit cap
Tip of bit cap
Replace the muffler
Muffler
Soiled muffler
53396-KMX-00
6. 2-year maintenance
3-60
Chapter 3 Periodic maintenance items
6.2 RM head unit
6.2.1 Cleaning/lubricating scissors gear
This section describes cleaning and lubricating the rotating axis (N-axis) in the rotary unit and the gears in
the rotating axis (R-axis) of each head all housed in the RS head.
1
Prepare for work.
e
1. Remove all items sensitive to magnetic fields
such as wristwatches and magnetic ID cards.
2. Press the emergency stop button and then
detach the feeder exchange carriage.
3. Open the machine safety cover and move
the head unit to a convenient position for
maintenance work.
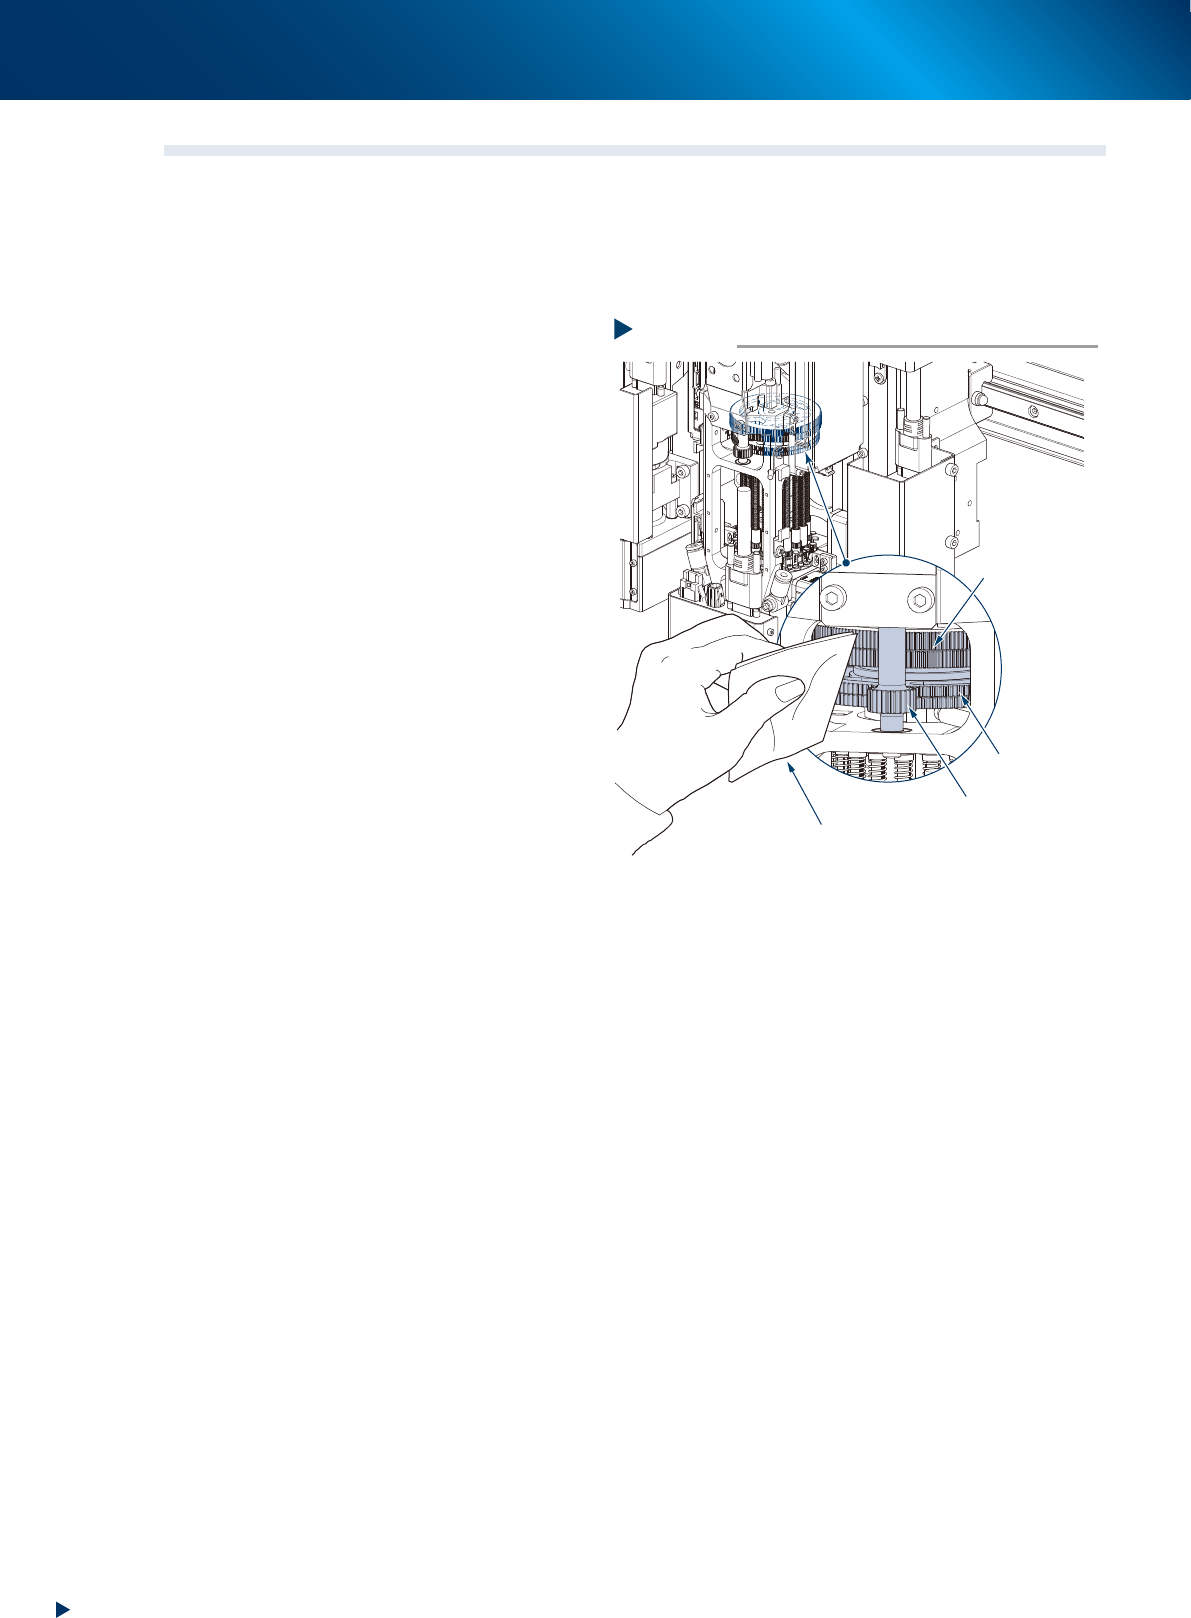
2
Wipe off the dirt from the 2 scissors
gear and their engaging gear (R-axis and
N-axis) rotating them by hand and using
a lint-free cloth or the similar.
3
Apply grease.
1. Apply the prescribed grease (LG2) to the
scissors gears of N-axis and R-axis, using
your finger or a lint-free cloth.
2. Rotate the R-axis gear by hand to spread
grease to the whole gear.
4
Wipe off excess grease using a lint-free
cloth.
Step 2
Engaging gear (R-axis)
Cleaning the scissors gear
Scissors gear
(N-axis)
Scissors gear
(R-axis)
Lint-free cloth
53391-KMX-00
6. 2-year maintenance
3-61
Chapter 3 Periodic maintenance items
6.2.2
Cleaning/lubricating the upper part of the nozzle shaft
The procedure for cleaning and lubricating the upper part of RS head nozzle shafts is described below.
The dedicated oil (KMB-M3855-00X) is required to lubricate the upper part of nozzle shafts.
1
Prepare for work.
e
1. Remove all items sensitive to magnetic fields
such as wristwatches and magnetic ID cards.
2. Press the emergency stop button and detach
the feeder exchange carriage.
3. Open the machine safety cover and move
the head unit to a convenient position for
maintenance work.
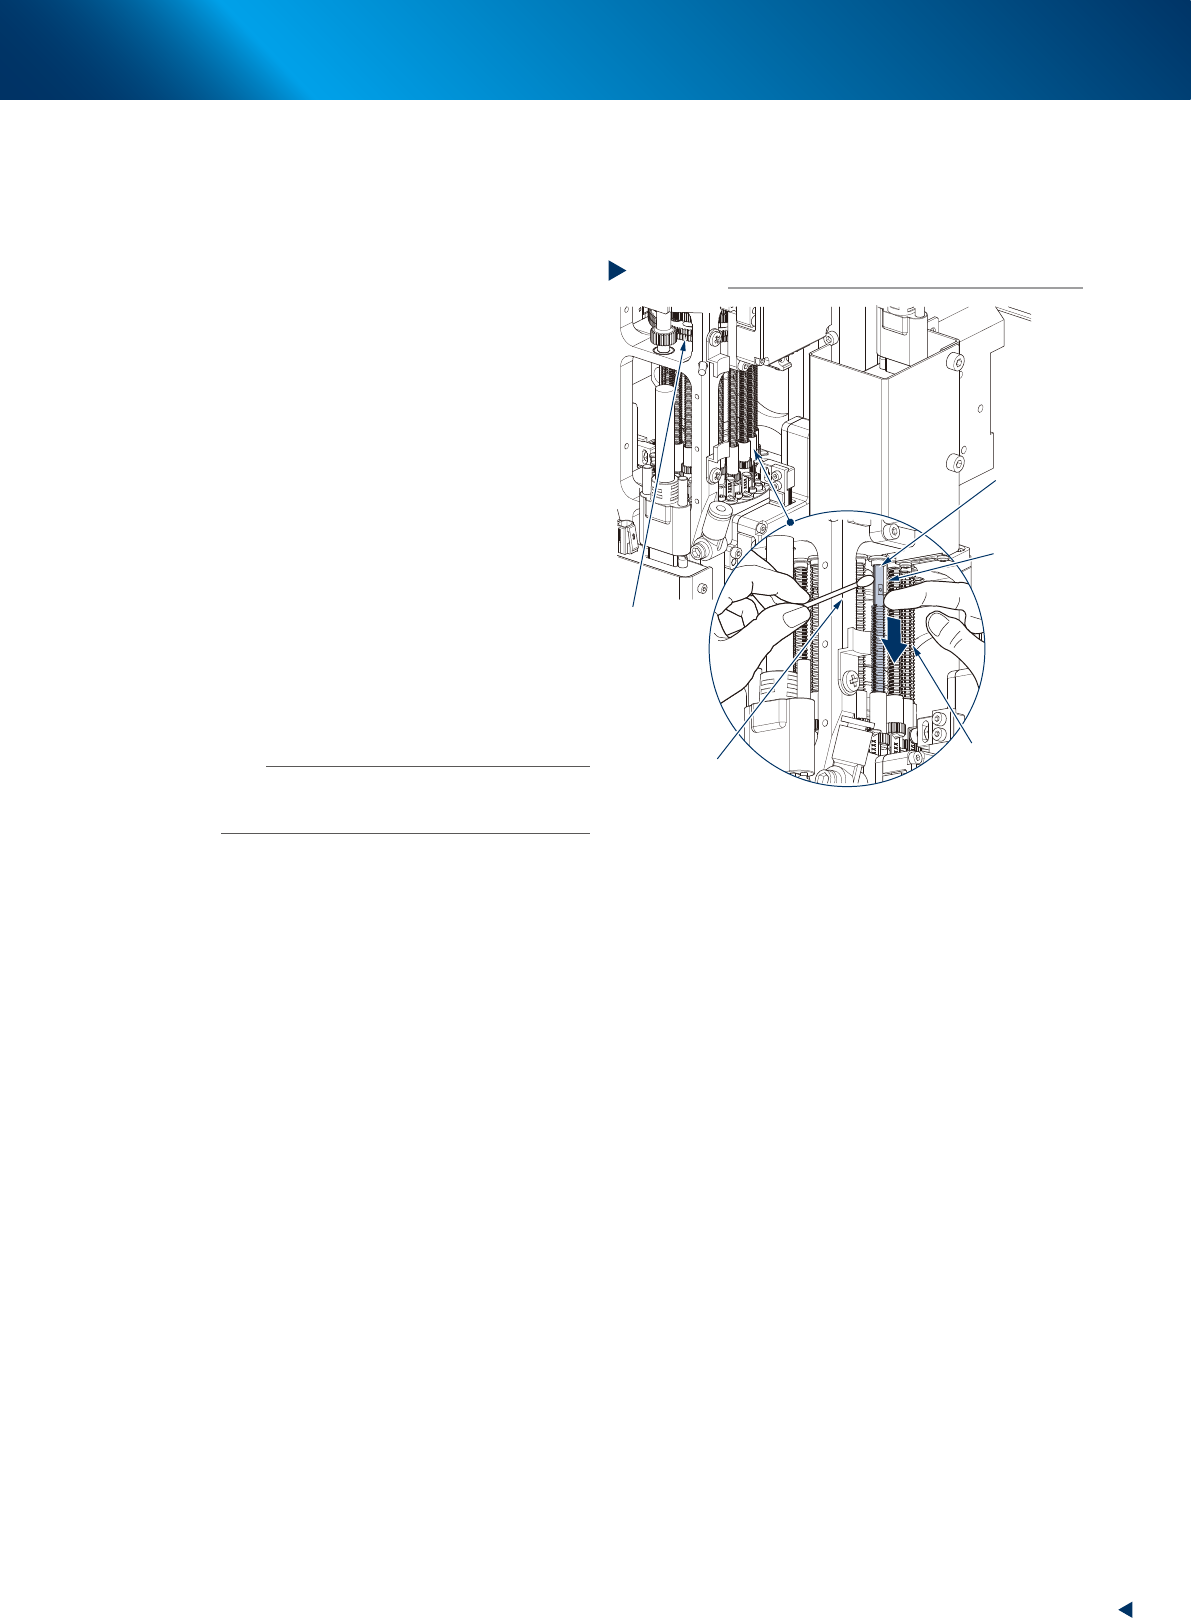
2
Cleaning the upper part of the shaft.
1. Use your finger to press down the nozzle
shaft spring of the head to be cleaned.
2. Wipe away dust or dirt from the upper part
of the nozzle shaft using a cotton swab.
3
Apply the specified oil (oil for upper
part of shaft) using a cotton swab
dampened in the oil, on the upper part
of the shaft as a thin uniform coat in
approximately 10 mm range.
n
Note
Id the target head spring locates where being difcult to
lower, see "Lowering RM head/nozzle shafts" above and
turn the N-axis gear to rotate the rotary.
4
Clean and lubricate the other shafts by
the procedure of Step 2 and 3.
Cleaning/lubricating the upper part of nozzle shafts
Step2-3
N-axis gear
Cotton swab
Press down the spring
with finger
Nozzle shaft
Approx. 10mm
53393-KMX-00