YRM20_Mainte_E.pdf - 第60页
1. Checking the nozzle 2-9 Chapter 2 Daily maintenance items 1.1.1 V acuum level when nozzle is open T he table below shows the v acuum level measured when eac h nozzle is open. T he values might differ slightly dependin…
1. Checking the nozzle
2-8
Chapter 2 Daily maintenance items
►
RM head
Here describes the procedure of Type 8106A as example.
n
NOTE
The "Vacuum level upon opening nozzle" which is judgment standard of clogged nozzle differs per each nozzle type. See
the next section "1.1.1 Vacuum level when nozzle is open" for the vacuum level upon opening other than Type 8104A.
1
Attach the nozzle.
e
►
Without nozzle station
1. Press the emergency stop button and open
the machine safety cover.
2. Attach Type 8106A nozzles to all head.
►
Nozzle station equipped
1. Press the [Nozzle Change] button and
attach the Type8106A nozzle to all head.
2. Perform "Table select" and attach the
nozzles to both A and B heads.
2
Release the emergencu stop.
n
NOTE
The checking of negative pressure of RM head should be
performed under the condition of turning the servo ON.
3
Reset values of vacuum level by
pressing the [Reset] button at lower
right of [Unit] - [Head] screen. Reset
every tables by selecting tables
n
NOTE
Perform checking negative pressure of RM head one by
one.
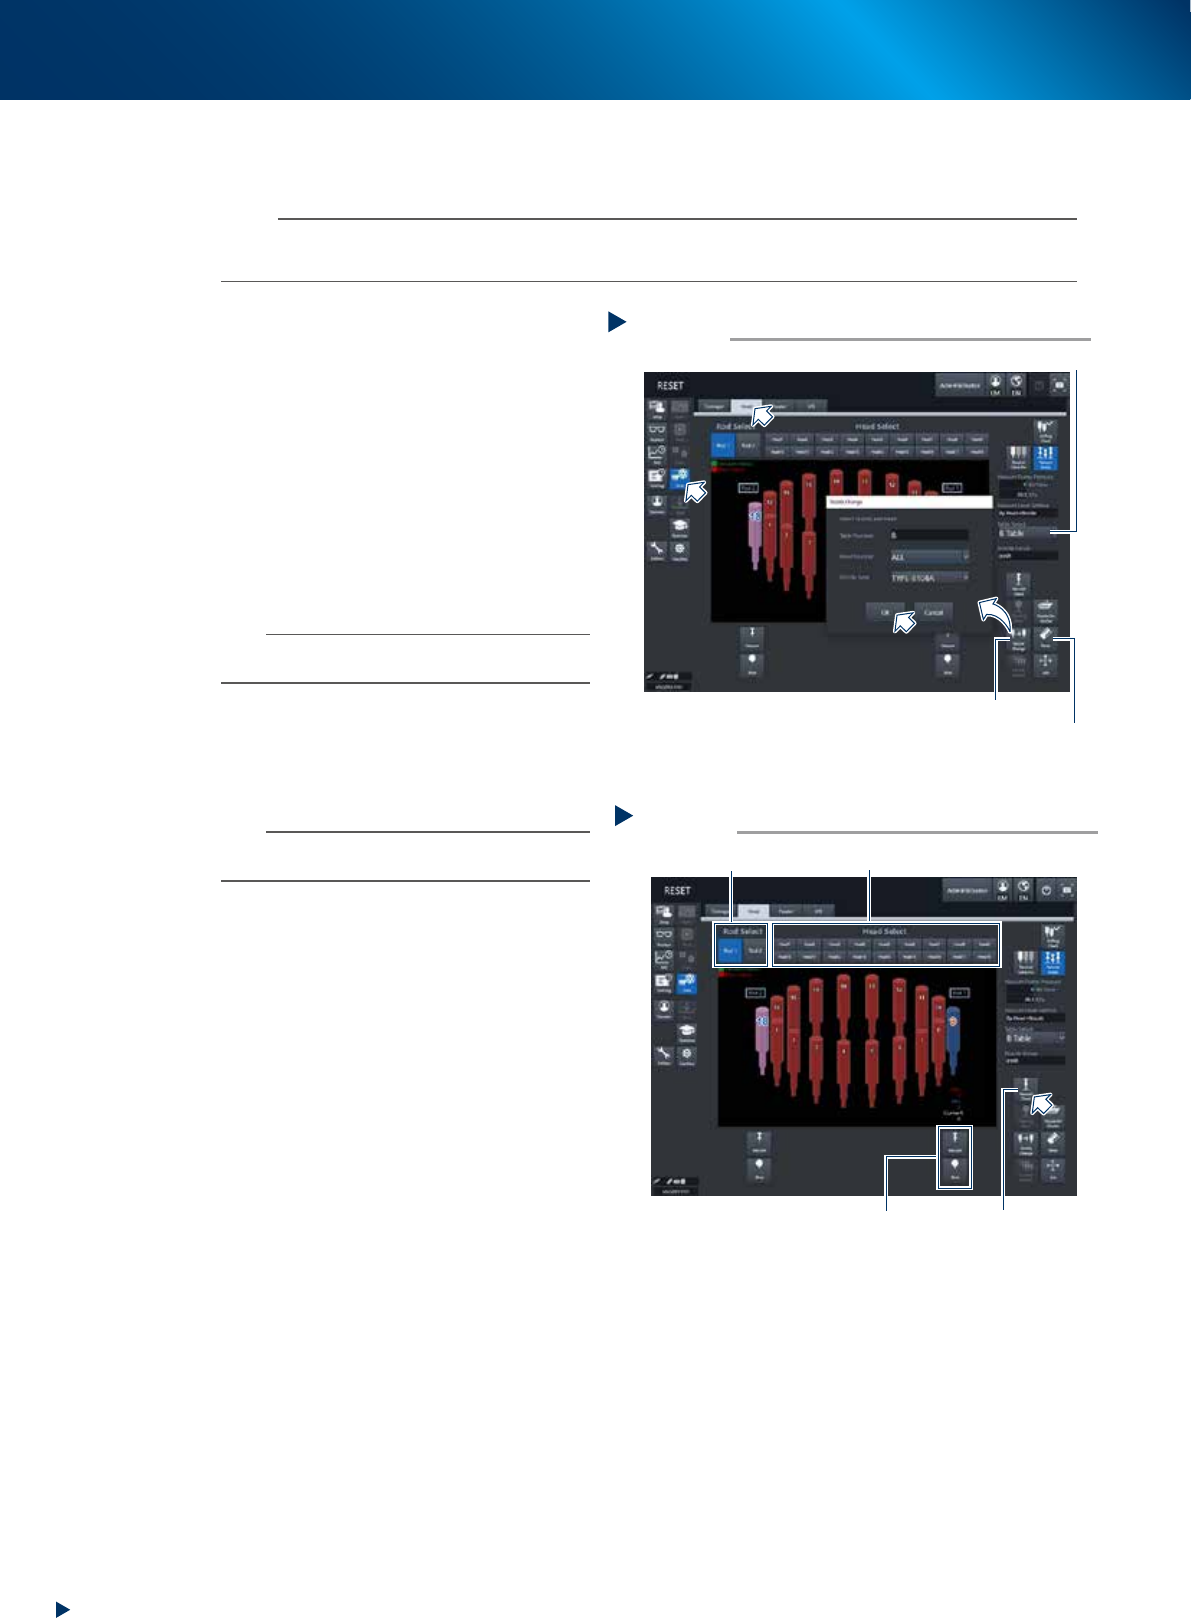
4
Generate negative pressure.
1. Select any rod (Valve-axis : Spool up-and-
down axis) by pressing the [Rod Select]
button. Each of rod 1 or 2 can be selected.
2. Select head by pressing the [Head Select]
button, then the selected head moves to
beneath the selected rod by rotating the
rotary of head unit.
3. Pressing the [Vacuum Check] button activates
the vacuum pump to generate negative
pressure at selected head.
Press the [Vacuum Check] button again after
raising the value in 5 to 10 seconds to turn
the vacuum pump OFF.
5
Read off the value.
1. Check the "Maximum" value displayed in
red at vacuum status. When the value is 160
or less means normal.
2. When the value is more than 160, the
nozzle hole may not be cleaned, or the filter
may be clogging.
See "1.2 Nozzle cleaning" and "2.4 RM
head unit" of Chapter 3 and clean the
nozzle or replace the filter
Step 1~3
Attaching nozzle/ resetting value
[Nozzle Change] button
“Table Select” Drop-down box
[Reset] button
54205-KMX-00
Generating negative pressure at RM head
Step 4
[Vacuum Check] button
[Rod Select] button [Head Select] button
Vacuum/Blow
54204-KMX-00

1. Checking the nozzle
2-9
Chapter 2 Daily maintenance items
1.1.1 Vacuum level when nozzle is open
The table below shows the vacuum level measured when each nozzle is open.
The values might differ slightly depending on the air source and operating conditions. Use these values for
reference during maintenance.
►
Standard vacuum level when nozzle is open
Head type
Nozzle
Standard value when nozzle is open
RM head HM head
Type 8104A 200 to 240 150 to 190
Type 8105A 180 to 220 130 to 170
Type 8106A 120 to 160 60 to 100
Type 8107A 110 to 150 40 to 80
Type 8108A 110 to 150 40 to 80
Type 8004H – 150 to 190
Type 8006H – 60 to 110
Without nozzle 140 or less 30 to 60
1. Checking the nozzle
2-10
Chapter 2 Daily maintenance items
1.2 Checking the nozzles visually
To visually check nozzles, remove each nozzle from the head or from the nozzle station.
█
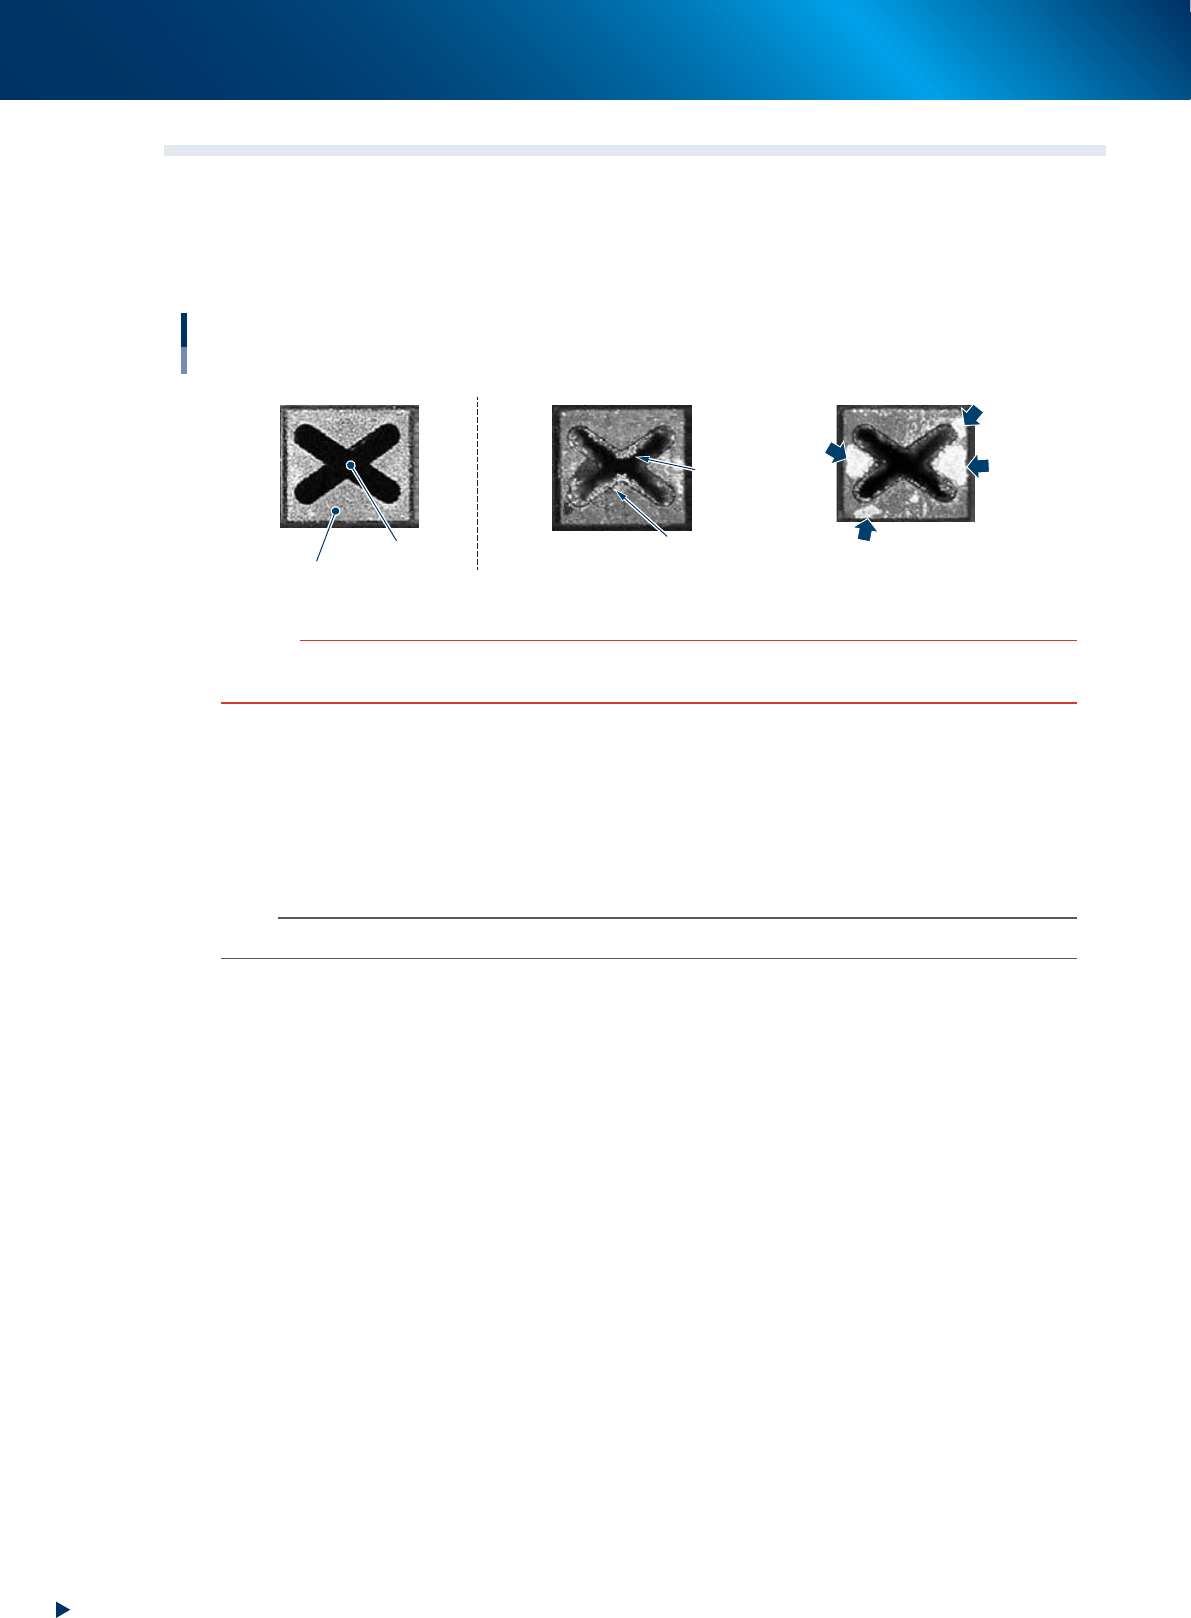
Points to check detached nozzles
Check the removed nozzles with a magnifying glass or similar tool.
Checking the nozzle condition
Nozzle tip
Solder is adhering to nozzle hole.
Solder
Solder
Solder is adhering to
flat surface of nozzle tip.
Nozzle hole
◆ Normal condition ◆ Fault: Nozzle is clogged
◆ Fault: Shiny material on tip
53200-KMX-00
c
CAUTION
When the fault nozzle is found, clean the nozzle hole and nozzle tip.
See the "1.2 Nozzle cleaning" of Chapter 3 for cleaning method.
►
Checking nozzles by detaching them from the head individually
1. Move the head to a position where the nozzles can be easily detached, then detach each nozzle
manually.
2. After checking and cleaning the nozzle, reattach the nozzle to the head while making sure the head
position and the nozzle's direction are correct.
n
NOTE
As for a simple method, check the nozzle attached to the head with a mirror or similar tool.