YRM20_Mainte_E.pdf - 第64页
2. Cleaning the feeder plate and related 2-13 Chapter 2 Daily maintenance items ► Cleaning clamp unit 1. Detach the feeder exchange carriage from the machine. 2. Using a feeder plate cleaning brush, sweep out the chips a…
2. Cleaning the feeder plate and related
2-12
Chapter 2 Daily maintenance items
2. Cleaning the feeder plate and related
Chips or foreign object falling on the feeder plate or the clamp unit may be bitten in between the parts
during feeder setting and cause the pickup position to deviate. Also, the chips or foreign object which
are bitten upon attaching the feeder exchange carriage may cause the communication error or similar.
Periodic inspection and cleaning are recommended to prevent this problem.
►
Cleaning with vacuum cleaner
1. Detach the Feeder exchange carriage from the machine.
2. Use a household vacuum cleaner, etc. to suction the dust and small debris.
►
Cleaning with vacuum assembly
1. Connect the optional vacuum assembly (KHY-M88V0-A0X) to the air connectors on the front of the
feeder exchange carriage.
2. Suction the dust and small debris using a vacuum assembly.
Air connector
Vacuum assembly
Air hose of
vacuum assembly
Connecting a vacuum assembly
To the air connector on the feeder exchange carriage
53201-KMX-00
►
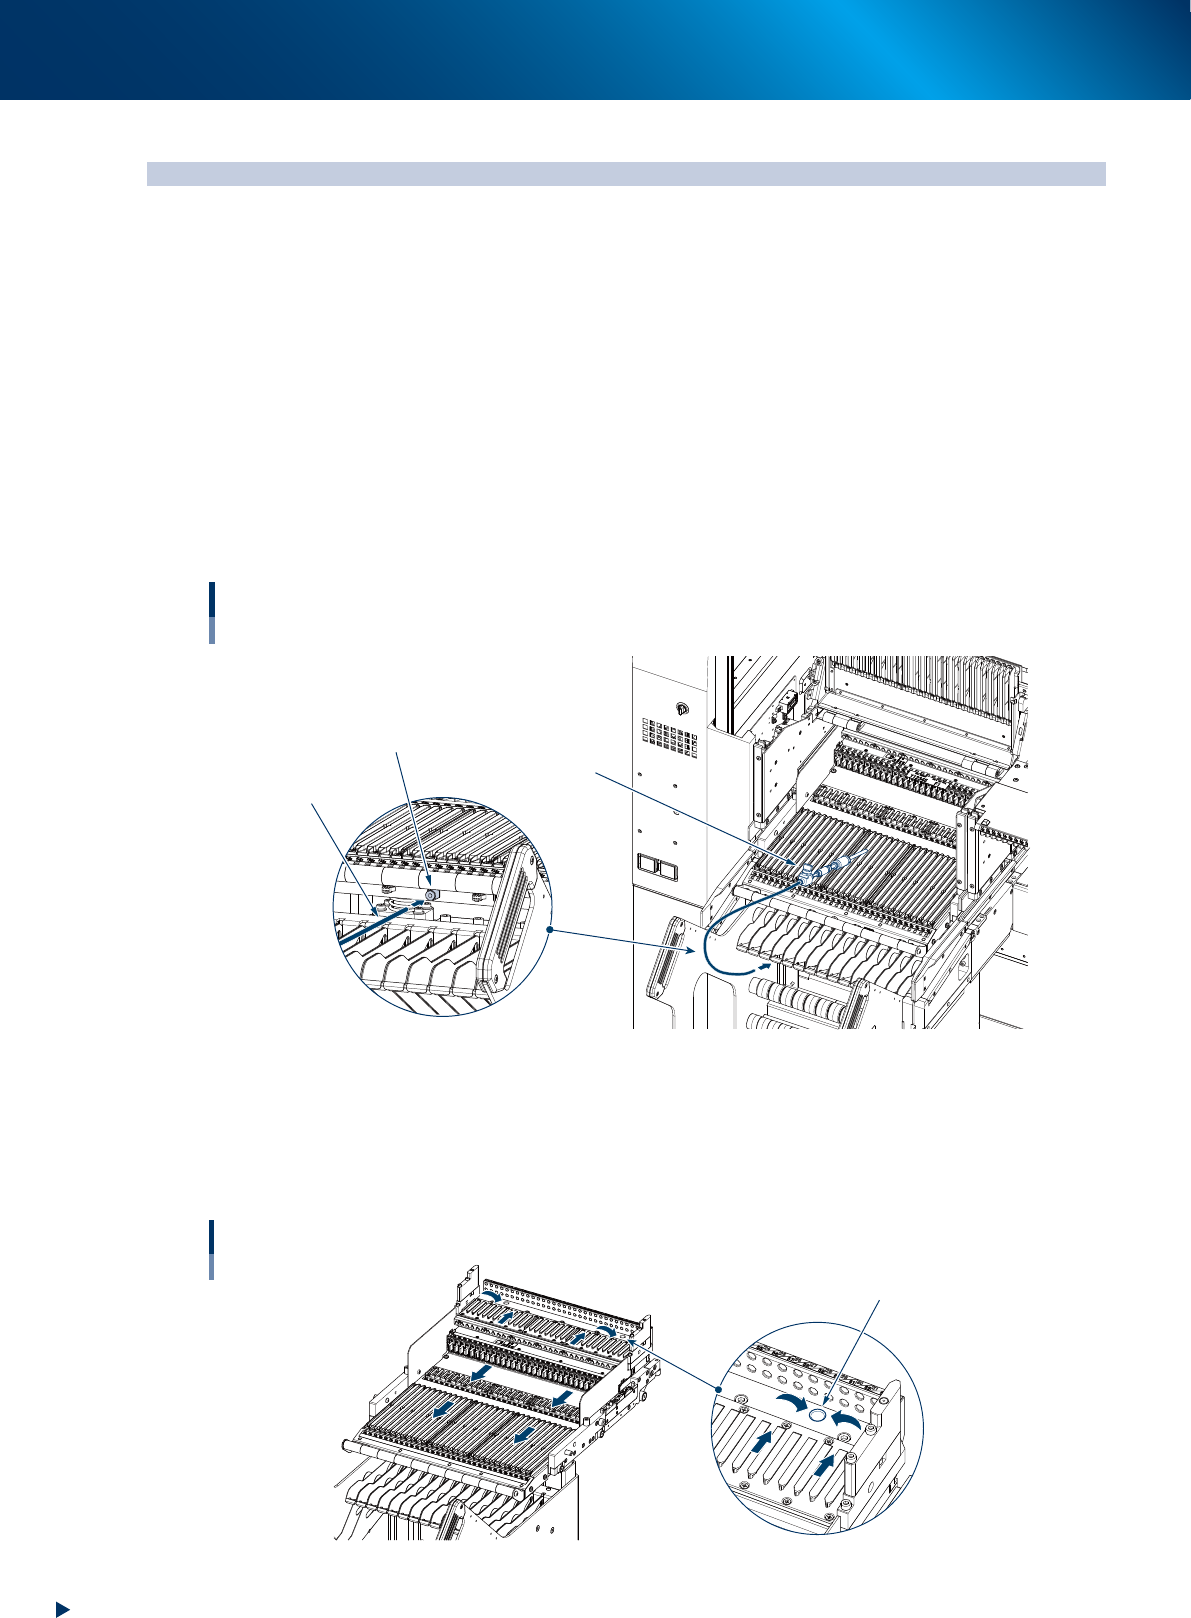
Cleaning with feeder plate cleaning brush
1. Detach the feeder exchange carriage from the machine.
2. Using a feeder plate cleaning brush, sweep out the chips and debris in the direction of arrow shown
in the figure below.
Cleaning feeder plate
Dusting hole
53202-KMX-00
2. Cleaning the feeder plate and related
2-13
Chapter 2 Daily maintenance items
►
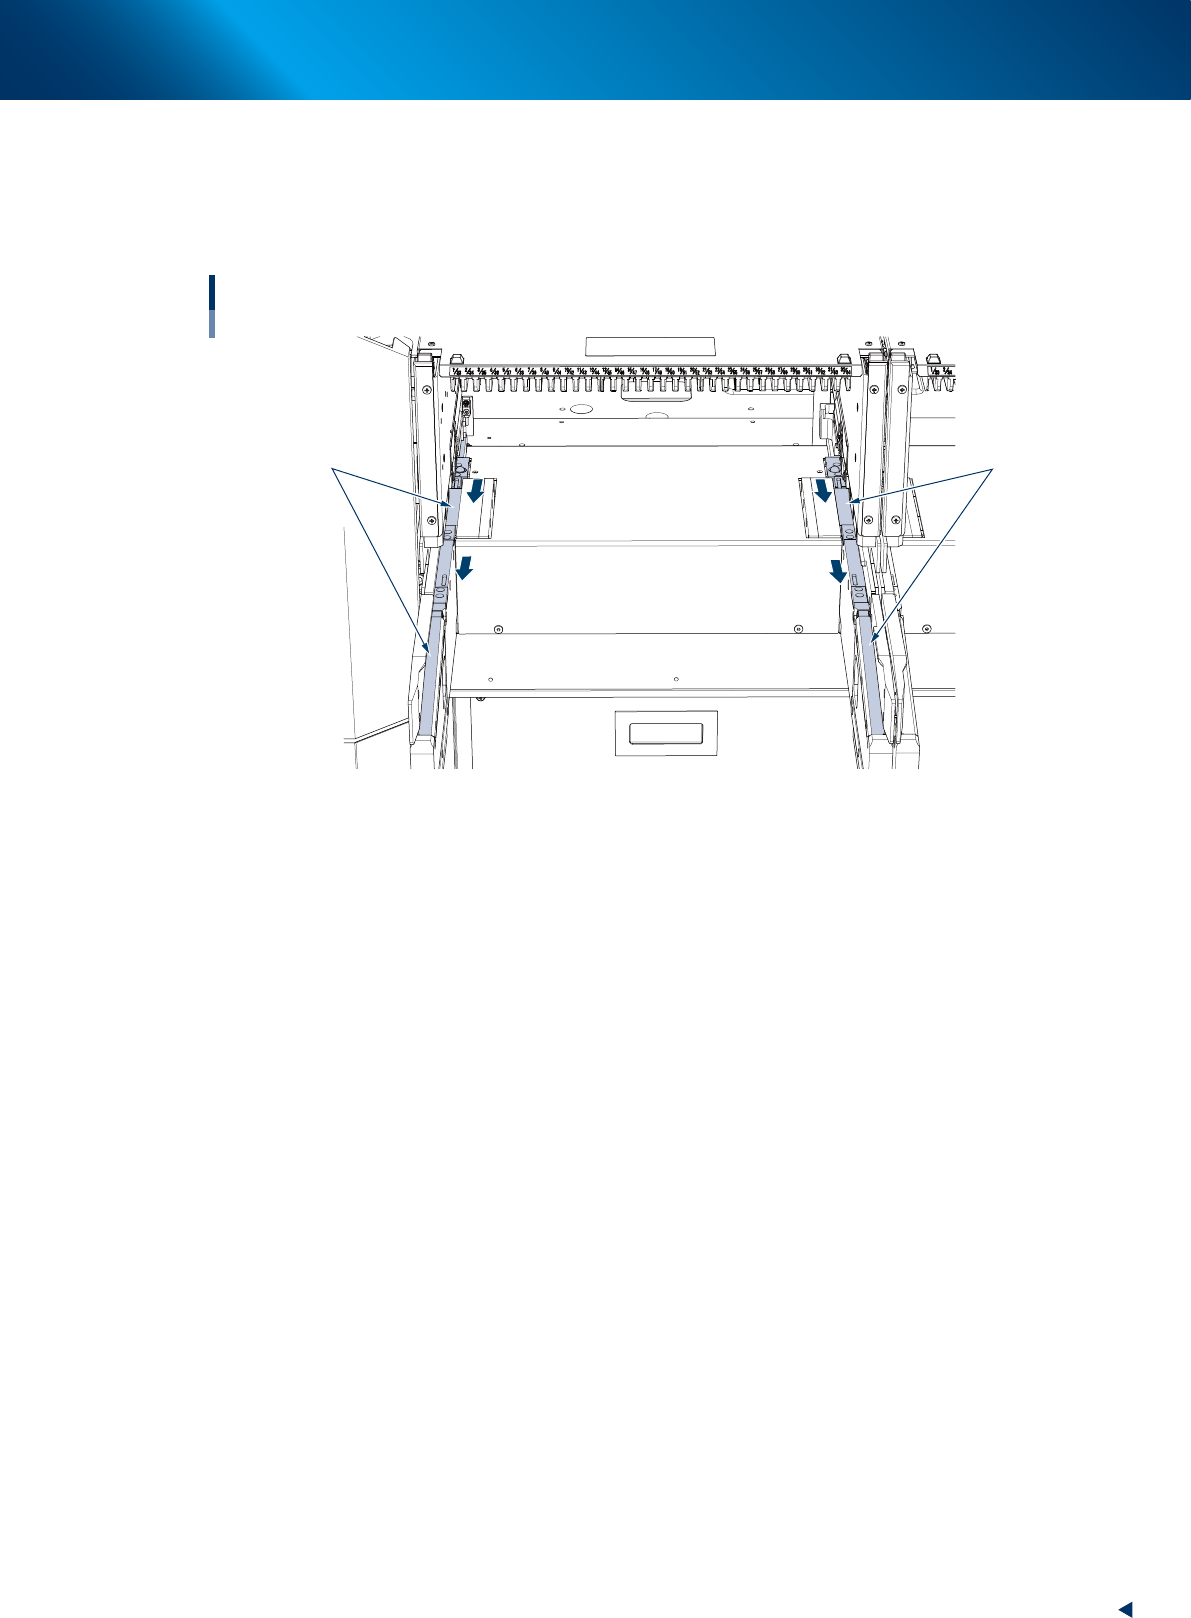
Cleaning clamp unit
1. Detach the feeder exchange carriage from the machine.
2. Using a feeder plate cleaning brush, sweep out the chips and debris in the direction of arrow shown
in the figure below.
Cleaning clamp unit
Target of cleaning
Target of cleaning
53203-KMX-00
3. Checking tape cutter sharpness
2-14
Chapter 2 Daily maintenance items
3. Checking tape cutter sharpness
The used carrier tape after mounting components are automatically cut by tape cutters in the machine
and collected in empty tape box. If a tape cutter loses the sharpness, carrier tapes that are not cut may
clog in the path to the empty tape box. Check tape cutter sharpness everyday.
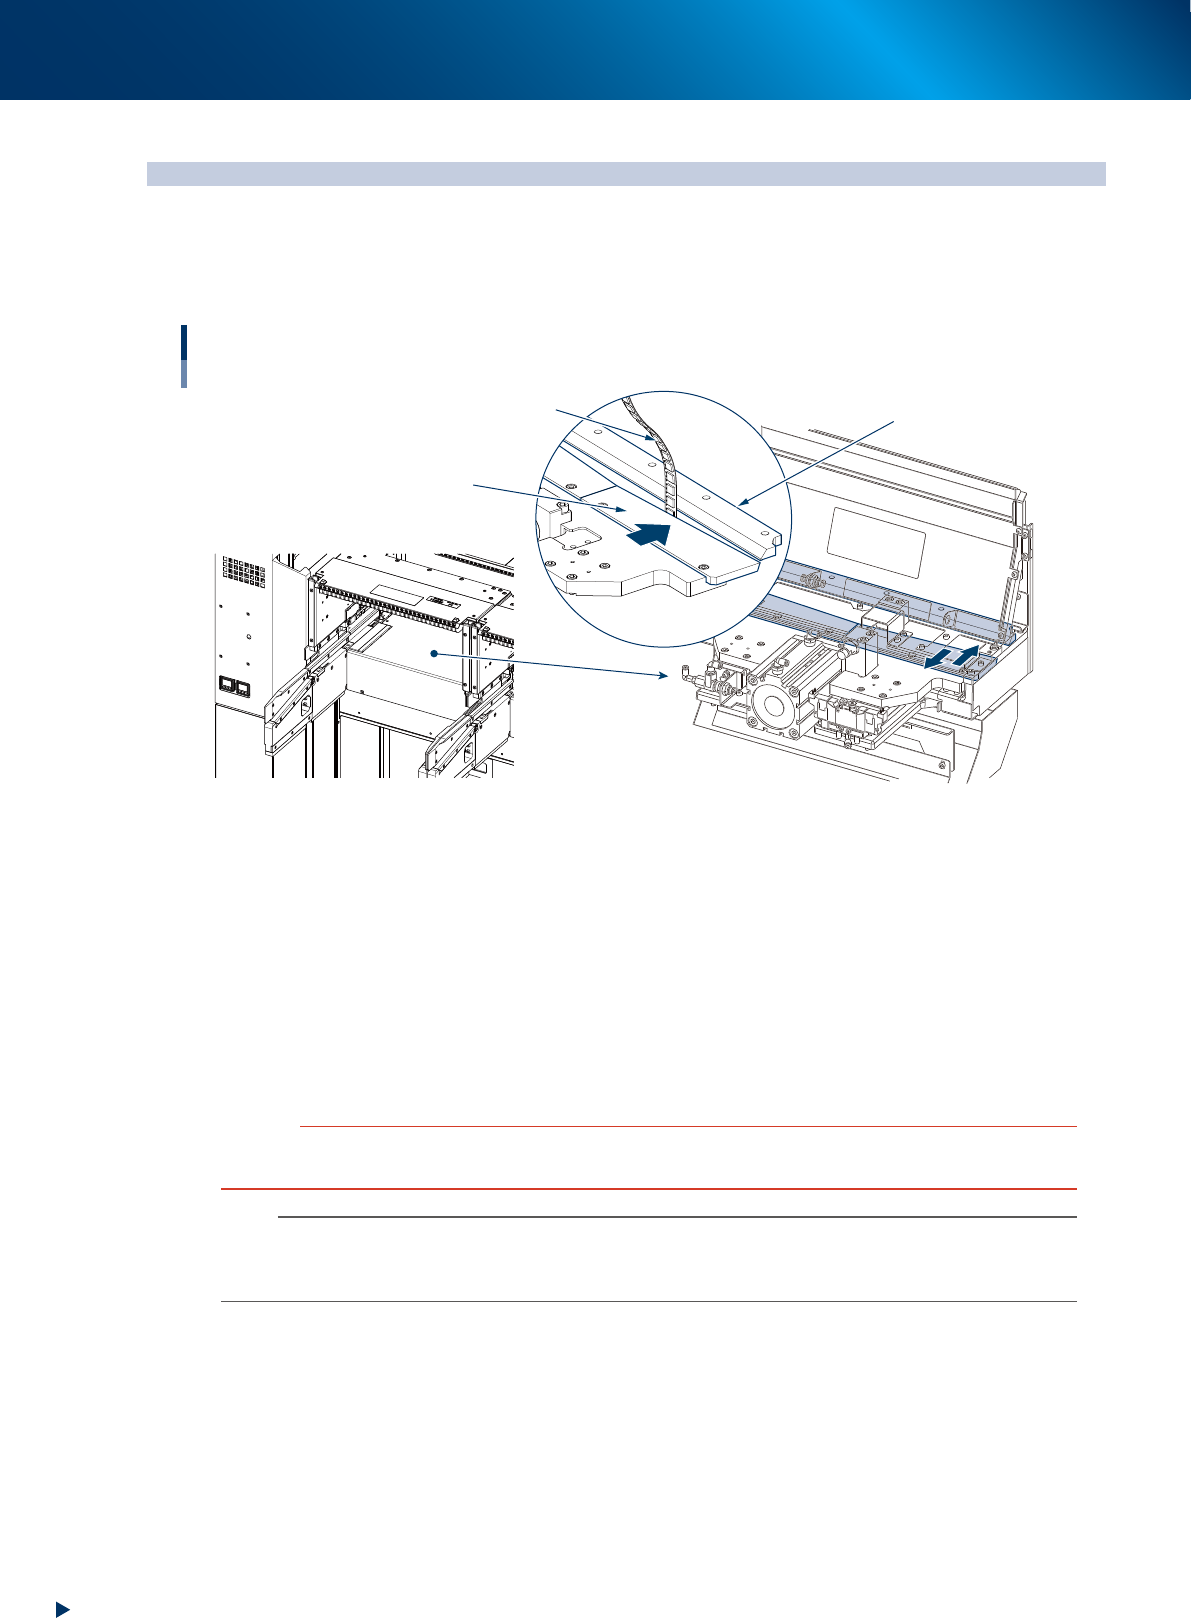
Checking tape cutter sharpness
Lower tape cutters (movable side)
Upper tape cutters (fixed side)
Tape
53205-KMX-00
►
3 checkpoints of daily tape cutter inspection
•
The sound when cutting tape is normal.
Check that the sound of tape cutter moving is not louder than usual.
Check that abnormal sound such as metal sound is not heard.
•
Carrier tapes in the empty tape box are cut appropriately.
Check the cut sections of carrier tapes when disposing of carrier tapes in the empty tape box.
•
Carrier tapes in the empty tape box are disposed of.
Check the empty tape box everyday and dispose of accumulated carrier tapes.
c
CAUTION
As used carrier tapes accumulates in the empty tape box, dispose of them periodically. If the empty tape box is filled with
them, trouble such as cutter operation error may occur.
n
NOTE
Lubricating tape cutter with disassembly, and replacing tape cutter blade must be performed by YAMAHA service
personnel as failure in these tasks cause serious injury. Contact your sales representatives when tape cutter abnormality is
noticed.