YRM20_Mainte_E.pdf - 第84页
2. Monthly maintenance items 3-17 Chapter 3 Periodic maintenance items ► When an error message appears Perfor m the conveyor tuning as following procedure. 1 Press the [C on veyor Sensor T uning] button at the right side…
2. Monthly maintenance items
3-16
Chapter 3 Periodic maintenance items
2.3 Conveyor unit
2.3.1 Check the conveyor sensor and its operation
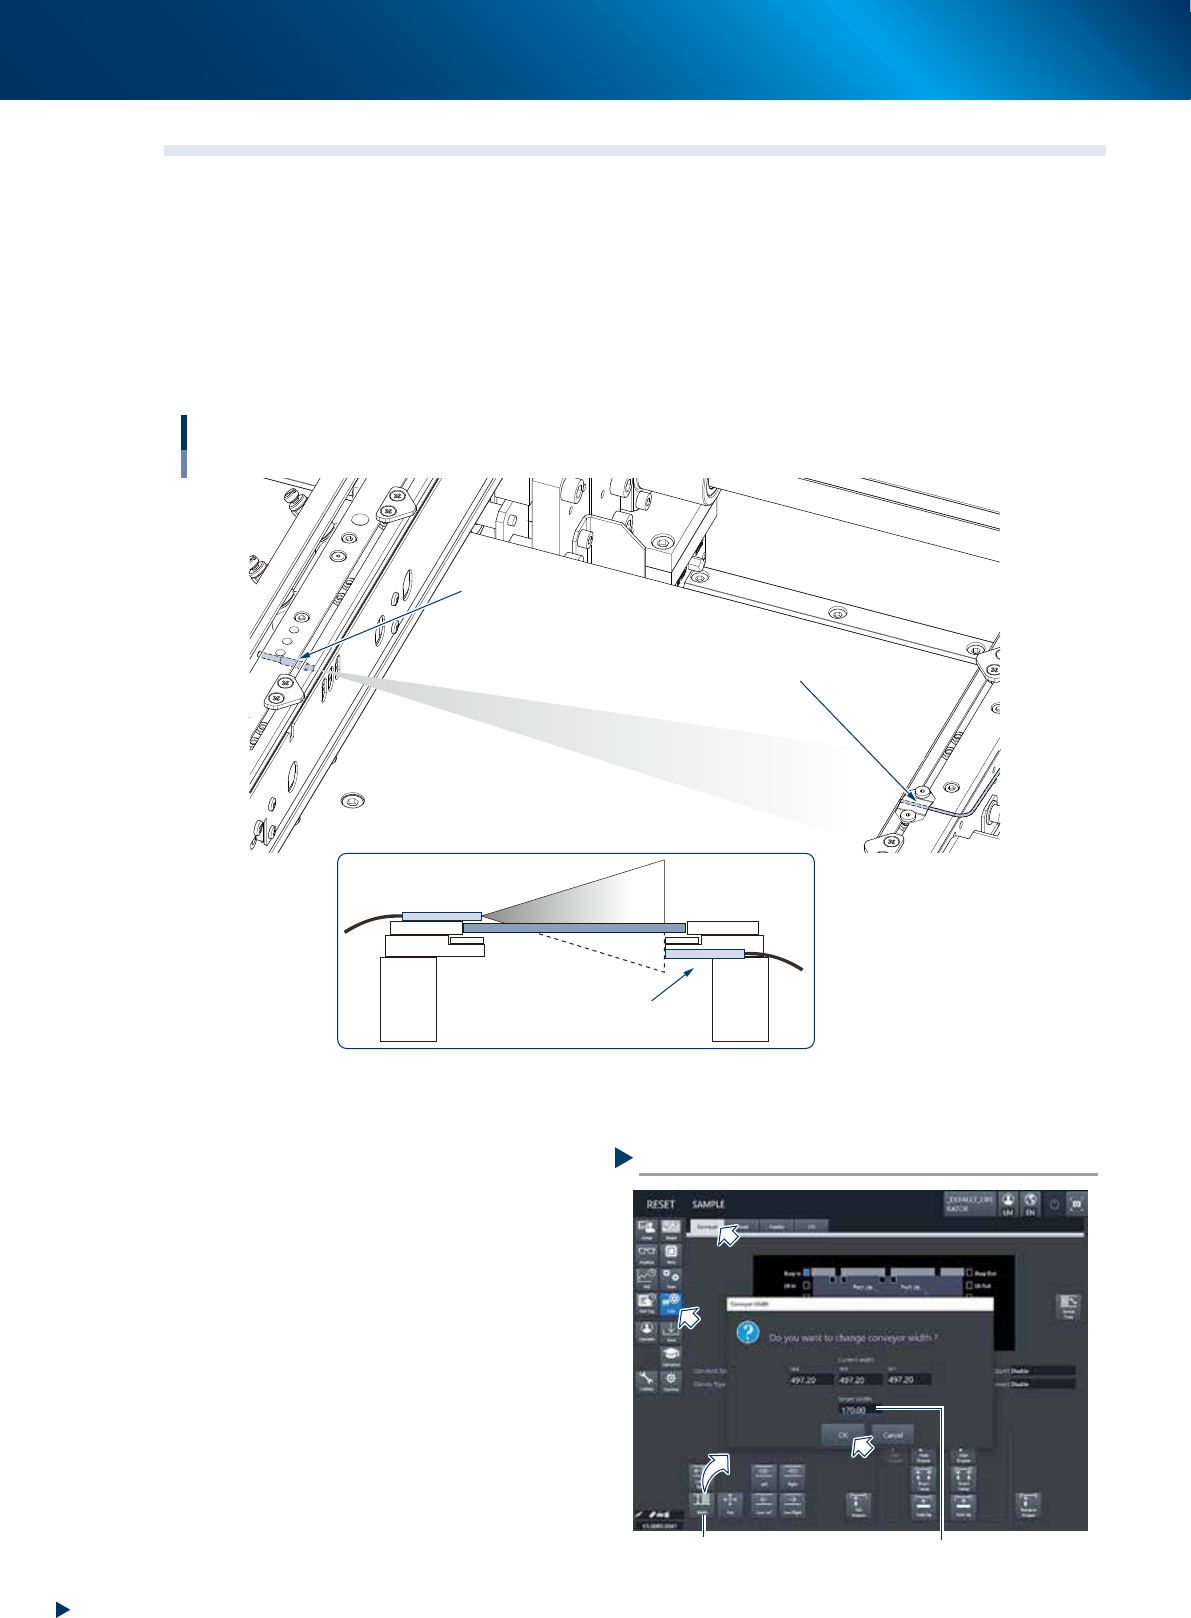
The YRM20 is installed transmission type sensors as conveyor sensor.
The beam receiving condition of sensor varies depending the distance between the beam emitter and receiver
upon changing the conveyor width.
Upon changing the conveyor rail width, the Conveyor Sensor Tuning function is actuated to rewrite the sensor
threshold value automatically by remembering the changing receiving condition of sensor. It is required to be
checked periodically if it operates correctly.
Operating image
Projector
Receiver
Checking the conveyor sensor and its operation
Beam emitting sensor
Bean receiving sensor
53329-KMK-10
►
Checking operation
1
Prepare for work by checking that there
are no board on the coneyor nor pushup
pins at the conveyor motion range.
2
Change the conveyor width.
1. Open the [Unit] - [Conveyor] screen and
press the [Width] button.
2. Conveyor width change screen appears,
then input any conveyor width and press the
[OK] button.
3
Check the message.
After changing the conveyor width, as long as
the Conveyor Sensor Tuning function actuates
normally, no error message appears.
Here finishes the operation.
Checking the conveyor sensor
Input any conveyor width[Width] button
54301-KMX-00

2. Monthly maintenance items
3-17
Chapter 3 Periodic maintenance items
►
When an error message appears
Perform the conveyor tuning as following procedure.
1
Press the [Conveyor Sensor Tuning]
button at the right side of the [Unit]
- [Conveyor] screen.
2
Check the sensor condition.
Change the conveyor width again, then check
if any error message appears.
The conveyor sensor tuning finishes when no
error message appears.
►
When an error message still appears
It may be the beam receiving condition deterioration around the sensor, the sensor (amplifier) breakage,
or the fiber broken.
Remove dirt and dust on the sensor unit using a lint-free cloth or a lens blower brush, then check that no
error message appears after changing the conveyor width again.
Conveyor sensor tuning
Step 1, 2
[Sensor Tune] button
Input any conveyor width
2
1
54325-KMX-00
2. Monthly maintenance items
3-18
Chapter 3 Periodic maintenance items
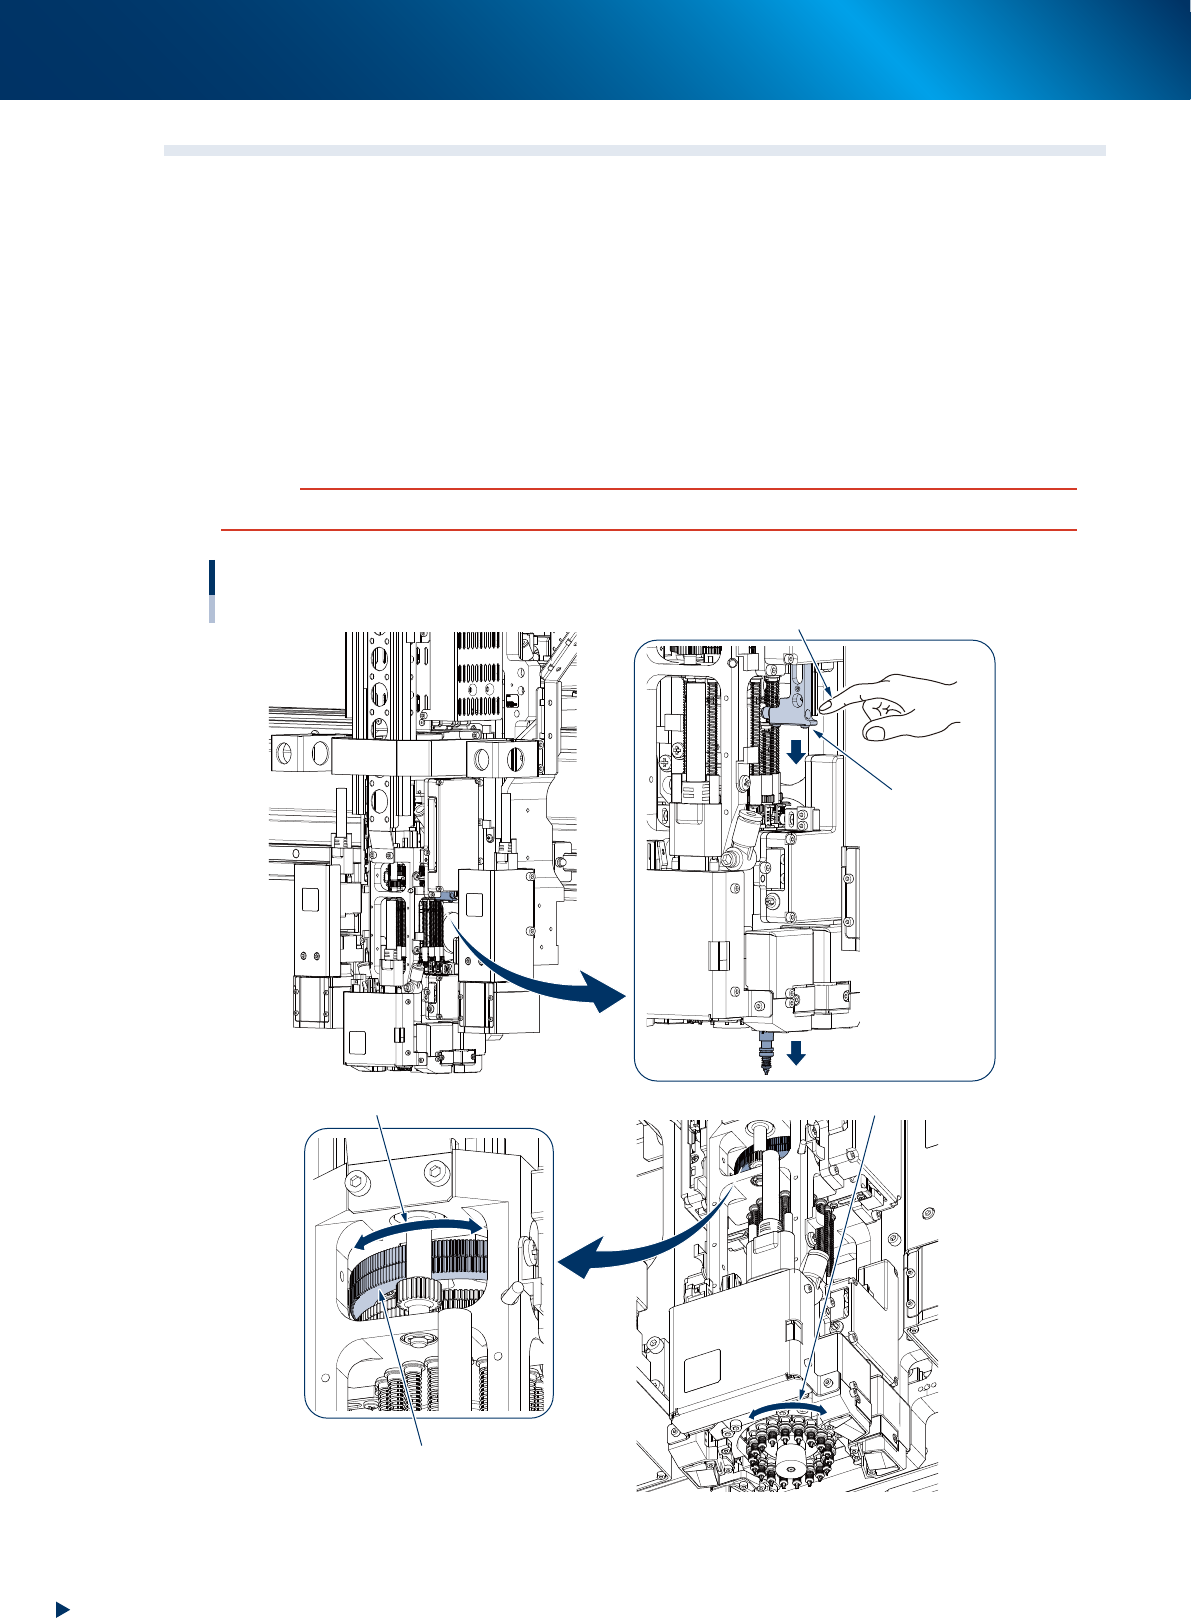
2.4 RM head unit
Lowering RM head/nozzle shafts
Maintenance of the RM head requires lowering the nozzle shafts manually in sequence as for example in
"2.4.1 Inspecting and replacing the air filters" and "3.2.1 Inspecting/cleaning nozzle shaft tip".
Here describes the lowering procedure of RM head nozzle shaft.
1
Press down Z-axis of RM head.
Z-axes units are installed on both sides of RM head unit to lower the nozzle shaft.
2
Change the nozzle shaft to be lowered.
Move any nozzle shaft to beneath Z-axis by turning the N-axis gear to rotate the rotary.
c
CAUTION
Make sure that all nozzle shafts have returned to upper end after having lowered the nozzle shafts manually.
Lowering RM head nozzle shaft
1
2
Z-axis of RM head
*installed on
both sides
Press down Z-axis and
lower the nozzle shaft.
Nozzle shaft is lowered
N-axis gear
Turn N-axis gear and rotate the rotary.
The rotary rotates according to N-axis gear
533H4-KMX-00