YRM20_Mainte_E.pdf - 第75页
1. Weekly maintenance 3-8 Chapter 3 Periodic maintenance items 5 Clean the no zzle tip. Push the nozzle tip vertically against the adhes ive surface of the nozzl e tip clean ing tape severa l times to rem ove dirt. c CAU…
1. Weekly maintenance
3-7
Chapter 3 Periodic maintenance items
1.2.3 Cleaning the nozzle tip
A little dirt at the nozzle tip can be cleaned with the "Nozzle tip cleaning tape" that comes with the machine. If
cleaning the nozzle with an ultrasonic cleaner (option) and then cleaning with the nozzle tip cleaning tape, the
nozzle tip can be cleaned effectively.
The following describes the cleaning procedure for the spring-action nozzle tip with an ultrasonic cleaner and
the nozzle tip cleaning tape.
c
CAUTION
When cleaning the nozzle tip, use YAMAHA recommended cleaning tape (TAPE,CLEANER: KGT-M8895-00X) only.
If using other tape, the adhesive surface may adhere to the nozzle and may cause the mounting failure.
n
NOTE
See the Service Information that comes with the tape for how to use the cleaning tape.
e
1
Remove nozzles.
1. Press the emergency stop button and then
open the machine safety cover.
2. Remove nozzles from the head.
When the nozzle station is equipped.
2. Store the nozzles and detach the whole
nozzle holder.
3. Open the nozzle station shutter and detach
nozzles.
2
Clean the slide section.
If dust is in the slide section, remove it with an
air blow tool (option), etc.
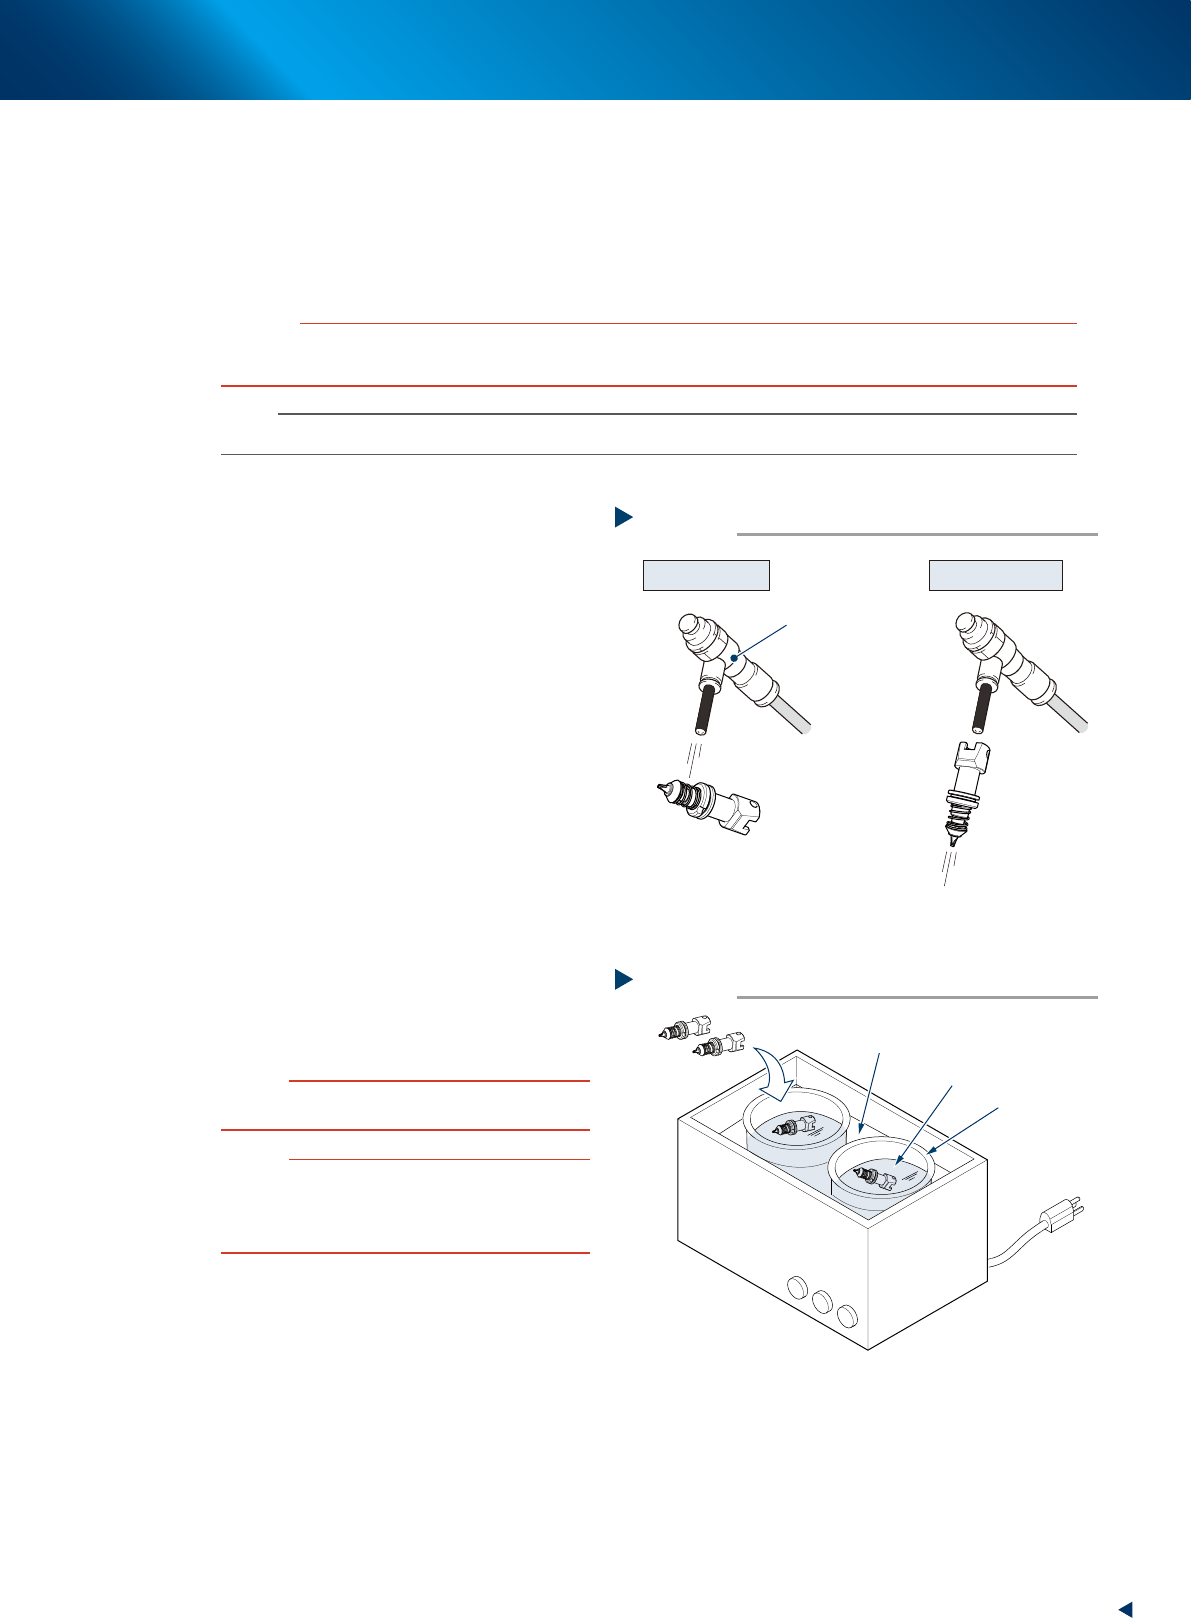
3
Clean nozzles with an ultrasonic
cleaner.
1. Put nozzles into a container (such as beaker)
in an ultrasonic cleaner.
2. Pour IPA in a container until nozzles are
dipped.
3. Pour water in an ultrasonic cleaner.
4. Clean nozzles with an ultrasonic cleaner for
about 10 minutes.
c
CAUTION
DO NOT pour ethanol directly into the ultrasonic cleaner. It
must be poured in a beaker or similar container.
n
NOTE
When cleaning a nozzle with an O-ring such as
Type 8110R or Type 8011H nozzle using an
ultrasonic cleaner, remove an O-ring and clean a
nozzle itself only.
4
Blow nozzles.
1. Take nozzles out from an ultrasonic cleaner.
2. Blow entire nozzle to remove IPA. Intensively
blow the slide section and the air path.
Air blow
Step 2, 4
Slide section Nozzle air path
Air blow tool
(option)
53307-KMX-00
Ultrasonic cleaner
Step 3
Ultrasonic cleaner
Beaker
Pour water
Air blown nozzle
Pour ethanol
53308-KMX-00
1. Weekly maintenance
3-8
Chapter 3 Periodic maintenance items
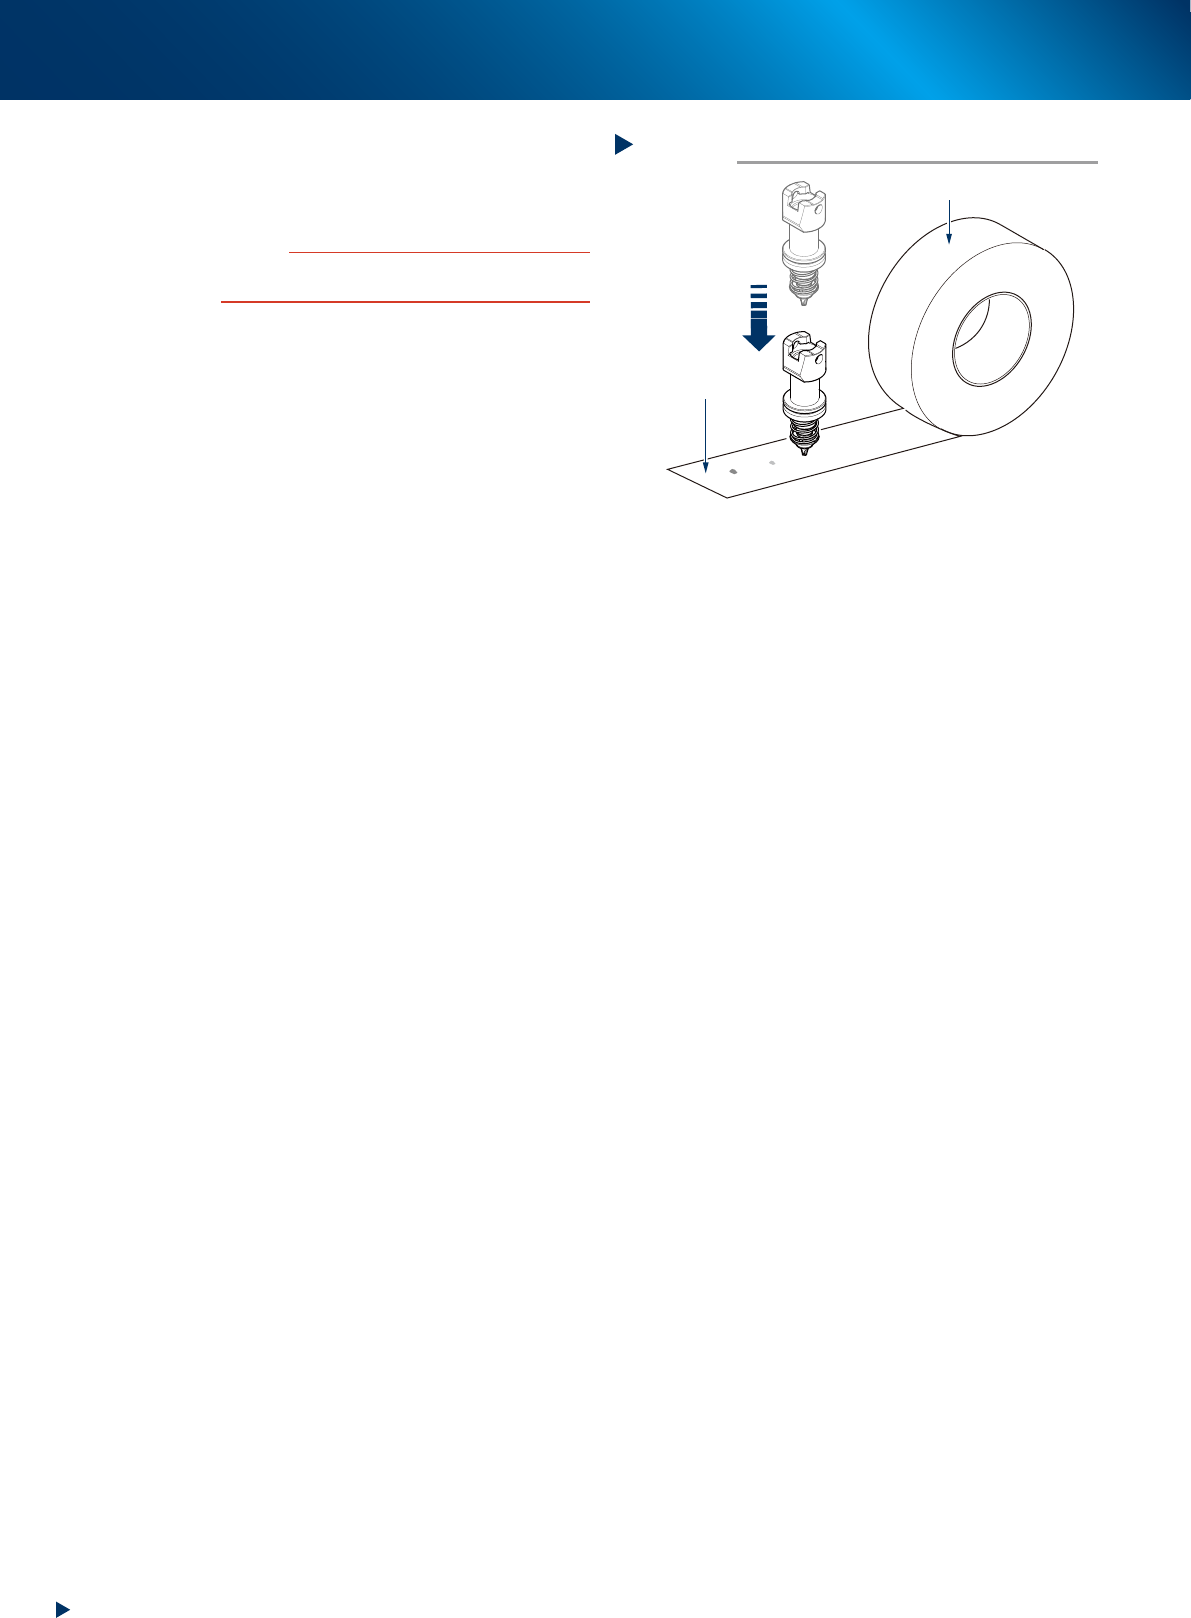
5
Clean the nozzle tip.
Push the nozzle tip vertically against the
adhesive surface of the nozzle tip cleaning
tape several times to remove dirt.
c
CAUTION
When turning or tilting a nozzle while pushing it against
the tape, the adhesive surface may stick to the nozzle.
6
6Lubricate the slide section.
Lubricate the slide section referring to "1.2.1
Cleaning and lubricating nozzle sliding section"
in this chapter.
7
Return detached nozzles to head.
When nozzles are detached from nozzle station
(optional), return them to the original storage
positions.
Nozzle tip cleaning tape
Step 5
Nozzle tip cleaning tape
Adhesive surface
Press vertically
to tape
53309-KMX-00
1. Weekly maintenance
3-9
Chapter 3 Periodic maintenance items
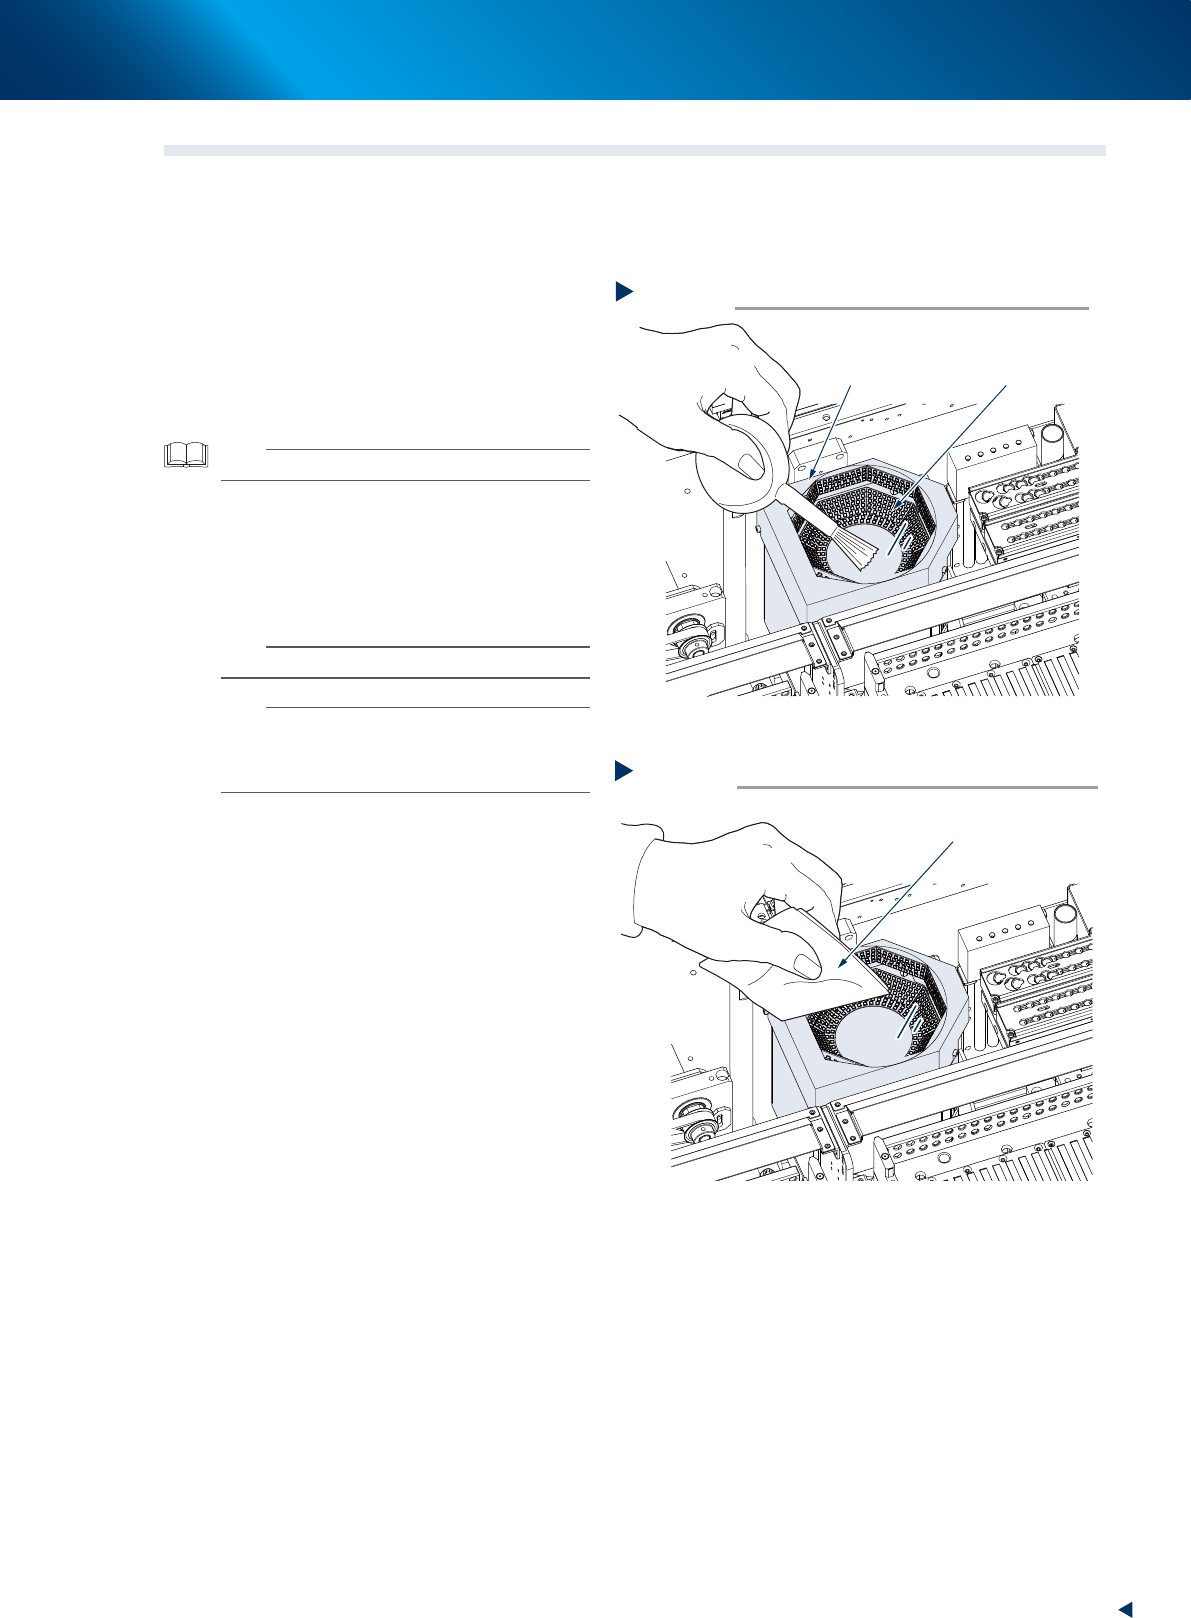
1.3 Cleaning the multi-vision camera lighting's protective cover
Adhered dust, etc., on the multi-vision camera lighting's protective cover can cause component recognition
errors. To prevent this, inspect and clean the cover in a periodic manner.
e
1
Remove any dust from the lighting's
protective cover.
1. Press the emergency stop button and open
the machine safety cover.
2. Remove any dust from the lighting's
protective cover using a blower brush.
TIP
A lens blower brush is available as an option.
2
Wipe the lighting's protective glass with
a cloth or cleaning paper.
Wipe the lighting's protective glass with
lint-free cloth or cleaning paper with a small
amount of lens cleaner.
n
NOTE
A lens cleaner and cleaning paper are optional item.
n
NOTE
If dust or debris still remains even after cleaning as
described above, clean the backside of the protective
cover and the light-emitting surface referring to "4.1.2
Multi-vision camera" in this chapter.
Blowing off dust with lens blower brush
Step 1
Protective cover
(glass)
Lens blower brush
53318-KMX-00
Step 2
Wiping protective cover
Lint-free cloth
53319-KMX-00