YRM20_Mainte_E.pdf - 第62页
1. Checking the nozzle 2-1 1 Chapter 2 Daily maintenance items ► Checking nozzles by detaching the whole nozzle holder When the nozzle station (option) is installed, another procedure can be perfor med by detaching the w…
1. Checking the nozzle
2-10
Chapter 2 Daily maintenance items
1.2 Checking the nozzles visually
To visually check nozzles, remove each nozzle from the head or from the nozzle station.
█
Points to check detached nozzles
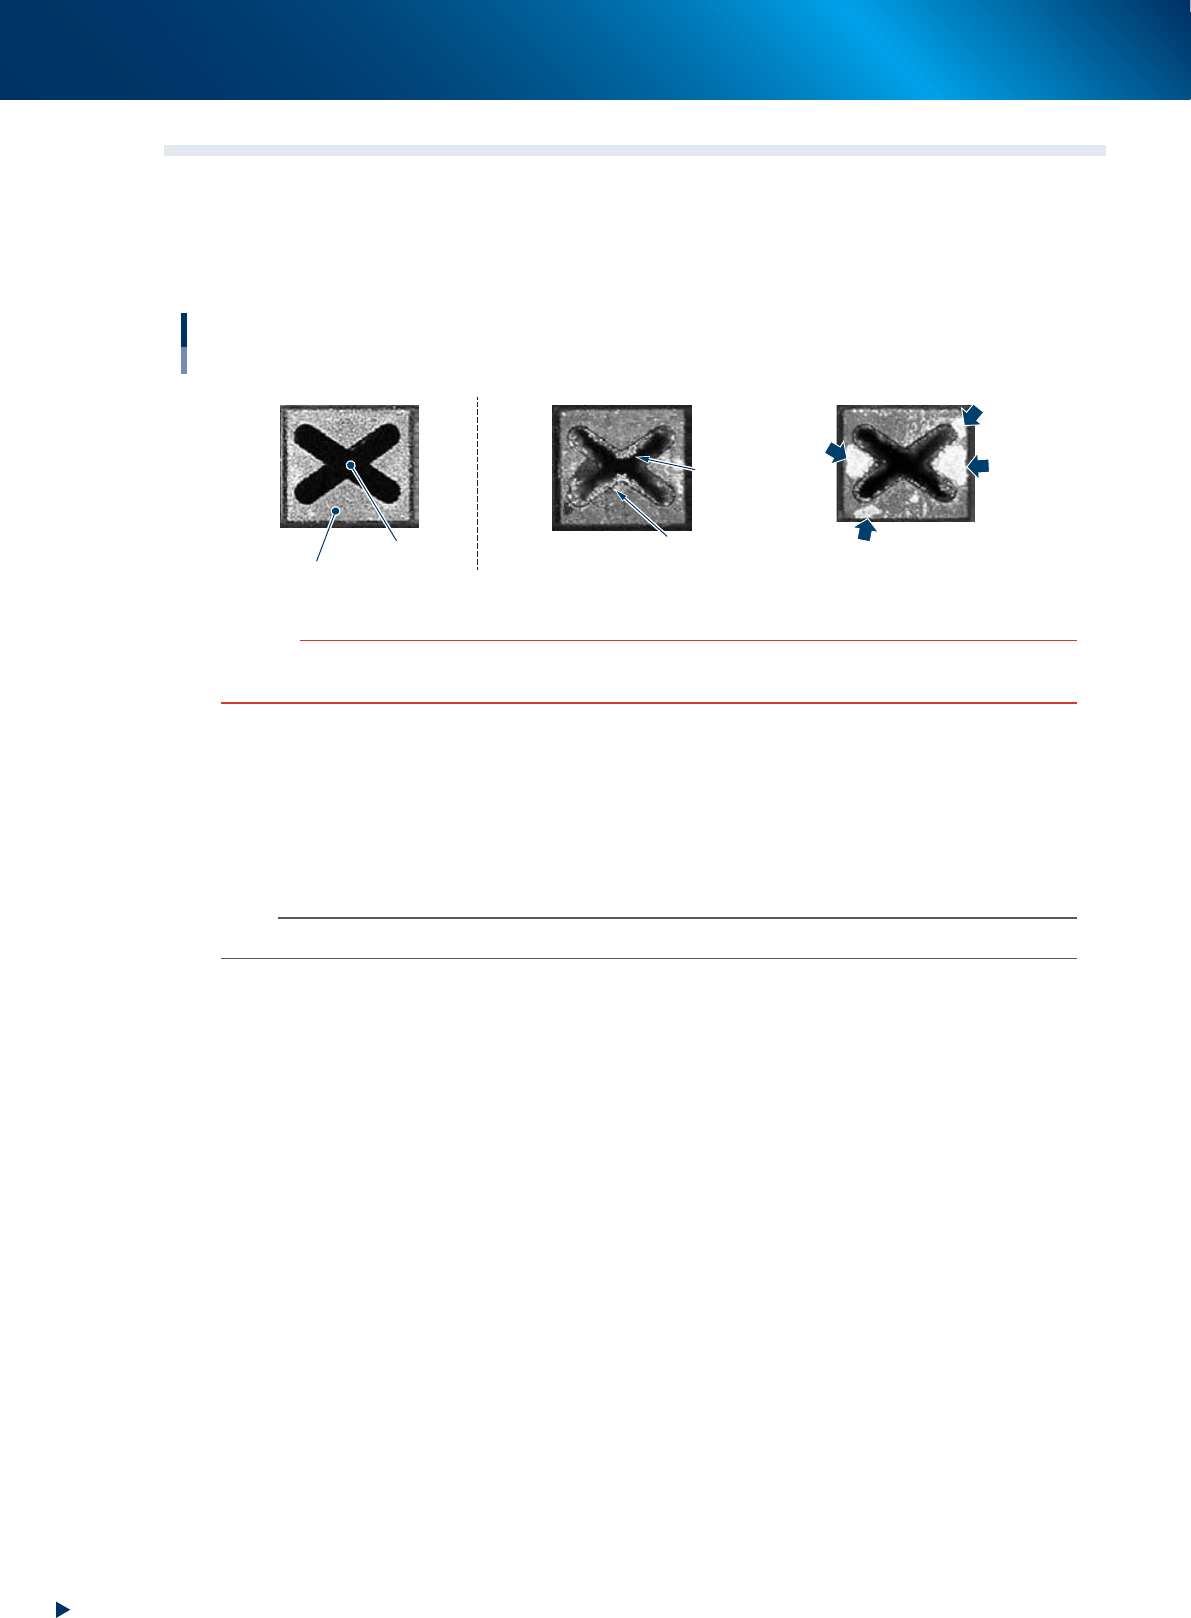
Check the removed nozzles with a magnifying glass or similar tool.
Checking the nozzle condition
Nozzle tip
Solder is adhering to nozzle hole.
Solder
Solder
Solder is adhering to
flat surface of nozzle tip.
Nozzle hole
◆ Normal condition ◆ Fault: Nozzle is clogged
◆ Fault: Shiny material on tip
53200-KMX-00
c
CAUTION
When the fault nozzle is found, clean the nozzle hole and nozzle tip.
See the "1.2 Nozzle cleaning" of Chapter 3 for cleaning method.
►
Checking nozzles by detaching them from the head individually
1. Move the head to a position where the nozzles can be easily detached, then detach each nozzle
manually.
2. After checking and cleaning the nozzle, reattach the nozzle to the head while making sure the head
position and the nozzle's direction are correct.
n
NOTE
As for a simple method, check the nozzle attached to the head with a mirror or similar tool.
1. Checking the nozzle
2-11
Chapter 2 Daily maintenance items
►
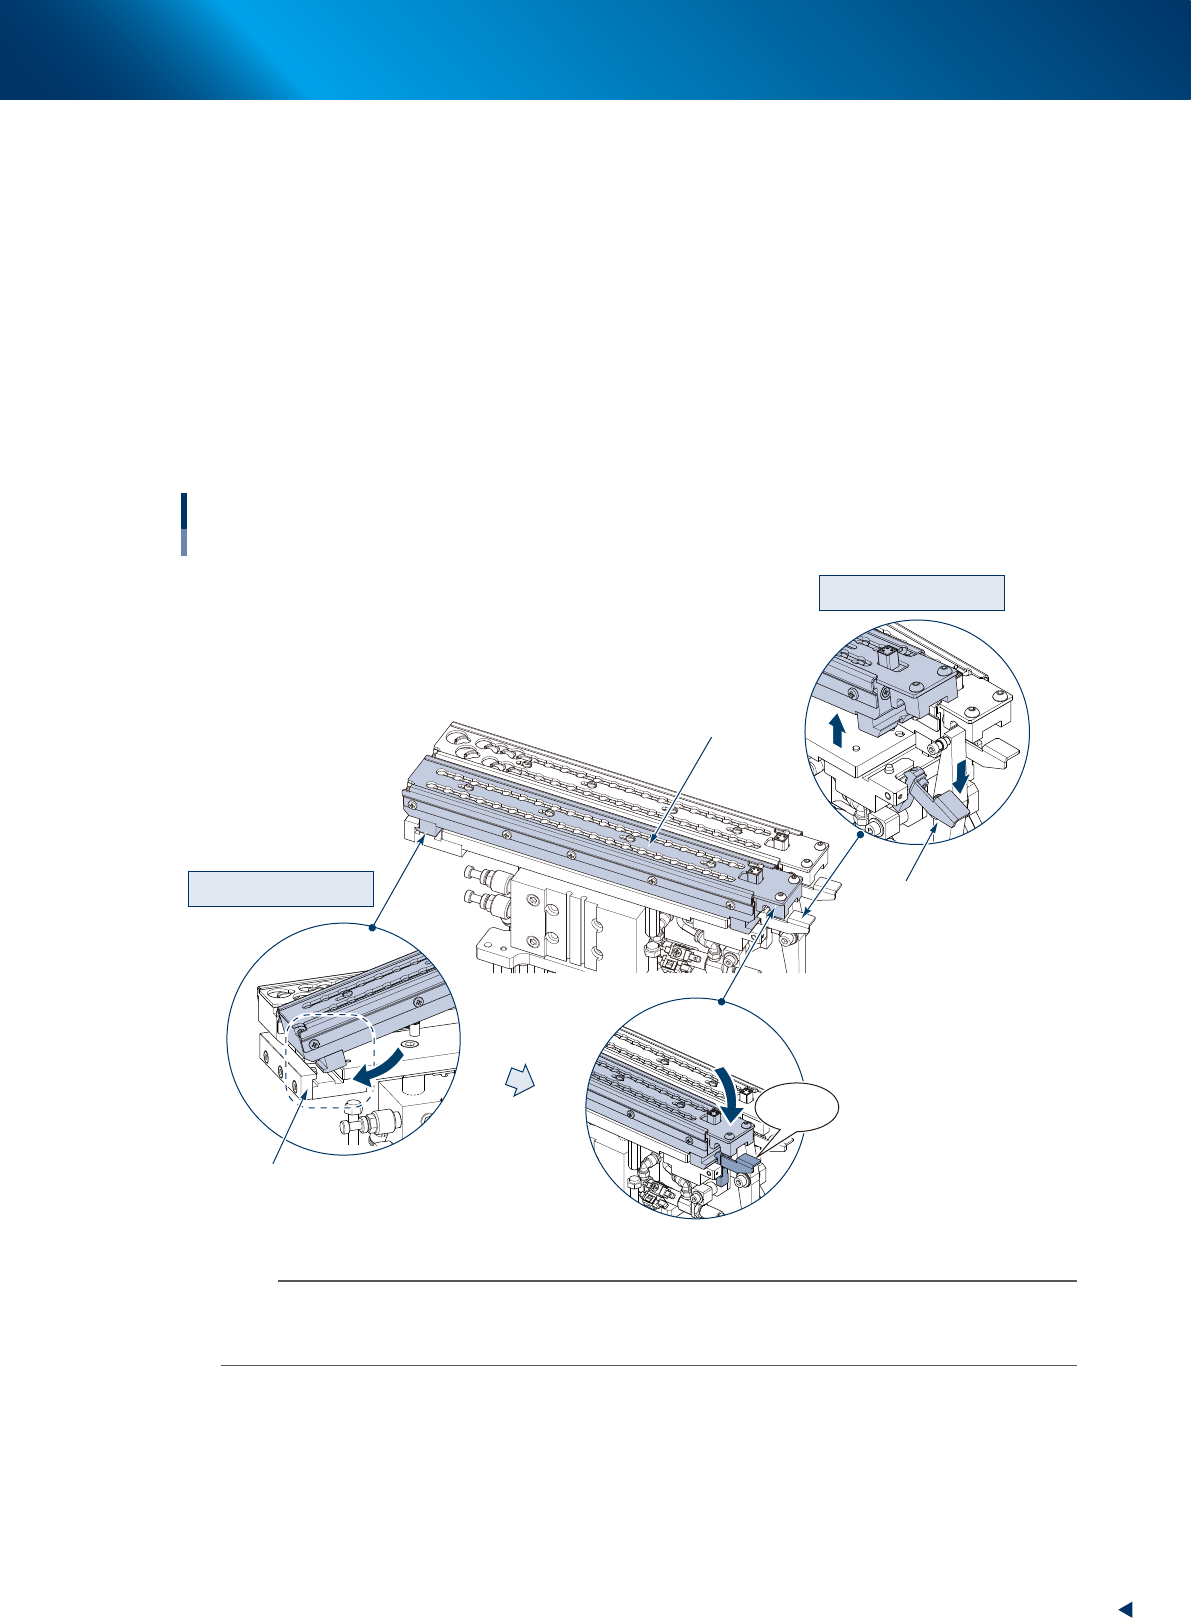
Checking nozzles by detaching the whole nozzle holder
When the nozzle station (option) is installed, another procedure can be performed by detaching the
whole nozzle holder storing nozzles from the nozzle station base section.
e
1. Return all nozzles in the nozzle holder and close shutter, then press the emergency stop button and
open the machine safety cover.
2. Lay the holder retaining lever frontward and detach the nozzle holder upward.
3. Check and clean the nozzles, then return nozzles.
4. Check if there is no foreign matter on the nozzle station, and insert the nozzle holder likely to hook
it into the attaching block section of base unit. Then push down the holder retaining lever while
pressing the nozzle holder until it clicks.
5. Check that the nozzle holder is fixed securely.
Detaching nozzle holder
Attaching nozzle holder
Click!
Detaching nozzles
Detaching the whole nozzle holder
Holder retaining lever
Mounting block
Nozzle holder
53206-KMX-10
n
NOTE
The nozzle holder shutter is equipped with magnet and it is closed after detaching the nozzle holder.
The nozzle can be detached while shifting the shutter by hand.
Moreover, do not make upside down the nozzle holder with opening the shutter as the nozzles may drop off.
2. Cleaning the feeder plate and related
2-12
Chapter 2 Daily maintenance items
2. Cleaning the feeder plate and related
Chips or foreign object falling on the feeder plate or the clamp unit may be bitten in between the parts
during feeder setting and cause the pickup position to deviate. Also, the chips or foreign object which
are bitten upon attaching the feeder exchange carriage may cause the communication error or similar.
Periodic inspection and cleaning are recommended to prevent this problem.
►
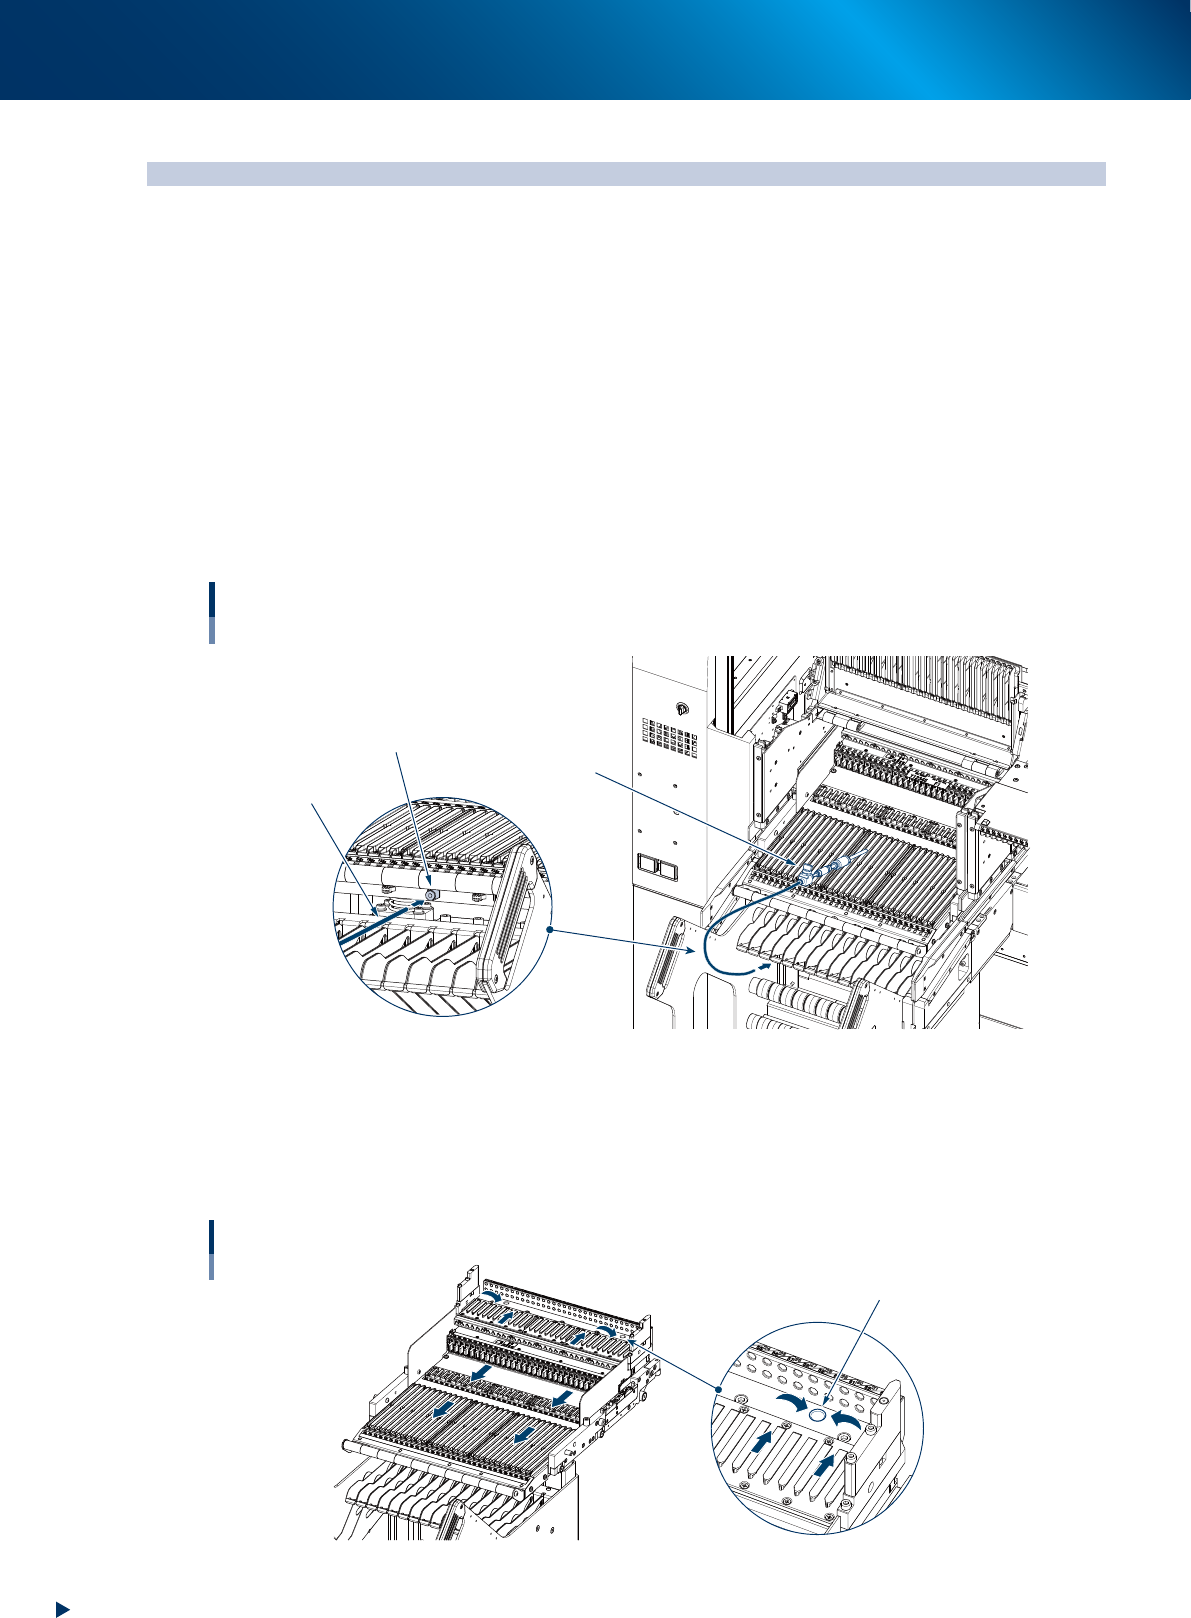
Cleaning with vacuum cleaner
1. Detach the Feeder exchange carriage from the machine.
2. Use a household vacuum cleaner, etc. to suction the dust and small debris.
►
Cleaning with vacuum assembly
1. Connect the optional vacuum assembly (KHY-M88V0-A0X) to the air connectors on the front of the
feeder exchange carriage.
2. Suction the dust and small debris using a vacuum assembly.
Air connector
Vacuum assembly
Air hose of
vacuum assembly
Connecting a vacuum assembly
To the air connector on the feeder exchange carriage
53201-KMX-00
►
Cleaning with feeder plate cleaning brush
1. Detach the feeder exchange carriage from the machine.
2. Using a feeder plate cleaning brush, sweep out the chips and debris in the direction of arrow shown
in the figure below.
Cleaning feeder plate
Dusting hole
53202-KMX-00