Printer 710-810 v9 ProFlow ATX.pdf - 第24页
PROFLOW ATX REPLACEMENT PROCEDURES 12.24 Technical Reference Manual Chapter Issue 6, Jan 16 4. If the print medium cartridge is not connected to the transfer head, fit the transfer head sealing plug int o the transfer he…
PROFLOW ATX
REPLACEMENT PROCEDURES
Chapter Issue 6, Jan 16 Technical Reference Manual 12.23
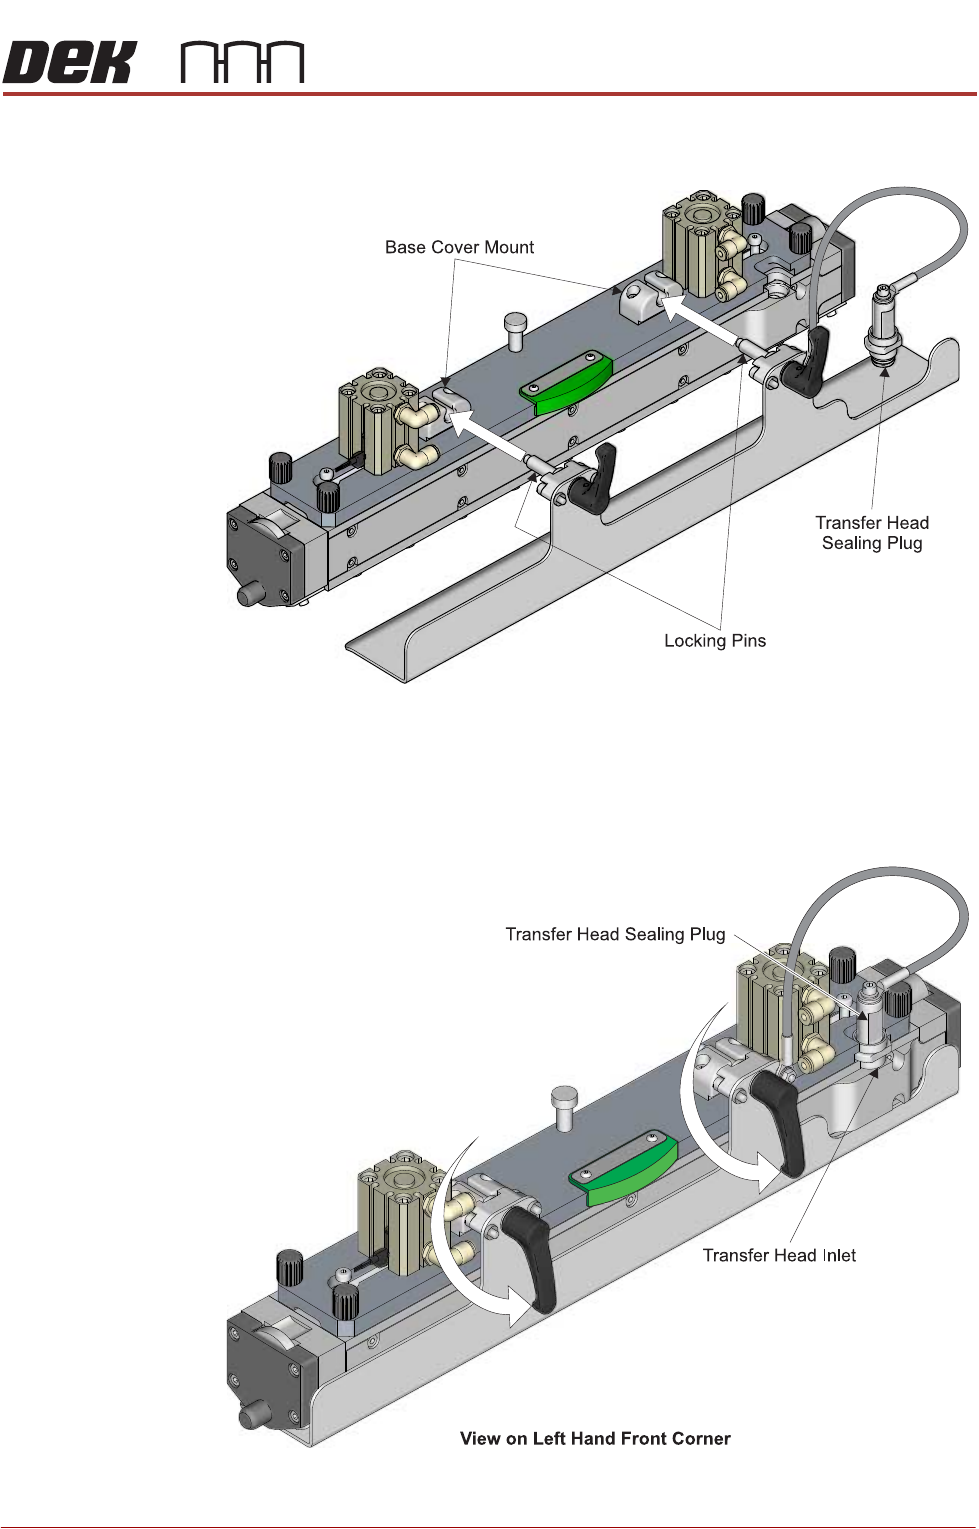
2. Fit the base cover to the transfer head by inserting the locking pins into the
two base cover mounts located on the top of the transfer head.
3. Rotate the locking clips to the down position to lock the base cover in place.
NOTE
The locking pins are off-centre (eccentric) to the locking clips. In the locked
position, the base cover is lifted upwards creating a tight fit to the base of
the transfer head.
PROFLOW ATX
REPLACEMENT PROCEDURES
12.24 Technical Reference Manual Chapter Issue 6, Jan 16
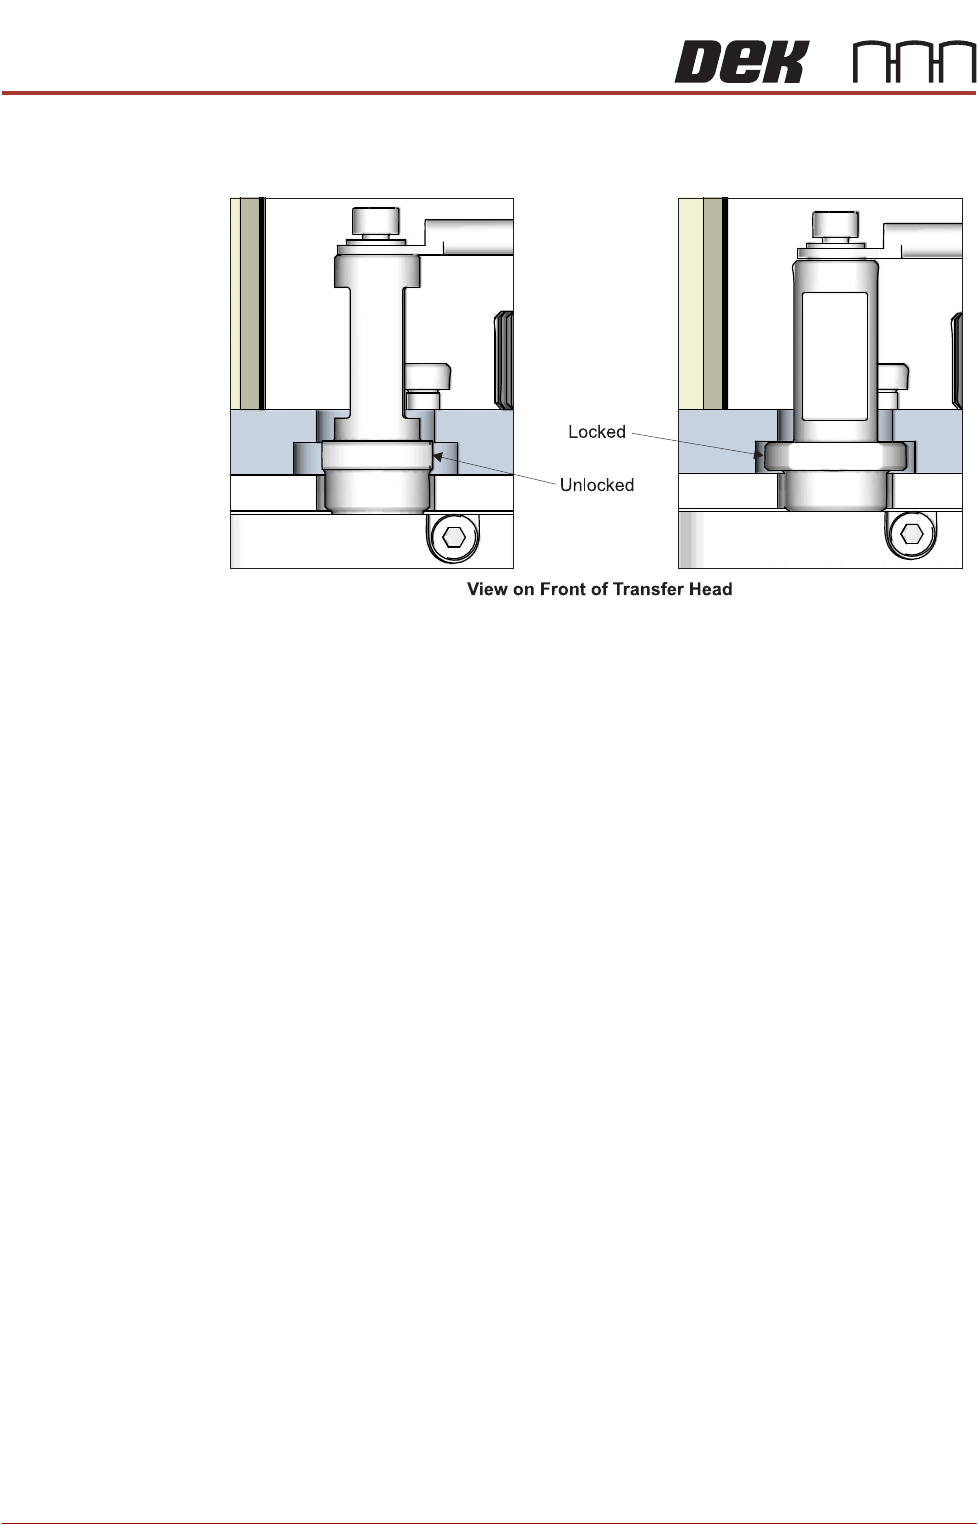
4. If the print medium cartridge is not connected to the transfer head, fit the
transfer head sealing plug into the transfer head inlet.
5. Turn the transfer head sealing plug 90° to the locked position.
Removal To remove the base cover from the transfer head, carry out the following:
1. Remove the transfer head sealing plug from the transfer head, if fitted.
2. Rotate the locking clips to the up position (unlocked).
3. Pull the base plate away from the transfer head.
Squeegees to ProFlow ATx
Removing The
Squeegee Mount
To remove the squeegee mount, carry out the following:
1. Select Open Cover Commands.
2. Select Carriage to Front.
3. Select Back.
4. Select Shut Down.
5. Select Continue.
6. Switch the mains isolator to OFF.
7. Remove the squeegees, if fitted.
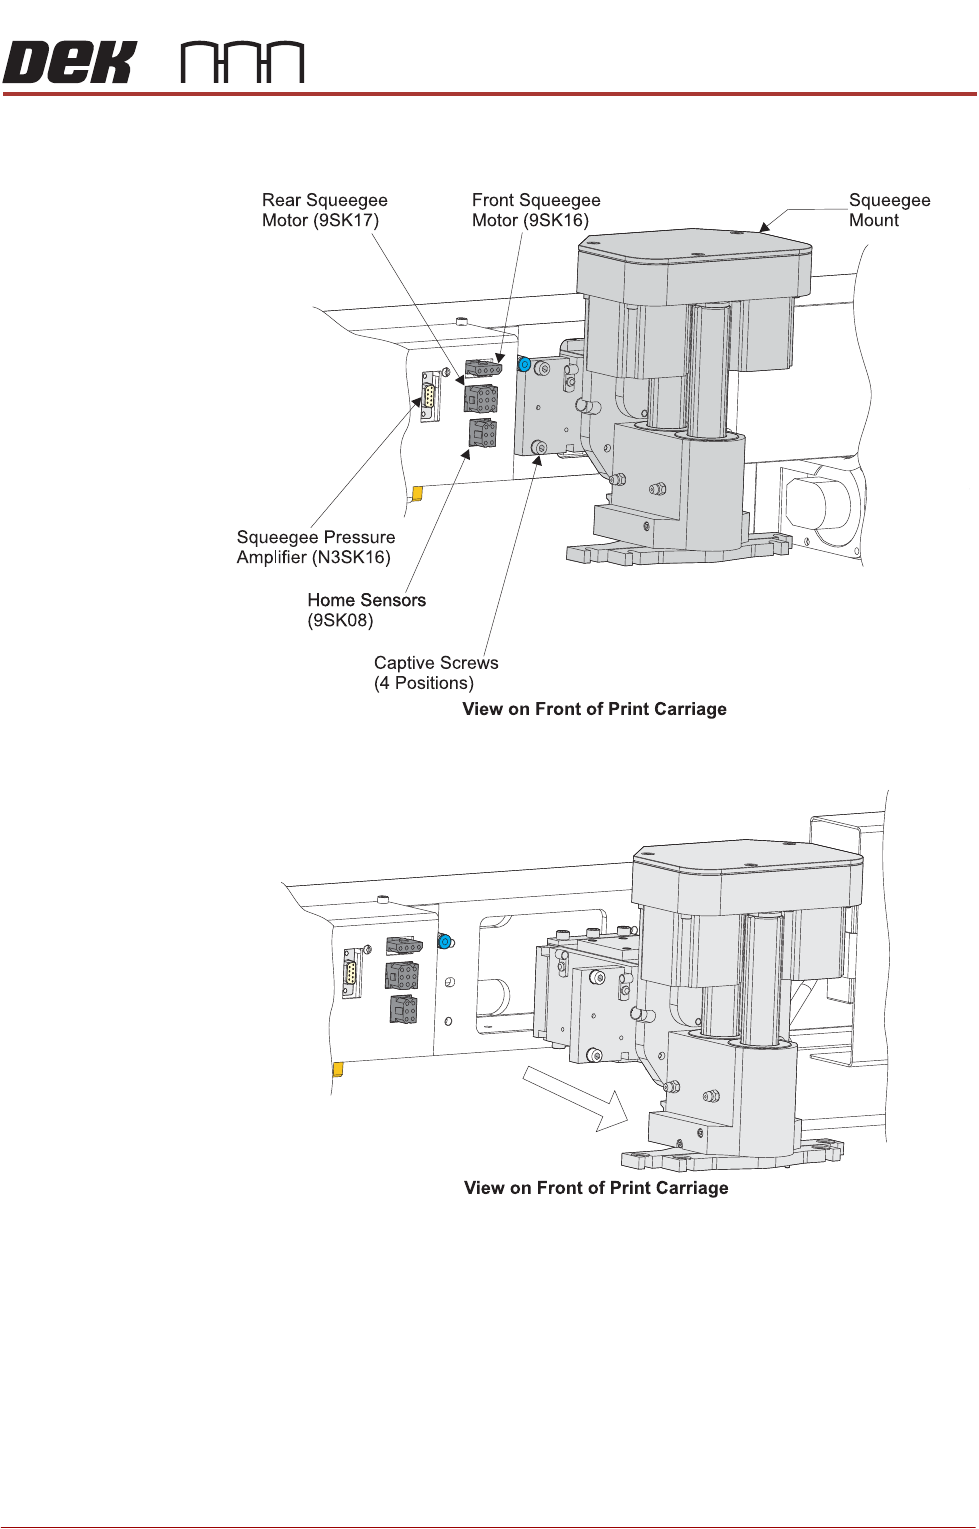
8. Disconnect the four squeegee mechanism connectors from the print car-
riage, left hand side:
• Front Squeegee Motor (9PL16)
• Rear Squeegee Motor (9PL17)
• Home Sensors (9PL08)
• Squeegee Pressure Amplifier (N3PL16)
PROFLOW ATX
REPLACEMENT PROCEDURES
Chapter Issue 6, Jan 16 Technical Reference Manual 12.25
9. Loosen the four captive screws securing the squeegee mount mechanism
to the print carriage, using the 4mm T-bar Allen key supplied (205973).
10. Carefully remove the squeegee mount.