OM-1461-001_w.pdf - 第14页
1 1 0712-001 5. Nozzle Change in the "Set-up" Operation 5. Nozzle Change in the "Set-up" Operation (1) Check the nozzles to be used in the placement head/nozzle data of the pattern program for the pro…
10
4. Installation Position
0712-001
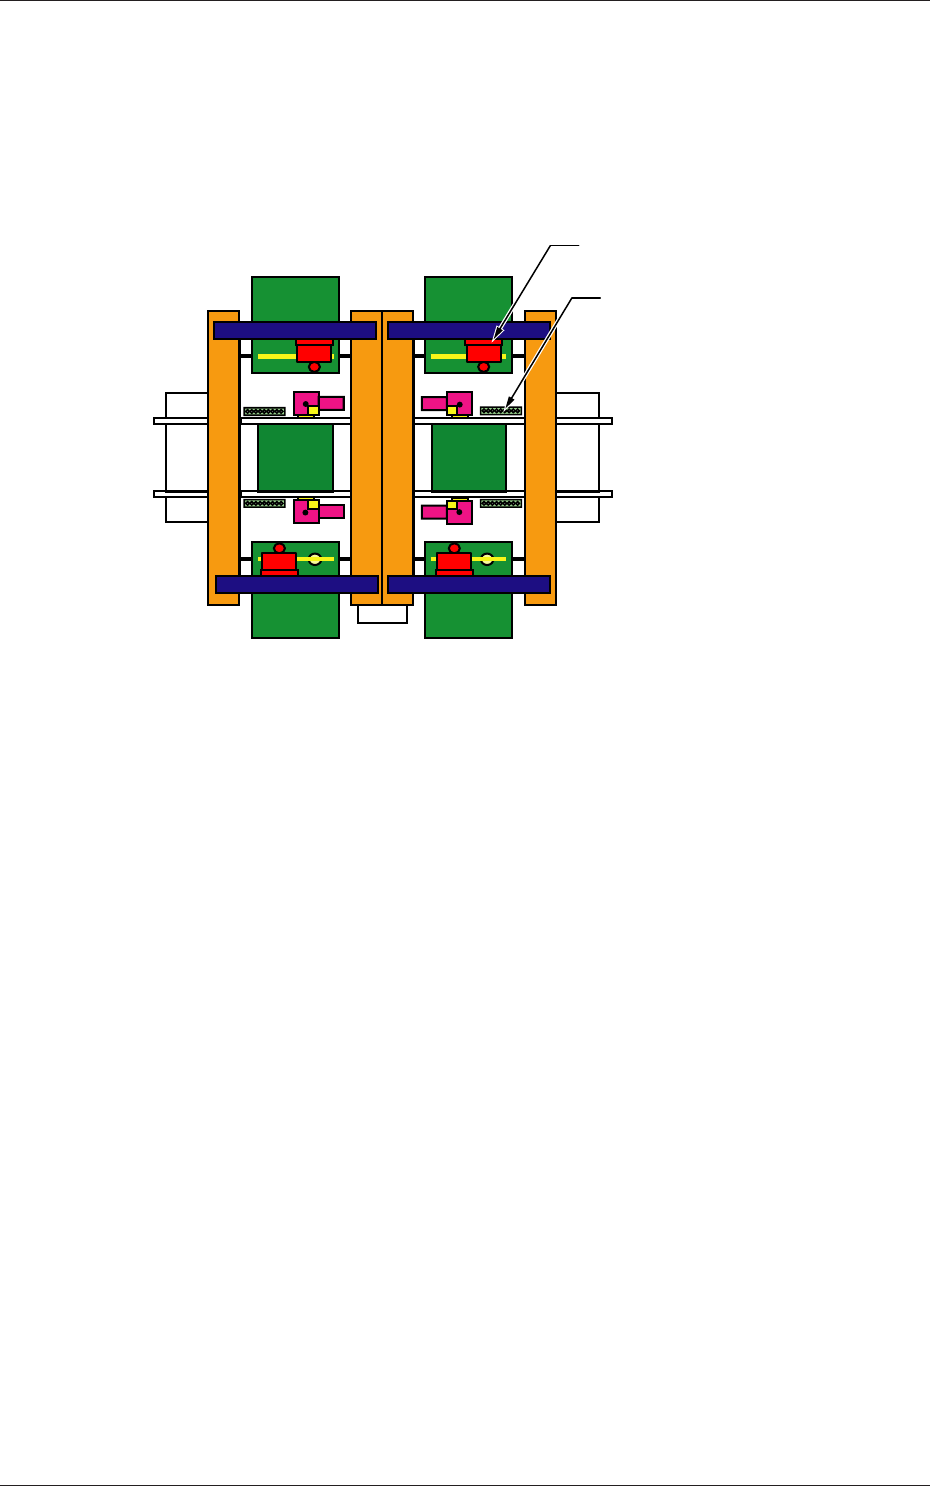
4. Installation Position
A multi-functional head can be attached to any beam to replace a high-speed
head.
Also, a multi-functional head can be combined with a high-speed head in a
single stage.
(Front Side of Machine)
(Rear Side of Machine)
Nozzle Stocker
Multi-Functional Head
Fig. 2
110712-001
5. Nozzle Change in the "Set-up" Operation
5. Nozzle Change in the "Set-up" Operation
(1) Check the nozzles to be used in the placement head/nozzle data of the
pattern program for the production model.
(2) Check the placement head/nozzle data (nozzle stockers) in the "Nozzle
Data" window.
Note
When the nozzles to be used are not registered, search them in the
list of nozzle types and register them.
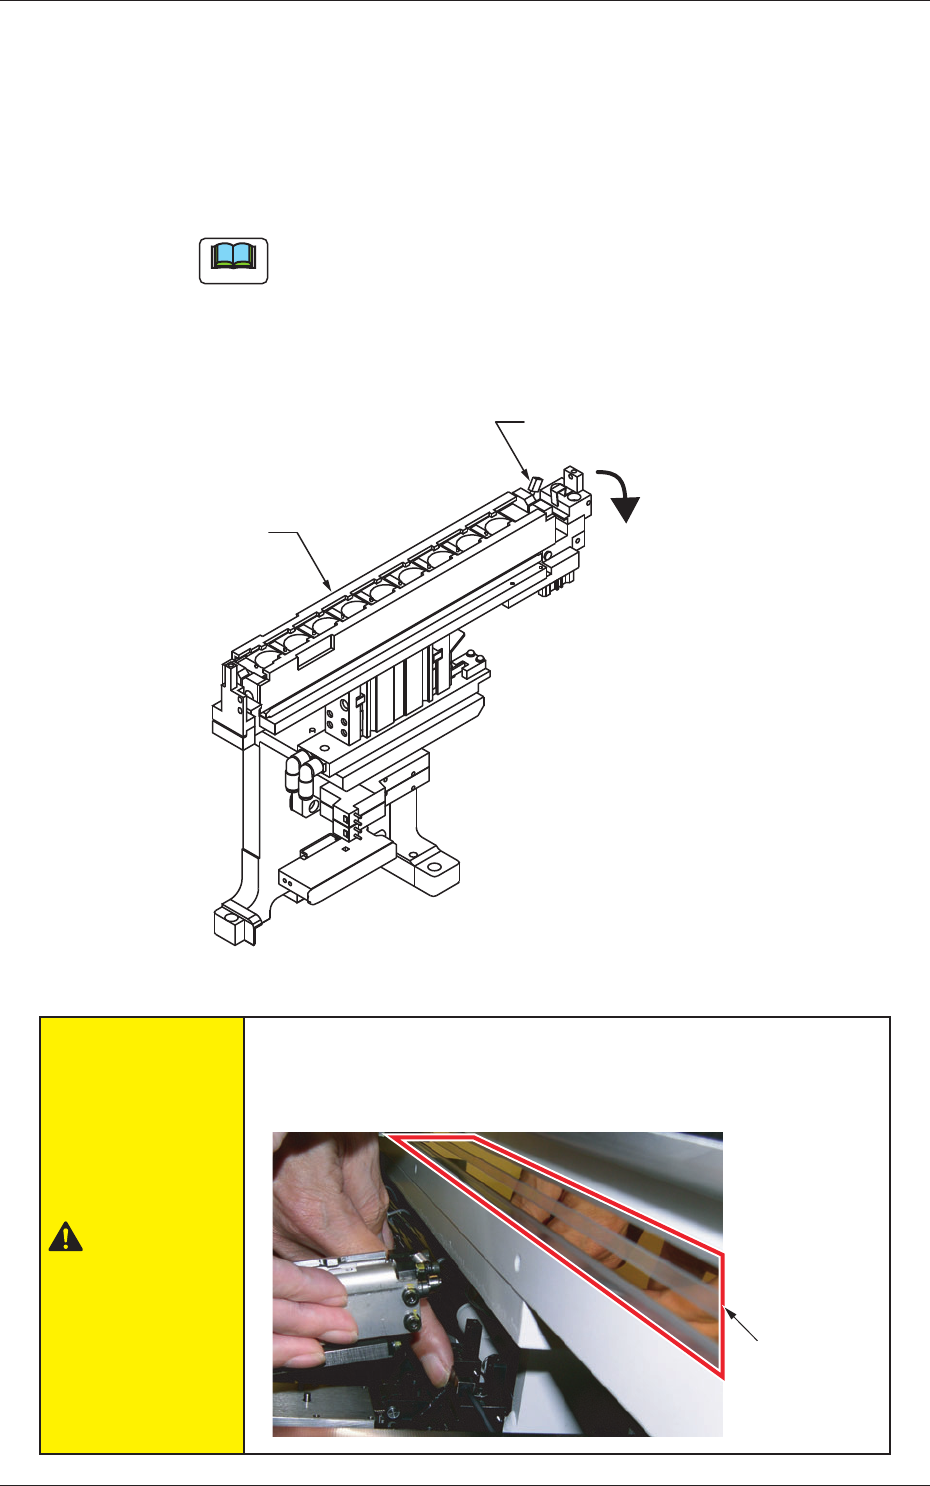
(3) While holding the nozzle stocker by hand, push down the lever of the
nozzle stocker section and detach the nozzle stocker from the nozzle
stocker section.
Nozzle Stocker
Lever
Push down the lever.
Fig. 3
CAUTION
Takecaresothatyourngerorthenozzlestockerdoesnot
touch the linear scale when the nozzle stocker is removed or
attached, because it might cause system breakdown or injury.
Linear Scale
.
120712-001
5. Nozzle Change in the "Set-up" Operation
(4) Pinch the lower section of the nozzle stocker to release the nozzle
clamp and remove the nozzle.
CAUTION
• Do not put any foreign substance on the nozzle stocker
section.
Otherwise, the machine will break down.
• Keep the diffusion plates of the vacuum nozzles clear of oil,
nicks, etc.
Otherwise, an error may occur during component recognition.
• Do not bring a magnet close to any vacuum nozzle.
Otherwise, an error may occur during component picks and
placement.
• Do not put any alien substance in the nozzle stocker hole.
Otherwise, the machine will break down.
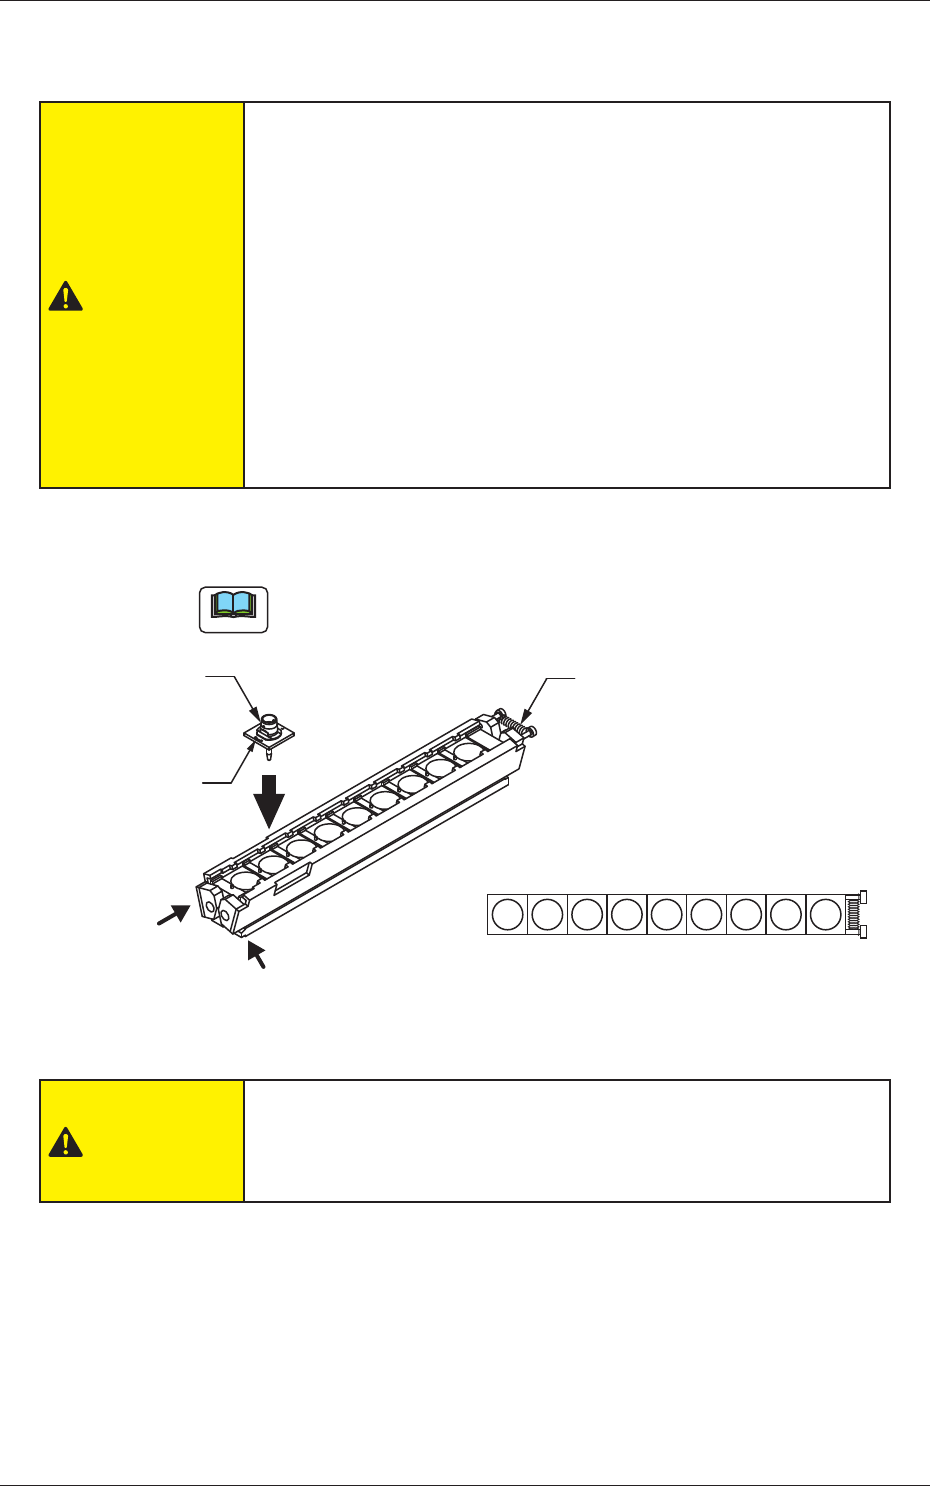
(5) Pinch the lower section of the nozzle stocker and set all the nozzles to
be used in the nozzle stocker.
Note
Set the nozzle so that the nozzle ID mark is on the side without
spring of the nozzle stocker.
Nozzle ID mark
Spring
Nozzle
Pinch the lower section of the nozzle stocker and release the clamp.
1 2 3 4 5 6 7 8 9
Fig. 4
CAUTION
Attach the nozzle to the nozzle stocker correctly.
If the machine is operated while the nozzle is placed on the nozzle
stocker shutter, the system might be broken down.