OM-1461-001_w.pdf - 第39页
36 0712-001 10.3 Quarterly Maintenance 10.3 Quarterly Maintenance Notice Lubrication must be made on the *-marked items after initial month and every 3 months for the subsequent use. T able 6 Maintenance Spots Descriptio…
350712-001
10. Maintenance Check List
10. Maintenance Check List
This session describes how to perform the maintenance work periodically.
Use the tables below as check lists.
Reference
Refer to "11. Maintenance Spots" for the spots to be maintained.
Note
DE1 : DAPHNE EPONEX GREASE No. 1
10.1 Weekly Maintenance
Table 4
Maintenance Spots
Description
Grease
Cleaning Tools,
Nozzles, etc.
Check
Name
DWG No.
11.3.2 Vacuum Nozzle Diffusion Plate
(Lower Surface)
Fig. 15 Cleaning - Lens Cleaning
Cloth
Diffusion Plate
(Upper Surface)
Fig. 15 Inspection,
Cleaning
- Lens Cleaning
Cloth
10.2 Monthly Maintenance
Table 5
Maintenance Spots
Description
Grease
Cleaning Tools,
Nozzles, etc.
Check
Name
DWG No.
11.3.1 Nozzle Stocker Nozzle Storage
Section
Fig. 14 Cleaning - Rag
Cam Follower Fig. 14 Cleaning,
Lubrication
DE1 Oiled Rag, Brush
11.3.2 Vacuum Nozzle Inside the
Vacuum Nozzle
Fig. 15 Cleaning - Air Gun
Vacuum Nozzle
Hole
Fig. 15 Cleaning - Air Gun
Vacuum Nozzle
End
Fig. 15 Cleaning - Rag
11.3.3 Placement Head Vacuum Filter Fig. 17 Inspection - Vacuum Filter,
Vacuum Filter
Replacement Jig

360712-001
10.3 Quarterly Maintenance
10.3 Quarterly Maintenance
Notice
Lubrication must be made on the *-marked items after initial month and
every 3 months for the subsequent use.
Table 6
Maintenance Spots
Description
Grease
Cleaning Tools,
Nozzles, etc.
Check
Name
DWG No.
11.3.3 Placement Head * Linear Guides Fig. 16 Lubrication DE1
Syringe
, Nozzle
(No.19)
* Ball Screw Fig. 16 Lubrication DE1
Syringe
, Nozzle
(No.19)
Saucer Fig. 16 Cleaning - Oiled Rag
370712-001
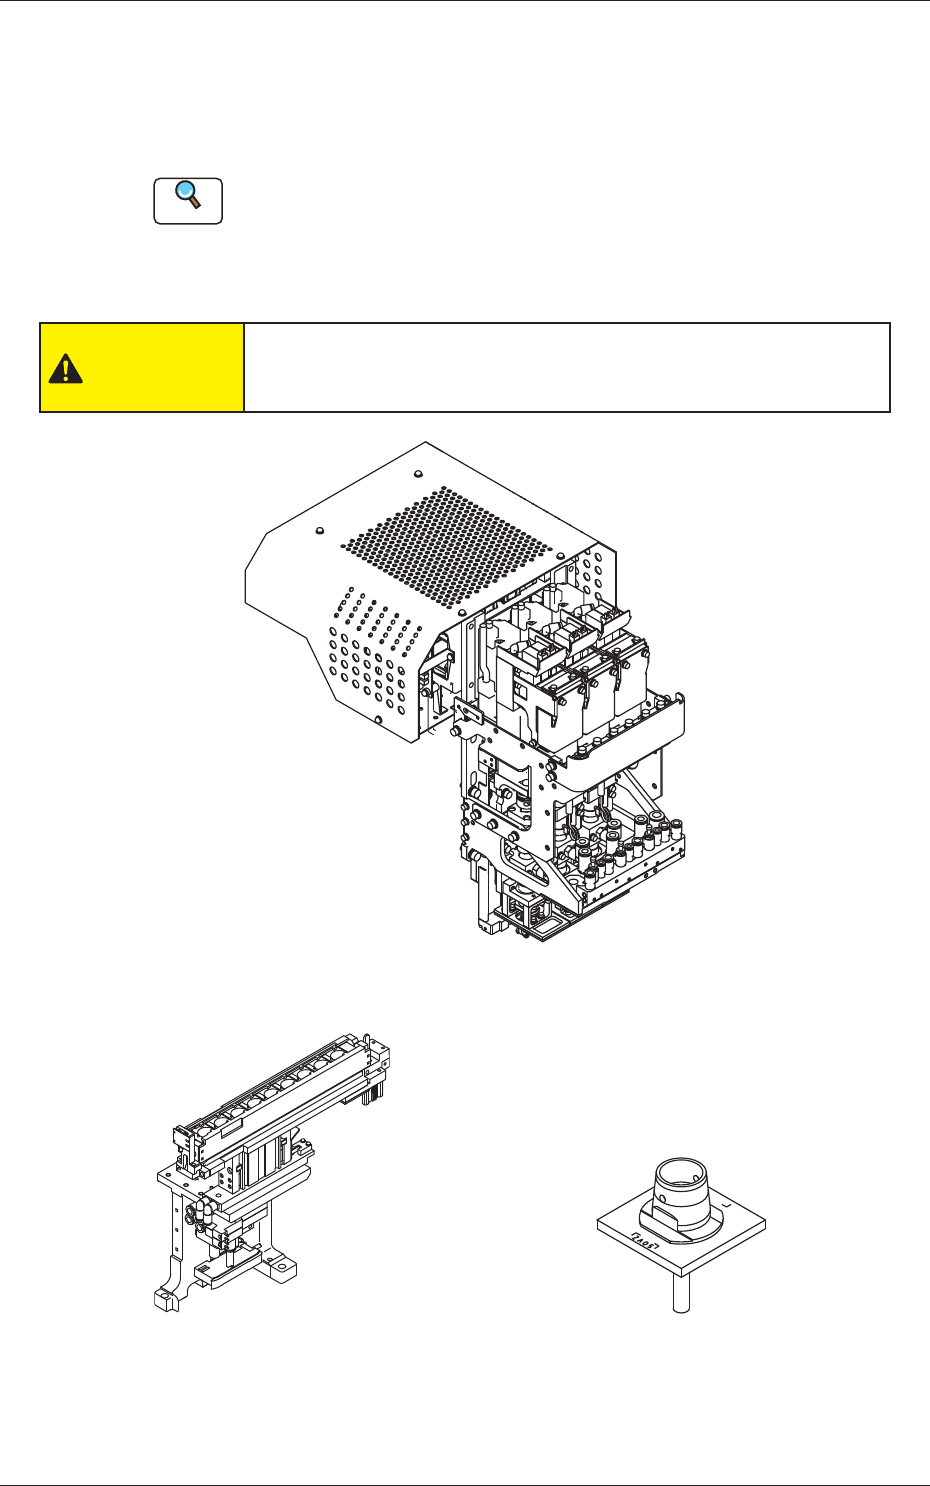
11. Maintenance Spots
11. Maintenance Spots
11.1 Whole View
Reference
Refer to "11.3 Inspection, Cleaning, and Lubrication Spots" and the
subsequent items for the detailed information on the spots of each
section to be maintained and how to maintain them.
CAUTION
• After the maintenance work, be sure to attach the cover back
in place.
Fig. 10 Placement Head
Fig. 11 Nozzle Stocker Fig. 12 Vacuum Nozzle