KE2040Instruction Manual Ver2.01,REV04.2003.6.25.pdf - 第399页
5 − 36 2) Edit a ball patte rn. 2-1 Cr eating a ball patt ern Select the “ Ball/Index” push butt on provided in the T ool box. Move the cursor over the displayed ball pattern, then click the left button of the track ball…
5 − 35
▼ How to edit a ball pattern
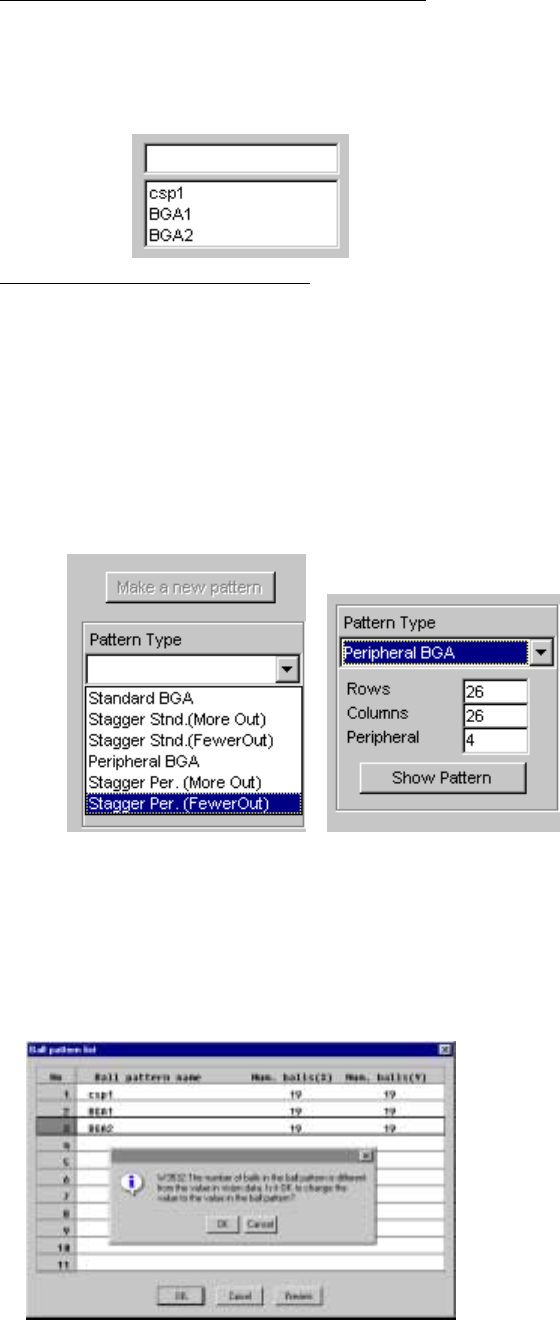
1) Set a ball pattern.
1-1 When setting a ball pattern from the list box
① When you select a registered ball pattern name, the corresponding
ball pattern appears on this dialog box.
② Click the <Make a new pattern> button.
③ Edit a ball pattern if necessary.
1-2 When setting a new ball pattern
① Click the <Make a new pattern> button.
② Select a ball pattern from the “Pattern Type” combo box, then enter
the number of “Rows” and that of “Columns” of a new pattern.
If you select a peripheral pattern, enter the number of lines on
which a ball is located.
③ When you click the <Show Pattern> button, the ball pattern you set
appears on this dialog box.
④ By clicking each cell to add/delete a pin, edit the displayed pattern.
* If the number of leads (balls) set on the Vision data screen is different
from the number of balls set on the “Ball pattern list” dialog box, the
number you set on this dialog box is regarded as “valid”, and the
number of leads (balls) and the number of missing leads (balls) are all
set to zero.
♦ The confirmation message appears on the screen.
5 − 36
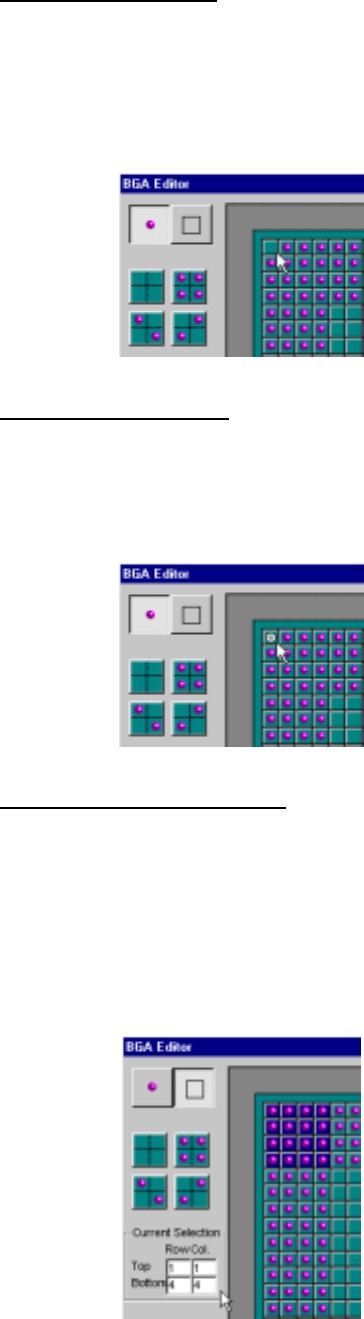
2) Edit a ball pattern.
2-1 Creating a ball pattern
Select the “Ball/Index” push button provided in the Tool box. Move the
cursor over the displayed ball pattern, then click the left button of the
trackball. It allows you to create a ball pattern.
- When you click the left button again, the displayed ball pattern is
cleared.
2-2 Creating an index mark
When you click the right button of the trackball, it allows you to create
an index mark.
- When you click the right button again, the displayed index mark is
cleared.
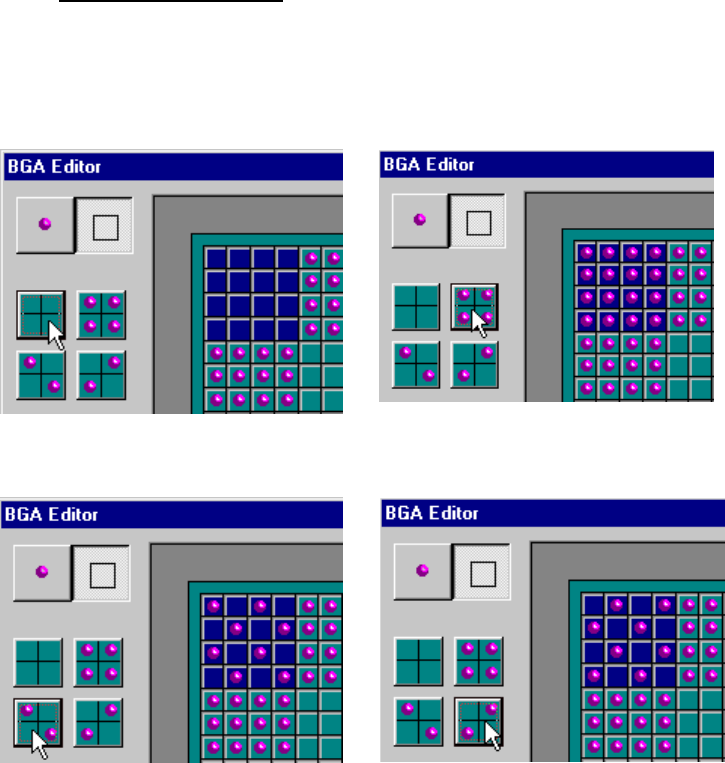
2-3 Arranging balls in a rectangle
Select the “rectangle” push button provided in the Tool box. Move the
cursor over the area you want to edit of the displayed ball pattern.
Move the trackball while holding down the left button of the trackball.
You can arrange balls in a rectangle.
- The color of the area of balls you set changes, and the coordinates
of the start and end points of the area being selected appear in the
“Current Position” fields.
5 − 37
2-4 Selecting a ball pattern
When you select one of four filling patterns, the ball pattern of the
selected area is changed to the selected pattern.
* Four types of ball pattern selecting screens are shown below.
Pattern 1 Pattern 2
Pattern 3 Pattern 4