KE2040Instruction Manual Ver2.01,REV04.2003.6.25.pdf - 第401页
5 − 38 3) Saving 3-1 Q uitting the ball pattern edit ing operat ion After editing a ball patter n, click t he <OK> butt on. - The f ollowing screen appears. W hen you click the <Cancel> but ton, it cancels yo…
5 − 37
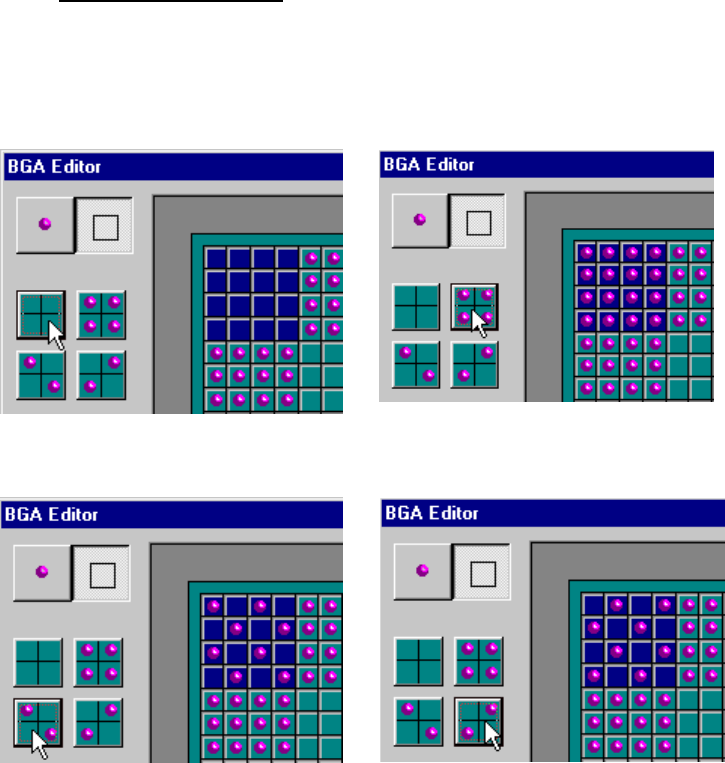
2-4 Selecting a ball pattern
When you select one of four filling patterns, the ball pattern of the
selected area is changed to the selected pattern.
* Four types of ball pattern selecting screens are shown below.
Pattern 1 Pattern 2
Pattern 3 Pattern 4
5 − 38
3) Saving
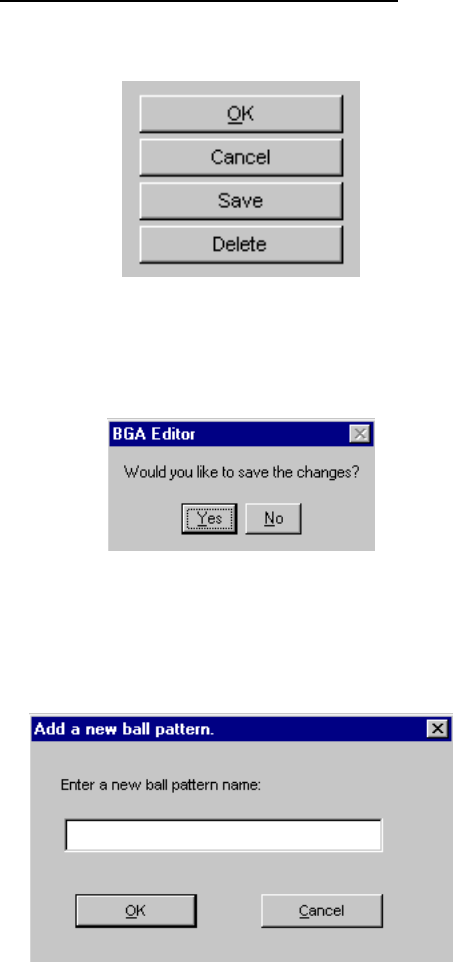
3-1 Quitting the ball pattern editing operation
After editing a ball pattern, click the <OK> button.
- The following screen appears.
When you click the <Cancel> button, it cancels your ball pattern
editing.
When you click the <Yes> button, the “Add a new ball pattern” dialog
box appears on the screen.
When you click the <No> button, the edited ball pattern is saved.
♦ - Enter a ball pattern name, then click the <OK> button. The
edited ball pattern is saved.
- When you click the <Save> button, the “Add a new ball pattern”
dialog box appears on the screen. Enter a ball pattern name,
then click the <OK> button. The edited ball pattern is saved.
- When you click the <Cancel> button, the machine cancels your
ball pattern editing.
5 − 39
4) Deleting
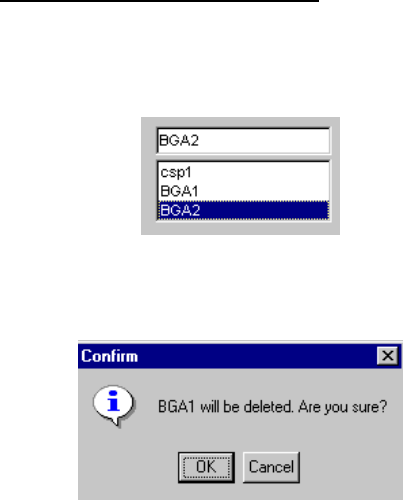
4-1 Deleting a registered ball pattern
This section describes how to delete a registered ball pattern.
- Select the name of a ball pattern that you want to delete from the list
box.
- When you click the <Delete> button, the following screen appears.
♦ - When you click the <OK> button, the selected ball pattern is
deleted from the list box.
- When you click the <Cancel> button, the machine cancels
deleting of the selected ball pattern.