00195655-04_SM_X-Series_FSE_en.pdf - 第106页
Service Work White Balance Process 3.7.1 Replacing the TwinHead Ho ses 106 Service Manual (internal ver sion) SIPLACE HF and X Series 3.8 3 . 8 W h it e B a la n c e P r o c e s s White Balance Process For details about …
Service Work
3.7.1 Replacing the TwinHead Hoses TwinHead
Service Manual (internal version) SIPLACE HF and X Series 105
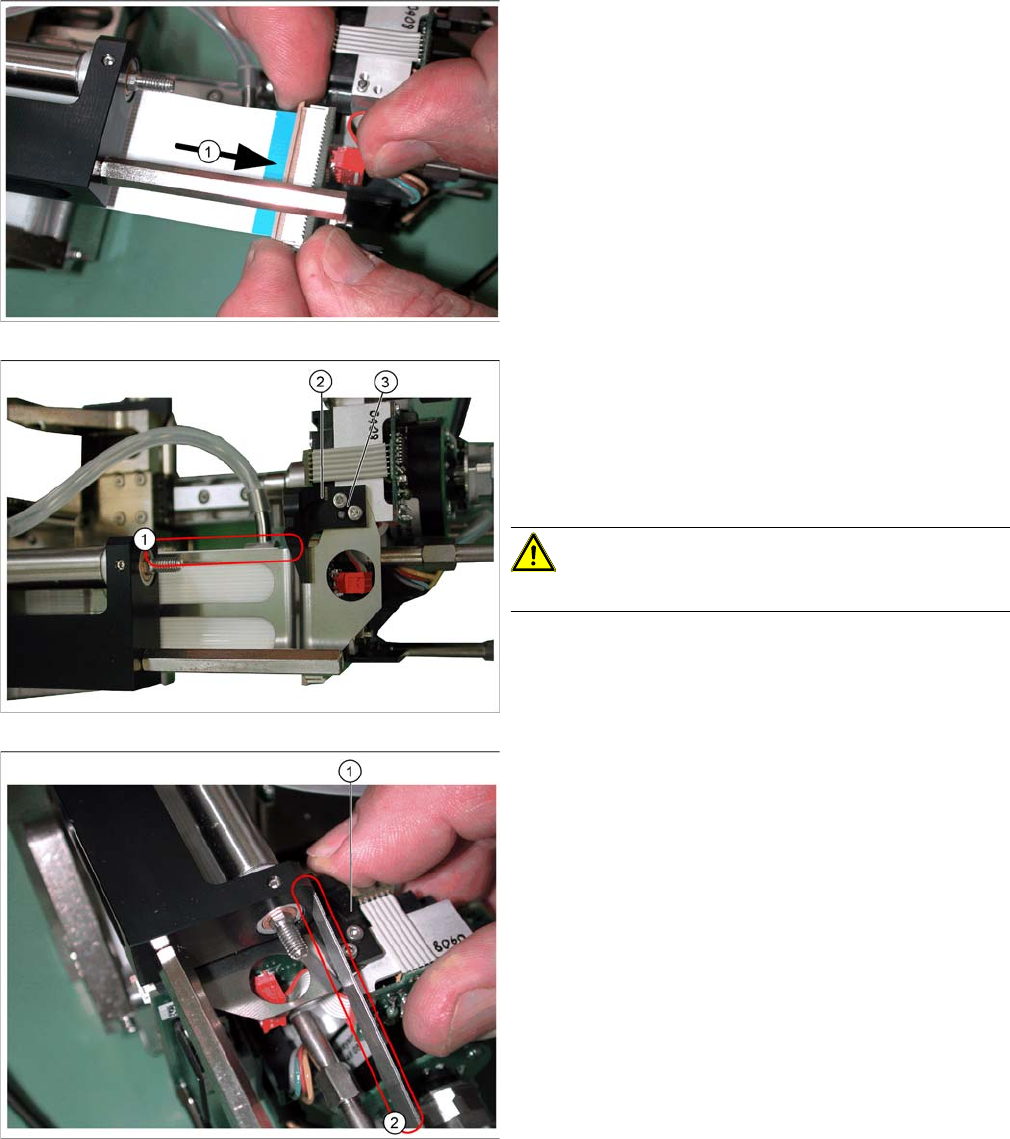
► Reconnect the flat ribbon cable connector (1).
► Place the flat ribbon baffle on the flat ribbon cable.
► Place the return unit stopper (2) onto the flat ribbon
baffle.
► Insert the two screws (3) into the stopper.
► Align the flat ribbon baffle to the flat ribbon cable.
CAUTION!
The baffle and cable must run parallel to one another (1)!
► Move the Z axis upwards.
► Insert the feeler gauge 0.6 mm (2) next to the stopper
(1).
► Tighten the screws fastening the stopper.
► Extract the feeler gauge.
Service Work
White Balance Process 3.7.1 Replacing the TwinHead Hoses
106 Service Manual (internal version) SIPLACE HF and X Series
3.8
3.8 White Balance Process
White Balance Process
For details about the white balance process, read the user guide "Camera Calibration FCCS Digital User
Guide" [00196449
-
xx].
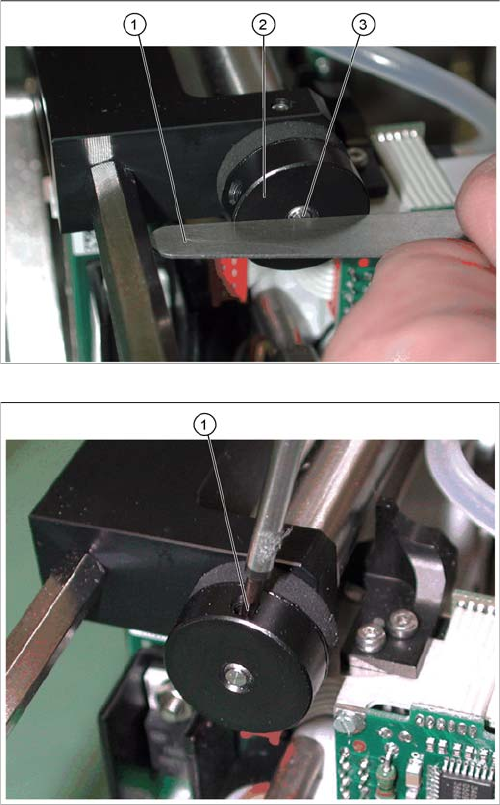
► Screw the bumper (2) in until the underside is level
with the screw (3) (checked with the feeler gauge (1)
on the photo).
► Fix the bumper with the side screw (1).
Service Work
3.9.1 Replacing the Cutter Blades [03009259-xx] Cutter
Service Manual (internal version) SIPLACE HF and X Series 107
3.9
3.9 Cutter
Cutter
3.9.1
3.9.1 Replacing the Cutter Blades [03009259-xx]
Replacing the Cutter Blades [03009259-xx]
Parts
The item number of the cutter blades may vary according to the cutter version and function status.
Tools
▪ Thick protective gloves
▪ Mounting plate [00312731-xx]
Alternatively: 2 large parallel clamps and a sturdy table with even surface to clamp down the disman
-
tled cutter
Removal
Tape cutter, pneumatic Function status Cutter blades, attuned
03000487 -01 to -03 03000501-xx
03000487 -04 to -05 03009259-xx
03019941 -01 03009259-xx
03052900 -01 03009259-xx
WARNING
Risk of injury
There is a high risk of injury from the blades and the tape deflector..
► Wear appropriately thick protective gloves!
► Never reach into the cutter from below or into the empty-tape duct from above.
► Dismantle the COT insert and the cutter.
► Remove the protective plate (2) and the baffle plate
(3).
► Remove the cover plate (1).
► Remove the caps (4) on the fastening screws.
WARNING!
There is a risk of injuring yourself on the cutting edge of
the blades.
For all further work, either fix the cutter to the assembly
plate with 4 hexagon socket-head screws M6 or use
screw clamps to fasten the cutter to a sturdy table.
4
1
4
3
2