F4000N_revD.pdf - 第15页
F4000N Series Operating Manual Section 3: T eaching Overview Part # 562187N - 1 Rev . D Sep 2012 14 © 20 12 Fisnar Inc. T o d ispense a bead of material in an arc, the XYZ loca tion of the start of the line is registered…
F4000N Series Operating Manual
Section 3: Teaching Overview
Part # 562187N-1
Rev. D Sep 2012
13
© 2012 Fisnar Inc.
1. Teaching Overview
A program consists of a series of instructions stored in the main memory unit. Each
instruction is stored in a numbered memory address. A memory address may record a
point location with an X, Y, and Z-axis value and point type or it may store an instruction,
which sets a parameter, such as a dispensing time or line speed.
When the program is executed, the robot will go through each memory address in
sequence and execute the instruction found there. If the memory address contains a point
location, the robot will move the X, Y, and Z axes to that location. Depending on the type
of point registered at that location, the robot may also perform other functions, such as
turning the dispenser on or off.
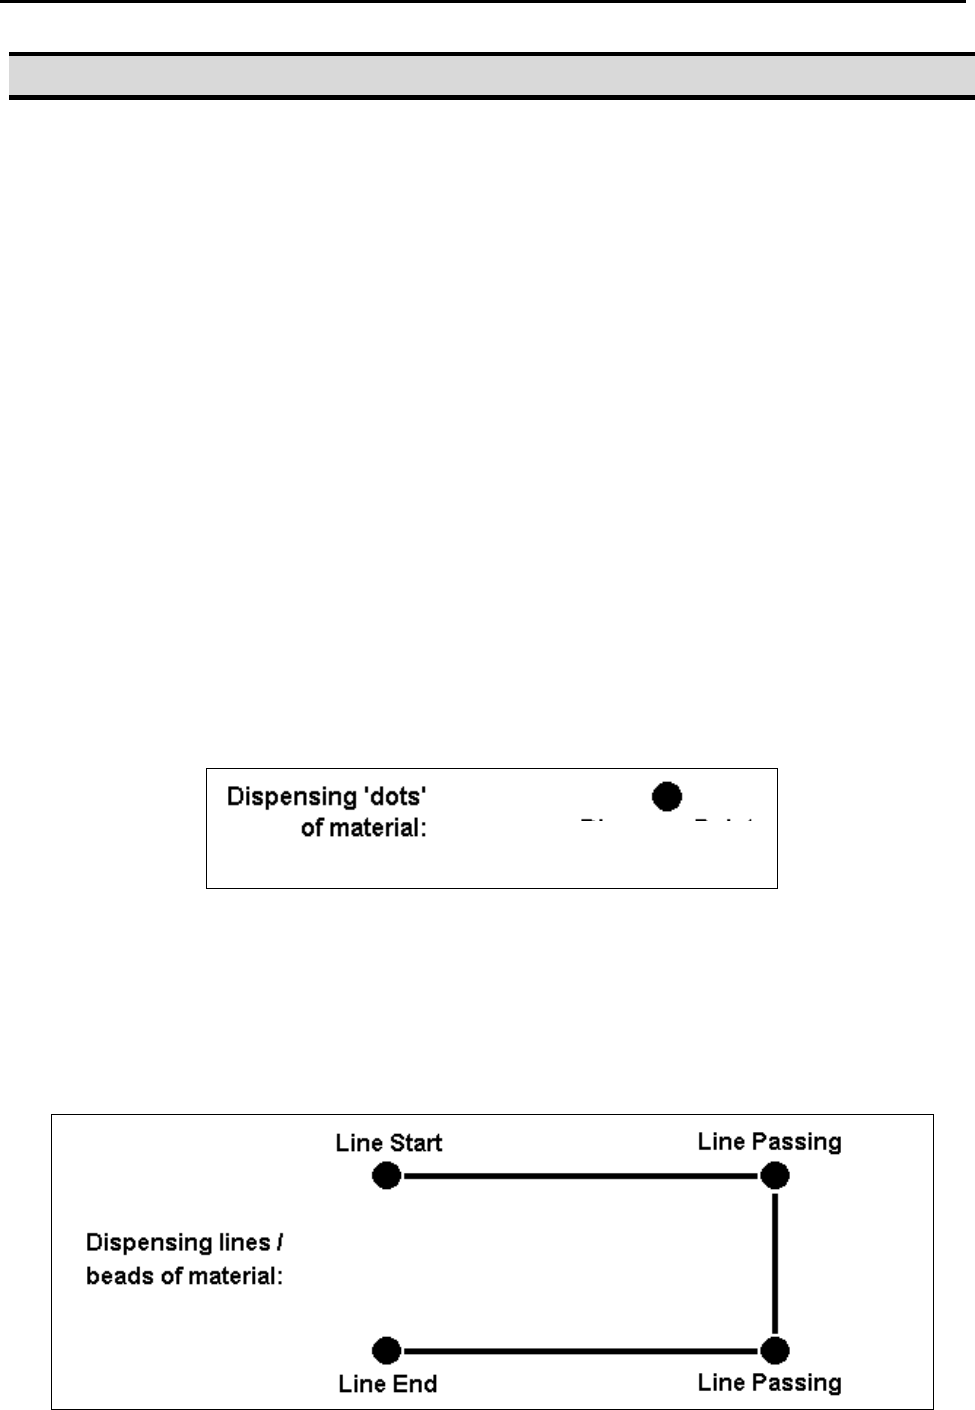
The most commonly used point types are Dispense Dot, Line Start, Line Passing, Arc
Point, and Line End.
To program the robot to dispense a „dot‟ of material, the dispensing tip must be jogged to
the desired XYZ location, then that location is registered as a DISPENSE DOT point type
by pressing the appropriate keys on the Teach Pendant.
To program the robot to dispense a bead of material along a linear path, the XYZ location
of the start of the line is registered as a LINE START point type. The locations where the
tip changes direction are registered as LINE PASSING points. The end of the line is
registered as a LINE END point:
Dispense Dot
F4000N Series Operating Manual
Section 3: Teaching Overview
Part # 562187N-1
Rev. D Sep 2012
14
© 2012 Fisnar Inc.
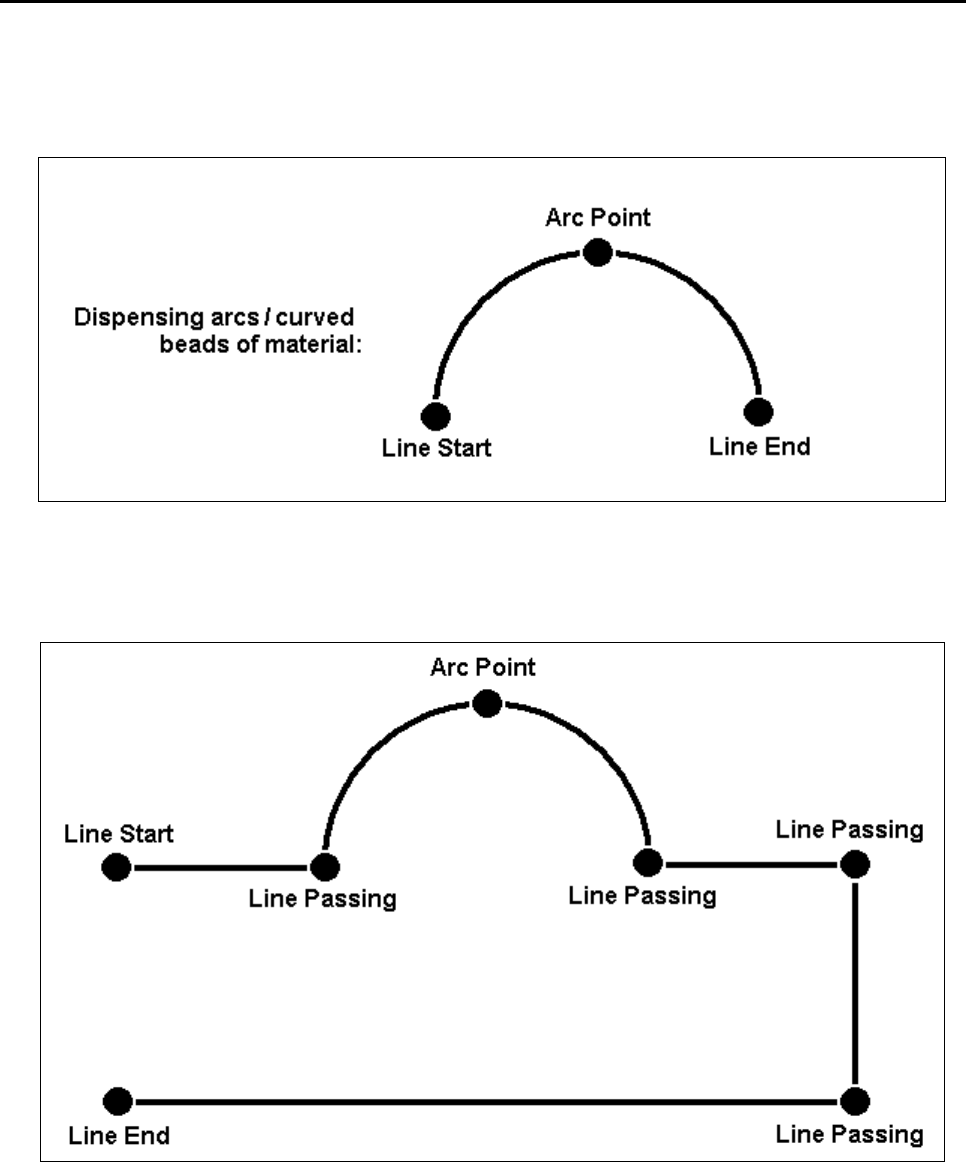
To dispense a bead of material in an arc, the XYZ location of the start of the line is
registered as a LINE START point type. The high point of the arc is registered as an ARC
POINT. The end of the arc is registered as a LINE END point:
Lines and arcs can also be combined to dispense a bead of material along a complex
path:
Once the required point locations for your program have been taught, the teach pendant is
no longer required. The unit can be switched to RUN mode and operated using the
buttons and switches on the main unit control panel.
F4000N Series Operating Manual
Section 3: Teaching Overview
Part # 562187N-1
Rev. D Sep 2012
15
© 2012 Fisnar Inc.
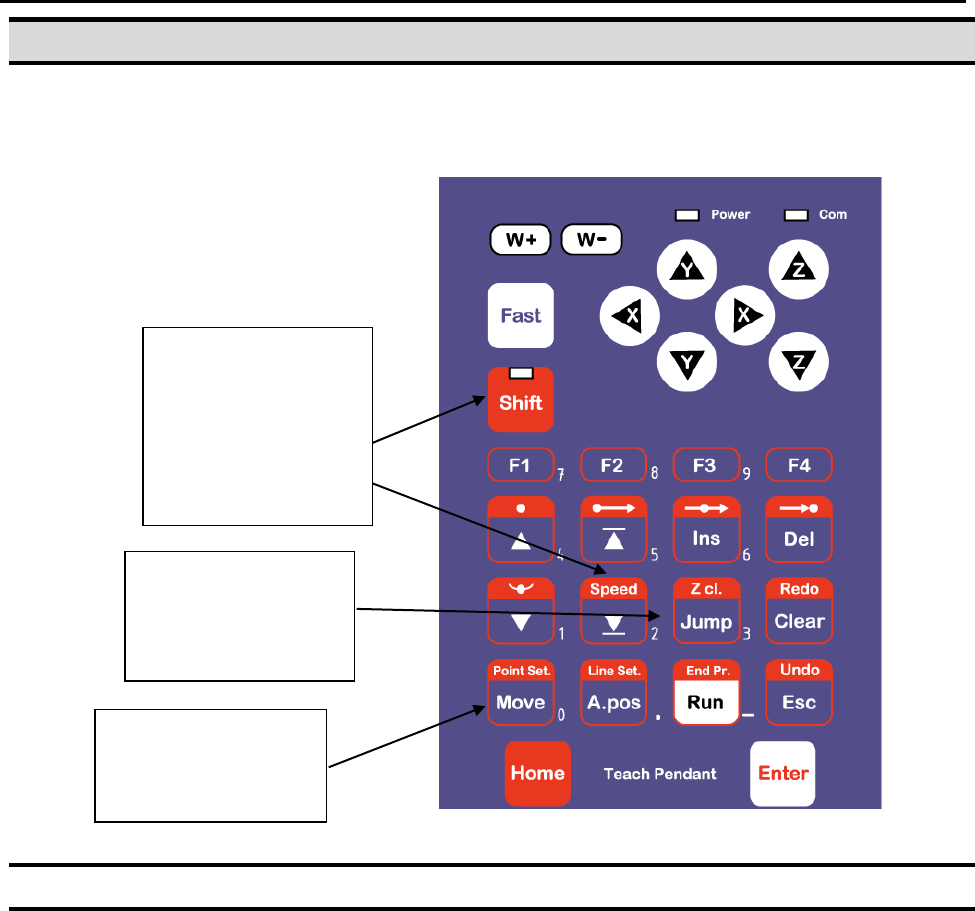
2. Using the Teach Pendant
The teach pendant enables the user to jog the robot and input program data.
2.1 Key Selection
There are several functions assigned to most keys on the Teach pendant. When a key is
pressed alone, the function shown in the blue colored area on the key is executed. For
example, Ins, Del, Jump, Clear and Esc are the default key functions, which are
executed when that key is pressed alone.
To access the function shown in the red colored area at the top of a key, press and
release the Shift key first (the LED on the Shift key will be flashing), then press the
desired key. For example, to select the Speed function, press and release Shift, then
press the Speed key.
When a number is required, the teach pendant will automatically switch to numeric entry
mode. The number represented by each key is shown in the lower right corner of the key.
If Shift is pressed,
released, then the
Speed key is
pressed, Speed
Setup is executed.
If this key is
pressed alone,
Jump is executed.
When entering
numbers, this key is
0.