fx3r.pdf - 第113页
FX-3R Maintenance Guide 9-8 <Detaching the head cover> 1) Loosen four hexagon socket head cap bolts (M6 × L30) fixing the head cover with an Allen wrench, and then remove the hexagon socket head cap bolts. Figure 9…
FX-3R Maintenance Guide
9-7
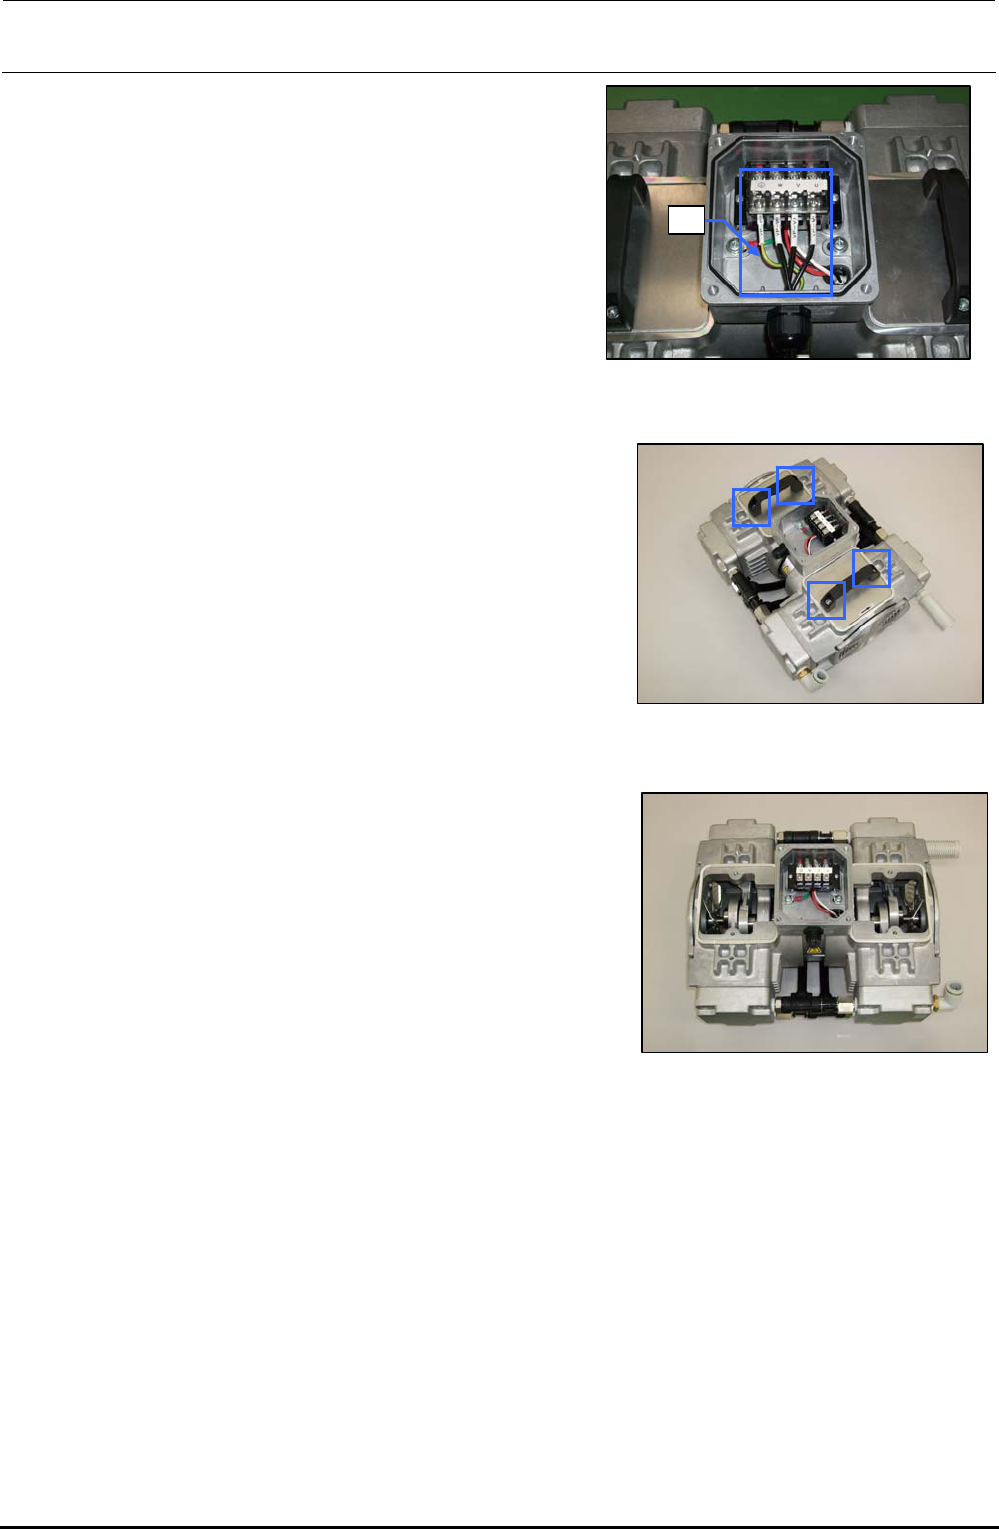
5) Open the cover of the terminal box and
disconnect the cables e from the terminal block.
e
Figure 9-4-2 Disconnecting the Cables
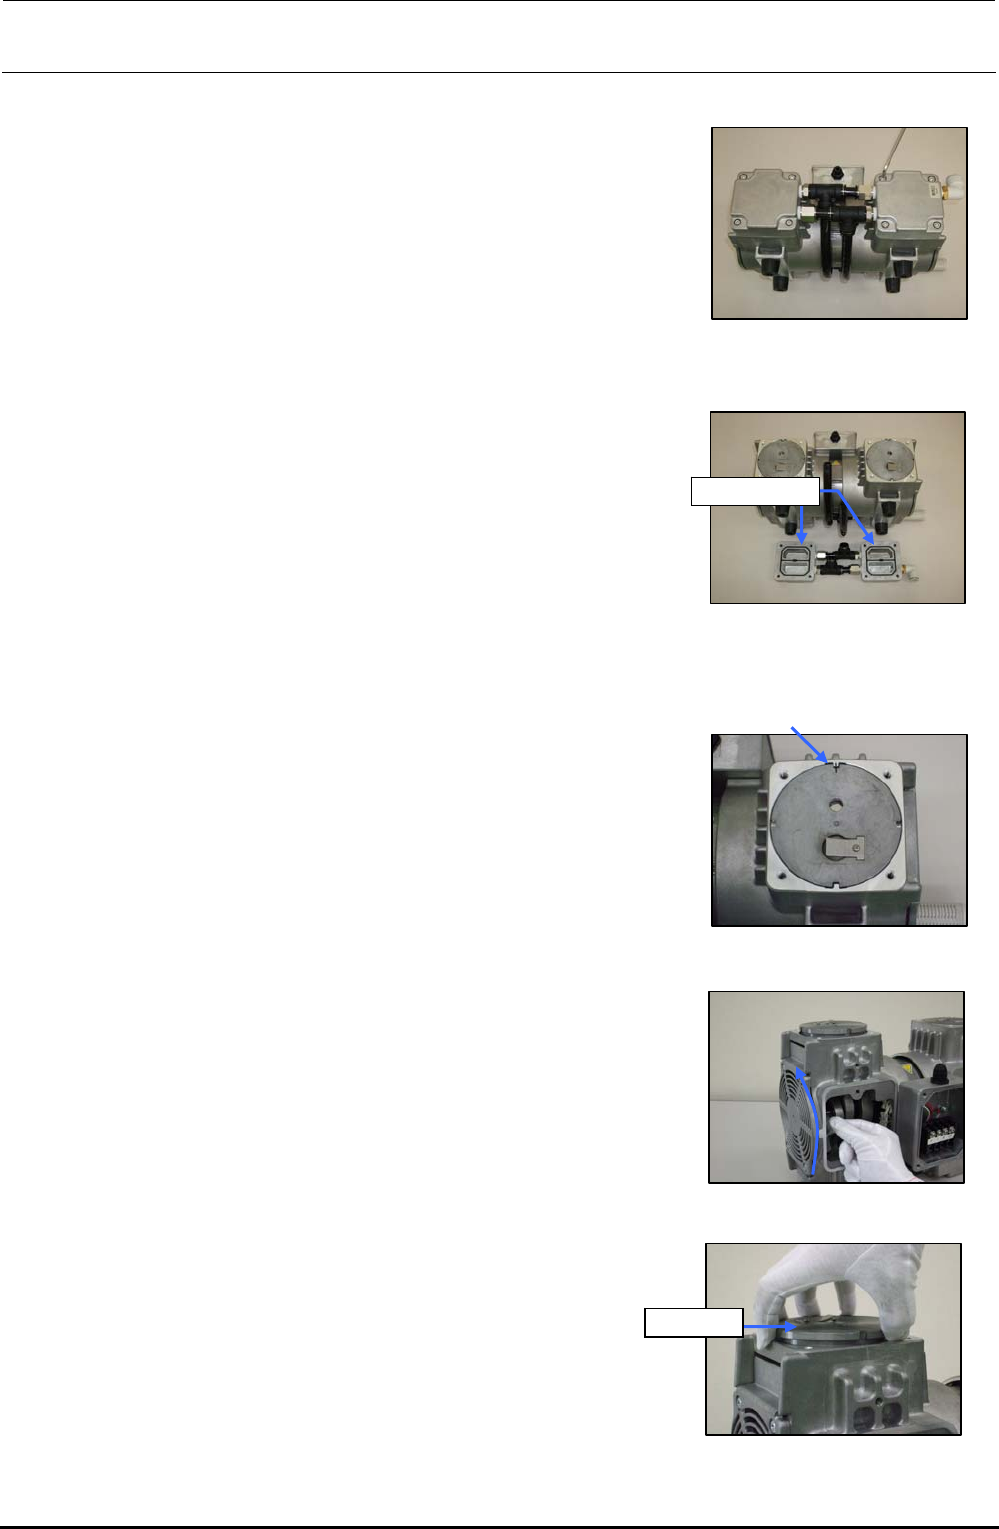
6) Loosen the hexagon socket head cap bolts (M6 × L16)
fixing the handle with an Allen wrench having a width
between across flats of 5 mm.
Figure 9-4-3 Removing the Bolts
7) Detach the handle and panel.
Figure 9-4-4 Detaching the
Handle and Panel
8) Place the pump vertically so that the head to be replaced is located at the top.
Rev. 1.00
FX-3R Maintenance Guide
9-8
<Detaching the head cover>
1) Loosen four hexagon socket head cap bolts (M6 × L30)
fixing the head cover with an Allen wrench, and then
remove the hexagon socket head cap bolts.
Figure 9-4-5 Removing the Head
Cover Set Screws
2) Detach the head cover.
Head cover
Figure 9-4-6 Detaching the Head
Cover
<Detaching the cylinder>
1) Before detaching the cylinder, put a mark on the casing
and cylinder with an oil felt pen.
Figure 9-4-7 Putting a Mark
2) Wear gloves and gradually turn the fan upward.
(At this time, always wear gloves.)
Rev. 1.00
Figure 9-4-8 Turning the Fan
3) Pull out the cylinder upward.
Cylinder
Figure 9-4-9 Pulling Out the
Cylinder
FX-3R Maintenance Guide
9-9
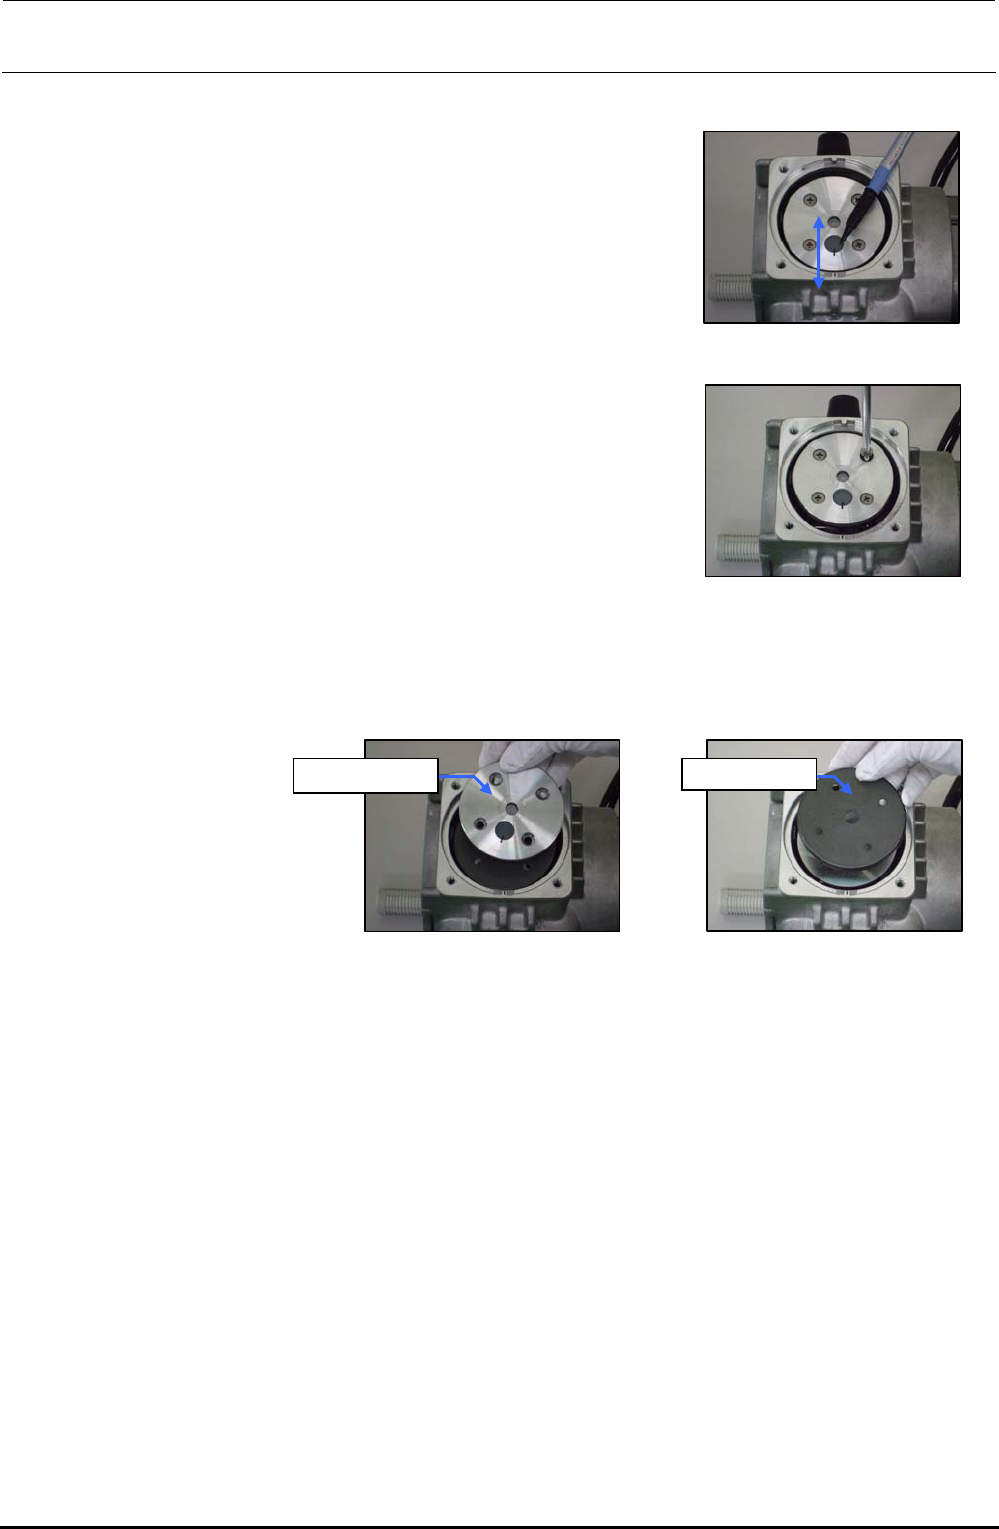
<Detaching the support plate, cup packing, and suction valve interference prevention rubber>
1) Put a mark on the support plate with an oil felt pen so
that it meets the mark on the casing.
Figure 9-4-10 Putting a Mark
2) Loosen four countersunk head screws of the support plate.
Figure 9-4-11 Removing the
Countersunk
Head Screws
3) Detach the support plate and cup packing.
Support plate Cup packing
Figure 9-4-12 Detaching the
Support Plate
Figure 9-4-13 Detaching the
Cup Packing
Rev. 1.00