fx3r.pdf - 第139页
FX-3R Maintenance Guide 12-10 6) Exit the BIOS setting. Display the “ Exit ” menu screen with the [ ← ] or [ → ] key. Phoenix TrustedCore (tm) Setup Utility Main Advanced Security Boot Exit Item S pecific Help Exit Savin…

FX-3R Maintenance Guide
12-9
5) Set “Boot priority order”.
Select the “Boot” menu screen with the [←] or [→] key. Set “Boot priority order” to the order
shown in the Fig. below while referring to the operating procedures.
Figure 12-2-2-1-5 BIOS Screen (Boot Screen)
・ “Boot” menu screen operating procedures
(1) Changing the order in “Boot priority order:”
Move the cursor to an item you want to move with the [↑] or [↓] key.
Move the cursor up or down with the <+> or <−> key.
(2) Moving from “Excluded from boot order:” to “Boot priority order:”.
Move the cursor to an item you want to move with the [↑] or [↓] key.
Move to “Boot priority order:” with the <X> key.
∗ In the same manner, you can move from “Boot priority order:” to “Excluded
from boot order:”.
Rev. 1.00
FX-3R Maintenance Guide
12-10
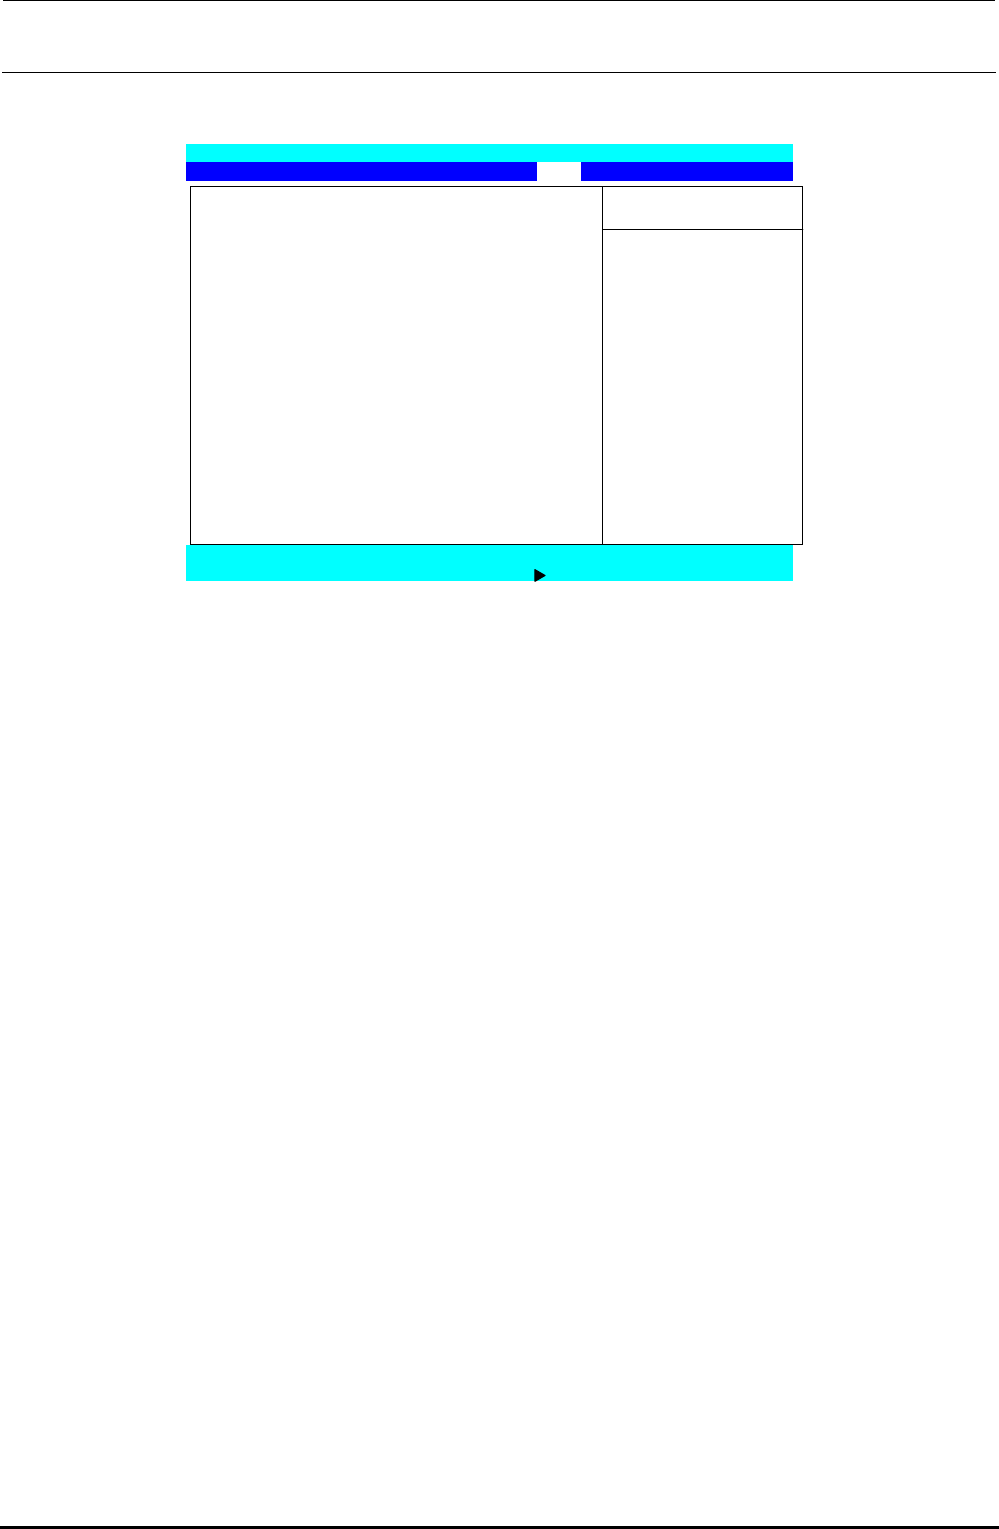
6) Exit the BIOS setting.
Display the “Exit” menu screen with the [←] or [→] key.
Phoenix TrustedCore (tm) Setup Utility
Main Advanced Security Boot Exit
Item Specific Help
Exit Saving Changes
Exit Discarding Changes
Load Setup Defaults Exit System Setup and
Discard Changes save your change to
Save Changes CMOS.
F1 Help ↑↓Select Item -/+ Change Values F9 Setup Defaults
Esc Exit Select Menu Enter Select Sub-Menu F10 Save and Exit
Figure 12-2-2-1-6 BIOS Screen (Exit Screen)
Move the cursor to “Exit Saving Changes” with the [↑] or [↓] key and press the <ENTER>
key to save the BIOS setting and exit it.
Rev. 1.00
FX-3R Maintenance Guide
12-11
12-2-3. Setting Up the Network (This setup is required when communicating with the
IS.)
To use the communication between the FX-3R and the IS, it is absolutely necessary to set up the
network.
<Setting procedures>
Setting up the TCP/IP
Setting up a shared folder
Registering a user
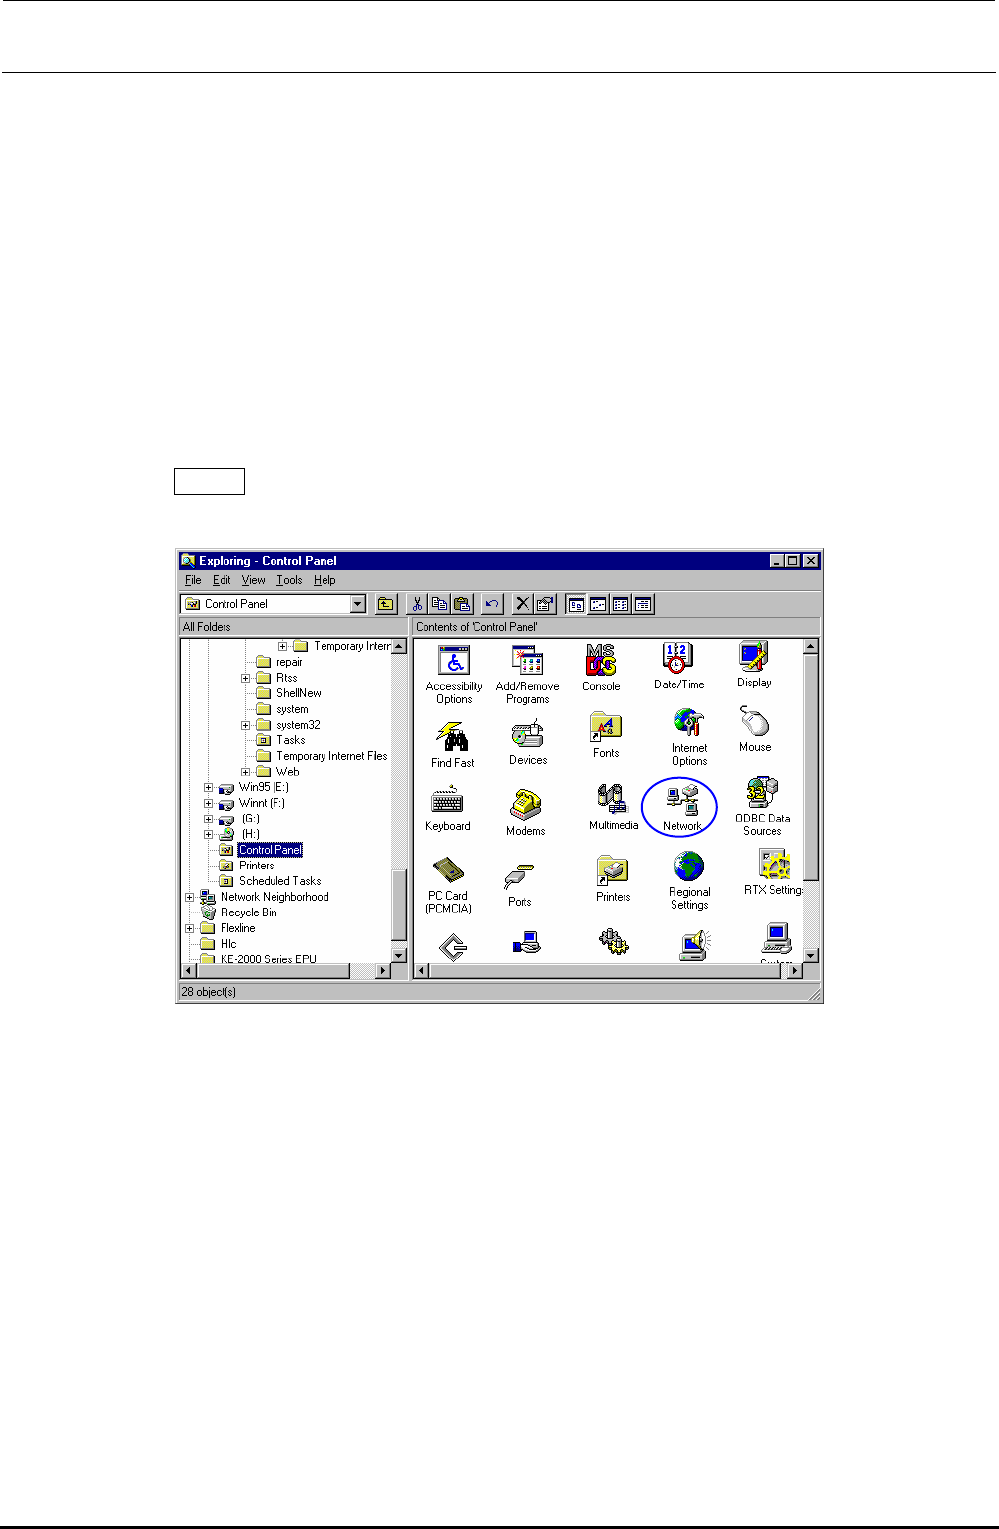
12-2-3-1. Setting Up the TCP/IP
1) From the Start button, select [Settings], and then [Control Panel].
2) Select the [Network ] icon from the control panel.
Rev. 1.00