YSI_Prog_E.pdf - 第33页
iii 3. Contents of each chapter This manual is comprised of the following chapters. Chapter 1 Basic operation T his chapter explains the basic configuration of the YSi software screen. Chapter 2 …

ii
2. Warranty
The machine you have purchased is warranted against malfunctions as described below.
n
Warranty description:
If a failure or breakdown occurs due to defects in workmanship or materials used to manufacture this machine within
one year or 5,000 hours of operation (whichever comes first) after the incoming inspection is complete, then YAMAHA
will repair the defective parts free of charge.
n
Warranty period
The warranty period ends when any of the following applies:
1. After one year has elapsed from the time of installation.
2. After 5,000 hours of operation.
n
Items not covered by the warranty
The warranty does not cover any of the following conditions:
1. Damage as a result of deterioration due to age or wear (e.g., normal discoloration of painted or plated surfaces, wear
of replaceable parts, etc.).
2. Incidents associated with sensory perceptions which have no bearing on the quality or function of the machine (e.g.,
signal sounds emitted by the controller, rotating sounds of the motor, etc.).
3. Damage caused by the user environment (e.g., impurities in the air supply, dust, debris and oil mist in the machine).
n
Exception to warranty repairs
Warranty repairs will not be made if damage is caused by the following:
1. Earthquakes, typhoons, floods, lightning, accidents or fires, other natural or man-made disaster.
2. Modifications or conversions not approved by YAMAHA or its dealers.
3. Use of non-genuine parts, greases or lubricants.
4. Lack of proper maintenance and inspection procedures.
5. Maintenance handled by someone other than the approved dealers.
6. Damage or malfunction due to changes in the machine installation level that may be caused by changes in the
foundation or surrounding environment.
7. The machine was modified or changed in specifications after the incoming inspection is complete.
8. When defective parts replaced free of charge were not returned to the location specified by YAMAHA or YAMAHA
sales representatives within 30 days.
n
Note on network connections
A precondition for network connections with the YAMAHA machines is that such connections will be used in closed
networks comprised of this machine and an off-line PC. The customer must take responsibility for connections to
company in-house networks and to external networks. Please acknowledge that YAMAHA can bear absolutely no
responsibility for networks configured by other than this machine and off-line PC nor can accept responsibility for
problems occurring due to network settings and connections.

iii
3. Contents of each chapter
This manual is comprised of the following chapters.
Chapter 1
Basic operation
This chapter explains the basic configuration of the YSi software screen.
Chapter 2
Creating inspection programs
This section describes how to create new and tune existing inspection programs.
Chapter 3
Step screen
This section describes the parameters set at the "Step" screen and the functions of each button.
Chapter 4
Inspection status
This section describes how to specify all inspection status settings.
Chapter 5
Inspection machine settings
This section describes operator management and machine settings.
Appendix
This section describes keyboard shortcut functions that are available when performing screen operation.
Index
The index at the end of this manual helps you quickly find where necessary items are explained.
iv
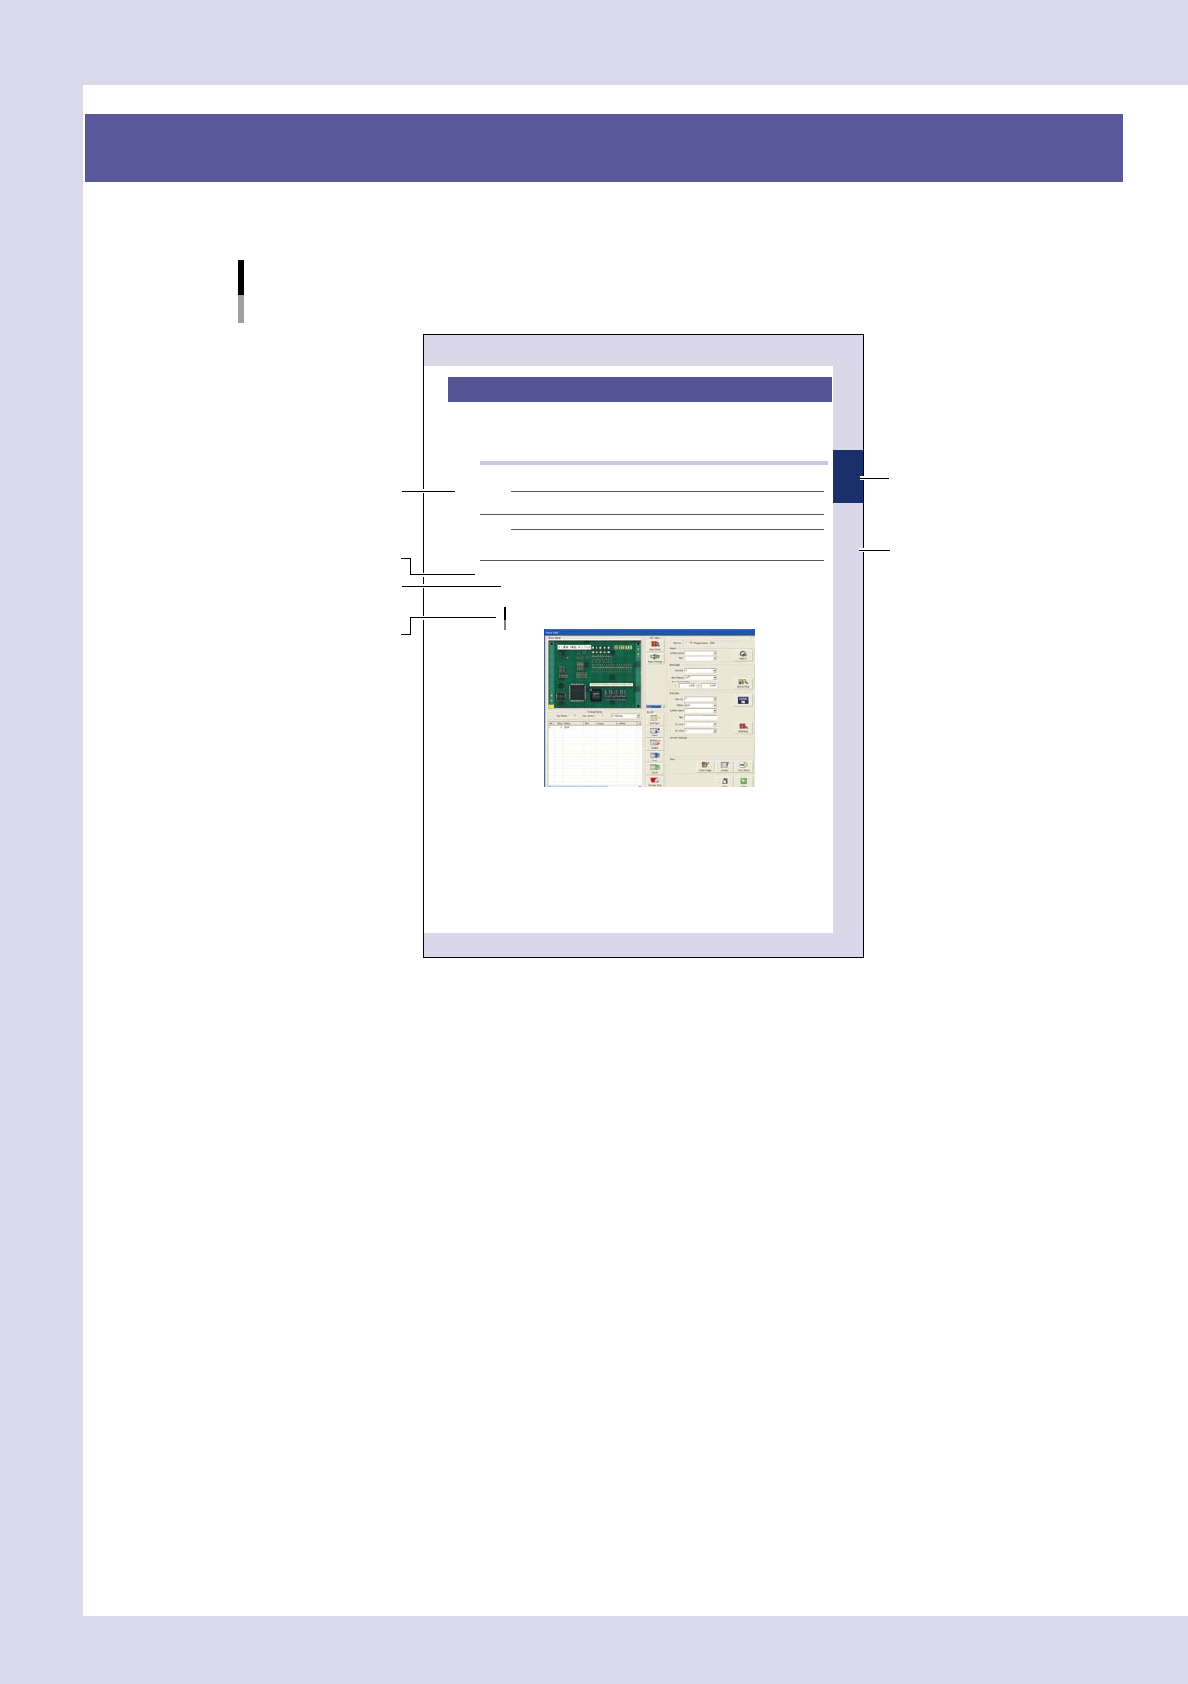
4. Page layout
The description below shows a typical page layout used in this manual.
2-15
2
Creating and setting data
5. Block settings
A "block" is the inspection range (field-of-view) of the inspection device. Blocks must be set on the board
locations to cover all parts to be inspected. Because the image of each block is acquired and saved, block
settings must be performed on the actual machine. (On the offline software, some buttons are grayed out and
inactive.)
5.1 Basic block setting procedure
The basic block setting procedure is explained below.
NOTE
When an inspection program created with P-Tool is loaded, there is no need to set blocks because they have already
been set.
NOTE
After carefully reading the basic procedure, refer to the next section 5.2, "Block setting function details", for creating
all blocks effi ciently.
Blocks can be automatically created by using the VADMIC editor.
Open the "Data Edit" screen and set a board in place.
When you press the [Data edit] button on the "Main" screen, a "Set PCB?" message appears. At this time,
set a board at the entrance sensor detection position on the conveyor and then press the [Yes] button.
"Data Edit" screen
24219-K0-10
Step
Sub step or
description of step
Typical page layout
Chapter number
Chapter title
Figure, picture
or table caption
Note, Caution
or Warning
23001-P6-00
n
Step
This describes the procedure for each operation.
n
Substep or description of step
This provides detailed information on the steps in each procedure.
n
Figure, picture or table caption
This is the title of the figure, picture or table and appears at the upper left.
n
Note, Caution or Warning
These are explained in detail in "Safety" instructions.