User-Manual-NeoDen9-PNP-machine.pdf - 第45页
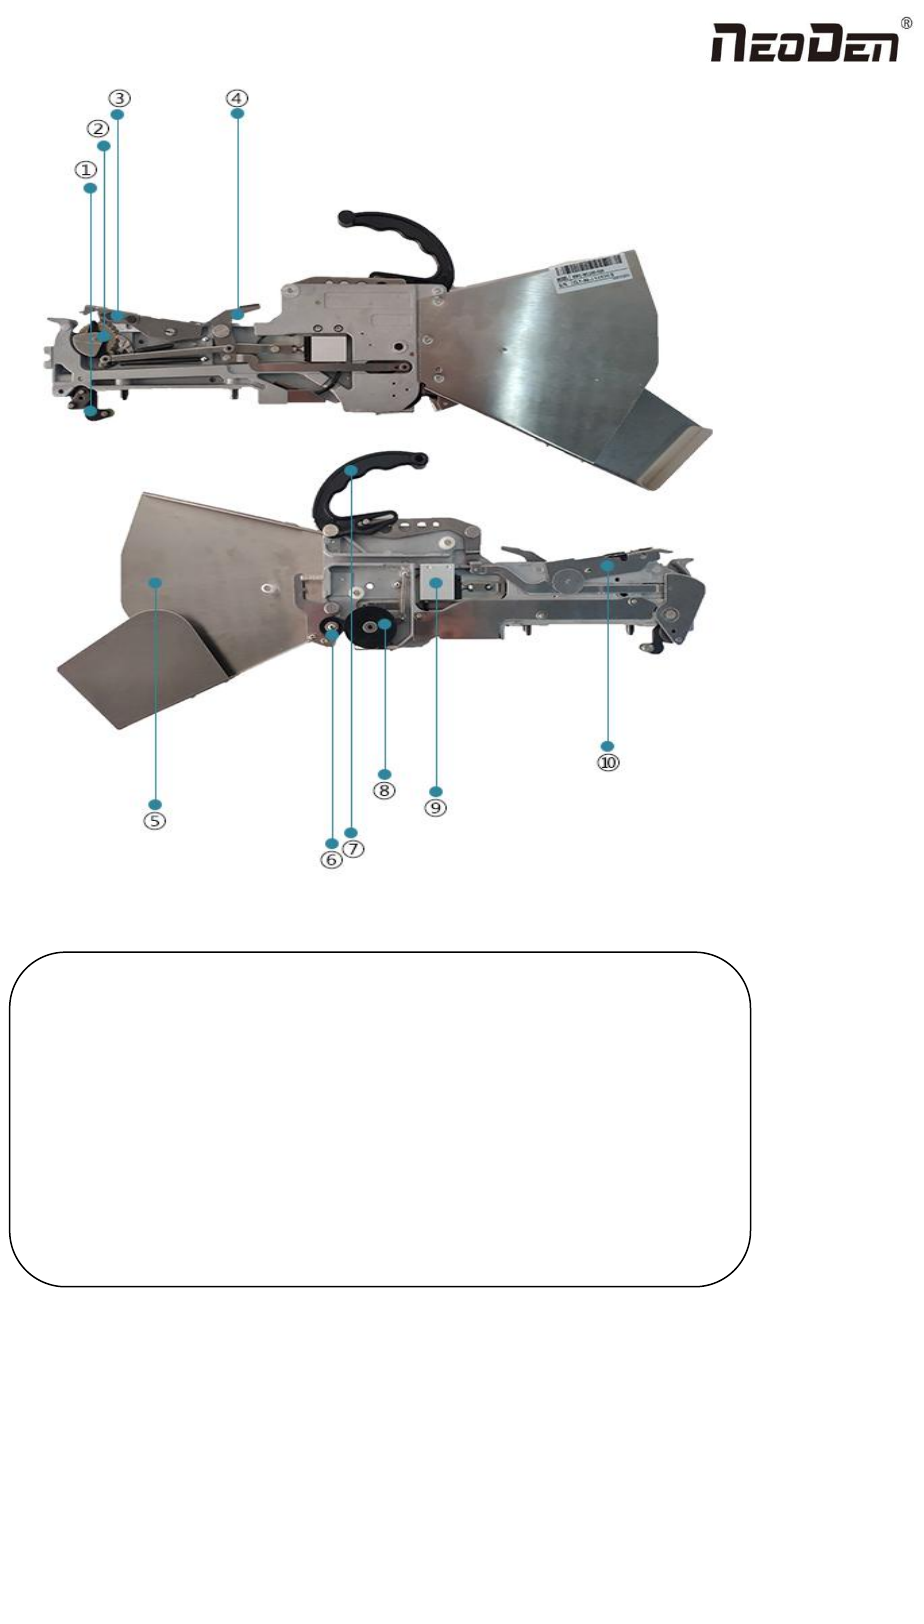
45 Zhejiang Neoden T echnol ogy Co., Ltd ① Fr ont fixed buckle ② Mat eria l-sen ding whee l gear ③ Pr ess materia l cover ④ Lock ing Claw ⑤ T a il board ⑥ Sin gle-t rack wheel ⑦ Hand Sha nk ⑧ T ap e coiling wheel ⑨ Cy li…

44
Zhejiang Neoden Technology Co., Ltd
(4) The nozzle was blocked
(5) The nozzle is damaged or has a crack
(6) The size issue of nozzle would cause air leakage or insufficient suction
(7) The air hose is blocked or has a leakage problem, and even the pump has an issue.
4. Frequently throwing components. Some suggestions are listed below,
(1) Up-looking camera can’t take a clear picture of component due to brightness issue for example
(2) The pins are distorted
(3) The size or shape isn’t aligned with that in “Footprint library’’
(4) The size of nozzle is inappropriate or insufficient suction.
(5) The nozzle has solder paste or rubbish cause air leakage
(6) The nozzle is damaged or cracked cause air leakage
10.4 Continuous SMT production
Follow the SOP to start production
Notes:
(1) Do not touch the surface to board to avoid damaging the printed solder paste.
(2) When the error message occurs, please check out and solve it a.s.a.p.
(3) Once reloading the component during production, pay attention to the model, specification, polarity and direction of
components.
(4) Clear the reject box timely to avoid wasted materials stacked too high to damage the mount head
11. Structure and maintenance instruction
11.1 Feeder Brief Introduction
45
Zhejiang Neoden Technology Co., Ltd
①Front fixed buckle
②Material-sending wheel gear
③Press material cover
④Locking Claw
⑤Tail board
⑥Single-track wheel
⑦Hand Shank
⑧Tape coiling wheel
⑨Cylinder
⑩Snap joint cover
46
Zhejiang Neoden Technology Co., Ltd
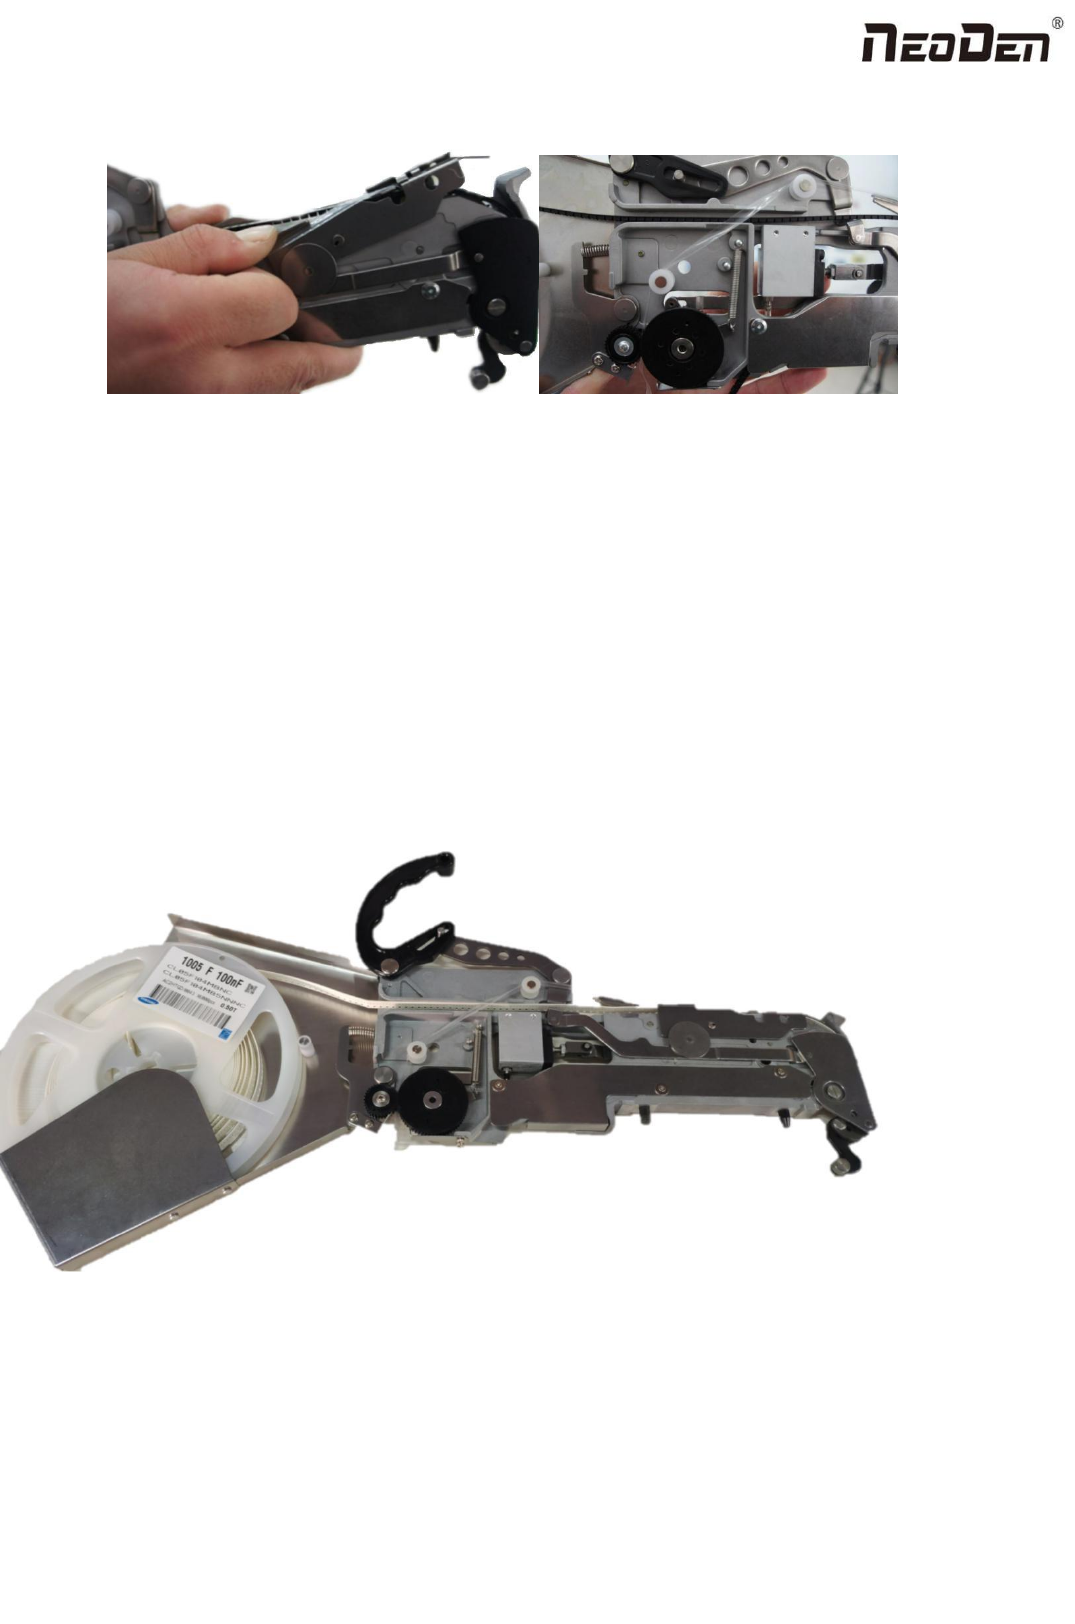
11.2 Installing tape and reel components
figure 1 figure 2
1. Making the feeder in open status to wait for installing the tape reel ①Lift up the feeder fixing handle;②Press the
material-sending handle with left hand ③meanwhile press the lamellule at right side of the feeder with your right hand;
loosen the material-sending handle, ensure the proper wrapped (see figure 1) then loosen the lamellule
2. Installing the tape and reel components: setting the reel on reel storage at the back side of the feeder, pull out
approximately 10cm length tape, separate the film and tape, then put into transfer storage (see figure 1).The tape should be
closely matched with the gear, and the film should pass through the upper denomination groove (see figure 2) through two
white guide wheels and then be sandwiched between two gears.
Fig 3
3. Finish installing tape and reel components.