User-Manual-NeoDen9-PNP-machine.pdf - 第46页
46 Zhejiang Neoden T echnol ogy Co., Ltd 11.2 Installi ng tape and reel components figure 1 figure 2 1. Mak ing the feede r in open status to wa it for installing the tap e ree l ① Lift up the fe eder fixing ha ndle ; ② …
45
Zhejiang Neoden Technology Co., Ltd
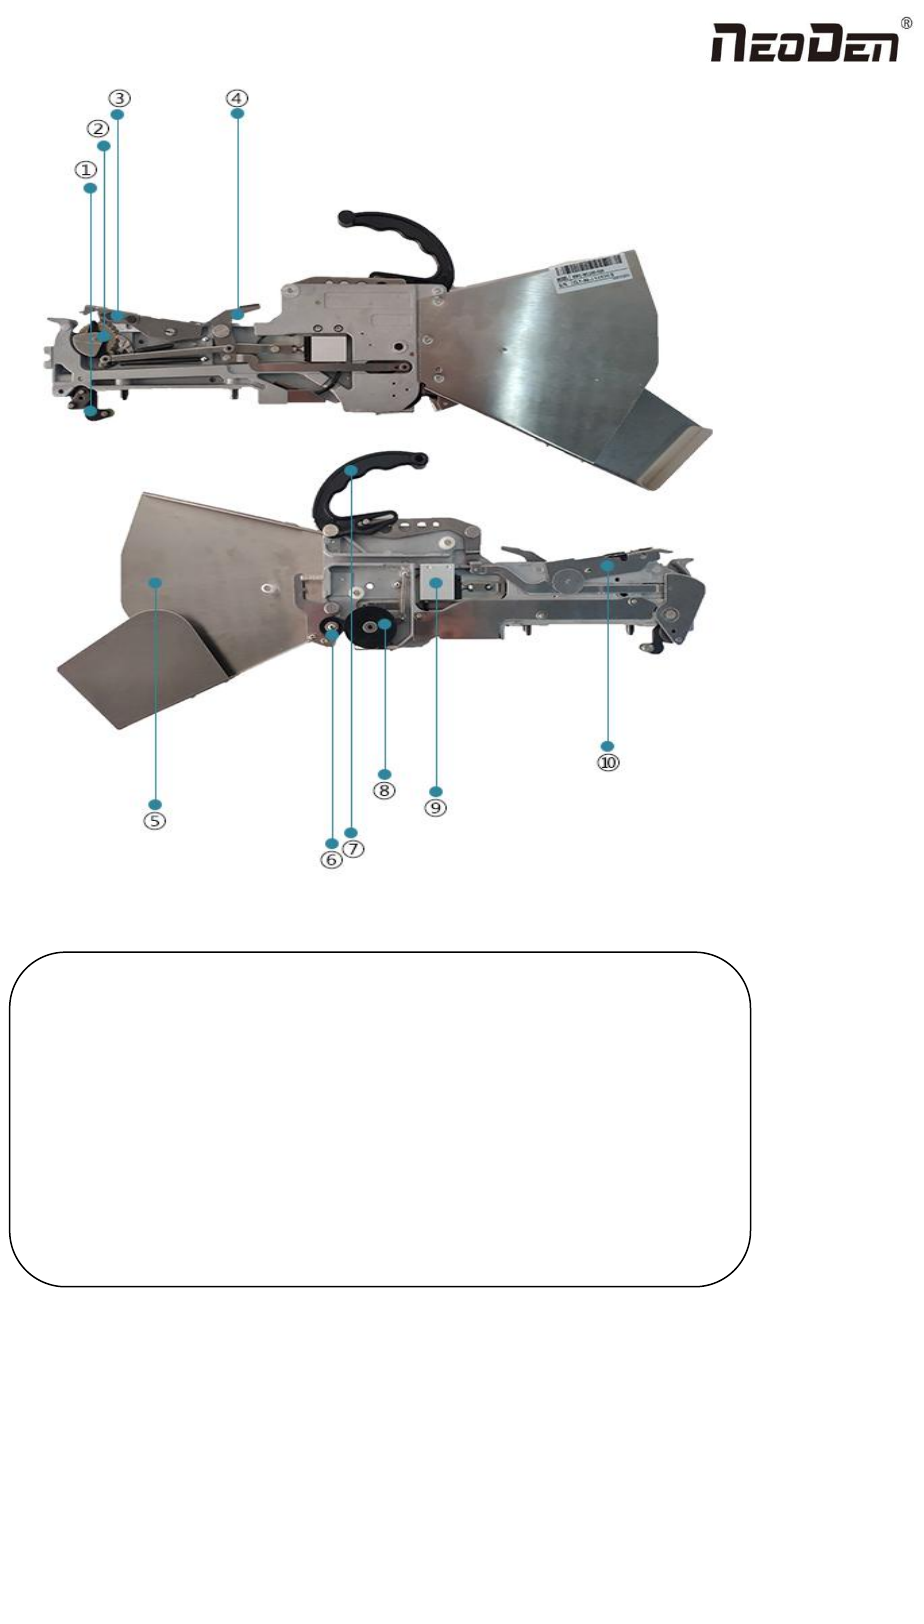
①Front fixed buckle
②Material-sending wheel gear
③Press material cover
④Locking Claw
⑤Tail board
⑥Single-track wheel
⑦Hand Shank
⑧Tape coiling wheel
⑨Cylinder
⑩Snap joint cover
46
Zhejiang Neoden Technology Co., Ltd
11.2 Installing tape and reel components
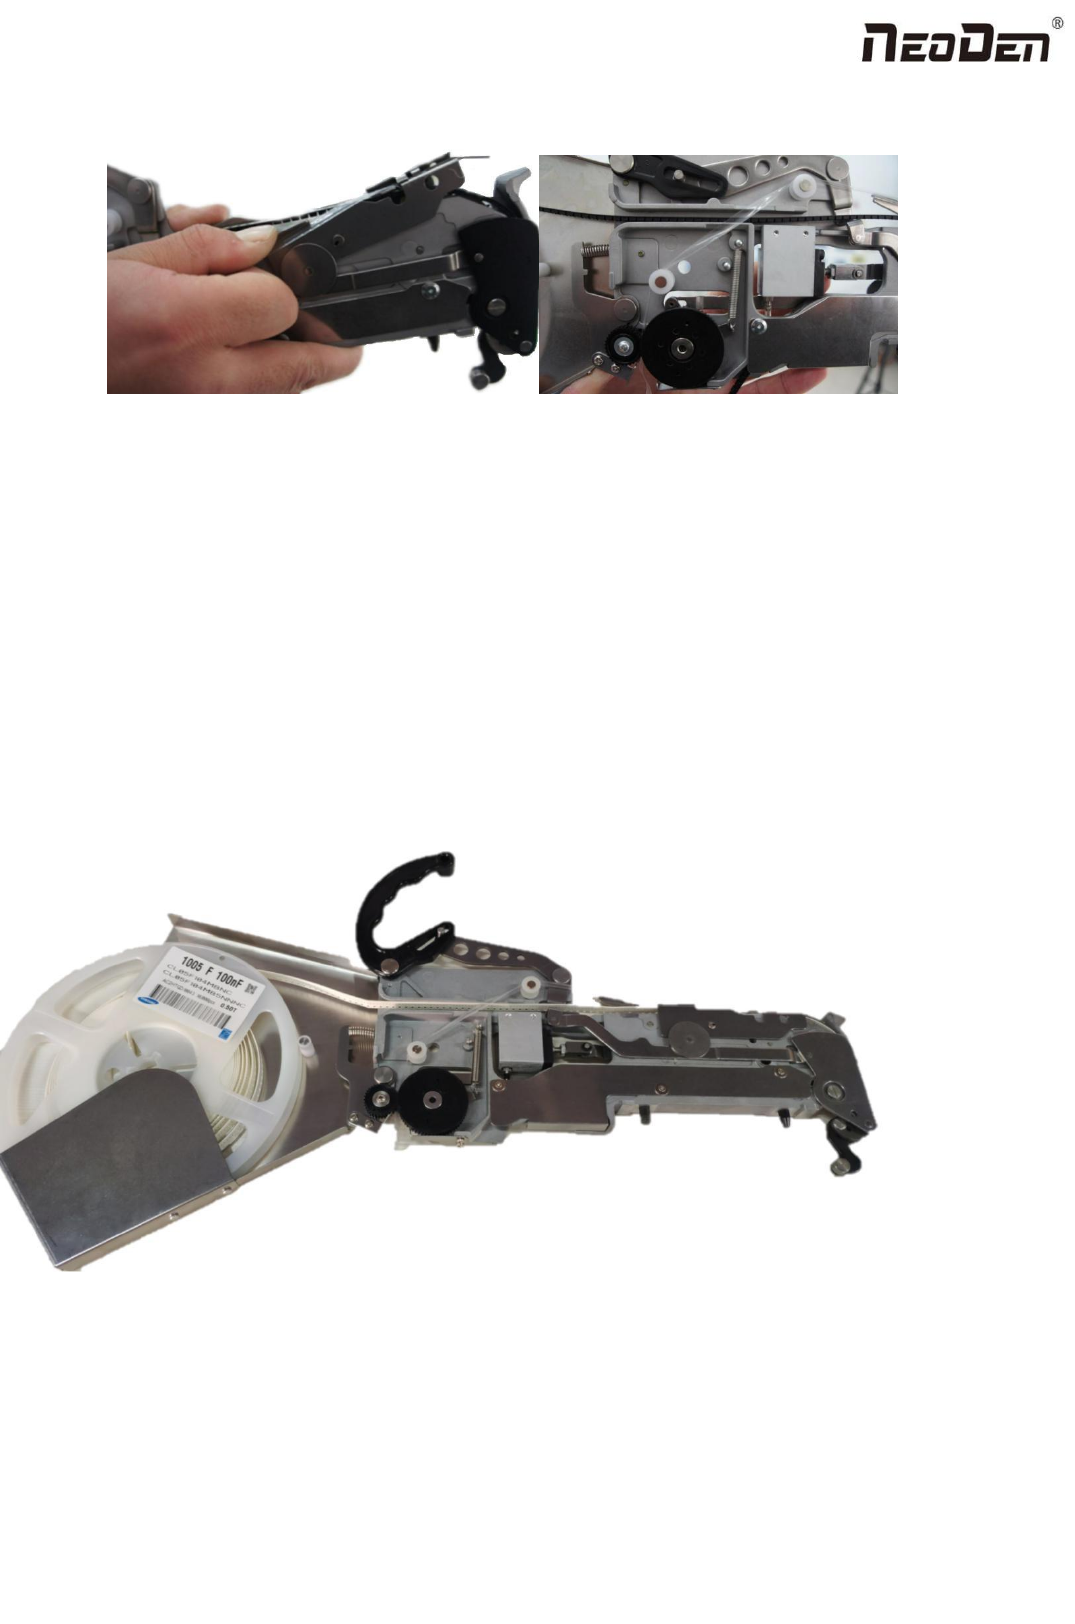
figure 1 figure 2
1. Making the feeder in open status to wait for installing the tape reel ①Lift up the feeder fixing handle;②Press the
material-sending handle with left hand ③meanwhile press the lamellule at right side of the feeder with your right hand;
loosen the material-sending handle, ensure the proper wrapped (see figure 1) then loosen the lamellule
2. Installing the tape and reel components: setting the reel on reel storage at the back side of the feeder, pull out
approximately 10cm length tape, separate the film and tape, then put into transfer storage (see figure 1).The tape should be
closely matched with the gear, and the film should pass through the upper denomination groove (see figure 2) through two
white guide wheels and then be sandwiched between two gears.
Fig 3
3. Finish installing tape and reel components.
47
Zhejiang Neoden Technology Co., Ltd
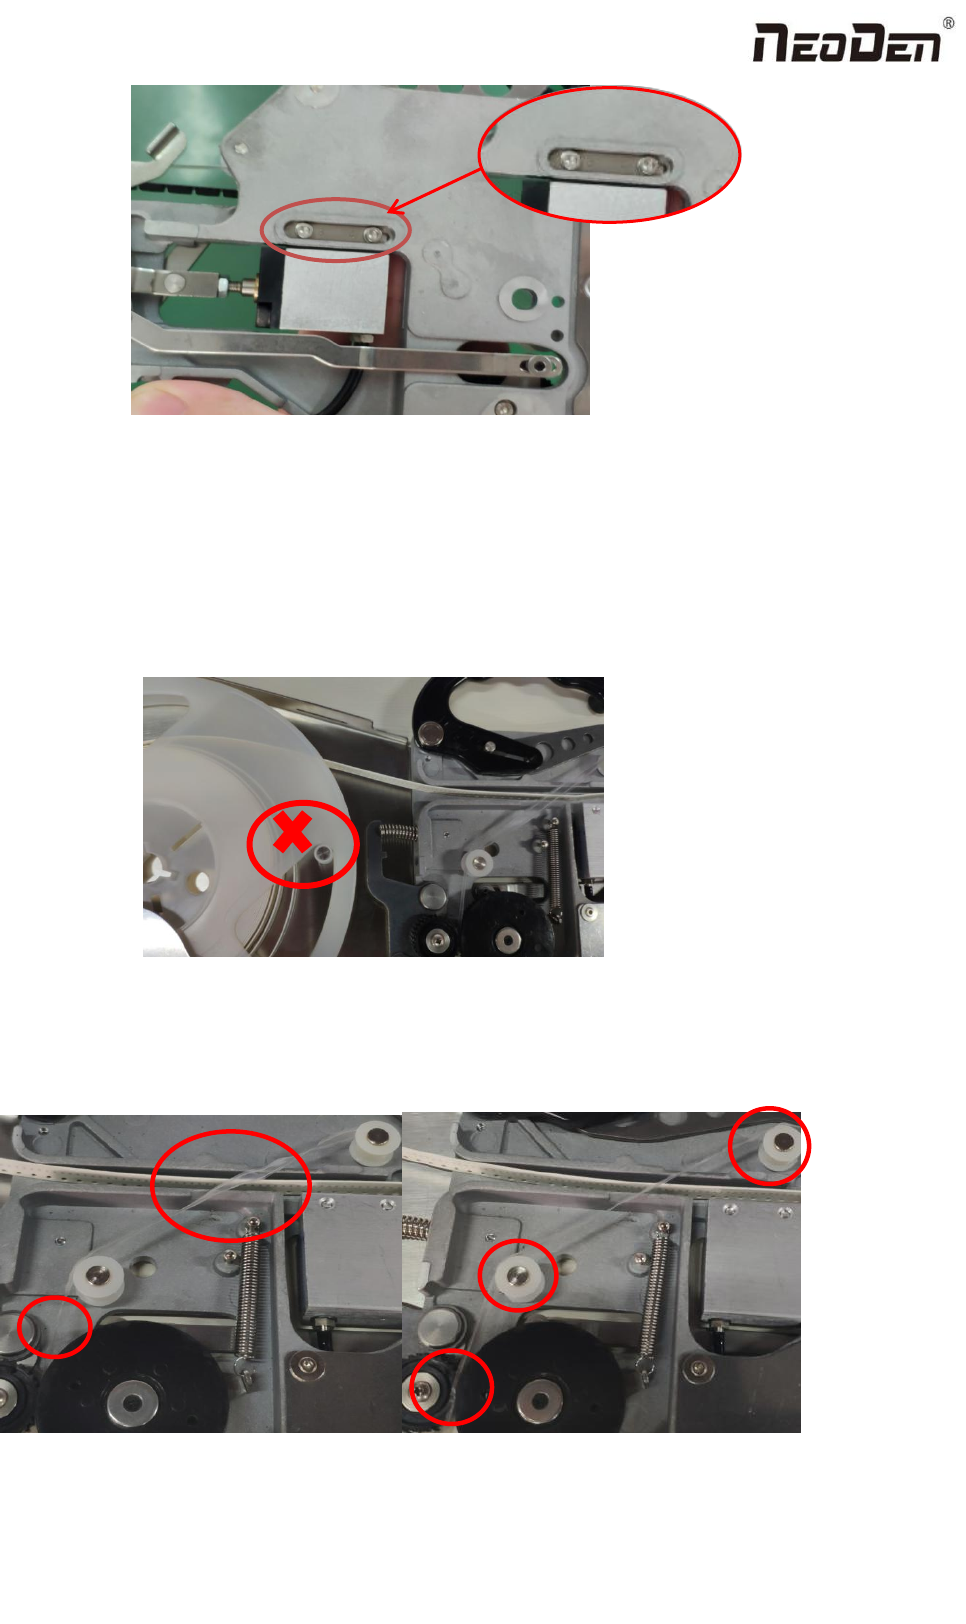
Fig 4
For 12mm,16mm width feeder, the feed rate can be adjusted by adjusting the parameters of the feed regulator.
11.3 Incorrect installation Samples:
1. Incorrect setting of reel in reel storage (see figure.5)
Fig5
2. The film is twisted, not tight enough, or the film is not between the white guide wheel and the black gear
3. Cautions: Strictly refer to the instruction manual to use the feeder, and non-standard operation is strictly forbidden
Warning: when installing the feeder, if feel the hand press is not strong, or loose match in place, then it is forbidden to